Black Ops 7 Zombies introduces its biggest content package ever, featuring the new round-based map Ashes of the Damned, the 32-player open-world Endgame mode, and the return of Dead Ops Arcade 4. This guide provides a complete, updated breakdown of every feature, system, and challenge you’ll encounter.
In this guide’ll we cover:
- Map overview of Ashes of the Damned + region flow
- Power, Pack-a-Punch, and traversal mechanics
- Full perk list, effects, and map locations
- Augments, GobbleGums, Salvage, and currency systems
- Necrofluid Gauntlet steps, Wonder Weapons, and weapon economy
- Early-game setups, perk routes, and best starting strategies
- High-round training spots and late-game meta builds
- Full Main Easter Egg walkthrough
- Cursed Mode, Relics, and how Tier rewards work
- Current exploits & glitches (patch 1.0.3)
- Endgame mode CR scaling, contracts, and extraction flow
- Dead Ops Arcade 4 overview and rewards
- Season 1 roadmap: Astra Malorum & more

What’s New in Black Ops 7 Zombies?
For players returning from previous titles, this new zombie mode introduces several key changes that blend classic design with modern mechanics, setting a new standard for the series since its launch.
- Hybrid Map Design: “Ashes of the Damned” is a large, multi-region map connected by a vehicle, reminiscent of Outbreak, but each region is a dense, traditional, round-based play space. The foggy lanes connecting them are a constant environmental hazard where enemies are faster and tougher; avoid them on foot past round 8-10 unless you have armor and mobility perks.
- Vehicle-Based Progression: The “Ol’ Tessie” vehicle is central to unlocking Pack-a-Punch and traversing the map, requiring players to manage its health and location.
- Expanded Augment System: The research and augment system returns, now allowing for one major and up to two minor augments on perks, field upgrades, and ammo mods for deeper customization.
- Cursed Mode: A hardcore, classic-style mode with a separate progression system based on “Relics” that increase difficulty for greater rewards.
- Endgame Mode: A 32-player, large-scale PvE experience fusing Zombies with open-world, objective-based gameplay.
- Melee Overhaul: Melee combat is more robust, now supporting critical hits for bonus Essence and slower, high-damage heavy attacks.

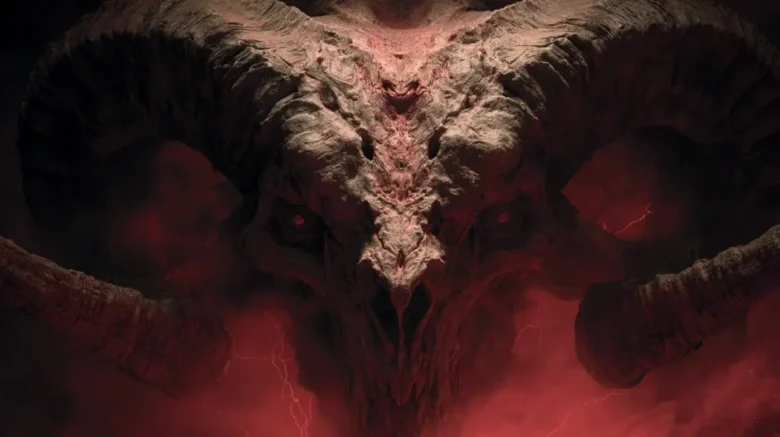
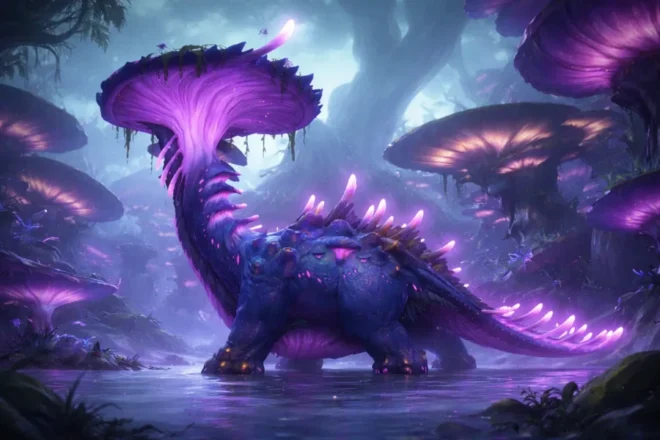
Ashes of the Damned Guide (BO7 Zombies Map)

Welcome to Ashes of the Damned, a sprawling map where remnants of Requiem and Janus operators face a new undead threat. The map’s multi-region design, connected by a central vehicle, evokes a “TranZit 2.0” feel, demanding both on-foot survival skills and strategic map traversal. Story intel and collectibles can be found throughout the map, revealing the deeper narrative. This section covers everything a beginner needs to know to survive and thrive.
Best Starting Setup (Loadouts, Field Upgrades, Equipment)
Proper configuration before deploying is crucial for a successful run, especially for new players.
- Weapon Loadouts: Any unlocked weapon from Multiplayer and Campaign can be brought into Zombies, with all weapon progression shared. Full integration with Warzone weapons is expected as part of the Season 1 roadmap.
- Field Upgrades: Select a Field Upgrade. All upgrades from Black Ops 6 return, joined by the new Toxic Growth.
- Equipment: Choose a Tactical and Lethal grenade. More options become available as you level up.
Augments Explained + Best Early Research Picks
The Augment system is your primary long-term progression path.
- Research Progression: Each Perk, Field Upgrade, and Ammo Mod has its own research track. You earn XP for a specific track only when that item is equipped and used in-game.
- Slots and Exclusivity: You can equip one Major Augment and one Minor Augment at first. A second Minor slot unlocks once you complete that item’s research track. Be aware that some Minor augments are mutually exclusive and cannot be equipped together.
- Mid-Match Swapping: Augments can be swapped for free in the pre-game lobby. To change them mid-match, you must find an Augment Station (which appear after the power is on) and pay an Essence cost.
- Best Early Research Priorities: For a strong start, prioritize researching the Aether Shroud Field Upgrade to unlock its “Afterimage” Major augment for a powerful safety net. For general play, the Major augments for Dead Wire (like Ball Lightning) and the Minor augments for Cryo Freeze are top-tier choices.
GobbleGums in BO7 Zombies (How to Get & Best Picks)

The GobbleGum system returns with a launch pool of approximately 47 gums, and your collection from Black Ops 6 carries over. You can earn new GobbleGums through:
- Reaching round milestones and successful Exfils.
- Opening high-tier chests from T.E.D.D.Tasks.
- As loot rewards from successful Endgame extractions.
- Unlocking them in the Battle Pass.
Top 5 GobbleGums for Ashes of the Damned
| GobbleGum | Rarity | Why It’s Good |
| Aftertaste | Rare | Insurance policy. Lets you keep all your perks if you get revived after going down. |
| Re-Equipment | Common | Instantly replenishes your stock of Tactical and Lethal grenades. Essential for quest steps or crowd control. |
| Armor Up | Rare | Instantly grants you a full set of Tier III armor. A lifesaver in mid-quest emergencies. |
| Power Vacuum | Epic | All zombies drop power-ups for a limited time. Great for restocking or turning the tide. |
| Round Off | Ultra-Rare | Instantly ends the current round. The ultimate panic button for a failed objective or overwhelming horde. |

Understanding the Currencies & The Arsenal
You’ll manage two primary resources during a match:
- Essence (Points): This is your main currency, earned by damaging and killing zombies. It’s used to open doors, buy perks, spin the Mystery Box, and activate the Pack-a-Punch machine.
- Salvage: This is a secondary resource, dropped by zombies and earned from completing objectives. It’s used at the Arsenal station to upgrade your weapon‘s rarity and your armor.
Essence, Salvage, and the Arsenal (Upgrades & Costs)
(Note: Salvage costs below were tested in-game on patch 1.0.3 and may shift with balance updates.)
The Arsenal is where you spend Salvage to increase your power. Armor is your first priority.
| Upgrade | Tiers / Costs | Notes |
| Armor | Tier I (500), Tier II (1000), Tier III (1500) | Each tier adds an armor plate, up to three. Plates absorb all damage until they break. |
| Weapon Rarity | Uncommon (Green, 1000) → Rare (Blue, 1500) → Epic (Purple, 2000) → Legendary (Orange, 5000) | Each tier provides a significant base damage boost to your weapon. |
Crafting Table: Support Equipment
Salvage is also used at Crafting Tables to build support items. Your first priority should always be a Self-Revive Kit, which is available immediately and costs 1,500 Salvage. After securing that, powerful support items like the new Disciple Injection or classic Sentry Turrets become top-tier choices once they are unlocked through player progression.
Weapon Rarity, Aether Tools, Wall Buys & Mystery Box

Wonder Weapons like the Ray Gun, Ray Gun Mk2, and the buildable Necrofluid Gauntlet sit in a class of their own. For everything else, understanding where to get guns is key.
- Aether Tools: These are consumable items dropped by zombies or earned from rewards that instantly upgrade the rarity of your held weapon by one tier (e.g., a Blue tool makes a Green weapon Blue). They are a critical part of the economy, saving you thousands of Salvage.
- Wall-Buys: Wall-buy rarity scaling is community-observed and not officially documented; treat it as subject to patch changes. After purchasing a weapon once, you can return to the same outline to buy discounted ammunition.
- The Mystery Box: The Box’s loot pool scales with the rounds. In later rounds, it has a higher chance of giving out high-rarity weapons and Aether Tools, but it will never dispense support equipment or melee weapons.
The Necrofluid Gauntlet: How It Works
The map’s signature Wonder Weapon is a vital tool for both the main quest and high-round survival.
- Primary Fire: Launches hardened spikes that can pierce multiple enemies and siphons health from damaged zombies, providing crucial self-sustain.
- Alternate Fire: After Pack-a-Punching, the Gauntlet gains a powerful charged recall attack that pulls in and obliterates a group of zombies, offering a burst of damage and healing.
- Strategic Role: Its ability to control crowds and provide healing makes it one of the best weapons for surviving past round 30, when conventional firearms begin to lose effectiveness.
The Full Perk Roster, Effects & Locations
There are 12 Perk-a-Colas on the damned map. Note that perks scale in price: the first costs 2500 Essence, with each subsequent purchase increasing the cost.
| Perk | Effect | Location |
| Jugger-Nog | Increases maximum health. | Ashwood |
| Stamin-Up | Increases sprint speed and duration. | Vandorn Farm |
| Speed Cola | Increases reload and armor plate speed. | Blackwater Lake |
| Quick Revive | Speeds up revives and health regeneration. | Janus Towers Plaza (Spawn) |
| Double Tap | Increases fire rate and bullet damage. | Ashwood |
| Deadshot Daiquiri | Snaps aim to critical spots and tightens hip-fire. | Exit 115 |
| PhD Flopper | Grants immunity to explosive and fall damage. | Zarya Cosmodrome |
| Elemental Pop | Adds a random chance to trigger any Ammo Mod effect. | Exit 115 |
| Vulture Aid | See perks, wall-buys, and drops through walls; zombies drop extra ammo/Essence. | Ashwood |
| Death Perception | Highlights enemies through walls and provides mini-map info. | Vandorn Farm |
| Melee Macchiato | Increases melee damage and speed. | Blackwater Lake |
| Wisp Tea (New) | Summons an ethereal creature after a sustained kill/damage streak, which deals periodic damage to nearby zombies (behavior may vary depending on balance updates). | Zarya Cosmodrome |

The Main Route: Power & Pack-a-Punch

The primary objective upon spawning is to restore power and enable the Pack-a-Punch machine.
- Acquire Ted’s Head: From the spawn room (Janus Towers Plaza), purchase the door leading to the Server Room (the left corridor off the main Plaza fountain). Inside, melee the grate in the corner to reveal Ted’s Head.
- Install Ted’s Head on “Ol’ Tessie”: Take the head to the large vehicle, “Ol’ Tessie,” and interact with one of the front doors to install it.
- Choose a Path: The vehicle can now be driven through one of two wooden barriers. The left path leads to Blackwater Lake, while the right path leads to Vandorn Farm.
- Clear the Infestation: Both locations have a large power pump covered in glowing spores. Shooting any spore begins a 30-second timer to destroy all of them.
- Restore Power: Once the infestation is cleared, flip the corresponding power switch. At Vandorn Farm, it’s on the second floor of the barn. At Blackwater Lake, it’s upstairs in the main cabin.
- Proceed to Ashwood: Drive Ol’ Tessie to Ashwood, the central hub of the map. Take the left-hand zipline up to Market Square.
- Power Up Ashwood: Purchase doors to proceed to the Ashwood Bridge (the large, central bridge connecting the two halves of Ashwood). Clear another spore infestation from the power pump on the bridge within 30 seconds, then flip the final power switch at the top of the bridge.
- Install the Pack-a-Punch: Powering Ashwood opens a garage. Drive Ol’ Tessie onto the circular platform inside. An item will appear on a workbench; interact with it to install the Pack-a-Punch machine onto the back of the vehicle.
Pack-a-Punch Tiers (Standard Mode)
(Current as of launch week; costs may be tuned in future patches.)
| Tier | Cost |
| Tier I | 5,000 Essence |
| Tier II | 15,000 Essence |
| Tier III | 30,000 Essence |
Note: Tier IV Pack-a-Punch is exclusive to Cursed Mode and can only be unlocked by activating all nine Relics.
Ol’ Tessie Vehicle Guide + Fast Travel

- Vehicle Systems (Ol’ Tessie): Ol’ Tessie is a key tool for survival and becomes a weapon in its own right through an upgrade path.
- Damage and Repair: The vehicle can be damaged by enemies. It can be repaired instantly for 150 Salvage or will slowly regenerate health over time if it avoids damage for about 20 seconds, indicated by a glowing green smoke.
- Summoning and Teleporting: If lost, Ol’ Tessie can be summoned back to the Ashwood garage for 1,000 Essence. Conversely, for 500 Essence, you can teleport directly into the driver’s seat from inside the garage.
- Combat Upgrade Path: Beyond the mandatory Pack-a-Punch, Ol’ Tessie has a linear upgrade path tied to the Main Easter Egg:
- Mobility Upgrade: Pack-a-Punching the truck grants a speed boost.
- Beam Attack: Installing the Abomination Carcass grants a powerful forward-firing beam.
- TESLA Cannon: A final TESLA cannon turret can be unlocked late in the quest, turning the truck into a mobile death machine.
- Secondary Mobility (Jump Pads & Ziplines): To avoid the dangerous Fog lanes on foot, use the map’s fast travel systems. Ziplines offer fixed point-to-point traversal, while Jump Pads allow you to select a powered-on region as your destination.

New Enemies in Ashes of the Damned (Ravagers, Zursa)
- Ravagers: Fast creatures that appear during special rounds every five to six rounds. They prioritize ground loot and power-ups over players. Players report that if a Ravager successfully consumes enough loot and escapes, it often drops a high-value Salvage cache.
- The Zursa: A formidable bear-like mini-boss (sometimes spelled Zersa) that spawns around round 15. Its primary weakness is the glowing weak spots on its front. Defeating it is required for the main Easter Egg.
Secrets & High-Value Interactions
- WonderFizz: This machine, allowing the purchase of any perk, spawns in the spawn room only after every player has purchased at least four perks.
- The Green Plants: Find a fumigator item around the map to spray small green plant orbs. Protect the growing plant from zombies, and it will explode, rewarding you with free points, Salvage, or even weapons.
- T.E.D.D. Tasks: Once all three main power areas are active (around round 15+), a purple beam of light will mark a T.E.D.D. Task terminal (often called TED Trials by the community). Completing its random challenge rewards a chest with loot that scales in rarity with the round number. Rewards can include free perks, Aether Tools, Salvage bundles, and a chance at a Wonder Weapon.
- Permanent Perks: If you have every perk on the map and then complete a T.E.D.D. Task that rewards a “Mystery Perk,” consuming it will grant you that perk permanently. If downed and revived, you will keep that perk (subsequent downs will remove one permanent perk at a time).
- “Chompy” Bins: These special bins accept a weapon or equipment in exchange for Salvage. Melee the bin to open it, then offer an item. This can be done three times per round.
- Traps & Map Interactables: Use the map’s built-in traps, like the new Saw Blade trap in the barn, to conserve ammunition during high rounds or to control choke points during difficult objective defenses.
- Rampage Inducer: This device in the spawn room can be activated by a player vote to make zombies sprint continuously, speeding up the round flow for faster XP gains.
Recommended Perk Routes

Your perk order dramatically impacts your chances of survival. Prioritize based on your goal, but don’t delay purchasing at least Tier II armor for perks.
- Beginner / “Just Survive” Route: 1. Jugger-Nog, 2. Stamin-Up, 3. Quick Revive, 4. Speed Cola, 5. Deadshot Daiquiri. This path prioritizes health, mobility, and safety nets.
- Solo Main Quest Route: 1. Jugger-Nog, 2. Deadshot Daiquiri, 3. Speed Cola, 4. Double Tap, 5. PhD Flopper. This “safe DPS” build focuses on damage and explosive immunity for chaotic boss fight phases.
- High-Round Route: 1. Jugger-Nog, 2. Stamin-Up, 3. Vulture Aid, 4. Speed Cola, 5. Double Tap. Here, mobility and resource sustain from Vulture Aid come first, with precision damage perks added later.
Recommended Loadouts & Ammo Mods
The right tools make all the difference. Early community consensus has formed around a clear meta.
Launch Meta in 60 Seconds
- Best Weapon Classes: Shotguns and LMGs are kings of crowd control. Marksman rifles excel at single-target boss damage.
- Best Field Upgrade: Aether Shroud for its unmatched escape potential.
- Best Ammo Mods: Cryo Freeze for high-round safety, Napalm Burst for boss damage.
- Best GobbleGum: Aftertaste is the ultimate insurance policy for any run.
- The Ammo Mod Arsenal & Elemental Weaknesses: There are six Ammo Mods: Fire Works (New), Brain Rot, Napalm Burst, Shadow Rift, Dead Wire, and Cryo Freeze. Many elite enemies have elemental weaknesses; matching your Ammo Mod to their weakness (e.g., Napalm Burst against the Zursa) provides a significant damage boost.
- Fire Works: The new mod, it causes kills to have a chance to launch a firework that seeks out and damages nearby enemies. It’s excellent for clearing dense, clustered hordes.
- Best-in-Slot Augment Synergies: Don’t just equip mods; augment them. For example, the Dead Wire major augment “Ball Lightning” spawns a roaming electric orb that extends the stun duration, making it a top-tier choice for crowd control. Likewise, augmenting Elemental Pop to only trigger your equipped mod ensures consistent procs on high-value targets.
- Meta Loadouts for Every Goal:
- Beginner “Safe Start”: Bring a fast-handling LMG or AR to easily clear timed spore objectives. Use the Aether Shroud Field Upgrade as a panic button.
- Solo Main Quest: Take a high-damage marksman rifle for critical boss damage and a top-tier shotgun (or a rolled Ray Gun) for crowd control. Aether Shroud is invaluable for reviving, repairing, or repositioning during the boss fight.
- High-Round: A powerful LMG or Shotgun equipped with Cryo Freeze is the go-to for safely managing massive hordes.

Recommended High-Round Tips for Mastery

- Difficulty Scaling: Zombie health increases significantly in the later rounds. By round 30+, most conventional weapons become ineffective for killing hordes. This is when you must transition to relying on Wonder Weapons, traps, and powerful Ammo Mod effects to survive.
- Best High-Round Training Spots:
- Vandorn Farm Exterior: The large, open field in front of the farmhouse is the safest and easiest spot for beginners to practice training large hordes.
- Exit 115 Road: The long, straight road in front of the diner is excellent for leading a horde in a predictable line.
- Ashwood Bridge: A riskier spot due to multiple flanking routes, but its central location is convenient.
- Cosmodrome Lower Level: An advanced spot with tight corridors, ideal for experienced players using area-denial weapons.
- Late-Game Economy Loop: Keep a secondary weapon of the lowest rarity for point farming on the last zombie. Run T.E.D.D. Tasks on cooldown and spend Salvage on armor before anything else.
Other Zombies Playlists
Beyond the standard experience, three other playlists offer different ways to play:
- Standard: The core, quest-driven experience on the full Ashes of the Damned map.
- Survival: Bite-sized, round-based matches set in smaller, sectioned-off areas of the main map (like Vandorn Farm), perfect for quick games or weapon grinding.
- Cursed: The hardcore, classic-style mode with unique rules and progression.
- Directed: A guided mode designed to help players learn and complete the Main Easter Egg, confirmed for arrival during Season 1.
Exfiltration
Exfil is triggered when a Phone Booth activates periodically throughout the match (it will start ringing). Answering it spawns an HVT, its minions, and the Exfil portal. Players who accept the exfil must kill the HVT within the time limit to escape, while players who decline can continue their match.
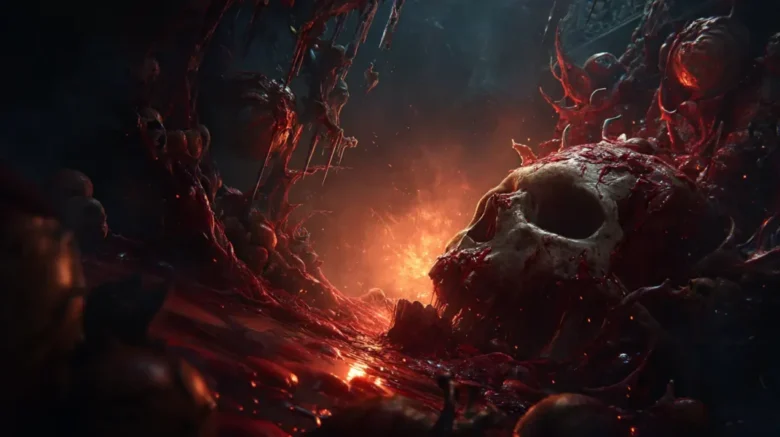
Black Ops 7 Zombies Main Easter Egg Walkthrough

To unlock relics for Curse Mode, completing the main quest first is a requirement. This journey will uncover the truth behind the outbreak.
Preparation Checklist
- Recommended Perks: Jugger-Nog, Stamin-Up, Speed Cola, and Quick Revive.
- Suggested Weapon Tier: At least one weapon Pack-a-Punched to Tier II (blue rarity).
- Armor Requirement: Tier 2 armor is highly recommended.
- Equipment: A Combat Axe and Molotovs are required for one step.
- Ideal Starting Round: Aim to begin steps around round 12-15.
Step-by-Step Guide
- Activate Pack-a-Punch: Follow the steps outlined in the guide above.
- Kill UBER Klaus: A unique boss named UBER Klaus spawns in Janus Towers Plaza. Defeat him to collect the Stabilizer Chip.
- Activate Klaus: Take the chip to the Sheriff’s Office in Ashwood (next to the Taylor Shop). Place it in the console, then throw a stun grenade at the dormant Klaus in the chair to activate him.
- Defend the Cosmodrome Console: Lead Klaus to the Cosmodrome underground area (beneath the large rocket). Command him to interact with a specific console, then defend him from waves of enemies. He will retrieve the Aether Barrel.
- Charge the Barrel: The barrel must be charged at all three main power generators (Vandorn Farm, Blackwater Lake, Ashwood Bridge) under a strict time limit. The order does not matter.
- Retrieve Key Items: Several items must be collected:
- Human Bones & Foot: At Vandorn Farm, retrieve the Human Bones from a corpse. Then, go to the upper floor of the barn, throw a Molotov at the hanging body to burn the rope, and throw a Combat Axe at its foot to retrieve another part.
- Abomination Carcass: At the Exit 115 Diner, kill Ravagers until they drop Ravager Eyes. Use these to open a freezer, containing a Freezer Key. Use the key on a nearby truck to get the Abomination Carcass.
- Widow’s Lantern: Collect the empty Glass Jar from Blackwater Lake. Take it to the fungus-covered dead horse at Vandorn Farm and interact with it. Note that the lantern may need to “cook” for a few rounds before it can be used for the next step.
- Upgrade Ol’ Tessie & Collect Horde Chunks: Install the Abomination Carcass on Ol’ Tessie to give it a beam attack. Use this beam to destroy large purple plants around the map to collect Horde Chunks. On or after round 16, use the beam to kill a Zursa for another key item.
- Create the Powder of the Forgotten: Combine the Horde Chunks and other collected items at a workbench to create the Powder of the Forgotten and the Mysterious Limbs.
- Build the Necrofluid Gauntlet: Deliver the fully charged Aether Barrel and the final crafted items to the glowing purple cube at Vandorn Farm. A sequence of glyphs will appear on a nearby rooftop; input them correctly on the cube. The Necrofluid Gauntlet, the new wonder weapon, will emerge.
- Final Puzzle & Collection: First, complete the Mirror Puzzle in the Ruby Rabbit bar’s spectral realm. After solving it, you will be able to use the Gauntlet to siphon a green orb in the farmhouse cellar and collect three souls from spectral figures around the map.
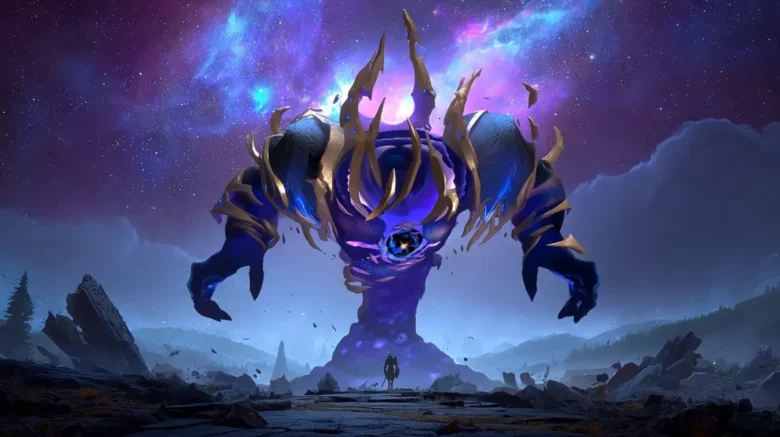
- The Final Lockdown & Boss Fight: Proceed to the rocket for a final lockdown, followed by a three-phase boss fight in a new arena.

Final Boss Fight: Quick Tips

- Phase 1: Focus the Orbs. The boss is immune until you destroy the floating spectral orbs. Use a high-damage weapon to break them quickly.
- Phase 2: Crowd Control is Key. The boss will summon elite enemies. Use your Wonder Weapon or an Ammo Mod like Dead Wire to control them while avoiding the boss’s ground attacks.
- Phase 3: Burn Phase. The boss is fully vulnerable. Use everything you have and aim for its weak spot.
- Best Ammo Mod: Napalm Burst provides excellent sustained damage on the boss’s weak points throughout all phases.
- When to Use Aether Shroud: Save your Aether Shroud for reviving teammates, reloading under pressure, or repositioning when cornered during Phase 2.
BO7 Zombies Exploits & Glitches (Patch 1.0.3)
(Verified on patch 1.0.3 – Nov 21, 2025)
The Zombies community is known for finding unique and sometimes unintended ways to survive. The following methods are considered exploits or glitches.
- Disclaimer: These methods are effective but are likely not intended by the developers and may be fixed in future updates. Use them at your own risk, as they can sometimes lead to unexpected game behavior, break main quest steps, or soft-lock enemy spawns.
Pileup Glitches
These locations force zombies into a predictable pileup, allowing for easy elimination.
- Barn Pileup Glitch: Climb atop the large cage inside the barn at Vandorn Farm.
- Farmhouse Pileup Glitch (Survival Mode Only): The top floor corner of the farmhouse is bugged, causing zombies to pile up below.
- Blackwater Lake Pileup Glitch: Sprint-dive into the corner of a specific rock near the docks and remain prone for a spot with high-reliability protection from most zombie attacks.
God Mode Glitch
This powerful exploit renders the player effectively invisible to all enemies. As the most powerful and game-breaking exploit, this is highly patch-prone.
- Requirements: Aether Shroud Field Upgrade with the “Afterimage” augment, a Ray Gun (or Mark 2), and a full charge.
- Procedure: Activate the Aether Shroud, then immediately and continuously fire the Ray Gun without interruption, even as it reloads, until the Aether Shroud’s effect wears off. If done correctly, the clone will not disappear and will attract the aggression of all enemies for the rest of the game.
Cursed Mode Guide (BO7 Zombies Hardcore Mode)

The new Cursed Mode is a hardcore variant for players seeking a true old-school challenge. It’s for those who enjoy the methodical, high-risk, high-reward intensity of early Zombies maps, where every point matters and a tougher challenge awaits. This is the ultimate classic mode experience finally brought to modern Duty Black Ops 7. It can also be played with a completely clean HUD by disabling all elements in the settings, for a truly immersive experience.
How to Survive to Round 20 in Cursed Mode
- Point Maximization: Use your starting pistol to its last bullet. Tag each zombie in a horde 4-5 times in the legs (+10 Essence per hit) before a melee kill (+130 Essence).
- Early Weapon Strategy: Use a cheap, low-rarity wall gun for point farming initially. Once you have enough Essence for perks and Pack-a-Punch, swap to your primary carry weapon.
- Perk Prioritization: Juggernog is your first and most critical purchase.
- Play Cautiously: With no mini-map, use sound cues to avoid being surrounded. You’ll also need to find ammo caches frequently.

All Relics in Cursed Mode (Solved & Unsolved)
The true endgame of Cursed Mode is the search for its nine secret relics. While the unlock methods for the first three are widely standardized, the effects of several relics are now confirmed, while four remain unsolved and are still being tested by the community.
Prerequisite: Unlocking the Hunt
Unlocking the ability to hunt relics is a two-step process:
- Complete the Main Easter Egg on the main Ashes map.
- Interact with the Mysterious Object at the end of the docks immediately after the final cutscene. This will make relics discoverable in Curse Mode.
All relic challenges can only be completed on or after Round 20.
The Relic Roster: Solved and Unsolved
| Status | Relic | Effect |
| Solved | Dragon Wings | Disables all natural power-up spawns. |
| Solved | Lawyer’s Pen | Causes ground loot to have a chance to be a Mimic. |
| Solved | Teddy Bear | Reduces the delay between rounds by 75%. |
| Verified | Vril Sphere | Limits players to a maximum of four perks. |
| Verified | Blood Vials | Disables all equipped Augments in-game. |
| Unsolved | Focusing Stone & 3 Others | Effects are not confirmed; challenges are still being solved. |
The Cursed Tier Reward Ladder
Activating relics fills a Cursed Tier meter, unlocking powerful rewards:
- Tier 1 (3 Relics Active): Unlocks the ability to purchase Golden Armor.
- Tier 2 (6 Relics Active): Unlocks the Ultra weapon rarity tier at the Arsenal.
- Tier 3 (9 Relics Active): Unlocks Pack-a-Punch Tier IV.
Endgame Mode Guide (32-Player BO7 Zombies)

Currently unlocked for all players (campaign completion no longer required as of the launch window), Endgame is a large-scale, 32-player cooperative mode that fuses elements of Outbreak and DMZ, feeling less like survival horror and more like an all-out war.
The Reward Loop & Progression
- What carries over? Operator Level, Weapon XP, and any camos or attachments unlocked carry over permanently. Your in-run Combat Rating and Skills are reset each match.
- Is it required for camos? No. It serves as an alternative environment for grinding with friends, and players can find Intel collectibles to piece together the ongoing story.
- Combat Rating and Zone Rules: The map is divided into four zones with recommended Combat Rating (CR) ranges: Zone I (CR 1-9), Zone II (CR 10-29), Zone III (CR 30-44), and Zone IV (CR 45-60). Pushing into a zone with a lower CR is extremely risky.
- The Path to Power: The core loop involves completing fast contracts to raise your CR. Defeating commanders at Guild Checkpoints allows you to upgrade your weapon rarity at Command Centers, providing a crucial power spike.
Contracts and Major Abilities
- Contract Types: Contracts include a variety of objectives, such as Assassination (eliminating HVTs), Defend Upload (protecting a data terminal), and Lockbox Crack (drilling a safe).
- Major Abilities: During a run, you can find powerful, single-use abilities like Supply Link (calling in a care package) and Black Hat (hacking enemy equipment), which can turn the tide of a difficult fight.
The Efficient Endgame Flow
A common strategy is to farm contracts in Zone I until your CR is stable, push to Zone II to upgrade weapon rarity, farm elites and fast contracts in Zone III to climb into the high CR ranges, and then exfil from Zone III unless your squad is fully prepared for the final zone.
Successful Exfiltration: The High-Stakes Rule
To win, you must extract. Activating an exfil point on a VTOL initiates a final stand where you must clear the landing zone of enemies, defeat a “Cradle Champion” boss, and board the transport before it departs. The stakes are high: Combat Rating resets on death or a failed exfil, but is preserved for your next run upon a successful extraction.

Dead Ops Arcade 4 Guide & Rewards

For those seeking a break from the first-person chaos, Dead Ops Arcade 4 returns as a fully-featured, top-down twin-stick shooter.
- How to Access: DOA4 is available directly from the main Zombies menu.
- Core Loop: Players navigate through a series of arenas, clearing waves of enemies, collecting treasure, and finding powerful Fates and weapon upgrades. The goal is to defeat the Mamaback boss and escape The Wild. DOA4 includes returning Fate choices, a variety of bonus rooms, new treasure sets, and global leaderboards to compete for high scores.
- Rewards: Playing DOA4 contributes to your overall player progression and unlocks exclusive calling cards, emblems, and other cosmetics.
BO7 Zombies Season 1 Roadmap (Astra Malorum)
This guide will be updated as the game evolves. With Season 1 on the horizon, players can look forward to a new round-based map, confirmed to be Astra Malorum, as well as continued content updates for both Ashes of the Damned and the Endgame experience.
Epiccarry: best wow boost and coaching services
Frequently Asked Questions
What is included in Black Ops 7 Zombies at launch?
Black Ops 7 Zombies launches with Ashes of the Damned (round-based map), the new Endgame 32-player open-world mode, Cursed Mode, and Dead Ops Arcade 4. Each mode offers unique progression, rewards, and challenges.
How do you turn on power in Ashes of the Damned?
Power is restored by clearing the spore infestations at Vandorn Farm, Blackwater Lake, and Ashwood Bridge, then flipping each region’s switch. The third switch unlocks the garage used to install Pack-a-Punch on Ol’ Tessie.
How do you unlock Pack-a-Punch in BO7 Zombies?
Install Ted’s Head on Ol’ Tessie, restore power in all three regions, then drive the vehicle into the Ashwood garage to install the Pack-a-Punch machine. PaP tiers cost 5,000 / 15,000 / 30,000 Essence.
What is the Necrofluid Gauntlet and how do you build it?
The Necrofluid Gauntlet is the Wonder Weapon of Ashes. It’s built by retrieving the Aether Barrel, collecting Horde Chunks, gathering ritual items, and completing a glyph input puzzle at Vandorn Farm.
What are the best starting weapons and loadouts in BO7 Zombies?
The early meta favors LMGs and shotguns for clearing hordes and spore objectives. Use Aether Shroud as your Field Upgrade and pair it with Cryo Freeze or Dead Wire depending on your playstyle.
Which perks should beginners buy first?
The safest perk route is: Jugger-Nog → Stamin-Up → Quick Revive → Speed Cola → Deadshot Daiquiri. This prioritizes survivability, mobility, and recovery.
How does the Augment system work in Black Ops 7 Zombies?
Each Perk, Ammo Mod, and Field Upgrade has its own Augment research tree. You can equip 1 Major and 1–2 Minor Augments, change them in-match at Augment Stations, and unlock more by progressing individual trees.
How do GobbleGums work in BO7 Zombies?
BO7 launches with 47 GobbleGums, and your BO6 collection carries over. You earn new gums by hitting round milestones, completing T.E.D.D. Tasks, extracting from Endgame, or through the Battle Pass.
What’s the fastest way to earn Salvage in Ashes of the Damned?
The most reliable methods are:
• Completing T.E.D.D. Tasks (high Salvage bundles)
• Killing Ravagers, who drop large caches
• Running round-end trains and using Ammo Mods for mass kills
Where are all perk locations in Ashes of the Damned?
There are 12 perks, including returning favorites and new perks like Wisp Tea. They’re spread across Ashwood, Vandorn Farm, Blackwater Lake, Exit 115, Zarya Cosmodrome, and the spawn area.
How do you defeat the Zursa mini-boss?
Aim for its glowing weak spots on the front of its body. Use Napalm Burst for a bonus damage multiplier. Zursa is required for the main Easter Egg and drops a key quest item.
What are T.E.D.D. Tasks and why are they important?
T.E.D.D. Tasks are rotating challenges unlocked after restoring all power. Completing them rewards high-tier loot, free perks, Aether Tools, and sometimes Wonder Weapons—making them essential for mid-game progression.
How do you start the Main Easter Egg in BO7 Zombies?
After Pack-a-Punch is unlocked, defeat UBER Klaus, install the Stabilizer Chip, activate Klaus, complete the Cosmodrome defense, then follow the quest steps involving item collection, glyph puzzles, and the final boss arena.
What is Cursed Mode in Black Ops 7 Zombies?
Cursed Mode is a hardcore classic-style variant with limited HUD, tougher scaling, and a special progression system tied to Relics. Completing Relic challenges unlocks powerful rewards like Golden Armor and PaP Tier IV.
How do you unlock Relics in Cursed Mode?
You must:
- Complete the Main Easter Egg on Ashes
- Interact with the Mysterious Object at the docks
Then all Relics become obtainable from Round 20 onward in Cursed Mode.
What do the Relics do in BO7 Zombies?
Confirmed Relics include effects like no natural power-ups (Dragon Wings), increased Mimic spawns (Lawyer’s Pen), faster rounds (Teddy Bear), perk limits (Vril Sphere), and no Augments (Blood Vials). Four Relics remain unsolved.
How does Endgame mode work in BO7 Zombies?
Endgame is a 32-player open-world PvE extraction mode with Combat Rating (CR) progression, zone difficulty brackets, contracts, elite commanders, rarity upgrades, and high-stakes exfil conditions.
How do you raise Combat Rating (CR) fast in Endgame?
Prioritize:
• Zone I contracts for early CR
• Commander kills for weapon rarity upgrades
• Farming Zone III elite groups once you reach CR 30+
Then exfil from Zone III for safe progression.
What rewards do you get from Endgame extractions?
Successful extraction rewards include GobbleGums, weapon XP, operator XP, camo progress, and the ability to keep your run’s unlocked upgrades for future matches.
What’s coming in Season 1 for BO7 Zombies?
Season 1 adds the next round-based map Astra Malorum, new Augments, new challenges, Endgame updates, and quality-of-life improvements for Ashes of the Damned and Cursed Mode.