The Hollow Palm Invoker Monk is one of Path of Exile 2’s most iconic builds, turning raw defensive stats into blistering speed and devastating crits. Built around the Hollow Palm Technique keystone, it thrives on unarmed combat, chaining ice explosions or shredding maps at lightning pace. This guide breaks down everything you need to know — from leveling to endgame min-maxing.
In this guide, you’ll find:
- Core Mechanics – how Evasion and Energy Shield fuel both offense and defense.
- Leveling Path (1–65) – key skills, passives, and campaign buff priorities.
- Endgame Playstyles – Ice Shatter explosions vs. Tempest Flurry speedster.
- Bossing Strategy – the Falling Thunder one-shot combo explained.
- Defense Layers – Charms, Deflection, Resistances, and sustain.
- Passive Tree & Ascendancy – Invoker pathing and essential keystones.
- Spirit & Auras – how to fuel Heralds, Ghost Dance, and utility supports.
- Gear Progression – from league start to BiS with Talismans of Sirrius.
- Min-Maxing & Adaptation – jewels, runes, and how to adjust after patches.

Who is this build for?
This build is ideal for players who enjoy:
- A fast-paced, active combat style.
- Seeing massive chain reactions clear the screen.
- A high-ceiling build that scales exceptionally well with investment.
- A unique gearing process that ignores weapons entirely.
Part 1: Core Mechanics of the Hollow Palm Invoker (Evasion & Energy Shield)
The foundation of any Palm Invoker Monk build rests on a hybrid model that utilizes both Evasion and Energy Shield. Each stat serves a dual purpose, feeding into a powerful feedback loop where survivability directly translates to damage.
Evasion: The Engine of Speed
- Offense: The Hollow Palm Technique grants 1% increased attack speed for every 25 Evasion Rating on equipped gear. This is the build’s primary source of speed.
- Defense: Evasion provides a chance to completely avoid enemy attacks. It is the first and most important line of defense.
Energy Shield (ES): The Spark of Power
- Offense: Hollow Palm Technique grants 0.1% base critical strike chance for every 10 Energy Shield on gear. It is important to note that unarmed attacks also have an inherent 5% base critical strike chance, and the bonus from this keystone is added on top of that, making it very easy to scale crit.
- Defense: Energy Shield functions as the primary health pool, absorbing incoming damage. This is further enhanced by the Ghost Dance skill, which provides significant ES recovery when hit.

Part 2: Hollow Palm Monk Leveling Guide (Levels 1–65)

The path from a fresh character to a map-clearing powerhouse is surprisingly smooth.
Important Note: Campaign Permanent Buffs
As you progress through the campaign, you will be offered permanent character buffs. These replace the old “Bandit/Pantheon” decisions from PoE1; make your selections with your endgame setup in mind. For this build, prioritize:
- Spirit Gains: You can gain a total of 100 Spirit across Acts 1, 3, and 6. This is a massive, free boost that enables more auras and is essential for the build.
- Charm & Flask Charges: Buffs that increase charm charges gained or reduce flask charges used are highly valuable for endgame safety and sustain.
Act 1: Laying the Foundation (Levels 1-13)
This initial phase is about getting to level 14 as efficiently as possible.
Your First Skills:
- Frozen Locus: Your primary area-clearing tool.
- Falling Thunder: A solid single-target skill for tougher enemies.
- Frost Bomb: A debuff to place on bosses to increase the damage they take.
Simple Gameplay Loop:
- Summon a Frozen Locus into a pack of enemies.
- Hit the Locus twice with your Quarterstaff to detonate it. Even a few hours ago, this was the most efficient way to clear Act 1.
Act 1-2: The Transformation (Level 14 Onwards)
At level 14, the build truly comes online.
Your New Core Passive:
Allocate Hollow Palm Technique on the passive tree.
- CRITICAL: Once allocated, you must unequip your Quarterstaff. You are now an unarmed fighter.
Your New Main Attack:
- Ice Strike: This replaces your basic attack. Move your Rage and a new Rapid Attacks support gem to it.
Your First Aura:
- Herald of Ice: Activate this aura as soon as you get it. Its explosions will chain with your Frozen Locus, dramatically improving clear speed.
Act 2-3: Ascending and Gaining Power (Levels 22-40)
- First Ascension (Invoker): Aim to ascend around level 22. Your first two points go into I Am the Blizzard for more cold damage and utility.
- Power Charge Generation: To use Charged Staff (“Charged Hands”), you need Power Charges. The recommended method is:
- Use the skill Combat Frenzy.
- Allocate the Resonance keystone on the passive tree (located on the east/right side). This keystone swaps charge types, so the Frenzy Charges from Combat Frenzy will become Power Charges.
Part 3: Endgame Playstyles & Core Mechanics

Once established in maps, the Hollow Palm Invoker Monk can be specialized into distinct playstyles.
Variation 1: The Ice Shatter Build
- Playstyle Feel: Methodical and explosive. You are the epicenter of cascading frozen explosions that chain across the screen.
- Core Skills: Ice Strike and Shattering Palm remain the foundation, triggering Herald of Ice.
- Advanced Clear: The Elemental Expression ascendancy passive becomes a cornerstone. On a critical hit, it unleashes elemental effects. Supporting it with Nova Projectiles creates 360-degree coverage.
Variation 2: The Tempest Flurry Speedster
- Playstyle Feel: Blisteringly fast and fluid. You become a blur of motion, with projectiles clearing enemies before you see them.
- Core Skill: Tempest Flurry is the build’s engine, capable of reaching incredible attack speeds (16+ attacks per second).
- The Projectile Buff: The clear speed comes from a buff granted by Staggering Palm. When an enemy is stunned, it grants a 30-second buff causing all attacks to unleash a barrage of projectiles. Maintaining this buff is key.

Part 4: PoE 2 Hollow Palm Bossing Guide – One-Shot Strategy
For pinnacle bosses, all variations utilize Falling Thunder for a devastating burst.
- Step 1: Build the Combo: Your main attack skill is supported by the Culmination gem, building “combo” stacks on each hit (3% more damage per stack). Aim for over 100 stacks.
- Step 2: Generate Power Charges: Use a utility skill like Hand of Chayula linked with Culmination and the late-game Ailith’s Chimes lineage gem. Striking the boss expends this skill’s combo to generate a full set of Power Charges, without affecting the stacks on Falling Thunder.
- Step 3: Unleash the Finisher: Use a single, guaranteed-crit Falling Thunder. Its damage is massively amplified by specific scalars:
- 100% more damage if one or more Power Charges were consumed.
- +50% more damage for each Power Charge consumed (not +25%).
- With seven Power Charges, this results in a staggering 450% more damage multiplier (100% for the first charge + 350% for the seven total charges), which combines with the combo multiplier for a true one-shot.
Part 5: The Modern Defense Checklist (PoE2 Systems)

Surviving in Path of Exile 2 requires layering multiple defenses beyond just Evasion and ES.
Flasks & Charms: Your Utility Belt
In PoE2, you are limited to one Life Flask and one Mana Flask. Utility and ailment immunity now come from Charms.
Charms
You can equip up to 3 charms, which automatically trigger when their condition is met, consuming charges. Campaign choices that boost charm charges meaningfully increase uptime.
- Mapping Core: Nascent Hope Thawing Charm (Freeze Immunity), Beira’s Anguish Dousing Charm (Ignite Immunity), The Black Cat Grounding Charm (Shock Immunity).
- Bossing/Utility Swaps: For Utopia Stone Charm (Stun Immunity), Forsaken Bangle Amethyst Charm (Chaos Resistance).
Build Pitfall: Do NOT take the Oasis keystone on the passive tree. While it buffs flask recovery, it completely disables your charms, which are essential for this build’s defenses.

Deflection Rating: The New Evasion Synergy
Deflection is a separate defensive roll that converts a portion of your Evasion into a chance to prevent ~40% of hit damage.
- Target Goal: Aim for reliable Deflection on maps via “Gain Deflection Rating equal to X% of Evasion” modifiers.
- Core Synergy: The Subterfuge Mask notable is a cornerstone node. It converts your Helmet’s ES into flat Evasion (+2 EV per 1 ES). This juices your increased evasion rating for more attack speed and feeds directly into your Deflection Rating.
Understanding Your Defensive Skills: Ghost Dance vs. Wind Dancer
It’s crucial to understand the distinct roles of your two primary defensive skills:
- Ghost Dance: This is your primary source of Energy Shield recovery. When you take a hit, it consumes a Ghost Shroud to recover a large amount of ES, making you incredibly resilient.
- Wind Dancer: This skill does not recover Energy Shield. Instead, it provides a stacking Evasion buff. When you are hit, the buff is consumed to create a damaging knockback explosion, giving you space to reposition. It is a tool for control and damage avoidance, not recovery.
Resistances: Caps and Overcapping
- Cap: Your elemental resistances cap at 75%.
- Overcap Target: For mapping, aim to have ~35-45% over the 75% cap to remain capped when debuffed.
Part 6: Passive Skill Tree and Ascendancy Deep Dive

Ascendancy: Invoker
The Invoker is the premier choice. The recommended progression provides a smooth power curve.
- Ascendancy Path Summary: A logical path through the labyrinths would be:
- Labyrinth 1: I Am the Blizzard… / I am the Thunder…
- Labyrinth 2: Lead Me Through Grace… (Essential for Spirit sustain)
- Labyrinth 3: Faith is a Choice (Meditate for a powerful defensive cooldown) or Sunder My Enemies…
- Labyrinth 4: Sunder My Enemies… or …and scatter Them to the Winds (depending on your third choice)
Spirit Math & Aura Planning
Spirit is the resource that allows you to reserve auras and buffs. Managing it correctly is key to unlocking the build’s full potential.
Sources of Spirit:
- Campaign: You gain a total of 100 Spirit from permanent buffs throughout the campaign. This is your baseline.
- Lead Me Through Grace: This is your primary source of Spirit. It converts your body armour’s Evasion and Energy Shield into a massive amount of Spirit.
- The “Lead Me Through Grace” Gotcha: This ascendancy node is so powerful that it disables Spirit gains from all other equipment slots (like amulets or sceptres). Your body armour becomes your sole source of gear-based Spirit.

Aura Planning Example:
Let’s say you have a good endgame body armour with 1400 Evasion and 500 Energy Shield. Combined with your 100 base Spirit from the campaign, the conversion from Lead Me Through Grace will give you a massive Spirit pool (e.g., 250+ total Spirit). This allows you to plan your auras accordingly:
- Core Heralds: Herald of Ice (~40 Spirit) + Herald of Thunder (~40 Spirit) = 80 Spirit
- Defensive Layer: Ghost Dance (~50 Spirit) = 50 Spirit
- Utility Aura: Precision (Level 10) (~35 Spirit) = 35 Spirit
- Total Reserved: 80 + 50 + 35 = 165 Spirit
- With a pool of 250+ Spirit, you have plenty of room for this setup and can even consider adding another powerful aura like Elemental Conflux.
High-Impact Persistent Supports
You can socket these into your auras to add powerful effects for a small additional Spirit cost:
- Precision: More crit chance (low Spirit cost).
- Cannibalism: On-kill life/ES sustain (medium Spirit cost).
- Warm Blooded: Reduces freeze duration while the aura is active (low Spirit cost).
Key Passive Keystones & Nodes
- Hollow Palm Technique: The build-defining keystone.
- Walker of the Wilds: Critical for resource management. It allows elemental damage to benefit from a single line of physical attack damage leech, making it easy to leech mana.
- Deadly Force & Overflowing Power: Key passive clusters that provide immense critical strike bonuses and additional power charges.
- The Wild Cat: A fantastic node that provides a large amount of flat Evasion while moving and deflection rating.

Part 7: Endgame Gear Setup & Upgrade Path

Gear Upgrade Ladder: From League Start to Endgame
- Entry Priorities (Budget / SSSF):
- Get the Walker of the Wilds keystone and one ring with a single line of mana leech. This solves all mana problems.
- Find a high-ES helmet to activate Subterfuge Mask for a massive Evasion spike.
- Stack rings and an amulet with multiple “flat added” damage lines. Even a 0/1 progress on a perfect item is better than nothing.
- Mid/Late Game Upgrades:
- Acquire a high EV/ES chest piece. A Greater Iron Rune can be socketed for even more defense.
- Begin scaling “Gain Deflection Rating from Evasion” on your armour pieces.
- The community has theorized a unique item, the Third Edict, which could revolutionize charge generation, but as of a few days ago, it remains a myth.
Best-in-Slot (BiS) / Endgame Gear Table
| Slot | Ice Shatter Focus (Explosions & Heralds) | Tempest Flurry Focus (Speed & Projectiles) | Shared Core / Bossing Notes |
| Body Armour | Hybrid EV/ES chest (1400+ EV, 500+ ES), craft Spirit reservation efficiency to sustain triple Herald + Ghost Dance. | Same base; Spirit scaling is vital for Flurry APS upkeep. | This is the single most important slot for Spirit. |
| Helmet | 500+ ES with Crit Chance + resists; works with Subterfuge Mask (converts ES → flat EV). | Same, but prioritize higher ES if leaning into Deflection. | Synergizes with both playstyles by boosting EV (speed + Deflection). |
| Boots | High Evasion (900+ EV) with Movement Speed; Deflection mods are optional. | 900+ EV boots with “Gain Deflection = % of EV” to survive at speed. | Deflection scaling here provides universal survivability. |
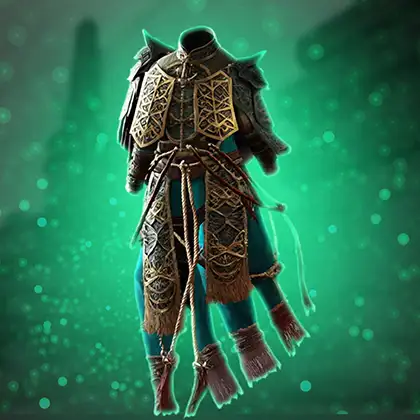
| Gloves | Rare with flat added damage lines (Cold/Lightning). Herald explosion chains scale better from raw damage. | Rare gloves with a Talisman of Sirrius socket (Gloves = +8% Attack Speed). | Gloves double as an elemental scaler (Ice) or speed engine (Flurry). |
| Belt | Rare EV/ES belt with high resists if you want durability while shattering. | Darkness Enthroned Fine Belt, + Talismans of Sirrius, with 80–100% effect roll. | For bossing, swap to a high-defense rare if needed. |
| Rings | Cold/Lightning flat damage stacking for Herald detonations. One ring must provide Mana Leech to activate Walker of the Wilds. | Same leech requirement, but bias affixes toward Attack Speed and Crit Multi. | Rings solve sustain and provide the bulk of flat added damage. |
| Amulet | +2/+3 Melee Skills, Crit Chance/Multi, global defenses. Auras benefit from Spirit implicits. | Same stats; Flurry variant benefits heavily from Crit Multi and APS rolls. | Crucial slot for scaling both damage and defenses. |
| Jewels | Heart of the Well: chase rolls = Skill Speed, Crit Damage Bonus, Gain % Damage as Extra Element. | Megalomaniac Diamond: chase notables = Wild Cat, Deadly Force, Overflowing Power, aura synergy. | Mix of Heart of the Well and Megalomaniac depending on drops. |
Key Notes
- Ice Shatter leans on raw damage scaling (flat Cold/Lightning, crit multipliers) to trigger bigger Herald of Ice chains.
- Tempest Flurry chases attack speed scaling (Talismans of Sirrius in Darkness Enthroned, APS jewels) to keep the projectile buff rolling.
- Bossing uses the same chest, helmet, and jewel core, but swaps in maximum combo stack gear for Falling Thunder.

Part 8: Community Tools, Privacy, and Staying Updated

This guide provides a powerful framework for the Hollow Palm Monk, but the journey doesn’t end here. As a live-service game, Path of Exile 2’s balance is always evolving. This final section offers guidance on pushing your build to its absolute limits and adapting to future changes.
Pushing the Build Further: The Min-Maxing Path
Once you have assembled the core components of the build, the final layers of power come from perfecting your gear and passive tree. Your primary goals will be:
- Perfecting Jewels: The hunt for ideal Heart of the Well and Megalomaniac jewels is the true endgame chase. Heart of the Well can roll multiple synergistic modifiers (e.g., Skill Speed, Critical Damage Bonus, Gain % of Damage as Extra [Element]), making a great copy one of the highest single-slot upgrades. Megalomaniac allocates two to three random notable passives; finding a roll that lines up with Hollow Palm’s Evasion/ES/crit scaling can outperform many gear swaps.
- Optimizing Runes: For the Tempest Flurry speedster variant, stack Talisman(s) of Sirrius and socket them into a Darkness Enthroned belt that (a) rolls “as though it were Gloves” and (b) has high increased effect of socketed items. This setup massively amplifies the talisman’s Gloves: 8% increased Attack Speed property and is a premier route to maximizing attack speed.
- Advanced Crafting: Craft endgame armour with “Gain Deflection Rating equal to #% of Evasion Rating” on as many slots as possible. Combined with Evasion stacking and key notables, this pushes your mitigation toward reliably preventing large portions of incoming hit damage while preserving the build’s speed.
Adapting to Patches and the Evolving Meta
Balance patches can and will change how this build functions. A small change to a key skill like Hollow Palm Technique, a support gem, or an ascendancy node like Lead Me Through Grace could require adjustments.
To stay informed about changes that directly impact this build, look for up-to-date discussions and testing after any major patch. Use precise search terms to surface current tech instead of outdated snapshots:
- “PoE 2 Hollow Palm Invoker [Patch Number]”
- “Unarmed Monk build after [Patch Name]”
- “Elemental Expression changes PoE 2”
Before investing significant currency into endgame items after a patch, simulate your upgrades in current community build planners to confirm they remain optimal.
Epiccarry: best wow boost and coaching services
Frequently Asked Questions
What is the Hollow Palm Monk build in PoE 2?
The Hollow Palm Monk is an unarmed Invoker build in Path of Exile 2 that relies on the Hollow Palm Technique keystone. This keystone transforms defensive stats into offense by giving attack speed from Evasion and critical strike chance from Energy Shield. Because of this, the build doesn’t need weapons and still achieves top-tier clear speed and boss damage. It’s considered one of the most efficient ways to experience Monk gameplay in PoE 2.
Why is the Hollow Palm Monk considered the best PoE 2 monk build starter?
Unlike many builds that require expensive uniques or crafted weapons, the Hollow Palm Monk comes online the moment you unlock the keystone at level 14. From that point, it scales naturally through campaign and mapping with common EV/ES gear. Its smooth power curve, strong defense layers, and reliable scaling make it a perfect league starter and one of the most consistent “best monk builds” in PoE 2.
How does Hollow Palm Technique work in PoE 2?
This keystone grants:
- +1% attack speed per 25 Evasion Rating on gear
- +0.1% base crit chance per 10 Energy Shield on gear
Combined with the unarmed base of 5% crit, this creates a system where every defensive upgrade also powers up your offense. It means you never waste a stat — EV and ES both keep you alive and make you stronger simultaneously.
What ascendancy is best for the Hollow Palm Monk?
The Invoker ascendancy is unmatched for this build. It provides:
- I Am the Blizzard / I Am the Thunder for elemental scaling.
- Lead Me Through Grace for massive Spirit to fuel Heralds and supports.
- Sunder My Enemies to bypass enemy resistances on crits.
- Scatter Them to the Winds for Elemental Expression, adding devastating on-crit explosions.
This blend of offense, utility, and sustain perfectly complements Hollow Palm scaling.
What skills are used for leveling the Hollow Palm Monk?
Leveling is straightforward and doesn’t require special gear:
- Frozen Locus clears early packs by detonating planted shards.
- Falling Thunder gives strong early single-target damage.
- Frost Bomb applies Cold Exposure to bosses.
At level 14, when Hollow Palm Technique is unlocked, you transition to Ice Strike as your main attack and activate Herald of Ice for chain explosions. This makes early acts extremely fast.
How do you generate Power Charges on this build?
Early on, Combat Frenzy provides Frenzy Charges. With the Resonance keystone, these are automatically converted to Power Charges. In the late game, you add Ailith’s Chimes and Hand of Chayula with the Culmination support to spend combo stacks and generate a full set of charges. This ensures maximum crit consistency and fully powers up the Falling Thunder finisher.
What are the main playstyle variants of the Hollow Palm Monk?
The guide supports two primary styles:
- Ice Shatter Build: Focused on freezing and detonating enemies with Ice Strike + Shattering Palm. Herald of Ice chains amplify the clear speed.
- Tempest Flurry Speedster: A hyper-fast style that reaches 14–18+ attacks per second, fueled by Staggering Palm’s projectile buff. It clears screens before enemies can react.
Both share the same defensive base and bossing tools, making them interchangeable depending on preference.
How does the one-shot Falling Thunder boss strategy work?
This technique builds damage in layers:
- Stack over 100 combo points with Culmination (3% more damage per stack).
- Use Hand of Chayula with Ailith’s Chimes to expend combo and generate Power Charges.
- Cast Falling Thunder with both combos and charges active.
Each cast gains +100% more damage if any charge is consumed, plus +50% per charge, multiplied with combo scaling. With 7 charges and 100+ combos, this delivers millions of burst damage in one crit, enough to one-shot even pinnacle bosses.
What body armor is best for the Hollow Palm Monk?
The build thrives on a hybrid Evasion/Energy Shield chest with 1400+ EV and 500+ ES. Crafting Spirit Reservation Efficiency here lets you sustain triple Heralds and defensive supports like Ghost Dance. This slot is critical because Spirit scaling comes almost entirely from body armor with Lead Me Through Grace.
Is Greater Iron Rune important for this build?
Yes, socketing a Greater Iron Rune into your body armor adds significant defensive layers. It improves mitigation and helps stabilize survivability in high-tier maps. For many players, this rune marks the transition from midgame into true endgame readiness.
What charms should the Hollow Palm Monk use?
Charms are your replacement for PoE 1 utility flasks. The recommended sets are:
- Mapping: Thawing (Freeze immunity), Dousing (Ignite immunity), Grounding (Shock immunity).
- Bossing: Swap to Stone (Stun immunity) or Amethyst (Chaos resistance).
Charms trigger automatically when conditions are met, which keeps you safe without constant flask micromanagement.
What flasks does the Hollow Palm Monk use?
PoE 2 only allows one Life Flask and one Mana Flask. This makes charm choices more important. The focus should be on instant or high-recovery flasks with enough charges for long boss fights. For mapping, this minimalist flask setup works fine because your sustain mostly comes from Spirit and leech.
How does Deflection Rating improve survivability?
Deflection is a new defensive mechanic that converts a portion of your Evasion into a separate roll that reduces incoming hit damage by about 40%. This means you don’t just avoid hits — even when something connects, Deflection softens the blow. Stacking it on gear and passives like Wild Cat turns the build into a near-unkillable blur.
What rings and amulet should you look for?
- Rings: One must provide Physical Attack Damage Leeched as Mana to activate Walker of the Wilds. Both should stack flat added damage (Cold/Lightning) and fill in resists/attributes.
- Amulet: Prioritize +2/+3 to Melee Skills, Crit Chance, Crit Multi, and global defenses. Spirit implicits are particularly strong for aura sustain. Together these slots provide both sustain and massive scaling.
Why are Talismans of Sirrius important?
Each Talisman of Sirrius adds Gloves: 8% increased Attack Speed. When socketed into a Darkness Enthroned belt with the “as Gloves” variant and 100% effect, this translates into a massive APS increase. For the Tempest Flurry variant, this is the main way to push your attack speed ceiling into the 18+ range.
What jewels are BiS for this build?
- Heart of the Well: Can roll premium affixes like Skill Speed, Crit Damage Bonus, or Gain % of Damage as Extra Element.
- Megalomaniac: Grants 2–3 random notables, with the best rolls including Deadly Force, Overflowing Power, Wild Cat, or aura efficiency nodes.
Chasing these jewels provides more power than almost any other single upgrade.
How does Spirit fuel auras in this build?
Spirit is the resource that sustains auras and persistent buffs. With +100 from campaign and the Lead Me Through Grace ascendancy, your body armor alone can generate 1500–2000 Spirit. This fuels triple Heralds, Ghost Dance, and powerful utility supports like Warm Blooded (freeze duration reduction) or Herbalism (extra charm/flask charges). Managing Spirit correctly is what separates a good Hollow Palm build from a great one.
How much resistance should you aim for?
Elemental resistances cap at 75%, but mapping curses and boss exposures often reduce them. To stay capped, aim for +35–45% overcap on gear. This ensures that even when cursed or exposed, you remain safe at the maximum resistance.
Is this build good for new players?
Yes. The Hollow Palm Monk is one of the most beginner-friendly builds in PoE 2 because it doesn’t rely on weapons, levels quickly, and teaches players about Charms, Deflection Rating, and Spirit management. Even without expensive gear, it feels powerful in the campaign and smooth in mapping. With investment, it rivals the strongest endgame builds.
How should you adapt this build after patches?
Path of Exile 2 is a live-service game, and balance changes are inevitable. Watch for changes to Hollow Palm Technique, Invoker ascendancy nodes (especially Lead Me Through Grace), or key skills like Ice Strike and Falling Thunder. After a patch, always check updated community PoB planners or build guides before crafting expensive items. This ensures your investments remain optimal as the meta evolves.

