

World of Warcraft: Midnight adds 60+ new mounts, including rare drops, renown rewards, Delve exclusives, PvP seasonals, and Mythic raid mounts like Ashes of Belo'ren. This complete collector’s guide covers every confirmed and likely mount, pre-patch removals, farming strategies, and the fastest unlocks to help you prioritize efficiently and minimize RNG before launch.
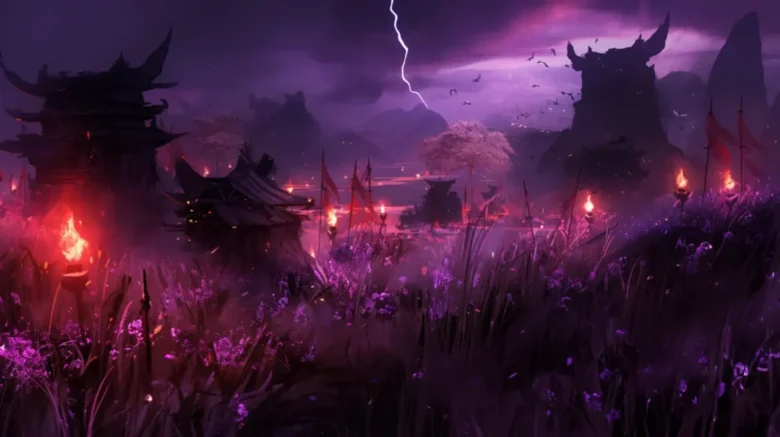
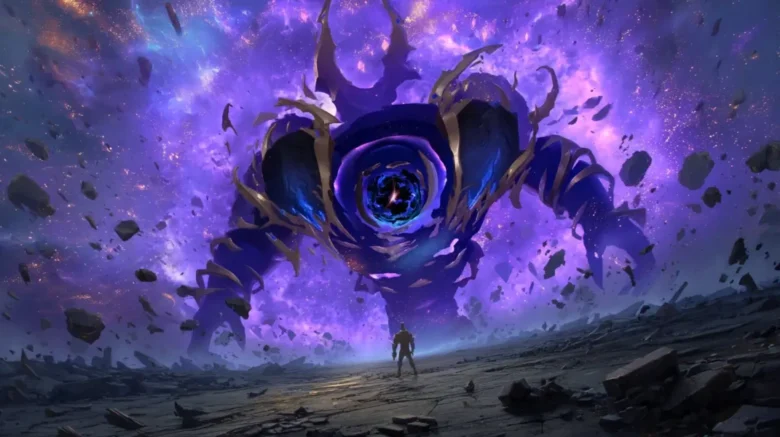
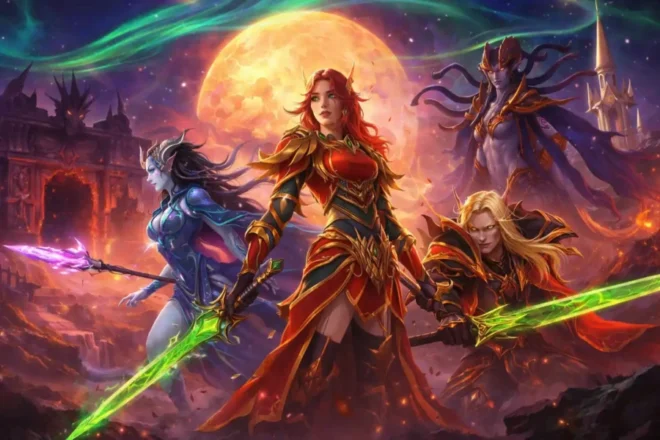
Welcome to the heart of a shattered world. Step into Manaforge Omega, the final raid of The War Within, where eight formidable bosses guard the Ethereal Nexus-King Salhadaar’s path to unleashing a Void Lord. This manaforge omega raid guide covers Normal and Heroic strategies, loot tables, role-specific tips, and progression rewards to prepare you for every phase of battle. Your mission is to disrupt Manaforge Omega’s operations and prevent the Nexus-King from his ultimate goal: to reawaken Dimensius by feeding the Dark Heart.
Table of Contents
- Raid Overview – Setting, story, and the mandatory Reshii Wraps prerequisite.
- High-Level Strategy – Recommended boss order and high-value raid utility.
- Boss Encounters – Detailed mechanics and at-a-glance cheat sheets for all eight bosses.
- Role-Specific Tips – Key responsibilities for Tanks, DPS, and Healers.
- Warlock Specialization Advice – Spec-by-spec recommendations for each fight.
- Loot, Rewards, and Progression – Item levels, Tier Sets, special items, and the Renown track.
Dive deeper into the article to find a special promo code for a discount to save on all your boosts.
 – Boss Strategies, Loot, &Amp; Tips | Epiccarry")
You may also be interested in:
| Class Tier List | Ghost of K’aresh Overview & release date | BiS Gear Guide | Tier sets overview |
| K’aresh Zone overview | Ecological Succession guide | Ethereal Crests guide | Untethered Coin Farm Guide |
| Mythic+ guide | Season 3 PvP guide | Manaforge Omega guide | Delves guide |
| Mount guide | Reshii wraps artifact cloak guide |
Raid-Wide Prerequisite: Reshii Wraps (The Artifact Cloak)
Before attempting any encounters in Manaforge Omega, it is mandatory for all raid members to have completed the K’aresh campaign and obtained the Reshii Wraps. This legendary artifact cloak provides a crucial Phase Blink ability, allowing players to Phase Dive through specific mechanics. Failure to equip it will result in death, as the forge’s defenses will disintegrate anyone not attuned to its energies.
 – Boss Strategies, Loot, &Amp; Tips | Epiccarry")
High-Level Manaforge Omega Strategy – Recommended Boss Order & Raid Preparation
Manaforge Omega Recommended Boss Order (Normal & Heroic):
Manaforge Omega is largely linear, with The Soul Hunters as the only optional encounter. After the Plexus Sentinel, the path to the following bosses opens up, with a progression that matches the general difficulty ramp:
| Order | Boss Name | Notes / Difficulty Spike | Optional? |
| 1 | Plexus Sentinel | DPS & coordination check to open the forge | No |
| 2 | Loom’ithar | Positioning and spatial control mechanics | No |
| 3 | Soulbinder Naazindhri | Add-heavy fight with priority targeting | No |
| 4 | Forgeweaver Araz | Multi-phase encounter with add and soak coordination | No |
| 5 | The Soul Hunters | Council fight requiring health balancing | Yes |
| 6 | Fractillus | Puzzle-style lane management boss | No |
| 7 | Nexus-King Salhadaar | Multi-phase endurance and positioning check | No |
| 8 | Dimensius, the All-Devouring | Final boss with escalating phase mechanics | No |
Essential Raid Utility for Manaforge Omega (Normal & Heroic):
- Mass Grips (Death Knight): Officially named Gorefiend’s Grasp, it is essential for bundling the orb adds on Forgeweaver Araz and grouping the waves on Soulbinder Naazindhri, turning chaotic add phases into manageable cleave.
- Displacement & Stuns (Monk, Druid, Evoker): Abilities like Ring of Peace and Ursol’s Vortex are invaluable for controlling adds on Forgeweaver Araz, preventing them from reaching their objectives.
- Group Mobility (Shaman, Druid, Evoker): Wind Rush Totem and Stampeding Roar can trivialize movement checks, such as navigating the intermissions for The Soul Hunters or escaping the pull on Forgeweaver Araz.
- Magic Damage Mitigation: Heavy magic damage reduction and absorbs are mandatory for tanks on the Heroic Dimension Breath from Nexus-King Salhadaar to prevent wiping the raid.
 – Boss Strategies, Loot, &Amp; Tips | Epiccarry")
Manaforge Omega Boss Encounters & Mechanics Guide
1. Plexus Sentinel Boss Strategy – Manaforge Omega (Normal & Heroic)
 – Boss Strategies, Loot, &Amp; Tips | Epiccarry")
The raid’s first challenge is a relentless arcane purifier, a massive construct serving as the gatekeeper to the forge’s inner workings. This is a two-phase encounter that serves as a DPS and coordination check as the raid is forced to advance through its domain.
Phase One: Engagement
The boss should be tanked in the center of the arena. The primary goal here is to manage the space effectively.
- Manifest Matrices: This ability targets players with purple circles. They must move to the outer edges to drop the resulting Displacement Matrix traps, which create dangerous void zones.
- Obliteration Arcanocannon: The active tank is targeted with a large, pulsating effect that detonates for heavy, proximity-based damage. A taunt swap is required after each cast.
- Eradicating Salvo: The boss targets a player and fires a missile that deals heavy damage, which must be split among all players in a group soak.
- Arcane Lightning (Heroic): Pools of arcane lightning will periodically spawn on the ground and must be avoided.
- Eradicating Salvo (Heroic): The soak mechanic now hits twice in quick succession and knocks players back. A second, un-knocked group is required to absorb the subsequent pulse.
Intermission & Phase Two
Upon reaching full energy, the Sentinel initiates Protocol: Purge, knocking the raid back and pushing everyone towards a lethal wall. Players must use their Reshii Wraps to Phase Blink through an advancing energy wall to survive. After passing through, the raid must break the boss’s shield to interrupt the cast.
- Pro-Tip: A well-timed Phase Blink can allow you to pass through the wall and an Energy Cutter beam simultaneously.
| Mechanic | Description | Difficulty Notes |
| Manifest Matrices | Drop purple circle traps at the edges to avoid cluttering the arena | Keeps hallway safe for movement |
| Obliteration Arcanocannon | Large tank buster; swap tanks after each cast | Position away from raid |
| Eradicating Salvo | Group soak damage | Heroic: Two soaks in quick succession, requires two groups |
| Arcane Lightning | Avoidable ground pools | Heroic only |
| Protocol: Purge | Knockback + advancing energy wall | Use Reshii Wraps Phase Blink to pass through safely |
 – Boss Strategies, Loot, &Amp; Tips | Epiccarry")
2. Loom’ithar Boss Strategy – Manaforge Omega (Normal & Heroic)
 – Boss Strategies, Loot, &Amp; Tips | Epiccarry")
The second boss is a colossal, genetically engineered silkworm. This two-phase encounter tests positioning and spatial control before transitioning into a high-damage kiting phase.
Phase One: Suspended Silkmaking (100% — 50%)
Loom’ithar is stationary, dangling in the center of the room.
- Piercing Strand: A wide beam targets the active tank. The boss casts this twice in succession, requiring a tank swap.
- Infusion Tether: The boss tethers multiple players, who must run ~40 yards away to snap them, dropping a damaging pool of Living Silk. (Heroic): Breaking a tether while in an existing Silk pool will stun you.
- Lair Weaving: A ring of “infused tangles” appears and slowly descends. Players must focus fire on one node to create an escape path. (Heroic): The tangle nodes are immune until struck by a tank’s Piercing Strand.
- Overinfusion Burst: At full energy, the boss creates a massive damaging ring. All players must exit through the opening in the tangle ring.
Intermission & Phase Two: Grounded Fury (50% — 0%)
At 50% health, Loom’ithar crashes down, creating a permanent damaging pool and taking 25% increased damage, making this the ideal time for Bloodlust/Heroism.
- Arcane Outrage: Each cast deals heavy raid damage and drops more damaging fluid under the boss, forcing tanks to kite her.
- Writhing Wave: The tank frontal is replaced with a cone that must be soaked by a large portion of the raid. (Heroic): Soaking this applies a debuff preventing players from soaking the next one, requiring two groups to alternate.
| Mechanic | Description | Difficulty Notes |
| Piercing Strand | Two-hit tank frontal | Swap tanks between hits |
| Infusion Tether | Run out to break tethers, dropping damaging pools | Heroic: Breaking inside another pool stuns you |
| Lair Weaving | Destroy a tangle node to open escape path | Heroic: Must be hit by Piercing Strand first |
| Overinfusion Burst | Large AoE ring | Exit through gap in tangles |
| Writhing Wave | Cone soak mechanic | Heroic: Two alternating soak groups required |
 – Boss Strategies, Loot, &Amp; Tips | Epiccarry")
3. Soulbinder Naazindhri Boss Strategy – Manaforge Omega (Normal & Heroic)
 – Boss Strategies, Loot, &Amp; Tips | Epiccarry")
The third encounter is a single-phase fight focused on add management. On Normal difficulty, six canisters activate; on Heroic, there are twelve. For a Shaman Bloodlust/Heroism on the pull is recommended.
Core Mechanic: Canister Breach
- Soulfray Annihilation: Two players are targeted with lines. They must position themselves so orbs fired from the boss travel through a canister’s barrier, releasing the nascent add inside. When the barrier is broken, the little unbound souls inside take 200% increased damage and must be cleaved down before their transformation cast completes.
- Pro-Tip: The raid receives six breaks per cycle. On Heroic, this becomes a strategic choice: use these six breaks to eliminate the highest-threat adds (Mages) first.
The Awakening
At the two-minute mark, all remaining adds are released simultaneously. Properly managing this cycle is the key to defeat Soulbinder Naazindhri.
Add Priority
- Mages: Top priority.
- Assassins: Second priority.
- Phaseblades (Heroic): Lowest priority.
Other Boss Abilities
- Mystic Lash: A channeled tank buster. Swap after each full channel.
- Soulfire Convergence: Marks players with five-directional beams that shoot out damaging orbs.
- Arcane Expulsion: A massive knockback with significant raid damage.
| Mechanic | Description | Difficulty Notes |
| Soulfray Annihilation | Fire orbs through canisters to release adds | Heroic: Plan breaks for priority adds |
| The Awakening | All remaining adds spawn at once | Layer interrupts & stuns |
| Mystic Lash | Channeled tank buster | Swap after full channel |
| Soulfire Convergence | Five-directional beam pattern | Avoid overlap |
| Arcane Expulsion | Massive knockback AoE | Position near safe edges |
 – Boss Strategies, Loot, &Amp; Tips | Epiccarry")
4. Forgeweaver Araz Boss Strategy – Manaforge Omega (Normal & Heroic)
 – Boss Strategies, Loot, &Amp; Tips | Epiccarry")
A multi-phase encounter against a technomancer attempting to harness arcane power. Shamans are recommended to use Bloodlust/Heroism after the first intermission.
Phase One: The Forging
- Invoke Collector & Astral Harvest: Araz activates a pylon, which first shoots out dodgeable orbs, before marking players who should stack on the boss to spawn Arcane Manifestation orb adds for cleave.
- Arcane Obliteration (Soak): A group soak on the tank that summons a large Void Forged Echo. (Heroic): The soak applies a heal absorb and a debuff, necessitating at least two soak groups.
- Echo of Obliteration (Arcane Echo): This add is the highest priority. (Heroic): It must be kept 20+ yards away from Araz.
- Pro-Tip: The Echo copies the boss’s casts, effectively creating double the hazards. Killing it quickly is paramount.
- Silencing Tempest: Araz creates silence zones on the ground.
- Overwhelming Power: A stacking tank debuff. Swap every 2-3 stacks.
Intermission & Phase Two
- Intermission: At 100 energy, the raid must destroy three pylons, prioritizing the one with the highest energy. Two Shielded Attendant adds will spawn and must be tank-swapped. Once destroyed, the boss is stunned and takes 100% increased damage.
- Phase Two: Begins after the second intermission. A Dark Singularity pulls the raid toward the edge. Players must kill Void Manifestation orbs and defeat Forgeweaver Araz before being pulled in.
| Mechanic | Description | Difficulty Notes |
| Astral Harvest | Stack on boss to spawn orb adds for cleave | Adds must be controlled |
| Arcane Obliteration | Group soak on tank, spawns large Echo add | Heroic: Heal absorb & debuff require soak rotation |
| Echo of Obliteration | Add that copies boss’s casts | Heroic: Keep 20+ yards away from boss |
| Silencing Tempest | Creates silence zones | Avoid standing inside |
| Overwhelming Power | Stacking tank debuff | Swap every 2–3 stacks |
| Intermission – Pylons | Destroy pylons in order of energy | Swap Shielded Attendants |
 – Boss Strategies, Loot, &Amp; Tips | Epiccarry")
5. The Soul Hunters Optional Boss Strategy – Manaforge Omega (Normal & Heroic)
 – Boss Strategies, Loot, &Amp; Tips | Epiccarry")
This optional boss is a council fight against three powerful Demon Hunter spirits: Ilyssa Darksorrow, Velaryn Bloodwrath, and Adarus Duskblaze. All three must be defeated at roughly the same time.
Main Phase: The Council
- Adarus — Devourer’s Ire: Creates void puddles that must be soaked by players with a special, dispellable DoT. (Heroic): The debuff stacks.
- Pro-Tip: Assign a mobile ranged DPS to handle this mechanic.
- Velaryn — The Hunt: Targets a player with a line soak. (Heroic): Soakers must spread out within the line.
- Ilyssa — Fracture & Spirit Bomb: The tank is hit with Fracture, splitting their soul into Soul Fragments. Non-tank players must collect these fragments before Spirit Bomb. What happens if you fail on Heroic? Absolutely nothing… good. It’s a wipe.
- Tank Swap: Tanks should swap after each Eye Beam and Fracture.
Intermissions (at 100 Energy)
- Adarus — Collapsing Star: Adarus pulls players toward the center. Orbs must be soaked. (Heroic): Soaking applies a stacking DoT.
- Velaryn — Fel Rush: Ghostly images perform line charges, requiring constant dodging.
- Ilyssa — Fell Devastation: The boss leaps and unleashes a massive cone attack.
A fourth intermission acts as a soft enrage.
| Mechanic | Description | Difficulty Notes |
| Devourer’s Ire (Adarus) | Void puddles must be soaked by debuffed players | Heroic: Debuff stacks |
| The Hunt (Velaryn) | Line soak mechanic | Heroic: Spread within the line |
| Fracture & Spirit Bomb (Ilyssa) | Tank splits into Soul Fragments, must be collected | Missing fragments causes wipe |
| Eye Beam / Fracture Tank Swap | Swap tanks after each occurrence | Applies heavy damage |
| Collapsing Star (Intermission) | Orbs must be soaked | Heroic: Soaking applies stacking DoT |
| Fel Rush (Intermission) | Dodge line charges | Requires constant movement |
| Fell Devastation (Intermission) | Massive cone attack | Get behind boss |
 – Boss Strategies, Loot, &Amp; Tips | Epiccarry")
6. Fractillus Boss Strategy – Manaforge Omega (Normal & Heroic)
 – Boss Strategies, Loot, &Amp; Tips | Epiccarry")
The “Tetris boss” is a unique, single-phase encounter where the challenge is managing crystalline walls. Shamans are recommended to use Bloodlust/Heroism on the pull.
The Lane Game
The arena is divided into six lanes. It is recommended to designate a “safe lane,” a “tank lane,” and four “drop-off lanes.”
The Cycle of Walls
- Wall Spawning: Four players are targeted to drop walls. If any lane accumulates six walls, it triggers a raid wipe.
- Tank Wall: The active tank is hit with Shockwave Slam, which also spawns a wall. Taunt after.
- Breaking Walls: Several players are marked for a knockback. They must position themselves in the lanes with the most walls to be knocked through them, shattering them. Breaking a wall spawns dodgeable Nexus Shrapnel circles.
- Void-Infused Walls (Heroic): Some walls are void-infused. When broken, they cause several players to get a debuff that detonates for AoE damage.
The goal is to defeat Fractillus before the arena becomes unmanageable.
| Mechanic | Description | Difficulty Notes |
| Wall Spawning | Players drop walls in lanes | Never drop in safe lane |
| Shockwave Slam (Tank Wall) | Tank frontal that also spawns a wall | Swap after knockback |
| Breaking Walls | Knockback breaks walls in targeted lanes | Spawns Nexus Shrapnel circles |
| Void-Infused Walls | Breaking causes AoE detonation | Heroic: Spread when broken |
| Six-Lane Rule | Any lane at 6 walls wipes raid | Maintain balance across lanes |
 – Boss Strategies, Loot, &Amp; Tips | Epiccarry")
7. Nexus-King Salhadaar Boss Strategy – Manaforge Omega (Normal & Heroic)
 – Boss Strategies, Loot, &Amp; Tips | Epiccarry")
A complex encounter with three phases and two intermissions. Successful Nexus-King Salhadaar attempts hinge on mastering Phase One. Recommended to use Bloodlust/Heroism during the second intermission.
Phase One: The Oath of Conquest
- Tank Mechanics (Conquer & Vanquish): The boss casts a random sequence of two Conquer (group soaks) and two Vanquish (lethal frontals). Tanks MUST taunt after every single cast.
- Removing the Oath: All players begin with the Oath-Bound debuff. Stacks are removed by soaking a Conquer circle. After soaking, a Vengeful Oath apparition will spawn, which the player must face until it disappears.
- Besiege: Waves of ethereal blades will shoot across the arena.
- Behead: Marked players must run far away from the group.
- Mind Control (Heroic): Any death during Phase 1 instantly resurrects that player under Salhadaar’s control, forcing the raid to crowd-control and kill them before they can be revived.
Phases Two, Three, and Intermissions
- Phase Two: The boss mounts his dragon, the Royal Voidwing. Players drop Netherbreaker portals at the edge. The tank must manage the Cosmic Maw debuff and the subsequent Dimension Breath, which is mirrored from all portals. (Heroic): The damage the tank takes from the breath is dealt back to the raid.
- Pro-Tip (Heroic): Absorbs and immunities can prevent this damage entirely.
- First Intermission: The raid splits to defeat adds on side platforms. Priority is killing the Manaforged Titan.
- Second Intermission: A burn phase where the boss’s dragon takes 100% increased damage.
- Phase Three: Starfall: Galactic Smash spawns Dark Stars that pull players in; place each on the arena’s edge to keep the center safe. During Starkiller Swing, targeted players must hit different stars with their missiles — two hits on the same star leave it active, and two misses on the same star trigger Nexus Collapse (wipe). (Heroic): Stars emit moving spike rings while orbiting the arena, adding constant dodge pressure.
| Mechanic | Description | Difficulty Notes |
| Conquer | Group soak mechanic | Tanks taunt after each cast |
| Vanquish | Lethal frontal cone | Tanks taunt after each cast |
| Oathbound Debuff | Removed by soaking Conquer | Spawns apparition that must be faced |
| Besiege | Waves of ethereal blades | Dodge patterns |
| Behead | Targeted player must run out | Avoid group damage |
| Mind Control | Any death causes mind control | Heroic only |
| Dimension Breath | Tanked breath attack mirrored from portals | Heroic: Tank damage shared with raid |
| Netherbreaker Portals | Dropped at arena edge | Prevent breath overlap |
| Dark Stars | Must be destroyed with missiles | Heroic: Stars orbit arena |
 – Boss Strategies, Loot, &Amp; Tips | Epiccarry")
8. Dimensius the All-Devouring Final Boss Strategy – Manaforge Omega (Normal & Heroic)
 – Boss Strategies, Loot, &Amp; Tips | Epiccarry")
The final boss of Manaforge Omega is a multi-stage epic against a Void Lord.
Phase One: The Edge of Infinity
The goal is to survive Devour, preventing the reborn Dimensius feasting on the raid.
- Living Mass & Collective Gravity: Defeating Living Mass adds drops Excess Mass, which players pick up to generate protective circles needed to survive Devour.
- Growing Hunger: Each Devour cast is like a cosmic cheat meal for the boss, increasing his hunger and requiring more Collective Gravity.
- Reverse Gravity: Players are pulled towards the boss. Other players must stand in their circles to tether them back down.
- Shattered Space: Circles of Antimatter must be soaked by the raid.
- Dark Matter (Heroic): This ability now leaves behind a pool of Dark Energy.
Intermission & Phase Two
- Intermission: A flying obstacle course.
- Phase Two: The raid splits to fight two Void Lords while dodging Extinction and resisting Gamma Burst. (Heroic): The Void Lords’ abilities leave behind permanent Debris Fields, and a Nullbinder add will spawn that is the highest priority kill.
Phase Three: Singularity
After defeating both Void Lords, Dimensius becomes destabilized, taking 100% increased damage. This is the ideal time for Shamans to wip out good ole Bloodlust/Heroism.
- Extinguish the Stars & Devour: Players must stand in a Void Star’s gravity well to survive Devour.
- Supernova: The boss periodically turns a Void Star into a lethal black hole.
- Accretion Disk: The deadly outer edge of the platform shrinks inwards after each Devour, emitting a sinister radiance and serving as a soft enrage.
- Voidgrasp: A heavy DoT and slow is applied to random players.
- Cosmic Collapse (Heroic): This tank swap mechanic also pulls players towards the boss.
| Mechanic | Description | Difficulty Notes |
| Living Mass | Killing drops Excess Mass for protective circles | Needed to survive Devour |
| Collective Gravity | Protective circle mechanic | More needed each Devour |
| Growing Hunger | Increases Devour requirements | Stacks over fight |
| Reverse Gravity | Pulls players toward boss | Stand in circles to avoid |
| Shattered Space | Soak antimatter circles | Heroic: Leaves damaging pools |
| Extinction (Phase 2) | Large AoE blast | Avoid and heal |
| Gamma Burst (Phase 2) | Knockback and damage | Heroic: Leaves permanent Debris Fields |
| Nullbinder Add | Priority kill in Phase 2 | Heroic only |
| Void Star | Gravity well used to survive Devour | Black hole after Supernova |
| Accretion Disk | Platform shrink after each Devour | Soft enrage |
| Void Grasp | Heavy DoT and slow | Heal through |
| Cosmic Collapse | Tank buster with pull-in | Heroic only |
 – Boss Strategies, Loot, &Amp; Tips | Epiccarry")
Role-Specific Tips for Manaforge Omega – Tanks, DPS & Healers
 – Boss Strategies, Loot, &Amp; Tips | Epiccarry")
Tanks:
- Plexus Sentinel: Kite Obliteration Arcanocannon to a far corner.
- Loom’ithar: On Heroic, aim Piercing Strand at a tangle node. In Phase 2, kite slowly around the edge.
- Soulbinder Naazindhri: Taunt after the Mystic Lash channel.
- Forgeweaver Araz: On Heroic, keep the boss and Void Forged Echo add 20+ yards apart.
- The Soul Hunters: Keep your bosses stacked on Adarus.
- Fractillus: Stay in your designated lane and taunt after the knockback.
- Nexus-King Salhadaar: In Phase 1, taunt after every single cast. On Heroic, use a major defensive/immunity on Dimension Breath.
- Dimensius: On Heroic, position Phase 2 adds to place their Debris Fields safely.
DPS:
 – Boss Strategies, Loot, &Amp; Tips | Epiccarry")
- Plexus Sentinel: Quarantine Manifest Matrices at the edges.
- Loom’ithar: Your top priority is burning the designated tangle node.
- Soulbinder Naazindhri: Adhere strictly to the kill priority: Mages > Assassins > Phaseblades.
- Forgeweaver Araz: The Echo of Obliteration is always your highest priority.
- The Soul Hunters: Cleave all three bosses evenly. Collect Soul Fragments.
- Fractillus: If a “breaker,” clear the lane with the most walls.
- Nexus-King Salhadaar: Soak your assigned Conquer, then face your apparition. In Phase 3, your precision with Starkiller Swing is critical.
- Dimensius: In Phase 1, your group’s survival depends on killing Living Mass adds. On Heroic, the Nullbinder must die instantly.
Healers:
 – Boss Strategies, Loot, &Amp; Tips | Epiccarry")
- Plexus Sentinel: Plan cooldowns for each Obliteration Arcanocannon and the Heroic soaks.
- Loom’ithar: Phase 2 is a major healing check requiring cooldown rotation.
- Soulbinder Naazindhri: The Awakening phase is the most dangerous moment; coordinate powerful cooldowns.
- Forgeweaver Araz: Be prepared for the large heal absorb from the Heroic soak.
- The Soul Hunters: Spirit Bomb requires a major cooldown. On Heroic, coordinate dispels.
- Fractillus: Spot-heal the heavy DoT on players spawning walls.
- Nexus-King Salhadaar: The raid damage after a Heroic Dimension Breath is a major check.
- Dimensius: Shattered Space and the Devour cast require major cooldowns. Players with Void Grasp will need focused healing.
Are Warlocks the Best for Manaforge Omega? Spec-by-Spec Boss Guide
Warlocks are widely regarded by much of the raiding community as top contenders for Manaforge Omega, thanks to their mix of sustained damage, burst windows, survivability tools, and unique utility like Healthstones, Gateways, and Banish. While you technically can clear the raid without them, many groups prefer not to test that theory. The following specialization picks reflect community consensus on which specs shine brightest for each boss in The War Within 11.2.
- 1. Plexus Sentinel: Demonology or Destruction.
- 2. Loom’ithar: Destruction (Diabolist).
- 3. Soulbinder Naazindhri: All three specs are viable.
- 4. Forgeweaver Araz: Destruction or Affliction (Hellcaller).
- 5. The Soul Hunters: Destruction (Hellcaller).
- 6. Fractillus: Demonology (Diabolist).
- 7. Nexus-King Salhadaar: All three specs are strong.
- 8. Dimensius, the All-Devouring: All three specs are viable, with Affliction’s strong burst profile being particularly valuable for the Phase 3 damage amplification window, while Destruction offers excellent control during the add-heavy Phase 2.
 – Boss Strategies, Loot, &Amp; Tips | Epiccarry")
Manaforge Omega Loot, Tier Sets & Rewards
 – Boss Strategies, Loot, &Amp; Tips | Epiccarry")
Manaforge Omega offers some of the most powerful gear in The War Within 11.2, alongside unique items, profession recipes, mounts, and prestige rewards. This section gives you everything — notable loot highlights, full boss-by-boss loot tables, profession drops, and progression rewards.
Raid Unlock Schedule
- Week 1: Normal, Heroic, Mythic, Raid Finder Wing 1 (Plexus Sentinel, Loom’ithar, Soulbinder Naazindhri).
- Week 2: Story Mode, Raid Finder Wing 2 (Forgeweaver Araz, The Soul Hunters, Fractillus).
- Week 3: Raid Finder Wing 3 (Nexus-King Salhadaar, Dimensius).
Item Level by Difficulty
| Difficulty | Bosses 1-3 | Bosses 4-6 | Bosses 7-8 |
| Raid Finder | 671 | 675 | 678 |
| Normal | 684 | 688 | 691 |
| Heroic | 697 | 701 | 704 |
| Mythic | 710 | 714 | 717 |
Notable Loot Highlights
 – Boss Strategies, Loot, &Amp; Tips | Epiccarry")
- Reshii Wraps Upgrade: The Interloper’s Boots (The Soul Hunters) enhance the legendary cloak.
- Voidglass Set Bonus (Shards of the Void) (Casters): Diamantine Voidcore trinket (Fractillus) + Voidglass weapons.
- Utility Weapon: Maw of the Void (Nexus-King Salhadaar) with unique on-use effect.
- Cosmetic: Soulbinder’s Nethermantle (Naazindhri) cloak for transmog.
- Mounts: Royal Voidwing (Heroic Dimensius), Unbound Star-Eater (Mythic Dimensius).
Plexus Sentinel
| Item | Difficulty | iLvl | Slot | Type |
| Factory-Issue Plexhammer | All | 662 | One-Hand | Mace |
| Atomic Phasebelt | All | 662 | Waist | Leather |
| Eradicating Arcanocore | All | 662 | Trinket | Trinket |
| Arcanotech Wrist-Matrix | All | 662 | Wrist | |
| Manaforged Displacement Chassis | All | 662 | Chest | Plate |
| Singed Sievecuffs | All | 662 | Wrist | Cloth |
| Logic Gate: Alpha | All | 662 | Finger | Ring |
| Overclocked Plexhammer | All | 662 | One-Hand | Mace |
| Sterilized Expulsion Boots | All | 662 | Feet | Plate |
| Mounted Manacannons | All | 662 | Shoulder | Cloth |
| Obliteration Beamglaive | All | 662 | Two-Hand | Polearm |
| Irradiated Impurity Filter | All | 662 | Head | Leather |
| Chambersieve Waistcoat | All | 662 | Legs |
Loom’ithar
| Item | Difficulty | iLvl | Slot | Type |
| Deathbound Shoulderpads | All | 662 | Shoulder | Leather |
| Piercing Strandbow | All | 662 | Ranged | Bow |
| Prodigious Gene Splicer | All | 662 | One-Hand | Dagger |
| Discarded Nutrient Shackles | All | 662 | Wrist | Plate |
| Ward of the Weaving-Beast | All | 662 | Shield | Shield |
| Laced Lair-Steppers | All | 662 | Feet | Cloth |
| Astral Antenna | All | 662 | Trinket | Trinket |
| Loom’ithar’s Living Silk | All | 662 | Trinket | Trinket |
| Colossal Lifetether | All | 662 | Waist |
 – Boss Strategies, Loot, &Amp; Tips | Epiccarry")
Soulbinder Naazindhri
| Item | Difficulty | iLvl | Slot | Type |
| Soulbinder’s Nethermantle | All | 1 | Back | Cosmetic |
| Soulbinder’s Embrace | All | 662 | Trinket | Trinket |
| Chrysalis of Sundered Souls | All | 662 | Neck | Amulet |
| Deathspindle Talons | All | 662 | Feet | |
| Fresh Ethereal Fetters | All | 662 | Waist | Plate |
| Frock of Spirit’s Reunion | All | 662 | Chest | Cloth |
| Unbound Training Claws | All | 662 | One-Hand | Fist Weapon |
| Bindings of Lost Essence | All | 662 | Wrist | Leather |
| Naazindhri’s Mystic Lash | All | 662 | Trinket | Trinket |
| Voidglass Spire | All | 662 | Two-Hand | Staff |
Forgeweaver Araz
| Item | Difficulty | iLvl | Slot | Type |
| Araz’s Ritual Forge | All | 662 | Trinket | Trinket |
| Breached Containment Guards | All | 662 | Hands | Plate |
| Forgeweaver’s Journal Holster | All | 662 | Waist | Cloth |
| Harvested Attendant’s Uniform | All | 662 | Chest | |
| Iris of the Dark Beyond | All | 662 | Held Off-hand | Off-hand Frill |
| Laboratory Test Slippers | All | 662 | Feet | Leather |
| Logic Gate: Omega | All | 662 | Finger | Ring |
| Marvel of Technomancy | All | 662 | Two-Hand | Staff |
| Photon Sabre Prime | All | 662 | Two-Hand | Sword |
The Soul Hunters
| Item | Difficulty | iLvl | Slot | Type |
| Interloper’s Chain Boots | All | 662 | Feet | |
| Interloper’s Plated Sabatons | All | 662 | Feet | Plate |
| Interloper’s Reinforced Sandals | All | 662 | Feet | Leather |
| Interloper’s Silken Striders | All | 662 | Feet | Cloth |
| Bloodwrath’s Gnarled Claws | All | 662 | Hands | Cloth |
| Brand of Ceaseless Ire | All | 662 | Trinket | Trinket |
| Clasp of Furious Freedom | All | 662 | Waist | |
| Collapsing Phaseblades | All | 662 | One-Hand | Warglaive |
| Darksorrow’s Corrupted Carapace | All | 662 | Chest | Leather |
| Duskblaze’s Desperation | All | 662 | Neck | Amulet |
| Event Horizon | All | 662 | Shield | Shield |
| Sigil of the Cosmic Hunt | All | 662 | Trinket | Trinket |
| Yoke of Enveloping Hatred | All | 662 | Wrist | Plate |
 – Boss Strategies, Loot, &Amp; Tips | Epiccarry")
Fractillus
| Item | Difficulty | iLvl | Slot | Type |
| Bite of the Astral Wastes | All | 662 | Head | |
| Conjoined Glass Bracers | All | 662 | Wrist | Cloth |
| Diamantine Voidcore | All | 662 | Trinket | Trinket |
| Fractillus’ Last Breath | All | 662 | Held Off-hand | Off-hand Frill |
| Kinetic Dunerunners | All | 662 | Feet | Leather |
| Lacerated Current Caster | All | 662 | Ranged | Crossbow |
| Shrapnel-Fused Legguards | All | 662 | Legs | Plate |
| Unyielding Netherprism | All | 662 | Trinket | Trinket |
| Voidglass Kris | All | 662 | One-Hand | Dagger |
Nexus-King Salhadaar
| Item | Difficulty | iLvl | Slot | Type |
| Beacons of False Righteousness | All | 662 | Shoulder | Plate |
| Darkrider Sabatons | All | 662 | Feet | Plate |
| Elite Shadowguard Legwraps | All | 662 | Legs | Leather |
| Maw of the Void | All | 662 | Two-Hand | Mace |
| Nexus-King’s Command | All | 662 | Trinket | Trinket |
| Oath-Breaker’s Recompense | All | 662 | One-Hand | Axe |
| Pactbound Vambraces | All | 662 | Wrist | |
| Perfidious Projector | All | 662 | Trinket | Trinket |
| Reaper’s Dreadbelt | All | 662 | Waist | Leather |
| Royal Voidscale Gauntlets | All | 662 | Hands | |
| Salhadaar’s Folly | All | 662 | Neck | Amulet |
| Sandals of Scarred Servitude | All | 662 | Feet | Cloth |
| Twilight Tyrant’s Veil | All | 662 | Head | Cloth |
| Vengeful Netherspike | All | 662 | One-Hand | Dagger |
| Voidglass Sovereign’s Blade | All | 662 | One-Hand | Sword |
Dimensius, the All-Devouring
| Item | Difficulty | iLvl | Slot | Type |
| All-Devouring Nucleus | All | 662 | Trinket | Trinket |
| Artoshion’s Abyssal Stare | All | 662 | Head | Plate |
| Band of the Shattered Soul | All | 662 | Finger | Ring |
| Claws of Failed Resistance | All | 662 | Shoulder | |
| Ergospheric Cudgel | All | 662 | One-Hand | Mace |
| Greaves of Shattered Space | All | 662 | Feet | |
| Screams of a Forgotten Sky | All | 662 | Trinket | Trinket |
| Singularity Cincture | All | 662 | Waist | Cloth |
| Stellar Navigation Slacks | All | 662 | Legs | Cloth |
| Supermassive Starcrusher | All | 662 | Two-Hand | Mace |
| Time-Compressed Wristguards | All | 662 | Wrist | Leather |
| Ultradense Fission Girdle | All | 662 | Waist | Plate |
| Winged Gamma Handlers | All | 662 | Hands | Leather |
Profession & Recipe Drops
| Boss / Source | Item | Profession |
| Plexus Sentinel | Formula: Enchanted Runed Harbinger Crest | Enchanting |
| Loom’ithar | Pattern: Duskthread Lining | Tailoring |
| The Soul Hunters | Pattern: Adrenal Surge Clasp | Leatherworking |
| Forgeweaver Araz | Plans: Siphoning Stiletto | Blacksmithing |
| Fractillus | Design: Magnificent Jeweler’s Setting | Jewelcrafting |
| Dimensius | Formula: Enchant Weapon – Authority of the Depths | Enchanting |
| Soulbinder Naazindhri | Formula: Enchanted Gilded Harbinger Crest | Enchanting |
 – Boss Strategies, Loot, &Amp; Tips | Epiccarry")
Manaforge Vandals Renown Rewards & Perks
 – Boss Strategies, Loot, &Amp; Tips | Epiccarry")
Progressing through the Manaforge Vandals Renown Track grants both combat perks and cosmetic prestige rewards:
| Renown Level | Reward | Benefit |
| 3 | Weakens non-boss enemies in Cultivation Chambers & The Unbound Vault | Easier trash pulls |
| 4 | +3% Raid Damage/Healing | Permanent buff inside raid |
| 5 | Raid Skip | Skip from entrance to Nexus-King Salhadaar |
| 7 | Weakens enemies in Technomancers’ Terrace | Easier mid-raid trash |
| 9 | Permanent Augment Runes | Runes do not expire on death |
| 10 | +3% Raid Damage/Healing | Permanent buff inside raid |
| 11 | Warbound Gear Drops | Named elites drop account-wide gear |
| 13 | +3% Raid Damage/Healing | Permanent buff inside raid |
| 14 | Mount: The Bone Freezer | Cosmetic & prestige reward |
| 15 | +3% Raid Damage/Healing & Title: Star Savior | Permanent buff & prestige title |
Promo code: Dina_Blog
Use this discount as my thank you for your attention!
Prestige Rewards
In addition to Renown, select boss kills grant high-visibility rewards:
- Royal Voidwing (Heroic Dimensius or higher) – prestige mount.
- Unbound Star-Eater (Mythic Dimensius) – ultra-rare mount.
- Vandal’s Gearglider – awarded at Renown 8.
- The Bone Freezer – awarded at Renown 14 (also listed in Renown table).
- Title: Star Savior – awarded at Renown 15 (also listed in Renown table).
Season 3 Meta Progression Rewards (The War Within)
- Bonus Catalyst Charge – earned by defeating Heroic/Mythic Dimensius, or achieving a 2000+ Mythic+ rating or 1600+ PvP rating.
- Enhanced Tier Set Visuals – unlocked by defeating Mythic Dimensius, or achieving Keystone Hero or Elite PvP rank.
Author
Epiccarry: best wow boost and coaching services
Frequently Asked Questions
What is the Manaforge Omega raid in The War Within 11.2?
Manaforge Omega is the climactic 8-boss raid in The War Within patch 11.2, set in the broken remains of K’aresh. Players face the Ethereal Nexus-King Salhadaar and ultimately Dimensius, the All-Devouring, a Void Lord threatening to consume reality. Each encounter features unique mechanics ranging from lane-based puzzles to large-scale add control, with escalating difficulty across Normal, Heroic, and Mythic modes. Beyond the challenge, Manaforge Omega is a major loot source for Season 3 — including tier set pieces, profession recipes, mounts, and prestige rewards.
How do I unlock the Manaforge Omega raid entrance?
You can’t just stroll in — first, you must complete the K’aresh campaign to attune yourself and earn the Reshii Wraps legendary cloak. This cloak’s Phase Blink is essential for surviving certain one-shot mechanics, and without it, the forge’s defenses will instantly vaporize you. The physical raid entrance is found in the Shadow Docks, but once attuned, you can take portals from capital cities for quick access.
What is the recommended boss order for Manaforge Omega?
For a smooth progression curve, most groups tackle bosses in this order:
Plexus Sentinel → Loom’ithar → Soulbinder Naazindhri → Forgeweaver Araz → (Optional) The Soul Hunters → Fractillus → Nexus-King Salhadaar → Dimensius.
This route starts with mechanically simpler fights, allowing your raid to gear up before handling complex council-style mechanics and multi-phase end bosses.
What item levels do bosses drop in Manaforge Omega?
Loot scales based on both raid difficulty and wing:
- Raid Finder: 671–678 ilvl
- Normal: 684–691 ilvl
- Heroic: 697–704 ilvl
- Mythic: 710–717 ilvl
The later-wing bosses (Salhadaar and Dimensius) drop the highest ilvl gear, rewarding deeper progression.
What are the Tier 34 set pieces and where do they drop?
Tier 34, themed after The War Within’s raid aesthetic, drops from specific bosses:
- Legs: Loom’ithar
- Hands: Soulbinder Naazindhri
- Helm: Forgeweaver Araz
- Shoulders: The Soul Hunters
- Chest: Fractillus
- Omni-token: Dimensius (can be turned into any slot)
Completing the set grants powerful class-specific bonuses, with Mythic versions offering enhanced spell effects and visuals.
What are the most notable loot drops in Manaforge Omega?
Some standout items include:
- Reshii Wraps Upgrade: Interloper’s Boots (Soul Hunters) for cloak enhancement
- Voidglass Set: Diamantine Voidcore trinket (Fractillus) + Voidglass weapons for casters
- Maw of the Void: A unique on-use weapon from Nexus-King Salhadaar
- Soulbinder’s Nethermantle: A purely cosmetic cloak from Naazindhri
- Mounts: Royal Voidwing (Heroic Dimensius) and Unbound Star-Eater (Mythic Dimensius)
These items are both mechanically powerful and visually prestigious.
How do I get the Royal Voidwing mount?
To earn the Royal Voidwing, you must defeat Dimensius the All-Devouring on Heroic difficulty or higher. The mount is a 100% guaranteed drop for everyone in the raid, making it a prestigious yet predictable reward for teams that can meet the DPS and mechanics checks.
How do I get the Unbound Star-Eater mount?
The Unbound Star-Eater drops from Dimensius on Mythic difficulty and is an extremely rare drop. Expect to farm multiple weeks — and consider it a long-term prestige goal rather than a guaranteed loot target.
What is the Raid Renown Track in Manaforge Omega?
The Manaforge Vandals Renown Track is a progression system tied to raid achievements, offering both power bonuses and cosmetics. Power perks include permanent +3% raid-wide damage/healing and trash mob debuffs, while cosmetics include The Bone Freezer mount and the Star Savior title. Reaching max renown makes subsequent clears faster and flashier.
What profession recipes drop in Manaforge Omega?
Rare crafting patterns drop from specific bosses:
- Enchanting: Enchanted Runed Harbinger Crest (Plexus Sentinel), Enchanted Gilded Harbinger Crest (Naazindhri), Enchant Weapon – Authority of the Depths (Dimensius)
- Tailoring: Duskthread Lining (Loom’ithar)
- Leatherworking: Adrenal Surge Clasp (Soul Hunters)
- Blacksmithing: Siphoning Stiletto (Araz)
- Jewelcrafting: Magnificent Jeweler’s Setting (Fractillus)
These recipes often sell for high gold early in the patch.
Which boss is the hardest on Heroic difficulty?
Most raiders agree Nexus-King Salhadaar is the toughest Heroic fight due to multi-layered soak mechanics, Dimension Breath reflecting tank damage to the entire raid, and punishing Phase 3 missile coordination. Dimensius is mechanically dense but becomes more predictable once your group learns the patterns.
What makes Dimensius the All-Devouring unique?
Dimensius combines multi-phase platform fights, raid-wide soaks, and dangerous movement restrictions. The battlefield shrinks after each Devour, and Heroic mode introduces Cosmic Collapse and permanent Debris Fields that reduce safe space. It’s a test of execution under pressure — one part dance, one part demolition derby.
Can you skip bosses in Manaforge Omega?
Yes — The Soul Hunters encounter is the only optional fight. Skipping it saves time but forfeits loot, a Tier 34 shoulder token, and a profession recipe. Most groups kill it for the rewards.
What are the major Heroic-only mechanics in Manaforge Omega?
Heroic difficulty adds layers of complexity such as:
- Double-soak sequences on Plexus Sentinel
- Tangle immunity phases on Loom’ithar
- Stacking DoTs from The Soul Hunters’ mechanics
- Permanent terrain hazards from Dimensius’ adds
- Raid-wide reflected damage from Salhadaar’s Dimension Breath
These changes demand tighter coordination and cooldown planning.
How does the Reshii Wraps cloak work in the raid?
Reshii Wraps grants Phase Blink, letting you teleport through lethal mechanics like advancing energy walls and beam grids. In fights such as Plexus Sentinel and Salhadaar, failing to Phase Blink at the right time is an instant death — and no, your healer can’t save you.
Which classes excel in Manaforge Omega?
Warlocks are considered top-tier due to sustained DPS, burst flexibility, survivability, and utility like Gateways, Healthstones, and Banish. Death Knights bring add grips, Druids and Shamans contribute key raid cooldowns, and Evokers shine for mobility and group saves.
How does loot contribute to the Great Vault in Season 3?
Killing bosses in Manaforge Omega counts toward your weekly Great Vault raid slots. Clearing more bosses unlocks more vault choices, and higher difficulty clears improve the item level of those rewards. Mythic clears naturally yield the highest ilvl vault gear.
Is Bloodlust/Heroism timing important in this raid?
Absolutely — proper timing can make or break progression pulls. Common timings include:
- Plexus Sentinel: On pull
- Loom’ithar: Phase 2 burn
- Forgeweaver Araz: After first intermission
- Nexus-King Salhadaar: Second intermission burn
- Dimensius: Final destabilized phase
Mis-timing Bloodlust often leads to an “almost kill” that slips away.
What consumables are best for Manaforge Omega progression?
The most recommended consumables are Phial of Elemental Chaos, Feast of Glacial Currents, and armor kits matched to your role. Carry Vantus Runes for your current progression boss (often Dimensius), and personal potions like Potion of Withering Dreams for burst phases.
How can I prepare my group for Mythic difficulty?
Preparation involves:
- Clearing Heroic with minimal deaths
- Assigning backups for every mechanic
- Optimizing class comp for utility (grips, immunities, AoE stuns)
- Reviewing logs for positioning and cooldown efficiency
- Running split raids for early loot funneling
Mythic is less forgiving, so every raid member must know their role without hesitation.


WoW Grt!