Sunwell Plateau is the final and the most challenging raid dungeon of all TBC addons. The dungeon is located on the Isle of Quel’Danas. Boss includes six bosses. Dungeon drops the remaining three parts of the T6 set and other powerful gear. The last boss of the raid is Kil’jaeden. He drops Thori’dal, the Stars’ Fury – the legendary bow.
WoW Classic Anniversary Hourly Driving
Any Customizable boost on your pleasure

To clear the Sunwell Plateau raid needs to be geared in Black Temple/Mount Hyjal T6 gear. Every raider must have 10000+ health as due to mechanics on some bosses, it is almost impossible to stay alive if your health is lower.
How to Kill Every Sunwell Plateau Boss
Kalecgos
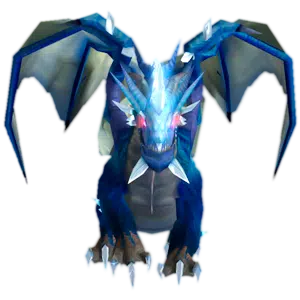
Kalecgos is the first boss of the Sunwell Plateau raid dungeon. This fight is very technical and will require a good raid rotation. Raid will need to fight in 2 dimensions at the same time – against Kalecgos in the real world and against Shathrovarr the Corruptor in the shadow world.
Abilities
Kalecgos
Arcane Buffet – boss doing 463 arcane damage and puts debuff that increases incoming arcane damage by 500; casts every 8 seconds; removable via entering the shadow realm;
Frost Breath – boss doing 2550 frost damage and puts debuff that reduces attack speed by 75% for 12 seconds;
Tail Lash – an ability that does 1969 physical damage from behind the boss and stuns the target for 2 seconds;
Wild Magic – a debuff that has different effects depending on the color:
- Green – increases the healing done by 100%;
- Blue – reduces the cost of spells and abilities by 50%;
- Red – reduces the chance to hit with ranged and melee attacks by 50%;
- Purple – increases the casting time of spells by 100%;
- Black – increases generated aggro by the target by 100%;
- White – increases the damage done by critical hits on 100% of damage;
WoW Classic Anniversary Leveling Boost
Let professionals expedite your power leveling

Spectral Blast – does 5700 arcane damage to the random target and 10 yards around and creates on that place a portal to the shadow world;
Spectral Realm – 60 seconds debuff that transports players to the shadow world; after 60 seconds, it will teleport you back to the real world;
Spectral Exhaustion – debuff that does not allow you to enter the shadow world for 60 seconds;
Crazed Rage – at 10% of health, Kalecgos and Shathrovarr get a 10% increased damage and attack speed buff.
Shathrovarr the Corruptor
Corrupting Strike – boss deals 9500 shadow damage and stuns for 3 seconds doing 1000 shadow damage per second at the same time;
Curse of Boundless Agony – a 30-second debuff that does a shadow damage every second that doubles every 5 seconds starting from 100;
Shadow Bolt Volley – boss, doing 4250 shadow damage to a random target and two nearby targets.
Preparation and Tactic
- 7-8 healers;
- Three tanks;
- 14-15 DPS (minimum one hunter);
- 4-5 classes that are able to remove curses.
The key to defeating the boss is a good rotation of the raid. During the boss fight, you will need to divide your raid into four groups of 5 people entering the portal one by one. For example, in 3 groups, you will need to have 4 DPS and one healer; in the fourth group, you will need 3 DPS and two healers. It is vital to have a minimum of 1 class that can remove curses (Druid or Mage ) in every portal group; otherwise, it will be a wipe. The group without a tank should be entering the second portal as there will be no need to switch a tank. Every portal can transport up to 10 people, and you have the option to split into three groups of 8 people or four groups of 5 people; however, we recommend the four groups strategy.
During the fight, your tanks will need to constantly communicate with each other and rotate. One will be tanking a boss in the live world, while another one will deal with the demon in the shadow world, and one just doing damage. Tanks should rotate every two portals.
WoW Classic Anniversary Hourly Driving
Any Customizable boost on your pleasure

If you have a problem with healing, a good option is to wear a tiny amount of arcane resistance gear. Roughly 120 arcane resistance is needed to resist Arcane Buffet which will decrease raid incoming damage by nearly 30%.
Brutallus
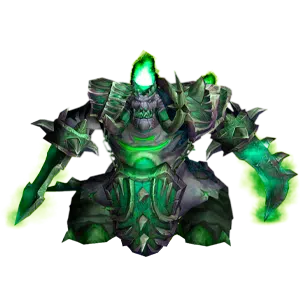
Brutallus is the second boss of the Sunwell Plateau raid. Boss is a DPS check that requires good gear. Boss has a massive amount of health and does insane damage to tanks.
Abilities
Burn – boss puts a 60 seconds debuff on a random player that deals a periodical fire damage every second that increases with time – during the first 10 seconds target will get 100 damage per tick, the next 11 will do 200 damage, next 11 will do 400 damage, next 11 will do 800 damage, next 11 will do 1600 damage and the last 6 seconds target will get 3600 damage per tick, and in the end, the target will get 7200 damage; debuff can be shared to the nearest players; Removed by Ice Block, Divine Shield, and Cloak of Shadows;
Meteor Slash – deals cone cleave that deals 20000 fire damage that is shared among cleaved targets; put debuff that increases incoming fire damage by 75%;
Stomp – deals 18850 physical damage to the tank; removes Burn debuff;
Preparation and Tactic
- Six healers;
- Two tanks;
- 17 DPS.
Brutallus is a gear check boss, which is why you should be ready to use all the buffs, potions, food, flasks, and oils during the fight. The fight with Brutallus will be static, and all the raid members will be standing on the position. It would be best to put your raid members close to each other in a way that allows the characters with Burn debuff to avoid the Meteor Slash cleave; otherwise, it will kill them. Tanks need to taunt each other before Stomp, and healers need to do insane healing as there will be only four healers in the fight.
Felmyst
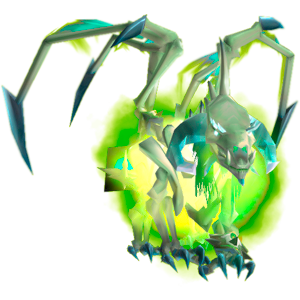
Felmyst is the third boss of the Sunwell Plateau raid. This is a monster that was resurrected from the corpse of the dragon Madrigosa. Fighting with this boss is quite dynamic; you will need to move a lot. The fight with the boss will be much easier if you have a lot of priests in the raid that will help you with a mass dispel.
Abilities
Corrosion – 0.75 seconds spell that damages its target for 9425 nature damage and increases incoming physical damage by 100% for 10 seconds;
Gas Nova – an AoE debuff that inflicts all the targets within 50 yards radius from the boss; does 1885 nature damage and puts a 30 seconds debuff that drains 3000 health and 1000 mana every 2 seconds; can be dispelled;
Noxious Fumes – an aura that does 1000 nature damage to everyone within 100 yards radius of the boss;
Encapsulate – boss chooses a random target and raises him in the air doing 3500 arcane damage per second during the 5 seconds to him and everyone around in 20 yards;
Demonic Vapor – a laser that chooses a random target and starts chasing it, leaving a green line debuff area on the ground; doing 4000 damage on hit and 2000 nature damage to everyone who steps in the green debuff area on the ground; spawns skeletons;
Buy Cheap WoW Classic era Gold
WoW Gold: Your Key to Greatness!
Fog of Corruption – boss creates three areas of fog in the arena; any player that steps into the fog becomes mind-controlled;
Preparation and Tactic
- 5-6 healers;
- Two tanks;
- 17-18 DPS;
- 2-3 priests (the more the better).
The boss fight is divided into 2 phases – ground and air.
Ground Phase
You will need to divide your raid into three groups (camps) – 1 melee and two ranged. Best of all will be if you’ll have three priests who will instantly dispel Gas Nova from the raid with Mass Dispel. The other important ability is Encapsulate. All the raid members need to be ready to run away from the target chosen for this ability.
Air Phase
During this phase, you need to continue DPSing the boss, especially with a range of classes that can do it while the boss is in the air. The target of Demonic Vapor needs to kite it in a small area, to make tanking skeletons easier. You will need one person to announce where the boss uses Fog of Corruption after the boss lands in the air and starts the ground phase. It is essential to use aggro reduction abilities for the DPSers with more aggro than the main tank.
Eredar Twins
Eredar Twins is the fourth boss of the Sunwell Plateau. This is a tactical fight where you will need to fight with two bosses simultaneously – Lady Sacrolash and Grand Warlock Alythess.
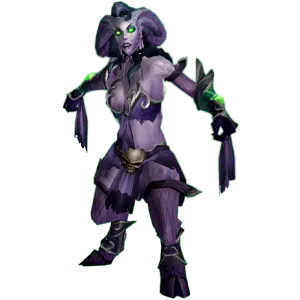
Abilities
Lady Sacrolash
Confounding Blow – confounds the target dealing 7353 shadow damage and making it confused for 6 seconds;
Shadow Blades – an attack dealing 2550 physical damage;
Shadow Nova – every 30 seconds boss casts a nova that does 3238 shadow damage to the target and everyone around 10 yards; usually chooses the second by the aggro person;
WoW Classic Anniversary Professions Kits Boost
Enough resources to upgrade your profession to the maximum level!

Dark Touched – an aura that reduces healing by 5%; stacks up to 20 times reducing max 100% of healing; can be removed via getting fire damage from a second boss;
Shadow Image – boss summons the shadow images that do only part abilities of the boss;
Grand Warlock Alythess

Blaze – doing 5525 fire damage and leaves fire on the ground, which burns for 2300 fire damage;
Conflagration – the chosen target gets 16000 fire damage during 10 seconds and scorches by 300 damage to the nearby targets; usually cast on the target who is third in the aggro list of the boss;
Flame Sear – a debuff that is placed on 3-4 random players that are doing 650 fire damage every half of a second during the 6 seconds;
Pyrogenics – the buff that increases the fire spell damage done by the boss by 35%;
Flame Touched – an aura that does 300 of fire damage every 2 seconds to its target; stacking, max 20 stacks (6000 fire damage per tick); can be removed via getting shadow damage from a second boss;
Preparation and Tactic
- 5-6 healers;
- Two tanks;
- One caster tank;
- 16-17 DPS.
Alythess should be tank by a caster tank; best of all will be to put a warlock as a tank due to their big health pull and TPS. The caster tank should be ready to move fast to avoid the fire from Blaze. Healers should put hots on the targets of Flame Sear and Conflagration.
Sacralosh should be tanked by two tanks changing each one after Confounding Blow. Raid should spread out to avoid getting Shadow Nova by a decent amount of players.
WoW Classic Anniversary Leveling Boost
Let professionals expedite your power leveling

M’uru
This is the fifth boss of Sunwell Plateau and probably the hardest one. Not many guilds were able to kill it before the nerf. Boss has 2 phases: In the first phase, you will be fighting with M’uru; in the second phase, you will be fighting with his void form – Entropius.
Abilities
M’uru
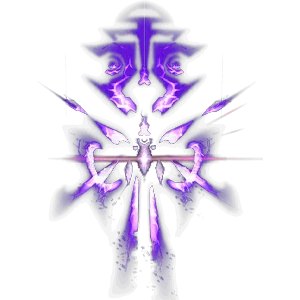
Negative Energy – boss deals damage 4-5 random targets for 943 shadow damage;
Summon Shadowsword Berserker – boss summons four berserkers every 60 seconds (2 on each side of the room); berserkers deal 2-3 physical damage; can cast Flurry buff that increases attack and movement speed by 100% for 6 seconds; have 124000 health;
Summon Shadowsword Fury Mage – boss summons two mages every 60 seconds (1 on each side of the room); they cast Fel Fireball that deals 4250 fire damage and have 2 seconds cast speed and Spell Fury which makes their casts instant and increases damage done by 50% (this buff should be stolen or purged); both have 104000 health;
Summon Void Sentinel – boss summons one void sentinel in the middle of the room; it has Shadow Pulse abilities that do 3750 AOE damage every 3 seconds and Void Blast that deals 10000 shadow damage and slows the attack speed of the damaged target by 35%; has 70 000 health; after death summons 8 Void Spawns that deals 700 physical damage each and can cast Shadow Bolt Volley AOE that damaging near targets for 1200 shadow damage;
Darkness – every 45 seconds boss spawns a big black void circle that deals 3000 shadow damage to everyone who steps inside of it; the boss also spawns 8 Dark Fiends that explode, dealing 5000 damage to all the raid;
Entropius
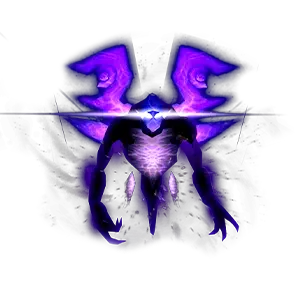
Negative Energy – becomes a chain ability that does lightning damage to 3 random targets decreasing its damaging effect; deals 1885 damage to the first target, 50% to the second, and 25% to the third;
Darkness – spawns a void zone and summons 1 Dark Fiend;
Preparation and Tactic
- Six healers;
- Four tanks;
- 15 DPS.
You will need to divide your raid into three groups – 2 that will by killing berserkers and mages and 1 group of warlocks that will be killing the void sentinel and spawns; it is imperative to put a shadow priest DPSing M’uru and to dispel the raid;
WoW Classic Anniversary Hourly Driving
Any Customizable boost on your pleasure

Phase 1
You will be fighting with ads mainly, and it will require doing tremendous damage as you will be limited in time. If it takes you too long, the spawning adds will eventually overwhelm your tank, and wipe the raid. After the killing of M’uru, he will despawn and summon a second phase boss Entropius.
Phase 2
Entropius has 1450000 health. And all the fight with him is another DPS race. you will either kill him fast enough, or the raid will die from Negative Energy. Boss will not spawn berserkers and mage adds in this phase; you can focus on doing damage to Entropius.
Kil’jaeden
This is the sixth and final boss of the Sunwell Plateau raid and one of the most influential figures in World of Warcraft lore. If you can reach him, you will defeat him for sure, as M’uru requires much more DPS than Kil’jaeden.
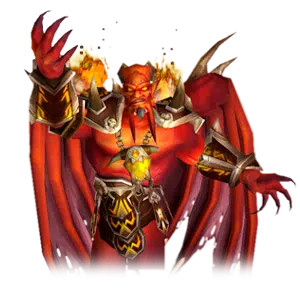
Abilities
Shadow Bolt Volley – Hand of the Deceiver add deals 850 shadow damage and put a stackable debuff on the raid that increases the subsequent shadow damage by 750;
Shadow Infusion – Hand of the Deceiver add becomes immune to stun and silence at 20% health;
Soul Flay – a 3-second cast that deals 3000 shadow damage per second; casts on the target with the most threat in the aggro list;
Legion Lightning – 2 seconds cast spell that deals 3007 shadow damage and drains 1500 mana to the random target; jumps additionally on four more targets after;
Fire Bloom – boss put debuff for 20 seconds on five random targets that get 1619 fire damage every 2 seconds; have 10 yards AOE radius;
Summon Shield Orb – boss summons 1-3 orbs (depends on phase) with 20000 health that does some AOE damage to the raid;
Sinister Reflection – spawns 4 Sinister Reflection adds that is a mirror of randomly targeted players;
Shadow Spike – casts an explosion on a randomly chosen target that deals 5100 shadow damage in 8 yards radius and puts a debuff that decreases incoming healing by 50%;
Flame Dart – every 3 seconds boss will hit all the raid members for 1663 fire damage;
Darkness of a Thousand Souls – 8 seconds cast that deals 47500 damage to all the raid members; avoidable by the dragon shield ability;
Armageddon – 8-second castability that lands a meteor on the chosen area that deals 10000 damage;
Sacrifice of Anveena – Anveena sacrifices herself, and boss gets a debuff that increases all incoming holy damage by 25%;
Phase 1
You will be fighting with 3 Hands of the Deceiver adds during this phase. After killing them, you will start the actual fight with Kil’jaden boss himself.
Phase 2
Static fight with the boss. Boss will be casting a knockback on the raid and summon Shield Orbs that you have to kill fast. At 85% health of the boss will start the third phase.
Phase 3
During this phase, the boss will cast Shadow Spike and summon Sinister Reflection. In this phase, your main task is to kill the ads and pay attention to the orbs. Kalecgos will help you in this fight and randomly empower one of the four dragon orbs. Using then, you will be able to use the Shield of the Blue ability to protect you from Darkness of a Thousand Souls. It is vital to burst the boss to 55% before using the third orb. On 55% of health starts the fourth phase.
Phase 4
WoW Classic Anniversary Leveling Boost
Let professionals expedite your power leveling

In this phase, Kil’jaeden is doing the same abilities like on the third phase with only Armageddon ability added, which should be avoided by raid without any problems. On 25% health of boss will start the fifth phase.
Phase 5
At 25% of the boss starts the last burst phase. Boss will cast Darkness of a Thousand Souls more often every 25 seconds instead of every 45 seconds as it was before. At the same time, he will keep all the other abilities. You will be able to use a dragon orb eight times. After that boss must be killed or will be wiped.
