Your Labyrinth To-Do List (Try Not to Cry)
Escape from Tarkov’s major event called The Labyrinth has beenreleased, and it’s available in both PvE and PvP, proving Battlestate Games occasionally listens… sort of. There’s also an achievement tied to it once you complete the full task line. This right here will walk you through the beginning first set of tasks right up your Labyrinth wonderland.
There are also some Arena tasks included, but those don’t really need a guide—they’re pretty straightforward. Some players still jump into Tarkov Arena matches beforehand to warm up their aim before diving into the event chaos.
There are also some Arena tasks included, but those don’t really need a guide—they’re pretty straightforward.


Prep Work (Because Most Tarkov Players Forget This Stuff)
Before we jump into the first task, there are two things you should take care of now to save yourself a headache later.
Zulu Nylon Rigs
You’re going to need six of these, and you can get them from Ragman. But here’s the trick—buy four right now and stash them. Ragman will restock by the time you need the last two. Right now, they’re sitting at around 9k, but prices might spike to 30k, 40k, or even 50k as the event progresses. If they’ve dropped, great. If not, just grab them from Ragman while they’re cheap and avoid overpaying later. Roubles rule the world around these parts.

Class 4 Armor Plates
The quest description makes it seem like you have to use the Monoclete PE plate from Peacekeeper. You don’t. Any class 4 plate will work, so don’t waste your money. Right now, the Monoclete PE plates are overpriced just because people think they’re required. Instead, you can grab cheaper class 4 plates from Skier for around 18-20k. They’re heavier, but they work just fine.
Now, you need six plates total—unless you plan to sell the six that Ragman gives you for the task. If you’re going that route, you’ll need to buy 12 plates in total. Either way, stock up early so you’re not stuck locked on trader resets when you actually need them.


First Task: Shady Contractor
You’ll get this task from Mechanic, but there’s one catch—you need to be level 21 to receive it. If you’re below that, you’re out of luck for now.
Once you have it, head to Ground Zero to find the Manager’s Diary.

Where to Look
Go to the south end of the map, near Capital Insight in Nakatani Tower. There’s a small two-story building that looks like a dealership. Out front, you’ll see a black Lexus with the door open—that’s your target.
The diary spawns inside the car, usually in one of these three places:
- On the dashboard
- On the seat
- In the trunk
If you don’t see it in those spots, explore around—it’s definitely somewhere in that car.
Once you’ve got the diary, extract safely and turn it in to Mechanic. That unlocks the next task: Needle in a Haystack.
Needle in a Haystack

After turning in the Manager’s Diary, Mechanic tasks you with “Needle in a Haystack.” This one isn’t particularly difficult, but it does require visiting specific locations across four different maps: Ground Zero, Interchange, Streets of Tarkov, and Shoreline.
Your first stop is Ground Zero. Make your way to the main courtyard of the large TerraGroup building. There, you’ll find a marked area, usually denoted by a visual cue like a box outline on the ground. Simply stepping inside this marked zone will trigger an audio cue and update the task objective. You don’t need to survive or extract from the raid for this part; once you get the update, you can move on or extract at your leisure.

Next, you’ll head to Interchange for two objectives. The first is the outdoor Cart Track area. The second location causes some confusion: you need to visit the playground inside, right outside the IDEA, not the larger outdoor playground near the stage area outside the mall. Players running Interchange repeatedly often mix these runs with graphics card farming routes to maximize profit while progressing quests.
The Streets of Tarkov objective is relatively straightforward. Head towards the Concordia residential complex and locate its playground. Similar to the other locations, find the marked box area, step inside for the task update, and you can proceed.

Finally, on Shoreline, you have two areas to visit. The first is the Construction Site located along the coastline; you only need to enter the middle section of the large, blue-fenced area, not the entire zone. Depending on your spawn, you might find yourself quite close already. The second location is the fenced Playground situated behind the Health Resort’s East Wing. Step inside the marked area here to complete the Shoreline objectives.
Once you’ve visited all the required locations across the four maps, you can turn the task in to Mechanic. Again, survival in the raids where you completed the objectives isn’t necessary. This completion leads directly to the next task: “Hidden Layer.”
Hidden Layer (aka Finding the Damn Knossos LLC Facility Key)

Now things become a bit more involved. For “Hidden Layer,” your primary goal is to acquire the Knossos LLC facility Key. This key is a quest item found specifically on the Shoreline map. While more might exist, there are five confirmed spawn locations to check:
- Smuggler’s Depot: Near the Health Resort’s East Wing, locate the fire truck close to the Smuggler’s Depot building. Enter the building; the key can spawn on a table inside.
- East Wing – Second Floor Utility Room: Ascend the stairs in the Health Resort’s East Wing to the second floor. Search the utility room; the key has been found inside a lightbox or fuse box on the wall.
- East Wing – Third Floor Utility Room: This spawn is in the corresponding utility room directly one floor above the previous location, on the third floor of the East Wing. Check the lightbox/fuse box here as well.
- Admin Building – Office with Broken Door: In the main Admin Building (between West and East Wings), head upstairs. Look for an office where the door has been knocked off its hinges; the key can spawn resting on a lamp within this room.
- West Wing – Computer Room Office: Enter the Health Resort’s West Wing from the main front entrance (near the crashed helicopter). Find a small office containing computers; the key is known to spawn in this room.

Once you’ve successfully found the Knossos Key, the rest of the task is straightforward. Head to the basement of the West Wing – this area was expanded with the event update. Look for a distinctive sign lying on the floor bearing the Russian text “ООО Кноссосс” (Knossoss LLC). Use your newly acquired Knossos Key on the nearby door. Upon opening it, drop down into the revealed room. Entering this new area should automatically complete both subtasks for “Hidden Layer.” Simply extract safely from Shoreline afterward and turn the task in to Mechanic.
Unlocking Time-Gated Tasks
Completing “Hidden Layer” triggers two separate timers. A short 30-minute timer begins, after which Ragman will offer the task “Sensory Analysis: Part 1.” While not strictly required for the main Labyrinth questline, this task is highly recommended as its rewards often include keycards or items useful for subsequent steps. Simultaneously, a much longer 5-hour timer starts, counting down until the next mandatory task in the main event chain becomes available. If you plan on continuing your session, tackling “Sensory Analysis: Part 1” is a productive way to fill the waiting period.

Sensory Analysis: Part 1
Available from Ragman 30 minutes after finishing “Hidden Layer,” this task starts with him providing you a bottle of Moonshine. Your objective is to deliver this Moonshine to the BTR driver, who can be found either on Streets of Tarkov (estimated ~70% spawn chance) or Woods (estimated ~80% spawn chance).
The interaction mechanic is similar to tasks like “Postman Pat.” You’ll need to approach the BTR, enter it, engage in dialogue with the driver, and hand over the Moonshine. There’s a secondary step or interaction required while still inside the BTR before you exit. Be aware that sometimes the UI notification for the second step might appear before the handover confirmation, but you must complete both parts of the interaction sequence within the BTR. After successfully completing the delivery and leaving the raid, return to Ragman to turn in “Sensory Analysis: Part 1.” Doing so will unlock the next task in this side-chain: “Hot Zone.”
Hot Zone – High-Risk Planting

Hot Zone quest presents a significant challenge, courtesy of Battlestate Games’ love for high-stakes planting missions in stupidly open areas. You are tasked with planting twelve (12) Zulu rigs on Customs and twelve (12) Class 4 armor plates on Reserve.
For the Customs objective, Ragman conveniently provides you with six (6) Zulu rigs upon accepting the task. This means you’ll need to acquire the remaining six yourself. The planting location is inside the New Gas Station, specifically within the unlocked office room to the left as you enter from the main doors (near the bathrooms). Each item takes 5 seconds to plant. Remember the “Tab Trick”: quickly pressing Tab twice after initiating the plant can sometimes bypass the planting animation delay, speeding things up slightly. Be mindful of risk; carrying all twelve Zulu rigs (24 slots) at once likely requires large backpacks like multiple Blackjack 50s or a Raid Bag setup, making you a high-value target. A safer approach might be to split the task over three raids, carrying four rigs each time.

The Reserve objective requires planting twelve Class 4 armor plates on the roof of the Black Knight building. Crucially, unlike the Zulu rigs, Ragman does not provide any plates; you must source all twelve yourself. Any armor plate specifically rated as Class 4 will work – you are not restricted to the potentially overpriced Granit Br4 plates sometimes associated with quests. However, be aware that some Class 4 plates are heavier than others, which could impact your movement speed. The main challenge here is the location: the Black Knight roof is extremely exposed, offering clear sightlines for snipers positioned on Dome, White Knight, and surrounding areas. Bringing smoke grenades is highly recommended. Deploy them strategically towards potential enemy positions, not at your feet, to obscure their vision while you plant the plates (which also takes 5 seconds each).
Once all twelve Zulu rigs are planted on Customs and all twelve Class 4 plates are planted on Reserve, the “Hot Zone” task will be complete.
Post-Hot Zone – Further Time-Gating
Upon completing ‘Hot Zone,’ another 5-hour cooldown begins… Get comfy, maybe touch grass, because after this wait, Mechanic basically dumps three tasks (‘Forced Alliance’, ‘Offensive Reconnaissance’, ‘Tarkov Butcher’) in your lap before you really get to the Labyrinth grind.

Forced Alliance
After the 5-hour wait post-“Hot Zone,” Mechanic offers “Forced Alliance.” The primary objective is to find a way behind the large bunker door located beneath the Health Resort on Shoreline. There’s also an optional objective related to assisting Therapist with her investigation, which typically involves having collected specific keycards (often rewarded from tasks like “Sensory Analysis”). If you have already obtained the necessary keycards from previous event tasks, this objective might complete automatically upon accepting the quest.

Offensive Reconnaissance
Following “Forced Alliance,” Mechanic gives you “Offensive Reconnaissance.” This task directly instructs you to discover what lies behind the aforementioned Health Resort bunker door. You’ll need to obtain the appropriate keycard (often linked to completing the “Forced Alliance” objectives or related tasks) and use it to enter the Labyrinth area beneath the resort. Simply entering the Labyrinth map instance is enough to complete this task; you do not need to survive the raid afterward.
Tarkov Butcher (Time for Some Messy Black Ops)
“Tarkov Butcher” is another multi-stage task involving high-risk item transport.
Step 1: Retrieve the Chemical Cylinder:
Your first objective is on Ground Zero. Head to the underground road network located on the south side of the map. Search for a specific truck, identifiable by the cargo of meat in its back. The item you need, a Chemical Cylinder, is located within this truck. Reports suggest it might be found inside a garbage bag, potentially held by a severed hand – search carefully. Once you have the Chemical Cylinder make absolutely sure you extract safely with the item Found-in-Raid. Nothing screams ‘Tarkov Error 404: Fun Not Found’ like having to go back because you brought the wrong one or died.

Step 2: Transport and Plant on Shoreline:
With the Chemical Cylinder secured, you need to bring it into a Shoreline raid and survive until you can plant it. The planting location is near the Cottages area, specifically at the ambulance parked inside the fenced yard (a common spawn area for the boss Sanitar). You must plant the cylinder near the front passenger-side wheel of the ambulance. Survival after planting is likely required.
Completing “Tarkov Butcher” yields significant rewards, typically including a Key Case for storing keycards and a batch of five valuable Keycards themselves. It also often unlocks the ability to purchase these specific keycards directly from TherapistPlayers hunting expensive event loot usually keep valuable Escape from Tarkov items secured before risking deeper Labyrinth runs.
Advanced Labyrinth Tasks – Post-Tarkov Butcher
After navigating the preceding quest chain and completing “Tarkov Butcher,” a series of tasks focused entirely within the Labyrinth itself unlock:
- Hypothesis Test: This requires locating the Library area within the Labyrinth (reportedly housing a prototype weapon) and finding/turning in five Labyras Research Notes. These notes are primarily found as loose loot within the Labyrinth itself, though some players occasionally report finding them via Scav Case runs or other loot sources. Expect to dedicate runs specifically to looting within the Labyrinth to gather all five notes.
- Vacate the Premises: A straightforward but potentially time-consuming PvP task. You must eliminate 24 enemy PMCs while inside the Labyrinth map. Given the likely high player concentration during the event, expect intense engagements.
- Confidential Info: This task has two objectives within the Labyrinth: first, find and retrieve the Special Storage Module item, typically located in a central, high-traffic area. Second, you must plant a grenade (any type usually works) in the same designated location where you found the module. High risk due to likely PvP presence.
- Indisputable Authority: A boss-hunting task. Welcome to the official start of the Tagilla task line misery. You need to eliminate six of Tagilla’s Guards (the specific event variants accompanying the boss) and also kill the main boss himself, Tagilla Minotaur, all within the Labyrinth. This will be a challenging PvE encounter against heavily armed and aggressive AI.
- This Tape Sucks: Requires locating the Torture Room area within the Labyrinth (usually described as relatively easy to find). Inside this room, search a specific, non-despawnable dead body for an item like a cassette tape or thumb drive. You must find this item and extract safely with it (meaning it needs the Found-in-Raid status) to turn it in. If you die after picking it up, you’ll need to find it again in a subsequent raid. Good luck with that loot goblin run!

So еhis will cover about 10–12 hours of gameplay (depends on your skill/luck).
Buy Escape From Tarkov Veteran Pack
Just Survive!

Welcome to the New Map from Hell: The Labyrinth Map
Alright, buckle up, buttercup. After all that running around Tarkov like a delivery boy with questionable life choices, you’ve finally earned access to the main event: the Labyrinth itself, tucked away under Shoreline’s Resort like a dirty secret.

First off, forget about spawning with your buddies. Even if you queue as a five-stack (which fills the entire map slot, by the way), you’re each getting your own personal escape room puzzle. No hand-holding, solve it, or sit there. Oh, and did you forget your entry keycard? Tough luck, enjoy spectating your friends’ muffled screams from the lobby.
| Chamber | Name | Steps |
| 1 | Toxic pool | 1. Find Key 01 2. Unlock the door in the left side room 3. Press the button on the wall |
| 2 | Steam hazard | 1. Find Key 02 2. Unlock the red door 3. Find the Valve handwheel on the 2nd floor 4. Apply the handwheel to the pipe next to the yellow door on the 1st floor |
| 3 | Fire hazard | 1. Find Key 03 2. Unlock the far door 3. Find the BBQ-S43 gas torch 4. Apply the gas torch to the door at the start 5. Press the button at the display |
| 4 | Shotgun trap | 1. Find Key 04 2. Unlock the 2nd door 3. Crawl into the connected room 4. Pull the lever on the wall 5. (Optional) Breach the door |
| 5 | Toxic puddle | 1. Find the BBQ-S43 gas torch 2. Apply the gas torch to the round door in the left side room 3. Pull the lever on the wall |
So You Solved the Puzzle? Here’s Your “Prize”

After the intro puzzle you’re spat out into the real playground. It’s dark, it’s tight, and the atmosphere feels like the shattered veil between ‘challenging shooter’ and ‘horror game’ got ripped right open. It’s dark, it’s tight. Oh, and say hello to the locals:
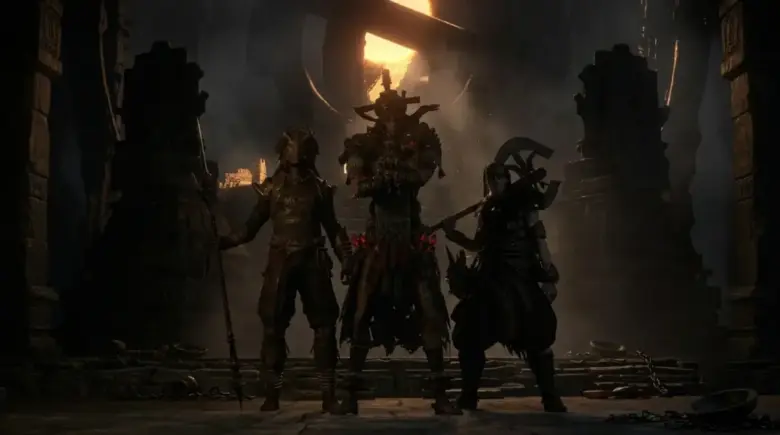
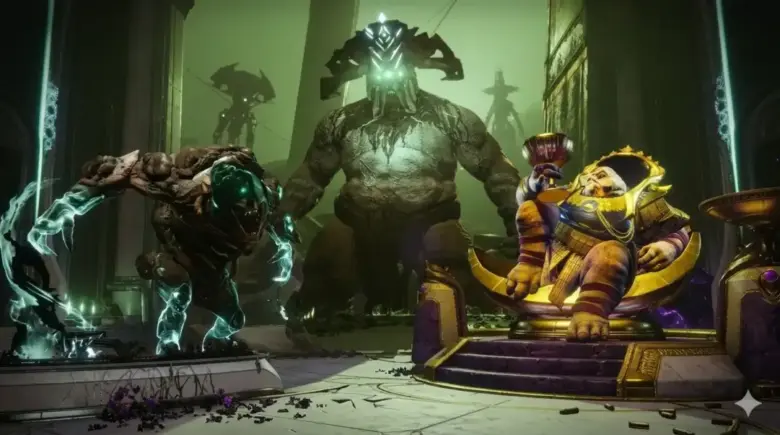
- Shadow of Tagilla: Remember Factory’s hammer-wielding maniac? Yeah, this ain’t him. This is the new shadow version, his bigger, meaner cousin who apparently headbutted a minotaur and stole its Class 6 helmet (a cool 100 durability, enjoy scratching that). He’s also traded the hammer for an axe that deletes PMCs on contact. Seriously, one hit. And he doesn’t come alone…
- The Goon Squad: Shadow Tagilla rolls deep with six guards. Think Scav Raiders who snorted a line of pure aggression and borrowed some decent gear. Don’t underestimate them; their aim isn’t total potato, and they can ruin your day while you’re focused on the big guy.
- Vengeful Killa (Special Guest Star): Sometimes, just for giggles, Killa shows up too. Not regular Killa, mind you. Vengeful Killa. It’s like regular Killa, but someone pissed in his Altyn, and now he wants to powerslide into your DMs with a hail of BS ammo.

Think that’s all? Cute. The place is riddled with traps. We’re talking poison spike traps that will kill you unless you’re juiced up on antidote stims (Blueblood, PNB, Zagustin, or XTG-12), tripwires connected to who-knows-what explosive party favors, and just loose grenades sitting around hoping you’ll trip over them. Pro tip: Walk, don’t run. Check corners like your life depends on it (it does). Charging in blindly is just a fancy way to donate your gear set.
Getting out is fun too. You’ve got two main options: a timed extract that screams your location to everyone nearby (loud, proud, and probably camped), or a special extract that needs a key… which conveniently drops off the bosses you just barely survived fighting. Good times.
Surviving the Nonsense:

Look, priority one is dealing with Shadow of Tagilla and Vengeful Killa if he decided to crash the party. Trying to juggle them and random players and traps is a recipe for a very short raid. Best bet? Aggro them early and try to lure them into a narrow corridor or chokepoint where their backup dancers (the guards) can’t easily swarm you, and where the bosses have less room to maneuver. Shadow Tagilla will charge you with that axe if you tickle him just right, so be ready to sidestep like a matador or get very familiar with your stash screen.
Gear Up, Don’t Be a Victim

These guys hit like trucks carrying other, heavier trucks. Minimum Level 6 armor is highly recommended. Trying to tank this party in Level 5 or less is basically volunteering for organ donation. A BNTI Zhuk-6a, Hexatac HPC, or similar is your friend. Helmet-wise, something chunky like a Bastion with a Slaap plate or a Crye Airframe with chops might save your skull, but don’t expect miracles. Forget head-tapping Shadow Tagilla – that Minotaur helmet laughs at your puny bullets and covers his neck now. Aim for the thorax and just mag dump with something that spits high-penetration rounds.
Speaking of which, bring the good stuff. An MCX firing .300 AP, an AKM with BP, or an M4 loaded with M995/SSA AP is the vibe.If you’re running low on top-tier ammo, maybe do a cheeky Labs run first. Some players even secure rare loot like valuable LedX medical spawns before committing to long Labyrinth sessions.
Is it Worth It? The Loot:

Oh yeah. If you survive the meat grinder, the Labyrinth showers you with gifts. Graphics Cards, LedXs, Microcontroller Boards, top-tier ammo, rare stims – it’s all here for the taking. Even the guards drop decent kits, often packed with good ammo and attachments worth stripping.
Bottom Line
Come prepared, bring your best gear (and expect to lose it), play slow and smart, and maybe, just maybe, you’ll walk out richer. If not, well, Therapist always appreciates the dog tags. This event is pure, chaotic Tarkov, and honestly? It’s a blast.
Epiccarry: best wow boost and coaching services
Frequently Asked Questions
What is the Labyrinth event?
The Labyrinth is a special time that happens in the game Escape from Tarkov for a limited period. During this event, the game makers add new missions for players to finish. There are also new areas to find on the maps, especially a big new place called the Labyrinth itself. It’s a chance to do something different in the game.
How high level must I be?
To start the main story missions for the Labyrinth event, your player character needs to be at level 21 or higher in the game. This level is needed because the first important mission, called Shady Contractor, is given by the trader character named Mechanic, and he will only offer it to players who are level 21 or above.
What things should I buy first?
Before you start doing many missions, it is a very good idea to buy some specific items early if you can. You should try to get Zulu Nylon tactical rigs from the trader Ragman, and you should also get Class 4 armor plates from traders like Skier or Peacekeeper. You will need quite a few of these items for a mission called Hot Zone later on in the event.
What maps do I visit for the Needle mission?
The mission called Needle in a Haystack requires you to travel to four different game maps. You will need to visit the Ground Zero map, the Interchange map, the Streets of Tarkov map, and the Shoreline map. On each of these maps, you must go to one or two very specific spots that the mission tells you about.
What key do I need for the Hidden Layer mission?
For the mission called Hidden Layer, you must find a special key. This key is named the Knossos Key. It is a specific quest item that only appears during this event, and you need it to open a special door related to the mission. You can only find this key on the Shoreline map.
Where can I find the Knossos Key?
The Knossos Key can appear in several different places on the Shoreline map, inside the big Health Resort building complex. You should check utility rooms on the second and third floors of the East Wing building. Also, look in an office with a broken door in the Admin building, and check a computer room office in the West Wing building near the front entrance. It might take a few tries visiting these spots to find one.
What is the Sensory Analysis mission?
Sensory Analysis Part 1 is usually a side mission given by the trader character Ragman. He gives you a bottle of Moonshine, which is a type of alcohol in the game. Your task is to take this bottle and deliver it to the driver of the big armored truck, the BTR, which can appear on either the Streets of Tarkov map or the Woods map.
What is the Hot Zone mission?
The Hot Zone mission is a challenging task that comes later in the event. It requires you to go to two different maps and place specific items in special locations. You must go to the Customs map and plant Zulu rigs at the New Gas Station. You must also go to the Reserve map and plant Class 4 armor plates on the roof of the Black Knight building.
Is the Labyrinth map hard to play?
Yes, the Labyrinth map area is designed to be very difficult and dangerous for players. The inside is very dark and the hallways can be confusing to navigate. It is filled with strong computer-controlled enemies, including a very tough boss named Shadow Tagilla and his well-armed guards. There are also many hidden traps like poison spikes and tripwires that can hurt or kill you if you are not careful. Other real players might also be inside fighting you.
How do I go into the Labyrinth map?
The main new map area for this event, the Labyrinth itself, is hidden underground beneath the big Health Resort building on the Shoreline map. To get inside the main Labyrinth area through the large bunker door, you will usually need a special keycard. You typically get this keycard by completing later missions in the event quest line, like Forced Alliance or Offensive Reconnaissance.

The Interchange playground isn’t actually in OLI, it’s right outside IDEA
My bad, sorry for the confusion! Fixed it now, good catch, appreciate it!
www! Grt