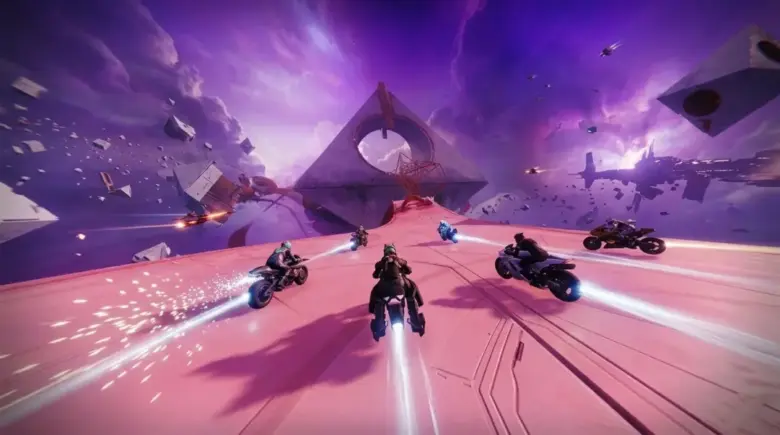
The Oblation trilogy is one of the biggest hidden Exotic missions in Destiny 2 Monument of Triumph update, sending players through Oblation: Bloodline, Oblation: Soulfed, and Oblation: Immolation. Completing the full chain rewards Cull’s Shadow, its four catalysts, and exclusive cosmetic rewards — but doing it solo flawless turns every rune puzzle, worm throw, trap room, and boss phase into a real test of patience.
In this guide, we’ll cover:
- how to unlock Oblation: Bloodline through the Moon’s hidden Weapon of Sorrow questline;
- the best solo flawless build, weapons, mods, and survivability setup;
- complete walkthroughs for Bloodline, Soulfed, and Immolation;
- how to unlock Cull’s Shadow and all four catalysts: Soulfire Succor, Rancor, Zeal, and Skewer;
- where to get the Sorrow’s Coronet Ghost Shell and Denier of Futurity Sparrow;
- the safest strategies for every boss, puzzle room, trap section, and flawless run killer.
 | Epiccarry")
Who Should Attempt Solo Flawless?
Solo flawless Oblation is best tackled after at least one normal clear of each mission. The trilogy contains hidden rune puzzles, timed worm throws, instant-kill pits, rotating spike traps, and multi-phase boss immunity shields. If you’re only chasing Cull’s Shadow or a single catalyst, a normal clear is a much safer starting point.
The Oblation trilogy can punish even small mistakes with long restarts. If you want flexible help with difficult Destiny 2 activities, setup, or reward-focused clears, our Destiny 2 Rent a Booster Boost is the best fit when there is no dedicated Oblation service available.
Rewards at a Glance
| Reward | Source |
| Cull’s Shadow (Exotic Kinetic Fusion Rifle) | Bloodline completion |
| Soulfire Succor Catalyst | Post-Bloodline tome + rune door |
| Sorrow’s Coronet (Exotic Ghost Shell) | Soulfed completion |
| Soulfire Rancor Catalyst | Soulfed secret route + completion chest |
| Soulfire Zeal Catalyst | Post-Soulfed six-rune puzzle |
| Denier of Futurity (Exotic Sparrow) | Immolation completion |
| Soulfire Skewer Catalyst | Immolation final chest |
 | Epiccarry")
Unlocking Oblation: Bloodline
 | Epiccarry")
Step 1 — Equip a Weapon of Sorrow
A Weapon of Sorrow must be equipped and actively held — not holstered — to reveal hidden green runes throughout this entire questline. Qualifying weapons: Thorn, Osteo Striga, Necrochasm, Touch of Malice.
If you are missing one of these Exotics, you can unlock the required weapon first through one of our dedicated services:
| Weapon of Sorrow | Recommended Boost |
| Osteo Striga | Destiny 2 Osteo Striga Boost |
| Necrochasm | Destiny 2 Necrochasm Boost |
| Touch of Malice | Destiny 2 Touch of Malice Boost |
Step 2 — Temple of Crota
Go to Anchor of Light on the Moon and enter the Temple of Crota. With your Weapon of Sorrow actively held, find the locked rune door inside. Shoot the matching hidden green discs in the order shown on the door, usually top to bottom. Open the door and check the Hive crystal behind it — you may not be able to fully interact with it yet, but it points you toward Scarlet Keep. If the rune door doesn’t appear, go to Scarlet Keep first and return afterward.
Note: Temple of Crota is visited twice — once here, and again after finding the Anchor of Light Cabal corpse in Step 4.
Step 3 — The Scarlet Keep Strike
Run Scarlet Keep on any difficulty. Progress to Hashladun’s arena with your Weapon of Sorrow actively held. Do not burn Hashladun immediately — wait for the rune locks to appear on the bars at the back of the arena, then shoot the matching Hive discs. Unlike later rune doors, order doesn’t appear to matter here — hitting the correct symbols opens the bars. Enter the back room, turn right, and inspect the Hive crystal.
Step 4 — Four Moon Patrol Zones
Return to Moon patrol and look for the four Suspicious Syndicate Activity search areas. Each contains a glowing green Cabal corpse that points you to a deeper Hive location with a rune door and crystal.
| Zone | Corpse Location | Deep Location |
| Archer’s Line | Near the small barricade under the main bridge | Shrine of Oryx |
| Anchor of Light | Raised platform on the western edge, near yellow structures | Temple of Crota |
| Sorrow’s Harbor | Low ramparts on the northern edge | K1 Revelation Lost Sector |
| Hellmouth | Path toward the Hive rune puzzle, before the first door | Chamber of Night |
At each deep location: clear enemies, match rune symbols on the locked door, shoot the corresponding discs with a Weapon of Sorrow actively held. Most doors use three runes; Shrine of Oryx uses five. Shoot top to bottom. If you hit the wrong disc, the lock resets and disc positions may shift. In K1 Revelation, do not activate the boss crystal — it only spawns extra enemies. The rune door is on the right side of the boss area.
Step 5 — Establish the Node
Return to Sorrow’s Harbor, go to the eastern side of the bridge leading into Scarlet Keep, drop beneath it, enter the cave opening, and turn left. Interact with the sealed door at the end. This unlocks the Oblation: Bloodline node on the Moon director.
 | Epiccarry")
Solo Flawless Build
 | Epiccarry")
Arc Titan is the recommended chassis. Thundercrash handles damage phases; Rally Barricade covers bad dunks and emergency repositioning.
Aspects: Knockout + Touch of Thunder.
Exotic: Crest of Alpha Lupi for first attempts (barricade healing is more forgiving than you’ll want to admit), or Synthoceps if you’re confident.
Weapons: Void hand cannon for add clear, Legendary Special Fusion Rifle to pair with artifact mods, sword with Eager Edge for mobility and platforming recovery.
Key mod: Particle Reconstruction for major Fusion Rifle damage. Strand Resist is strongly recommended for Bloodline’s final boss. Heavy Ammo Finder matters on longer attempts.
 | Epiccarry")
Oblation: Bloodline
 | Epiccarry")
Objective: Sabotage Cabal drilling operations. Defeat Valus Tau’rig.
Drill Encounters: Clear the shielded Centurion at each console before overriding safety protocols. Destroy the fuses, then shoot the exposed cooling pillar vents when they rotate open. Repeat at the second console, then overload the laser at the third and take the jump pad into the crater below.
Traversal: Follow the laser beam down into the cavern. Jump on swinging Hive lanterns to cross chasms — the dark pits are instant kills.
Soulfire Barrier: Three cauldrons need to be charged. Remove the giant Colossus enemies first — leaving them alive during mechanics is the most common run killer. Kill the Wizards guarding each green Hive bubble, finish the Soulfire Vessel inside to collect a Soulfire Charge, and bank it in the active cauldron before the timer expires. Dunk all three to open the boss arena.
Boss — Valus Tau’rig: Tau’rig deploys a Strand shackle that suspends you in place, so keep lateral movement constant. At each health gate, three Hive Wizards spawn. Some shields require baiting tracking crystal explosions into them to strip protection.
Do not stand next to the Wizard when the crystal detonates. Bait the crystal, rotate out, then finish the exposed Soulfire Vessel to gain a Soulfire Charge.
Bank the charge in the cauldron Tau’rig is channeling. Repeat this across all three cauldrons to break the shield.
The boss repeats this phase at roughly 50% health with Ogres added. Clear Colossus enemies before every DPS window — their missiles can end a flawless run without warning.
 | Epiccarry")
Unlocking Soulfed + Soulfire Succor Catalyst
 | Epiccarry")
After Tau’rig dies, do not interact with the End Mission prompt.
Return to the preceding cavern, clear any remaining enemies, and wait for the message: “The Weapon of Sorrow craves profane wisdom…”
Follow the sarcophagi path to the high route near the third Soulfire buff location. Interact with the floating Hive grimoire tome.
Return to the boss room and find the sealed rune door on the back-right wall. Shoot the runes top to bottom using Cull’s Shadow or another Weapon of Sorrow.
This unlocks Oblation: Soulfed and awards the Soulfire Succor Catalyst.
 | Epiccarry")
Oblation: Soulfed
 | Epiccarry")
Objective: Navigate the Hive fortress. Use Soulfire Worms to clear blocked paths.
First Descent: Drop through the floor. Navigate past rotating spiked cylinders — contact usually won’t kill you directly, but it can bounce you into pits and ruin the flawless attempt. Find the Soulfire Vessel Knight and brazier room, kill or finish the Knight for a Soulfire Charge, bank it to spawn worms, then throw the first worm at the green crystal across the room. Grab another worm, return to the original blocked drop, and throw the second worm at the crystal above the Soulfire plume to clear the path downward.
First Major Puzzle Room: Dunk Soulfire in the lower brazier to spawn worms. Hit four crystals: inside the small cave across the moat to the left; high on the far-left wall above the moat; near the rotating spiked wheel to the right; near the upper sarcophagi by the Soulfire pipe. Hitting all four douses the Soulfire jet, opens the pipe route back toward the earlier area, and removes the plume blocking the next drop.
Second Puzzle Room: Kill the Soulfire Vessel Knight and dunk the charge at the highest point. Throw a worm at the main platform crystal to raise a sarcophagus across the moat. Throw a second worm at the newly accessible crystal to open the highest back-left passage. In the next room, grab a worm from the active brazier and hit the crystal above the doorway to the brazier’s left — this starts the sarcophagi and Soulfire jet gauntlet. Carry another worm across the chasm, weave through the jets, and throw it at the crystal on the far side.
Secret Console (Do Not Skip): Backtrack to the beginning of the Soulfire jet passage. Look down at the statues holding small basins and drop onto them. Look right for a yellow energy button set inside a crystal claw and activate it. “A door unlocks deep within the fortress” confirms the step. Missing this blocks the Rancor catalyst route for that Soulfed run.
Secret Tome: Drop into the lower pit after the trap and lantern sections. If the hidden console was activated, one door will be open and glowing. Interact with the Tome of Profane Wisdom inside.
Boss — The Abomination Trio: Three bosses in sequence. The Soulfire Vessel is a Thrall in the lower rooms below the crystal platform — kill it, dunk the charge in the lower brazier, then carry a worm upstairs to the matching crystal. Stay in lower rooms and cubbies throughout; the upper arena gets chaotic quickly, and Hive jail traps appear after each boss dies.
| Boss | Crystal Position | Key Danger |
| Ogre | Middle | Purple pull sphere drags you into its eye beams — fight from corners |
| Wizard | Left | Prioritize cover during approach |
| Knight | Right | Lower cubbies are safest |
Defeating the Ogre snuffs the brazier — relight it with another Soulfire Charge to awaken the Knight and Wizard. After all three are down, interact with the Hive tome that appears, then wait for the reward chest. This awards Sorrow’s Coronet and Soulfire Rancor if the hidden steps were completed.
 | Epiccarry")
Unlocking Zeal + Immolation
 | Epiccarry")
After the Soulfed bosses, don’t leave. Go to the backside of the arena, equip Cull’s Shadow, and inspect the weapon to see six Hive runes shown vertically on the magazine. Screenshot or write them down. Shoot the six matching rune discs on the surrounding statues in that exact order, top to bottom. This awards the Soulfire Zeal Catalyst and unlocks Oblation: Immolation.
Oblation: Immolation
Objective: Traverse the sarcophagi gauntlet. Defeat Ir Gohl, Forger of Sorrow.
Traversal: Move left across floating sarcophagi, using standing Hive Acolytes as route markers. Clear the Wizard platform ahead, take the left-wall crawlspace, destroy the glowing chitin blockers, and kill the Ultra Ogre.
Bellowstoker Plate Encounter: Damage the Bellowstoker until it teleports away, usually after about one-third of its health per cycle, then capture three plates to redirect Soulfire. Stand on the outer edge of each plate — center position can trigger lethal Soulfire damage. Each plate takes roughly 30 seconds. The Bellowstoker returns between plates; later plates add shield Knights and an Ogre. Clear them before stepping on.
Path to Ir Gohl: After Bellowstoker, continue through the pipe and survive the long drop. At the bottom, jump down and left, then stick to the right wall as you climb. Look for the blue-lit path near the top, pass the swinging pendulums and furnace pipe, and dodge the Soulfire jet rooms. Clear the Shrieker room to drop the barrier, then use the left-side statue opening, drop to the lowest left platform, and follow the bridges through the Hive statues into Ir Gohl’s arena.
Boss — Ir Gohl, Forger of Sorrow: Ir Gohl is a Soulfire-infused Knight with a recurring immunity shield that resets at each health gate.
Phase 1: Kill the three Wizard mini-bosses across the three ramps to drop the initial shield, then push DPS.
Worm Loop (repeats each gate): Leave the middle immediately when the shield goes up. Locate the active green brazier — each central Soulfire sphere explosion rotates which brazier is active, so follow the green glow rather than waiting in one spot. Pick up worms and throw them at both side crystals. Each successful worm phase gives roughly 30 seconds of DPS. Repeat until Ir Gohl is dead.
The active brazier explosion and the middle arena Soulfire explosion are both instant kills. Track Ir Gohl’s hammer timing by watching the bubble around the trapped Lightbearer — that’s your window to rotate out before the explosion. Never extend a DPS phase past that signal.
The final chest awards Denier of Futurity and Soulfire Skewer. Cull’s Shadow does not need to be equipped for Skewer to drop — no extra hidden steps required.
 | Epiccarry")
Optional: Legendary Timed Variant
 | Epiccarry")
After the final chest, check the back of the Immolation boss arena for a rune-sealed door while Cull’s Shadow is equipped. Community reports indicate this opens a timed Legendary Gauntlet variant with a shorter worm timer (roughly 12 seconds versus the standard 19) and nine collectible worms. The collectible worms appear to be Triumph-only and don’t affect the normal catalyst route. Treat this as community-discovered until you’ve confirmed the trigger yourself — it warrants its own dedicated run.
Solo Flawless Run Killers
| Mission | Biggest Threat | Fix |
| Bloodline | Strand suspend + Colossus missiles during DPS | Clear all adds before dunking or committing to damage |
| Soulfed | Spiked traps and upper arena chaos | Stay in lower rooms, slow down on platforming |
| Immolation | Brazier and central Soulfire one-shots | Track hammer timing, rotate early, never greed DPS |
Clear first. Dunk second. The mechanics aren’t the hard part — surviving while doing them is.
Check out more Destiny 2 Monument of Triumph guides:
Epiccarry: best wow boost and coaching services
Frequently Asked Questions
The safest start is in the Temple of Crota. Enter from Anchor of Light, find the locked Hive rune door, shoot the matching hidden green discs with a Weapon of Sorrow, and check the crystal behind the door. If that step does not appear, go to the Scarlet Keep strike first and return afterward.
Which Weapons of Sorrow work for the Oblation rune puzzles?
The qualifying Weapons of Sorrow are Thorn, Osteo Striga, Necrochasm, and Touch of Malice. One of them must be equipped and actively held in your hands to reveal the hidden green runes.
Do you need Thorn, Osteo Striga, Touch of Malice, or Necrochasm for Oblation?
Yes, you need at least one Weapon of Sorrow to progress through the hidden rune steps. You do not need all four — any one of Thorn, Osteo Striga, Touch of Malice, or Necrochasm works.
Where are the Suspicious Syndicate Activity locations on the Moon?
The four Suspicious Syndicate Activity zones are Archer’s Line, Anchor of Light, Sorrow’s Harbor, and Hellmouth. Each zone contains a glowing Cabal corpse that points toward a deeper Hive location with a rune door and crystal.
Where are the Cabal corpses for the Oblation: Bloodline unlock quest?
The Archer’s Line corpse is near the small barricade under the main bridge. The Anchor of Light corpse is on a raised platform on the western edge near yellow structures. The Sorrow’s Harbor corpse is on the low ramparts along the northern edge. The Hellmouth corpse is on the path toward the Hive rune puzzle before the first door.
What is the correct rune order for the Oblation Bloodline doors?
For most Oblation rune doors, shoot the matching hidden discs in the order shown on the locked door, usually top to bottom. If you hit the wrong disc, the lock resets and the disc positions may change. Scarlet Keep is the main exception, where order does not appear to matter as long as you hit the correct symbols.
How do you solve the Shrine of Oryx rune puzzle in Oblation?
The Shrine of Oryx puzzle works like the other Moon rune doors, but it uses five runes instead of three. Clear the enemies, hold a Weapon of Sorrow, read the symbols on the door from top to bottom, then shoot the matching hidden discs in that order.
How do you complete the Oblation: Bloodline Exotic Mission?
In Bloodline, sabotage the Cabal drilling operation by overriding consoles, destroying fuses, shooting cooling pillar vents, and overloading the laser. After the traversal section, charge three Soulfire cauldrons to open the boss arena, then defeat Valus Tau’rig by breaking his immunity shield with Soulfire Charges.
How do you beat Valus Tau’rig in Oblation: Bloodline?
Keep moving to avoid Tau’rig’s Strand shackle attack. At each health gate, bait tracking crystal explosions into shielded Wizards, finish the exposed Soulfire Vessel, collect the Soulfire Charge, and bank it in the cauldron Tau’rig is channeling. Repeat across all three cauldrons, then clear Colossus enemies before every DPS window.
How do you get Cull’s Shadow in Destiny 2?
You get Cull’s Shadow by completing Oblation: Bloodline. It drops after defeating Valus Tau’rig, and it is required for the later catalyst and rune puzzle steps.
How do you unlock Oblation: Soulfed after Bloodline?
After defeating Valus Tau’rig, do not use the End Mission prompt. Return to the preceding cavern, follow the high sarcophagi route, and interact with the floating Hive grimoire tome. Then return to the Bloodline boss room, shoot the sealed rune door on the back-right wall with Cull’s Shadow or another Weapon of Sorrow, and Soulfed unlocks.
How do you get the Soulfire Succor Catalyst for Cull’s Shadow?
The Soulfire Succor Catalyst comes from the post-Bloodline secret step. After defeating Tau’rig, interact with the hidden Hive tome, return to the boss room, and shoot the back-right rune door from top to bottom using Cull’s Shadow or another Weapon of Sorrow.
How do Soulfire Worms work in Oblation: Soulfed?
Soulfire Worms spawn after you kill or finish a Soulfire Vessel and bank the Soulfire Charge in a brazier. Pick up a worm and throw it at green Soulfire crystals to clear blocked paths, lower platforms, open doors, or break boss shields. Worms have a short timer, so throw them quickly.
Where is the hidden console in Oblation: Soulfed?
The hidden console is near the Soulfire jet passage. Backtrack to the start of that passage, look down at the statues holding small basins, drop onto them, then look right for a yellow energy button inside a crystal claw. Activating it unlocks the secret tome route needed for Soulfire Rancor.
How do you beat the Abomination Trio in Oblation: Soulfed?
The Abomination Trio consists of an Ogre, Wizard, and Knight. Kill the Soulfire Vessel Thrall in the lower rooms, bank the charge, carry a worm upstairs, and throw it at the matching crystal to make a boss vulnerable. The Ogre uses the middle crystal, the Wizard uses the left crystal, and the Knight uses the right crystal. Stay in lower cubbies for cover.
How do you get the Soulfire Rancor Catalyst and Sorrow’s Coronet Ghost Shell?
Complete the hidden console and Tome of Profane Wisdom steps during Soulfed, then defeat the Abomination Trio. After the bosses die, interact with the Hive tome that appears and wait for the reward chest. This awards Sorrow’s Coronet and Soulfire Rancor if the secret route was completed.
How do you unlock Oblation: Immolation and the Soulfire Zeal Catalyst?
After the Soulfed bosses, do not leave. Go behind the arena, equip Cull’s Shadow, and inspect the weapon to see six Hive runes on the magazine. Shoot the matching statue rune discs in that exact top-to-bottom order. This awards Soulfire Zeal and unlocks Oblation: Immolation.
How do you beat Ir Gohl, Forger of Sorrow in Oblation: Immolation?
First, kill the three Wizard mini-bosses at the braziers to drop Ir Gohl’s initial shield. After each health gate, leave the middle, find the active green brazier, pick up worms, and throw them at both side crystals to reopen DPS. Avoid the center Soulfire explosion and brazier blasts, as both can instantly end a flawless run.
How do you get all four Cull’s Shadow catalysts in Destiny 2?
Get Soulfire Succor from the post-Bloodline tome and rune door. Get Soulfire Rancor from the Soulfed hidden console, secret tome, and completion chest. Get Soulfire Zeal from the six-rune Cull’s Shadow puzzle after Soulfed. Get Soulfire Skewer by completing Immolation and opening the final chest.