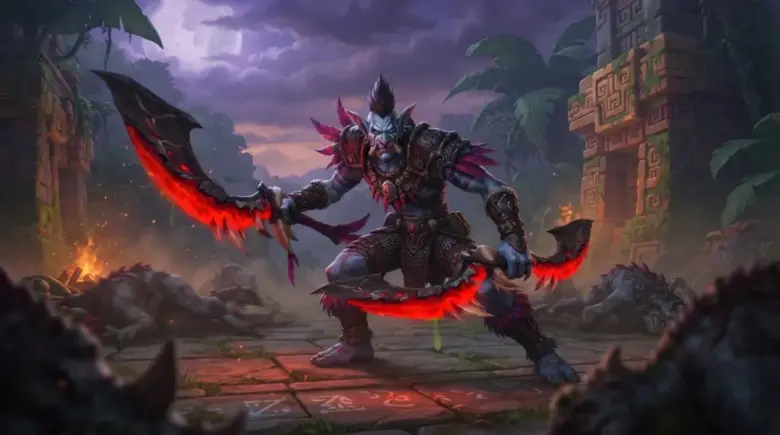
Alright, champions! Word on the Undermine streets is that Season 2’s big bad, the Underpin, hasn’t just been hoarding gold and gadgets – he’s committed the ultimate fashion crime: swiping Bran Bronzebeard’s favorite hat! This hulking mech is the challenge of the season’s Delves, especially on solo hard mode. Get ready for exploding bombs, fiery tantrums, and a whole lot of dodging. Think of it as the ultimate test of patience and mechanical mastery, with shiny rewards (and hat-based justice!) on the line. Ready to dive into the Demolition Dome and show this tin can who’s boss? Let’s do it!
Why Bother With This Beast?

Facing the Underpin in solo hard mode is widely considered a proper nightmare. It’s genuinely tough. But the rewards? Oh, the rewards make the struggle seriously worthwhile! We’re talking the prestigious “The Real Deal” title, a shiny golden goblin delve mount (the Delver’s Gob-Trotter!), and the sheer, unadulterated satisfaction of finally seeing this particular mechanical “bastard” hit the dirt at your hands. While Delves themselves can be tackled with a group of up to five players, many of the most sought-after Underpin achievements (including the challenge modes discussed here) specifically require a solo completion. These tough solo challenges are a fantastic addition to the game of WoW, giving a nod to the difficulty of things like the Legion Mage Tower.
| Reward | Source | Requirement |
|---|---|---|
| Delver’s Gob-Trotter (Mount) | Quest: “I Want My Hat Back” | Complete Intro Questline |
| Bran’s Spare Hat (Transmog) | Quest: “Defeating the Underpin” | Complete Underpin Quest |
| Explosive Victory (Toy) | Quest: “Defeating the Underpin” | Complete Underpin Quest |
| My New Nemesis (Achievement) | Defeat Underpin | Any Difficulty |
| Golden-Gob Propulsion Rig (Cloak Transmog) | Achievement: “My New Nemesis” | Any Difficulty Kill |
| Pacifist Rig (Utility Curio) | Underpin Loot Drop | Any Difficulty Kill |
| Breaking the Bank (Achievement) | Defeat Underpin on Tier ?? | Tier ?? Kill |
| “The Real Deal” (Title) | Achievement: “Breaking the Bank” | Tier ?? Kill |
| Let Me Solo Him: The Underpin (Feat of Strength Achievement) | Defeat Underpin on Tier ?? SOLO | Solo Tier ?? Kill |
| Delver’s Gob-Trotter Schematic (Gold) (Mount Appearance) | Achievement: “Let Me Solo Him: The Underpin” | Solo Tier ?? Kill |

Getting Started: The Hat-Retrieval Mission

Before you can challenge the Underpin, you need to unlock him. This involves a short intro quest chain for Season 2 Delves:
- Visit Delver Headquarters: Find Bran Bronzebeard. He’ll give you “Seasonal Refresher.” This quest asks you to check out the “Delver’s Journey” (your progress tracker) and chat with the Delve vendors in the HQ.
- Go Shopping! Talk to Reno Jackson and purchase the “Delver Cosmetic Surprise Bag” (hello, Bitter Shroom Cap Helm transmog!). Then, see Sir Finley and grab the “Delver Starter Kit” (which includes a Restored Coffer Key and some handy Season 2 consumables). Each item here helps you on your journey!
- Uncover the Crime: Turn in “Seasonal Refresher.” Bran reveals the true tragedy – his hat is GONE! Accept “I Want My Hat Back.” This leads to a brief scenario showing the hat’s unfortunate fate and introduces the Underpin. Finishing this rewards you with the awesome Delver’s Gob-Trotter mount!
Unlocking the Challenge Difficulties:
Once the intro is completed, grab the quest “Defeating the Underpin” from Bran. Unlocking higher tiers of Bountiful Delves (by completing lower tiers with revives remaining) is the key to unlocking the Underpin’s higher challenge tiers.
- Tier ? Challenge (Normal Mode): To unlock the standard challenge difficulty, you must successfully complete a Tier 7 Bountiful Delve with revives remaining. Once this is done, you become eligible to face the Underpin at Tier ?.
- Tier ?? Challenge (Hard Mode): For the toughest solo challenge, you’ll need to complete a Tier 10 Bountiful Delve with revives remaining. This makes you eligible for the higher Tier ?? difficulty.
| Underpin Challenge Tier | Required Bountiful Delve Tier Completed | Must Have Revives Remaining? |
|---|---|---|
| Tier ? (Normal) | Tier 7 | Yes |
| Tier ?? (Hard) | Tier 10 | Yes |
Underpin Spawn Location (His Lair!)
When you’re prepped and ready, head to the Demolition Dome in the north of the Undermine zone. To find the Underpin spawn location, look for passageways to the left or right before entering the main arena. Follow these paths along the stands until you spot an opening with a small building in the center. The entrance is against the back wall of that building.
Preparation: Don’t Go In Unprepared!

Think of Sun Tzu, who might have wisely stated: “The player who wins the battle makes many purchases in his auction house before the battle is fought.” This is your motto for this war!
Gear Up & Enchant: Ensuring you have strong, well-optimized gear is crucial for this challenge. A high item level isn’t just helpful – it’s often necessary to meet the DPS check for the shield and survive key mechanics. Get your best gear and cover it in every relevant enchantment. Don’t be shy!
Stock Consumables: Phial, Combat Potion, Food (stat food), Augment Runes – load up! Don’t forget Healing Potions too.
Bind Those Potions: Seriously, put them somewhere easy to hit. Clicking them in a panic is a recipe for disaster.
Essential Add-ons & Settings: Deadly Boss Mods (DBM) with the Delves module is crucial for tracking timers. A WeakAura for boss timers is also highly recommended. Make sure your Sound Effects and Dialogue sound channels are on and audible – the boss has crucial voice callouts. Binding and using the Interact Key is highly recommended for speed and reliability when kicking bombs.
Specs: While a DPS spec is usually recommended for solo challenges, a healer sticking to their spec might find Bran’s DPS mode necessary later if survival isn’t the main issue.

Bran Bronzebeard: Your Trusty Sidekick (and His Setup)
Bran comes along for the ride! His setup is key:
- Bran’s Role: Setting him to Healer mode is generally the most effective, providing crucial sustain. However, DPS Bran can help chip away at the boss if your own survival feels solid.
- Note: To maximize Bran’s effectiveness, especially on harder difficulties, ensure he is well-leveled. Aim for at least level 50+, as this significantly boosts his healing and/or damage output.
Curios for Success:
Utility Curio – L00T-RAID-R: Widely agreed upon as excellent for the 10% additional damage burst every 30 seconds. It’s a powerful item for this fight.
Combat Curios (Highly Recommended):
- Goblamatic Bouncing Bomb: Decent damage with a chance to bounce to cronies.
- Mechasaur EZ-Build Kit: Offers a temporary taunt and extra mechasaurs for damage.
- Pocket Factory: Can provide extra damage support.
- Consider the Bofuel Rocket Curio mentioned in other strategies – great for cleaving adds during shield phase and downtime.
Curio to AVOID – Pacifist Rig: While great for regular delves, using it here can cause the Underpin to target only Bran. If Bran gets knocked out while you’re safe in the Rig, the boss fight might reset. Nobody wants that!
Underpin Abilities: Dodging the Deadly Dance

This dude has several ways to end your day. Mastering these is non-negotiable.
Crush: He targets a spot (you or Bran) and slams down, dealing heavy damage and stunning you for 4 seconds if hit. Just step out of the orange circle that appears! This ability also moves him, which is important later for controlling the spawn location of adds.
Flamethrower: A wide fire cone blasting out 40 yards in front of him. Getting caught in this means significant initial damage and a nasty 5-second damage-over-time effect. Stay relatively close – the cone is narrowest right next to him, making strafing out much easier than when you’re far away.
Swirly Vomit Rain: Ground areas appear and then detonate. Standing in these equals an instant trip back to the start. Just dodge them!
Time Bomb Launcher: He scatters “puntable” time bombs. These count down and explode, blasting an area within 15 yards. Another one-shot mechanic! Binding and using the Interact Key is highly recommended for speed and reliability when kicking these. Kicking them sends them in the direction of the blue arrow. The drop location of these bombs is important!
The Cronies: The Real Annoyance
The Underpin summons cronies (three on Tier ?, five on Tier ??) who line up and make things much harder.
Molten Cannon: They paint red targeting lines on the ground and then fire fiery lava orbs. Hit by these, you take heavy damage and get knocked back (usually resulting in death). Dodge the lines before the orb fires, or immediately after it passes.
Shoot: A simple targeted damage ability that slowly chips away at your health while they’re alive. You want them dead quickly!
Strategy: Taming the Mechanical Beast (Tier ?)

The core fight loop involves three main phases you’ll cycle through:
The Opener:
Blow all your offensive cooldowns right at the start! This is your best window to get some free damage in before the mechanics begin.
Dodging & Adds:

- Keep dodging his abilities (Crush, Flamethrower, Swirlies).
- When cronies spawn (first wave ~20s in, then every 1m 10s), prioritize killing them. If you let too many accumulate, the fight becomes overwhelming.
- Use the Time Bombs! They are the key to clearing adds efficiently. Kicking a bomb into the adds causes an AoE explosion that deals significant damage (around 40% of an add’s health). Three bombs can usually kill a group of three adds.
- Optimal Bomb Kicking: Aim your kicks at the second or fourth add in the line. This clever positioning allows one bomb to hit three adds, meaning you can clear a wave of three with just three bombs (three kicks aimed at #2 or three aimed at #4). Avoid aiming at the ends or the exact middle, which is less efficient. Using the Interact Key bind makes kicking these bombs much faster and more reliable than clicking.
- Don’t Rush! A common pitfall is rushing to bomb adds as soon as they appear, putting distance between you and the boss just as Flamethrower might be coming. Wait for the Underpin to cast Flamethrower first. It goes on a ~15-second cooldown, creating a perfect window to run and kick bombs without fearing immediate incineration.
- Exploding Bombs: Watch out for un-kicked bombs that are about to detonate (they get a big circle around them). You have about 5 seconds warning; if you’re near one, quickly kick it away! The drop location of these is marked!
The Shield Phase: Burn It Down!
Watch the Underpin’s energy bar. When it hits 100, he’ll shout “Time Out!” and cast Divert Energy to Shields.
- He puts up a shield (10% of his max health) that lasts 20 seconds. YOU MUST BREAK THIS SHIELD! If you don’t, he fully “recharges” and heals for a massive 25% of his health, undoing all your hard work.
- Damage Opportunity: During this 20-second window, the boss stands still and takes 100% additional damage! Drop everything else and focus all your damage on the shield. If you’re struggling to break it, save your biggest offensive cooldowns specifically for this phase.
- After the 20-second shield phase ends, whether you broke the shield or not, he’ll splatter slippery oil around, making movement a bit harder.
The Fight Evolves: Handling Later Cycles

The Underpin fight essentially loops, but it gets trickier!
- Burning Marks & Add Spawns: Dead cronies leave burning marks that block future add spawns in those spots. Ads always try to spawn at fixed points around the arena edge, going to the nearest available spot. Check your map if you’re unsure of these points!
- The Problem: In later cycles, blocked spots mean adds can spawn spread out across the arena, making bomb-kicking much harder.
- The Solution: Positioning with Crush! This is key to controlling the fight. As soon as you’ve cleared an ad wave, immediately sprint to a new area of the arena that doesn’t have burning marks. Bait the boss’s Crush ability to jump to your location. By controlling where he jumps, you control where the next wave of adds will spawn (ideally, all together in a fresh spot!). This strategy wasn’t crucial previously, but it becomes vital.
Taming the Chaos: Desync and Overlaps

The actual hardest part is often the boss’s unpredictable spell timing. His spell timing can vary, causing overlaps in mechanics that are harder to manage.
- Problem: Sometimes all his abilities are on cooldown, and he just starts hitting you with heavy melee damage (this is where Bran’s healing, your defensives, and health pots come in!). Other times, he might delay his shield cast, summoning more adds before the shield, or even chain cast abilities without moving (messing up your ad positioning plan).
Tools for Order:
- DBM Timers: Pay attention to DBM! Know which abilities are on cooldown and what’s coming next. If Flamethrower is ticking down, be ready to dodge before running for bombs. If “Signal Cronies” is next, it’s your cue to make sure the boss is in a good position first.
- Voice Lines: Blizzard put voice callouts for every ability! Make sure your sound effects and dialogue are on and audible. You’ll learn to recognize the audio cues, allowing you to react faster without constantly staring at spell bars. They provide crucial warnings.
The Winning Mindset: Patience, Precision, and No Panic!

You will face tricky overlaps and moments that feel overwhelming. Here’s how to handle it:
- Prioritize Positioning: After adds die, immediately move to bait the next Crush jump to a clear spot. This makes subsequent add waves manageable.
- Adds First: When bombs and adds are out, clearing the adds is priority one. Even if it means the boss free casts for a moment (unless he’s shielding!).
- Respect Mechanics: Never get greedy. Trying to squeeze in extra DPS at the wrong time (like standing in Flamethrower’s potential range or running for bombs before the cone is on cooldown) will lead to death.
- Stay Calm: This fight tests patience. Rushing leads to mistakes. Focus on executing each step calmly and precisely. Practice makes perfect; increase your speed as you get comfortable.
- Roll with the Punches: Sometimes the RNG might feel unfair (adds spawn badly, Bran gets Crushed). If things go south and you die, don’t sweat it! GG, go next. It’s a solo challenge. Learn what went wrong and try again.
Keep executing the core loop: Position the boss, clear adds with bombs, dodge abilities, burn the shield. Stay calm, keep pulling, and eventually, the boss will fall!
Tier ?? Difficulty Specifics: More Mayhem!
For the Tier ?? challenge (requiring a completed Tier 10 Bountiful delve to be eligible), there are no new abilities, but two existing ones get a noticeable buff:
- Time Bomb Launcher: Now spawns persistent fire swirls around the boss for a short duration after the initial bombs are out. More ground effects to weave through!
- Signal Cronies: Summons FIVE cronies instead of three! Clearing them efficiently with bombs requires slightly more precision. Aiming kicks at the second or fourth add in the line still hits 3 adds, but you will need to kick four bombs (e.g., two aimed at #2, two aimed at #4) to reliably clear all five adds with bomb damage alone.
These changes make the fight significantly more hectic and demanding on this higher Tier.
Great Treasure Awaits: Rewards for Defeating the Underpin!

Successfully defeating the boss comes with some sweet loot and achievements (generally available until Season 3 ends):
From the quest “Defeating the Underpin” (turned in to Bran):
- Bran’s Spare Hat (transmog)
- Explosive Victory (toy)
General Defeat Rewards (Any Difficulty):
- Achievement: “My New Nemesis” (Awarded for defeating the Underpin on any difficulty). The ‘Golden-Gob Propulsion Rig’ (cloak transmog) is awarded upon completion of this achievement.
- Utility Curio: Pacifist Rig (Drops directly from the Underpin’s loot).
Tier ?? Specific Rewards:
- Achievement: “Breaking the Bank” (Awarded for defeating the Underpin on Tier ?? difficulty). This achievement rewards the title “The Real Deal”.
Claim the ‘Let Me Solo Him’ Achievement, WoW’s True Testament to Your Prowess!

Feat of Strength Achievement: “Let Me Solo Him: The Underpin”! This achievement specifically awards the ‘Delver’s Gob-Trotter Schematic (Gold)’, allowing you to craft the golden version of your mount.
There’s usually a good amount of time in a patch cycle to tackle this, so keep gearing up and practicing over the next few weeks!
Epiccarry: best wow boost and coaching services
Frequently Asked Questions
What is the Underpin and why is this guide focused on fighting it solo?
The Underpin is the main “boss” or big challenge introduced in Season 2 of World of Warcraft’s Delves. It’s a large mechanical enemy found in a specific area called the Demolition Dome. This guide specifically helps you defeat the Underpin, especially the tougher versions designed for a single player. The story behind fighting him is that he’s committed a terrible “fashion crime” by stealing Bran Bronzebeard’s favorite hat! Beating him solo is considered the ultimate test of skill and patience in the Season 2 Delves.
Why should I bother attempting this difficult fight all by myself?
Fighting the Underpin solo, particularly on the hardest difficulty level (Tier ??), is extremely challenging and considered one of the toughest solo tasks available in the game currently. However, the rewards are very impressive and make the struggle worthwhile. By mastering this solo fight, you can earn a highly respected title called “The Real Deal,” unlock a special golden version of the Delver’s Gob-Trotter mount to show off, and gain prestigious achievements like “Let Me Solo Him: The Underpin,” which are true testaments to your individual playing ability, similar to the challenge of the Mage Tower in Legion.
How do I unlock the chance to even fight the Underpin initially?
To gain access to the Underpin fight, you first need to complete a short series of introduction quests that start the Season 2 Delves storyline. You begin by speaking to Bran Bronzebeard at the Delver Headquarters. He will give you quests like “Seasonal Refresher,” which guide you to check your Delver’s Journey progress and interact with the Delve vendors (like Reno Jackson and Sir Finley) to buy some basic items like the Cosmetic Surprise Bag and Starter Kit. Finishing this introductory quest chain, which includes “I Want My Hat Back,” reveals the Underpin and rewards you with the standard Delver’s Gob-Trotter mount, unlocking the encounter itself.
How do I become eligible to try the harder challenge Tiers (Tier ? and Tier ??) of the Underpin fight?
The different challenge levels for the Underpin are unlocked by completing specific tiers of Bountiful Delves while keeping revives remaining. To unlock the standard Underpin Challenge (Tier ?), you must first successfully clear a Bountiful Delve of Tier 7 difficulty or higher, making sure you still have revives left when you finish. To unlock the much harder Tier ?? Underpin Challenge, you need to demonstrate mastery of tougher Delves by completing a Bountiful Delve of Tier 10 difficulty or higher, again, with revives remaining upon completion. Finishing these specific delve tiers makes you eligible to select the corresponding Underpin challenge difficulty.
Once unlocked, where do I go to find the Underpin boss’s exact location within the Demolition Dome?
The Underpin’s lair is located within the larger Demolition Dome area in the northern part of the Undermine zone. When you enter the Demolition Dome, look for passageways along the sides of the main arena area, either to your left or right, instead of going straight into the middle. Follow one of these side passages. You will eventually find an opening that leads away from the stands towards a small building situated in the center of that side area. The actual entrance you need to go through to start the Underpin fight is found against the back wall of that specific small building.
What kind of preparation should I do before attempting this difficult solo fight? Is having good gear important?
Preparation is absolutely essential! Having strong gear with all the necessary enchantments is very important, especially for the harder Tier ?? difficulty. Your gear level directly impacts how much damage you do (needed to break the shield!) and how much damage you can survive. You should also bring lots of consumables – things like Phials or Flasks for a constant stat boost, Combat Potions for bursts of extra damage, stat-boosting Food, Augment Runes if you use them, and definitely Healing Potions for emergency health recovery. It’s crucial to bind your potions and important abilities to keys you can quickly press without looking, especially using the Interact Key for kicking bombs.
My companion, Bran Bronzebeard, helps during the fight. What should I set him to do?
For most players attempting this solo challenge, setting Bran Bronzebeard to his Healer mode is the most beneficial choice. His healing provides crucial support throughout the fight, helping you survive the boss’s attacks and the steady damage from the adds. This allows you to focus more on mechanics and dealing your own damage without having to worry constantly about your health. While Bran can also do damage, his healing is generally considered more valuable for solo survival. Remember to level Bran up (ideally to 50 or higher) as this significantly increases how effective his healing (or damage) is.
Which specific special items from Delves, called Curios, are recommended for this boss fight?
There are several useful Curios mentioned in the guide. A top recommendation for the Utility slot is the L00T-RAID-R, which gives you a consistent burst of extra damage every 30 seconds, very helpful for getting the boss down. For Combat Curios, options like the Goblamatic Bouncing Bomb (good for damaging adds and potentially bouncing to others), the Mechasaur EZ-Build Kit (provides temporary help and some damage), or the Pocket Factory (adds extra damage support) are solid choices. The Bofuel Rocket Curio is also highlighted as being very good for damaging groups of enemies efficiently.
Are there any Curios I should specifically NOT use when fighting the Underpin solo?
Yes, the guide advises against using the Pacifist Rig Utility Curio for this specific boss fight. While it’s great for making you temporarily safe in other Delve situations, when used against the Underpin, it can cause the boss to focus all his attacks solely on Bran Bronzebeard. If Bran gets defeated while you are in the Pacifist Rig, the fight can bug out or reset, which would be a waste of your attempt. It’s better to use a Curio that helps you or both of you directly without changing the boss’s targeting onto Bran alone.
What are the most dangerous abilities the Underpin uses that I absolutely must avoid?
The Underpin has several deadly mechanics you need to master dodging. The most critical are: Crush, where he targets a spot with an orange circle and slams down dealing massive damage and stunning you – always move out of this circle before he lands. Flamethrower, where he blasts fire in a wide cone in front of him for 40 yards – quickly strafe or step to the side to get out of the fire zone (staying somewhat close to him makes this easier as the cone is narrower). And Swirly Vomit Rain, where dangerous circular areas appear on the ground and then detonate – standing in these when they explode means instant death, so get out immediately. You need to react quickly to these to survive.
How do I handle the waves of smaller robot enemies called Cronies that appear?
The Cronies are a major threat because they can quickly deal significant damage with their Molten Cannon (dodge the red lines they aim before they fire!) and regular Shoot attacks. The most efficient way to deal with them is by using the Time Bombs that the Underpin drops. Kicking these bombs into the group of Cronies causes a large explosion that deals substantial damage (around 40% of their health per hit). For the three Cronies on Tier ?, kicking three bombs aimed at the second or fourth add in the line is usually enough. For the five Cronies on Tier ??, you need to kick four bombs aimed at the second and fourth adds to ensure all five are hit multiple times and die. Using your Interact Key binding makes kicking bombs much faster and more reliable.
What happens during the Underpin’s shield phase, and what is the most important thing I need to do?
When the Underpin’s energy bar reaches 100, he will activate a shield around himself for 20 seconds, shouting “Time Out!” and casting Divert Energy to Shields. During this time, he stands still and takes 100% increased damage, making it a prime opportunity to hit him hard. However, the most crucial thing is that you absolutely must break this shield before the 20 seconds are over! If you fail to break the shield in time, he will fully “recharge” and heal himself for a very large amount (25% of his maximum health), which will likely make it impossible to defeat him. Focus all your damage, including cooldowns, on the shield. After the 20-second shield phase is over, whether you broke the shield or not, he will also spawn slippery oil puddles on the ground.
What specific mechanics are changed or made harder when fighting the Underpin on the Tier ?? Hard Mode?
The Tier ?? difficulty significantly increases the challenge compared to Tier ?. There are two key differences based on existing abilities: Firstly, the Time Bomb Launcher is enhanced – after the bombs explode, they now leave behind damaging fire swirls on the ground for a duration, creating more dangerous areas you need to navigate through constantly. Secondly, the Signal Cronies ability summons five Cronies in each wave instead of just three. This means more enemies to deal with simultaneously, requiring faster targeting of adds and more precise bomb kicks (needing four bombs instead of three) to clear the wave efficiently before they overwhelm you. These changes make managing the encounter much more demanding.
Can you provide a clearer breakdown of the specific rewards I can get from the Underpin fight?
Certainly! By completing the initial Season 2 Delve questline that introduces the Underpin (specifically the “I Want My Hat Back” quest), you earn the standard Delver’s Gob-Trotter mount. When you complete the follow-up quest “Defeating the Underpin” after beating him for the first time, you receive Bran’s Spare Hat transmog and the Explosive Victory toy. Defeating the Underpin on any difficulty level (Tier ? or ??) awards the achievement “My New Nemesis,” which in turn gives you the Golden-Gob Propulsion Rig cloak transmog, and he can also drop the Pacifist Rig curio directly as loot. Defeating the Underpin on the Tier ?? difficulty awards the “Breaking the Bank” achievement and the prestigious “The Real Deal” title. Finally, the most sought-after reward, the ‘Delver’s Gob-Trotter Schematic (Gold)’ which allows you to make your mount golden, is earned specifically from the “Let Me Solo Him: The Underpin” feat of strength achievement, which is awarded for defeating the Underpin on the Tier ?? difficulty while playing solo.
I know this guide focuses on solo play, but can I do Delves or fight the Underpin with other players?
Yes, the general Delves content, including the Bountiful Delves needed to unlock the Underpin challenges, can be completed with a group of up to five players. You can certainly bring friends along for regular delve runs. However, it is crucial to understand that the specific Underpin Challenge Tiers (Tier ? and Tier ??), and many of their unique and most desirable rewards like the “The Real Deal” title, the golden mount appearance schematic, and the “Let Me Solo Him: The Underpin” achievement, are only awarded for completing those specific challenges solo. If you attempt the Tier ? or Tier ?? challenge with a group, you will not receive these particular solo-only rewards.