Sporefall is a new single-boss raid arriving in World of Warcraft: Midnight with Patch 12.0.7 Revelations. Located in Harandar, the raid pits players against Rotmire — a massive fungal giant built around add control, positioning, and strict corpse management mechanics.
Unlike traditional WoW raids with multiple bosses, Sporefall focuses entirely on a single encounter and introduces Blizzard’s first-ever Mythic Flex system, allowing Mythic difficulty to scale between 15 and 25 players. You can comfortably test it with the Epiccarry team and our Sporefall Boost. Our Sporefall Heroic Boost and Sporefall Mythic Boost will help you obtain the best rewards from this new raid.
In this guide, we’ll cover:
- Rotmire mechanics
- Mythic add management and Cross-Fertilization
- All three Mythic positioning strategies
- Loot table and item levels
- Raid composition and utility recommendations
- Cooldown alignment
- Frost Mage-specific tactics
- Mythic Flex scaling and raid structure

Sporefall Quick Facts
| Feature | Details |
| Recommended Level | 90 |
| Raid | Sporefall |
| Boss | Rotmire |
| Patch | Midnight Patch 12.0.7 |
| Raid Type | New Single-Boss Raid |
| Location | Harandar |
| Mythic Flex Range | 15–25 Players |
| Raid Finder Minimum Item Level | 240 |
| Highest Loot Item Level | 298 (Mythic) |

Mythic Flex Difficulty Explained
Mythic Sporefall is the first flex Mythic raid experiment in WoW history. Traditional Mythic raiding has been locked to exactly 20 players for over a decade.
Sporefall allows groups between 15 and 25 players to attempt Mythic difficulty, with encounter tuning, boss health, and mechanic frequency adjusting dynamically based on raid size through flex scaling.
Important: Bringing fewer than 15 players does not reduce boss health, mechanic frequency, or overall difficulty. Mythic Sporefall only scales between 15 and 25 players.
Because Blizzard must balance the fight across a range of raid sizes, Rotmire is intentionally tuned to be more accessible than a conventional Mythic encounter. This makes Sporefall one of the easiest ways for Heroic guilds to start experimenting with Mythic raiding.
This is especially helpful for guilds that struggle to maintain a fixed 20-player Mythic roster.
Mythic Scaling Breakpoints
Early PTR testing suggested that certain raid sizes, particularly around 19 or 22 players, produced cleaner mechanic distributions and easier add management than fully capped 25-player groups.
Guilds struggling with arena space or add control may find slightly smaller raid sizes easier to coordinate during Mythic progression.
Key Takeaway: Smaller Mythic raid sizes may feel easier to manage during the fight’s heavy add-control phases.
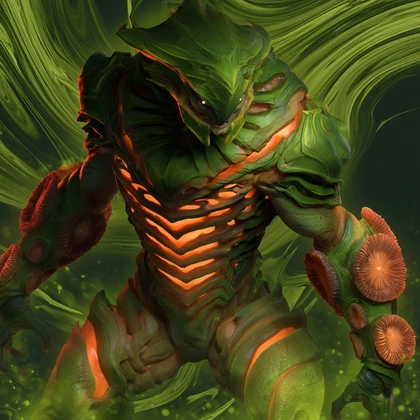
Difficulty and Progression Expectations
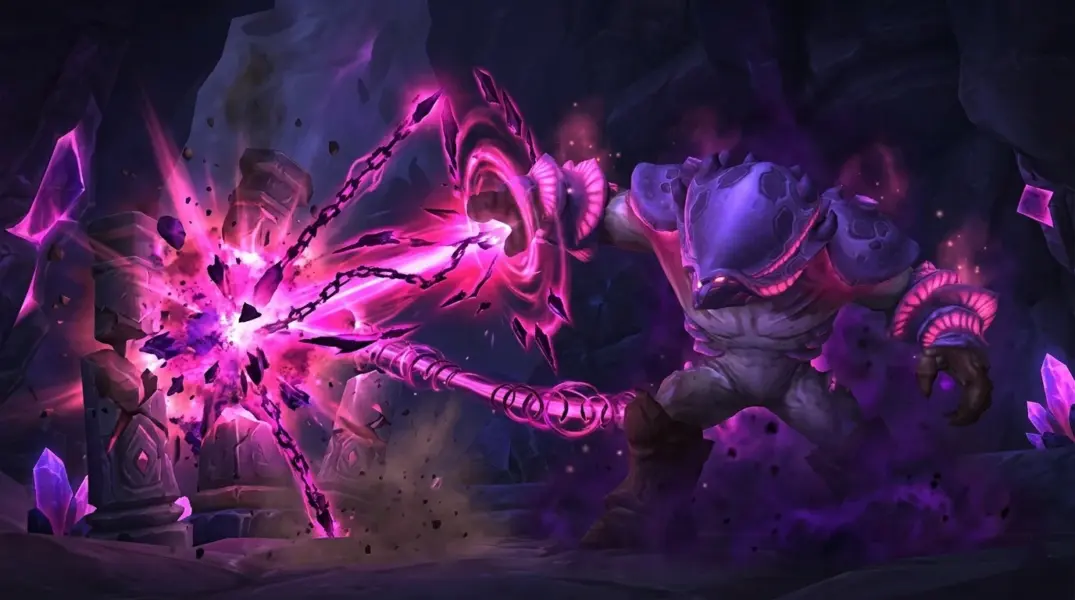
Rotmire is harder than a typical first boss, but nowhere near the complexity of a final-tier Mythic encounter. The fight has no trash, so execution is tested immediately from the first pull. Most guilds can expect a kill somewhere between 5 and 10 pulls.
Positioning discipline and add management matter far more than raw throughput here, which makes mobility-heavy specs especially valuable. Most Mythic wipes come from positioning mistakes and accidental corpse overlap rather than failing DPS checks.
While mechanically simpler than a traditional end-tier Mythic boss, Rotmire becomes extremely punishing once add placement or corpse spacing starts breaking down. Since there are no phase transitions or downtime moments, every mechanic remains active continuously throughout the encounter.
Key Takeaway: The fight is mechanically straightforward, but maintaining clean positioning under increasing arena clutter is what determines most progression kills.
The final stretch becomes especially dangerous as Bursting Pustules stacks ramp up and available floor space shrinks from accumulated vine zones. Groups that lose control of positioning late into the fight usually collapse very quickly.
Rotmire Mechanics Explained
These are the baseline mechanics shared across all difficulties.
Raid-wide Nature damage ramps steadily throughout the encounter, so healers should expect pressure to increase continuously rather than arrive in isolated burst windows.
Putrid Fist (Physical damage)
Rotmire strikes the active tank with a physical hit that applies a stacking debuff, increasing physical damage taken and knocking the tank backward.
Most groups handle this with a standard single-stack tank swap.
Bursting Pustules (Nature damage)
Rotmire permanently stacks a pulsing raid-wide damage aura that grows more dangerous as the fight extends.
Key Threat: Bursting Pustules functions as the fight’s primary soft enrage mechanic.
Healing requirements become increasingly overwhelming in the later stages, so groups need to push damage rather than attempt to outlast the timer.
Festering Vines (Nature damage)
Festering Vines targets multiple random players with green circles and applies a heavy movement slow. When the debuff expires, those players drop persistent Writhing Vines pools on the ground.
Affected players should use movement abilities or immunities such as Blessing of Freedom or Tiger’s Lust to carry their zones toward the outer walls before they drop.
Positioning Tip: Keeping the center of the arena clear is critical for later add waves and Fungal Bloom positioning.
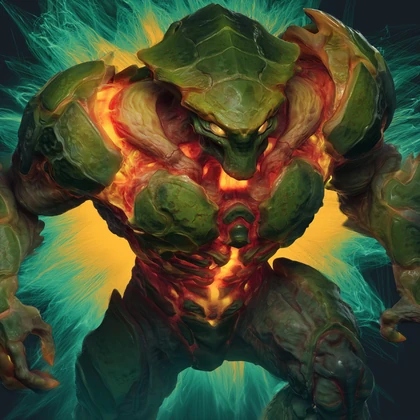
Mythic Add Mechanics and Cross-Fertilization
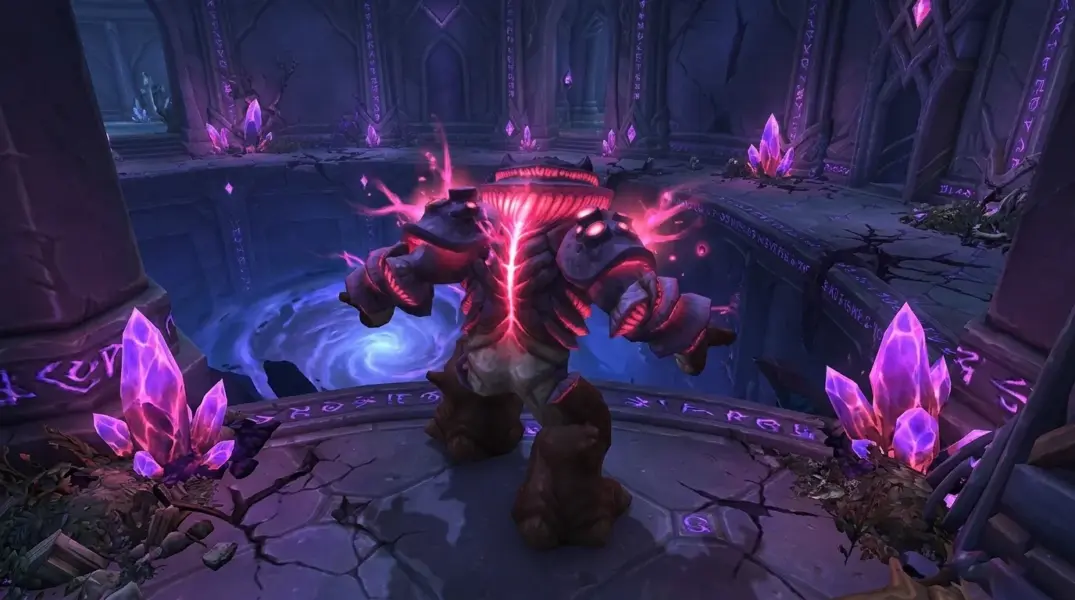
The entire Mythic add sequence revolves around Awaken Fungi, Rotmire’s signature add-spawn mechanic Mythic.
During the Awakening Fungi phase, green and blue circles appear across the arena floor.
Clear raid frames and a visible energy bar for Rotmire’s Fungal Bloom cast help significantly here, since players need to track fixates, corpse spacing, and add positioning simultaneously.
The Spore Cap
The blue circle spawns a stationary Spore Cap caster that repeatedly channels Poison Burst.
Assign a dedicated interrupt rotation before pull. If Poison Burst gets through even once, the pull is usually over. Kick assignments need to be locked in, not improvised mid-fight.
Spore Caps also fire Blightshot at random players throughout the phase, adding additional raid pressure while interrupts are being coordinated.
Shroomlings and Funglings
The green circles on Mythic spawn two distinct add types: Shroomlings and Funglings. Each type fixates on specific players, indicated by colored fixate lines — typically green for Shroomlings and red for Funglings.
Some PTR builds inverted these colors, so groups should always verify the fixate indicators in-game before pulling.
Fixated players are responsible for physically dragging their assigned adds into the designated kill zones before the raid begins heavy AoE damage.
Cross-Fertilization
Cross-Fertilization is the mechanic responsible for most Mythic wipes. If a Shroomling corpse comes within 10 yards of a Fungling corpse, it triggers an unkillable Bursting Doom Shroom that immediately channels a raid-wide wipe.
There is no surviving it. These add types must remain separated both in life and in death.
Where adds die matters throughout the encounter, since every defeated add corpse later reanimates into a Bursting Shroom during Fungal Bloom. Sloppy positioning during the kill phase creates a cleanup disaster during the intermission.
Melee Warning: Larger raid sizes can create dangerous congestion near corpse piles, making accidental Cross-Fertilization far more likely during movement-heavy moments.
⚠️ The most common Mythic wipe is accidental Cross-Fertilization caused by DPS killing adds before they are fully separated. Do not use major AoE cooldowns until fixated players have moved their adds into the correct positions.
Key Takeaway: Mythic Rotmire is fundamentally a positioning fight. Most wipes happen because adds die in the wrong locations — not because the raid lacks damage.
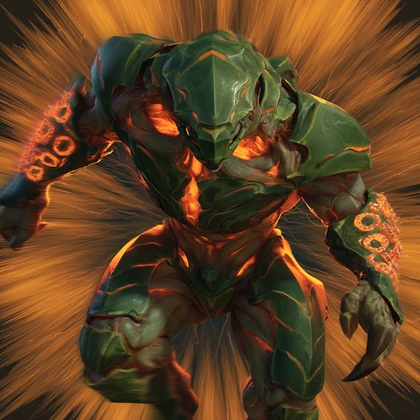
The Intermission: Fungal Bloom

At 100 energy, Rotmire channels Fungal Bloom.
There is a short delay between the cast completing and the first Bursting Shrooms becoming active. Use this window to reposition the raid before cleanup begins.
Fungal Bloom knocks players backward when the cast completes and also applies a 16-second Nature damage-over-time effect to the entire raid, creating a major healing check during the cleanup phase.
Any small adds still alive when Fungal Bloom starts immediately gain Fungal Frenzy, increasing their damage by 100%, movement speed by 50%, and granting complete CC immunity.
Important: All active adds must die before Fungal Bloom begins.
Once the intermission starts, every defeated add corpse reanimates as a Bursting Shroom with a 16-second fuse.
The raid must quickly split its AoE damage across all active mushrooms and destroy them before they detonate. If even a few survive the timer, the pull usually collapses immediately.
Key Takeaway: Fungal Bloom is less about raw damage output and more about efficient corpse placement before the intermission even begins.
Three Mythic Positioning Strategies

Strategy 1: Stack-and-Ignore (Recommended for Most Guilds)
This is the most consistent strategy available and the one most progression groups should default to. Most Cutting Edge guilds eventually settled on this approach during PTR testing.
Early PTR strategies attempted to keep Shroomling and Fungling corpse piles on opposite sides of the room. In practice, this often failed because the raid only has 16 seconds to destroy all Bursting Shrooms during Fungal Bloom. Centralizing corpse piles dramatically improves cleave efficiency and makes cleanup significantly more reliable.
First Wave (24s)
Pull the boss to the first Spore Cap. Place one marker on each side of it — one for Shroomlings and one for Funglings. The initial Spore Cap effectively determines the primary corpse-management zone for the rest of the fight.
Fixated players stand on their assigned markers, keeping both add types separated by roughly 5 to 10 yards before the raid begins cleaving them down.
Second Wave (74s)
A second Spore Cap spawns somewhere else in the room. Ignore its location.
Fixated players bring their new adds back to the original corpse piles near the first Spore Cap. Assign two or three ranged DPS to interrupt and kill the remote Spore Cap from a distance.
Fungal Bloom Cleanup
When Fungal Bloom begins at 2:00, all small add corpses are stacked centrally.
Pull the boss directly on top of the pile so the raid can quickly AoE down all Bursting Shrooms within the 16-second cleanup window.
Handling the Stray Mushroom
The remote second Spore Cap corpse later reanimates as a single isolated Bursting Shroom far away from the raid.
Groups intentionally ignore this mushroom and allow it to detonate. Surviving one explosion is manageable with coordinated raid defensives such as Anti-Magic Zone, Darkness, or Rallying Cry.
Key Takeaway: Stack-and-Ignore became the dominant PTR strategy because centralized corpse placement makes Bursting Shroom cleanup dramatically easier during Fungal Bloom.

Strategy 2: Parallel Dual-Pile Spacing

This strategy is less forgiving on positioning but eliminates the need to survive any mushroom detonations.
Tanks actively move the boss to every newly spawned Spore Cap. Fixated players maintain two tightly controlled corpse piles — Funglings on one side and Shroomlings on the other — separated by just over 5 meters at all times.
During Fungal Bloom, the raid splits 50/50 and clears both piles simultaneously.
One positioning mistake during the add phase is enough to instantly wipe the raid.
This strategy is worth considering if the Stack-and-Ignore explosion is proving too costly, but it demands extremely consistent execution across every wave.
Strategy 3: Hybrid Alternating Kill
This strategy removes almost all risk of accidental Cross-Fertilization by keeping the two add types temporally separated. They are never dead in the same location at the same time.
Wave 1:
Designate the first Spore Cap location exclusively for Shroomlings. Shroomling players stack and kill their adds there.
Fungling players keep their adds alive while healers manage the additional single-target physical damage.
Wave 2:
Move the boss to the second Spore Cap. This location now becomes the Fungling kill zone.
All Funglings are brought here and killed, while remaining Shroomlings are cleaned up at the original location.
When Fungal Bloom begins, Shroomlings and Funglings are already separated into two clean corpse piles with virtually no contamination risk.
Tradeoff: This strategy greatly reduces wipe potential from Cross-Fertilization, but it creates noticeably higher healing pressure while Funglings remain alive between waves.
Sporefall Gear: Loot Table and Item Levels

Spore-fused gear from Sporefall is intentionally focused on a smaller selection of high-value armor pieces, accessories, and fungal-themed effects rather than replacing every slot in a full gear set.
Blizzard also removed the randomized secondary stat rolls that appeared during PTR testing, so the live versions of these items now have fixed stat profiles. No rerolling, no RNG frustration.
Item Levels by Difficulty
| Difficulty | Item Level |
| Raid Finder | 259 |
| Normal | 272 |
| Heroic | 285 |
| Mythic | 298 |
Catalyst-Eligible Set Pieces
- Plate — Chest
- Mail — Legs
- Leather — Helm
- Cloth — Chest
Off-Pieces
- Plate and Leather — Belt
- Cloth and Mail — Boots
Accessories and Trinkets
- Neck — Critical Strike / Mastery profileRotmire’s Sporeheart can spawn protective toadstools that absorb incoming damage before bursting to deal Nature damage to nearby enemies.
- Ring — Haste / Mastery profile
- Trinket — Sporelord’s Mycelial Insignia grants a random secondary stat and Leech proc for 12 seconds when your spells or abilities nourish the surrounding mycelium.
Sporefall trinkets can still be upgraded normally through existing progression systems without invalidating earlier seasonal progress.

Cosmetics and Mount Rewards

Defeating Rotmire also rewards fungal-themed weapon models, armor transmogs, and additional new cosmetics.
Rotmire also rewards several collectible cosmetics, including the Madcap Redcap and the Mycomancer’s Hearthspore toys.
Additional rewards include the Luminous Rotshroom housing decor item and several fungal-themed transmogs and weapon appearances.
Players can also earn the Luminous Sporeglider mount by collecting four Delicious Sporesnacks, earned once per week per account from defeating Rotmire on any difficulty.
Bonus Roll Quest and Voidcore Rewards
Completing the quest Sporefall: Rotmire rewards a Void-Twisted Sporbit, which converts into a Nebulous Voidcore used in Midnight’s Voidforge bonus-roll system.
This makes Sporefall a valuable weekly stop even for players who no longer need direct gear upgrades, since the raid also contributes toward bonus-roll progression for other Season 1 activities.
Best Classes and Raid Composition for Rotmire

Best DPS Specs
Rotmire is an AoE-heavy fight where burst cleave defines performance. Classes with strong burst AoE and reliable defensives perform especially well in this single-boss raid.
Top-performing specs include:
- Warlock
- Devastation Evoker
- Frost Mage
All three bring exceptional burst cleave alongside strong defensive utility that translates directly into add management and Fungal Bloom cleanup.
Recommended Utility
Several utility abilities interact extremely well with Rotmire’s add-control mechanics. Mass displacement and knockback tools are especially valuable for moving adds into designated corpse piles without relying entirely on fixated players.
Highly Recommended Utility:
- Death Grip
- Gorefiend’s Grasp
- Ring of Peace
- Typhoon
- Ursol’s Vortex
- Stampeding Roar
- Anti-Magic Zone
- Darkness
- Rallying Cry
Tiger’s Lust and Blessing of Freedom are especially useful for players slowed by Festering Vines, allowing them to safely carry hazardous zones toward the outer walls before getting trapped near the center of the arena.
Key Utility Priority: Add movement and corpse positioning tools are often more valuable than raw throughput utility on Mythic Rotmire.
Healer Notes
Healing pressure ramps steadily throughout the fight due to Bursting Pustules stacks, with major danger spikes occurring during Fungal Bloom transitions and stray mushroom detonations.
Groups should establish a defensive cooldown rotation before the first pull, especially for Bloom windows and the later stages, where Pustule damage becomes difficult to stabilize.
Healers with strong instant-cast throughput and good mobility generally perform best during progression.

Cooldown Alignment

Getting cooldown timing right has a noticeable impact on both add management and Bursting Shroom cleanup.
2-Minute Cooldowns
These are the most valuable. Hold them on the pull and activate at roughly 16 seconds in. This aligns with the first Bursting Shrooms phase at 2:00 and keeps them naturally synced with every Fungal Bloom thereafter, which repeats on roughly a 2:16 cadence.
90-Second Cooldowns
Also strong. Activate on the first add wave at 24 seconds. They will be ready again in time for the 2:00 Bursting Shrooms phase and continue to line up with key moments as the fight goes on.
1-Minute Cooldowns
These are the awkward ones. Using them on pull means they miss both the 24-second and 74-second add waves and will not align with the critical 2:00 window. Where possible, hold them for the 24-second wave rather than burning them at the start of the pull.

Frequently Asked Questions
Sporefall is a new single-boss raid arriving in WoW Midnight with Patch 12.0.7: Revelations. Located in Harandar, the raid features a single encounter against the fungal giant Rotmire across Raid Finder, Normal, Heroic, and Mythic difficulties.
How do you defeat Rotmire in the Sporefall raid?
Rotmire revolves around add control, corpse positioning, interrupt coordination, and surviving Fungal Bloom phases. The key to victory is separating Shroomling and Fungling corpses while killing all adds before Fungal Bloom activates.
What is the best strategy for Mythic Rotmire?
Most progression guilds are expected to use the Stack-and-Ignore strategy. This approach centralizes corpse piles to simplify Bursting Shroom cleanup during Fungal Bloom while intentionally surviving a single distant mushroom explosion with raid defensives.
How does Mythic Flex work in Sporefall?
Mythic Sporefall supports flexible raid sizes between 15 and 25 players. Boss health, add counts, and mechanic scaling dynamically adjust to raid size, unlike traditional fixed 20-player Mythic raiding.
Can you run Mythic Sporefall with fewer than 20 players?
Yes. Mythic Sporefall can be completed with anywhere between 15 and 25 players. However, the raid does not scale below 15 players.
What happens during Fungal Bloom in the Rotmire fight?
At 100 energy, Rotmire casts Fungal Bloom, knocking players backward and applying a 16-second Nature damage-over-time effect to the entire raid. All defeated add corpses then reanimate into Bursting Shrooms that must be destroyed before they detonate.
What is Cross-Fertilization in Sporefall?
Cross-Fertilization is the primary Mythic-only wipe mechanic. If a Shroomling corpse dies within 10 yards of a Fungling corpse, they create a Bursting Doom Shroom that quickly wipes the raid.
How do Doom Shrooms spawn on Mythic difficulty?
Bursting Doom Shrooms appear when Shroomling and Fungling corpses are positioned too closely together. Proper corpse spacing and controlled add movement are the core challenge of Mythic Rotmire.
What are the best classes for the Rotmire encounter?
Specs with strong burst cleave and AoE perform best on Rotmire. Warlocks, Devastation Evokers, and Frost Mages are especially strong because they excel during add waves and Fungal Bloom cleanup.
How do you handle Shroomlings and Funglings in Mythic Sporefall?
Players fixated by Shroomlings and Funglings must drag their adds into designated kill zones before the raid begins AoE damage. The two add types must remain separated throughout the encounter to avoid Cross-Fertilization.
What loot drops from the Sporefall raid?
Sporefall rewards Sporefused gear, fungal-themed cosmetics, mounts, toys, transmogs, and high-item-level accessories. Mythic difficulty rewards gear up to item level 298.
How do you get the Luminous Sporeglider mount?
The Luminous Sporeglider mount is earned by collecting four Delicious Sporesnacks, which can be obtained once per week per account from defeating Rotmire on any difficulty.
What item level gear drops from Mythic Sporefall?
Mythic Sporefall rewards item level 298 gear, making it one of the highest-value gearing sources in Midnight Season 1.
What is Sporefused gear in WoW Midnight?
Sporefused gear is a special set of fungal-themed raid items that drop from Rotmire. The loot includes armor pieces, rings, necklaces, and trinkets with unique fungal-themed effects.
Does Sporefall award Ahead of the Curve and Cutting Edge?
Yes. Heroic Rotmire awards Ahead of the Curve, while Mythic Rotmire awards Cutting Edge during the current season.
What is the recommended raid composition for Rotmire?
Raid groups should prioritize burst cleave damage, strong add control, and utility abilities like Death Grip, Ring of Peace, Typhoon, and Gorefiend’s Grasp to manage corpse positioning safely.
How hard is the Sporefall raid compared to traditional raids?
Rotmire is more approachable than a traditional end-tier Mythic boss, but still punishes poor positioning heavily. Most wipes happen because of corpse overlap and add-management mistakes rather than strict DPS checks.
What does Fungal Frenzy do during the Rotmire encounter?
If any adds survive when Fungal Bloom begins, they gain Fungal Frenzy, increasing their damage by 100%, movement speed by 50%, and granting complete crowd-control immunity.
How do you avoid wipes during Fungal Bloom cleanup?
Successful Bloom cleanup depends on proper corpse placement before the intermission starts. Groups must quickly AoE down all Bursting Shrooms within the 16-second fuse timer while managing raid-wide damage.
Is Sporefall worth farming every week in WoW Midnight Season 1?
Yes. Sporefall offers high-item-level loot, collectible rewards, Voidcore progression through its weekly quest, and one of the easiest entry points into Mythic raiding thanks to Mythic Flex scaling.