Whether you’re tackling The Desert Perpetual for the first time or chasing flawless clears, this guide covers everything you need to know to master Destiny 2’s latest raid. Inside, you’ll find:
- A complete, encounter-by-encounter walkthrough from the Edge of Fate expansion
- Recommended loadouts, weapons, and team compositions for smooth clears
- Clear breakdowns of core mechanics like Temporality buffs, Chronons, and the Hourglass
- Detailed strategies for Agraios, Iatros, Epoptes, and the final battle with Koregos
- Tips for triggering and extending damage phases to maximize DPS
- A full loot table plus details on the Feat system and reward modifiers
- Post-clear farming strategies to speed up Spoils of Conquest and loot collection

You might be interested in:
| The Edge of Fate Destiny 2 Campaign Guide | Power Leveling in Destiny 2: Edge of Fate | Destiny 2 Armor 3.0 |
The Desert Perpetual is one of the most demanding raids in Destiny 2, debuting in the Edge of Fate expansion. Blending the punishing mechanics of modern encounters with the nonlinear exploration of classic raids, it challenges fireteams to think, adapt, and coordinate like never before. This guide walks you through every challenge and boss fight, giving you the tools and strategies to conquer the raid on normal difficulty and beyond.
Loadout Philosophy & General Advice

Before diving into specific encounters, establishing a solid loadout philosophy is key. The primary goal for most teams should be a comfortable two-phase clear for each boss.
- Ammunition Management: Many roles in this raid are mechanics-focused and do not involve constantly killing enemies, leading to a scarcity of Special and Heavy ammo. To counteract this, high-damage primary weapons are invaluable. Outbreak Perfected, particularly with its catalyst, is a standout option. It deals excellent damage, generates a large amount of super energy for burst-damage supers (like Gathering Storm or Golden Gun), and entirely negates ammo concerns. It is one of the top-tier meta weapons for this raid.
- Weapon Archetypes: While Outbreak is a reliable workhorse, other weapons have their place. For encounters requiring burst damage at close range, Legend of Acrius and Lord of Wolves are potent choices. For sustained damage at a distance, Machine Guns like Thunderlord are reliable, and a good sniper rifle with ammo-generating perks is excellent for consistent damage on distant targets.
- Team Composition: While any balanced team can succeed, a few key elements will smooth the experience. Warlocks with Well of Radiance are a cornerstone for survivability. Titans using Crest of Alpha Lupi for team healing or contributing significant damage with Thundercrash are excellent additions. Hunters provide strong boss damage with Golden Gun and exceptional add control with grapple-centric builds.

Core Raid Mechanics

Several key systems appear across multiple encounters. Understanding them is fundamental.
| Mechanic | Description | Key Details / Variants |
| Temporality Buffs | Timed debuffs that let players see and interact with unique mechanics | Cyclical, Constant, Absolute — if timer hits zero, player dies. Acquired by standing on Chronal Plates with correct number of players. |
| Chronons | Physical pickups from specific enemies, deposited by passing through a matching energy ring | Cobalt – Blue, ↑ icon; Cinnabar – Red, ↓ icon; Antimony – White, ↑↓ icon |
| Hourglass | Central device tied to progression and wipe prevention | Fill with 6 Chronons, then destroy the Vex diamond below it to advance phase or reset timer |
| Enrage Timer | Hard fail state for bosses | 3 DPS phases max — exceeding this triggers a wipe |
Raid Structure and Getting Started

The Desert Perpetual features a nonlinear structure for its first three bosses. This opening encounter section serves as your entry point. To begin, clear enemies in the central area, take the launcher up the large tower, and interact with one of the three half spheres that serve as podiums to choose your path:
- Left Podium/Plate: Leads to Epoptes, Lord of Quanta (The Hydra).
- Middle/Back Podium/Plate: Leads to Agraios, Inherent (The Hobgoblin).
- Right Podium/Plate: Leads to Iatros, Inward-Tuned (The Wyvern).
After selecting an encounter, a traversal section will lead to the arena. It is worth noting that the lore hints from the Edge of Fate campaign are scattered throughout these paths. Upon completing an encounter, the fireteam must return to this central hub, clear any spawned high-value targets to unlock the podiums again, and select the next challenge. Once all three are defeated, the final boss encounter against Koregos, the Worldline becomes available in the main area. This guide will present the encounters in one possible order, but feel free to tackle your chosen first encounter as you see fit.

Encounter 1: Agraios, Inherent (The Hobgoblin)
Objective: Charge a series of Vex coils and use a sequence of buffs to create and use a special grenade that reflects a boss’s sniper shot, stunning it for a damage phase.
Roles:
- Buff Holders (3 Players): Stand on the central plates to acquire Temporality buffs. They are responsible for reading mechanics and making callouts.
- Chronon Runners (3 Players): The non-buffed players who will collect and deposit Chronons into the coils.
- Alignment Runner (1 of the Buff Holders): The designated player who will run through the charged coils to create the stun grenade.
Execution: The Path to DPS

Phase 1: Powering the Coils
The encounter begins with three invincible Hobgoblin bosses sniping from elevated upper platforms. The first wave of enemies will be Goblins. Clear them to spawn a Hydra. Killing the Hydra will, in turn, spawn five Minotaurs. These Minotaurs drop Cobalt Chronons. The objective is to have players run through each of the five large, inactive coils in the center of the arena while holding a Chronon to power them on.
Phase 2: The Alignment Process
Once all five coils are powered, several powerful Wyverns will spawn. Eliminate them quickly. Following this, three players should stand on the Vex plates, including the center plate, to acquire their Cyclical, Absolute, or Constant Temporality buffs.
The encounter’s pace now determines the next step:
- If your team is fast, a player with a Temporality buff can find the Hobgoblin boss with the matching name, go beneath its platform, and interact with an object to gain the “Alignment Charge” buff.
- If your team is slower, one of the Hobgoblin bosses will begin targeting all players with a high-powered sniper rifle attack, inflicting the Variable Elimination debuff. In this case, the player whose Temporality buff matches the name of the sniping boss is forced to go to that boss’s platform and interact with the object to begin the alignment process.
Phase 3: Stabilizing and The Run
The two Buff Holders who are not aligned must now look at the five central coils. They will each see two coils glowing blue instead of red. They must communicate which coils they see (using a 1-5 system), effectively creating a list of four called out portals of energy that must be stabilized.
The three non-buffed Chronon Runners must now kill more Minotaurs for Chronons. They need to run through the four identified coils first, followed by the one remaining “odd one out” coil. Once all five coils are stabilized, the player with the Alignment Charge buff must run through all five in sequence, filling their buff’s meter.
Phase 4: The Reflection
With a full meter, the Alignment Runner’s grenade is replaced with a Refraction Field. To trigger DPS, another player must bait the Variable Elimination shot by standing in the open and counting down their timer aloud. When the timer hits its last 2-3 seconds, the Alignment Runner must deploy the Refraction Field on the targeted player. If timed correctly, the shot is reflected, and the boss teleports down to the ground to begin the damage phase.

Damage Phase and Extension
After a short delay, the boss becomes vulnerable. The Alignment Runner must immediately run the gauntlet of all five coils again to acquire another Refraction Field. After a period of damage, the boss will teleport back up to an elevated platform. The Alignment Runner must once again use their Refraction Field to reflect a sniper shot, bringing the boss back down and extending the damage phase. This can be done a second time for a total of three damage windows per cycle.
Encounter Tips:
- Solar and/or Sniper Damage Resist mods are highly recommended. A good sniper rifle can also be used to pressure the bosses on the upper platforms.
- Try not to kill the final Hydra until just before you are ready for the damage phase. Killing it too early will spawn Minotaurs that will cause significant flinch during DPS.
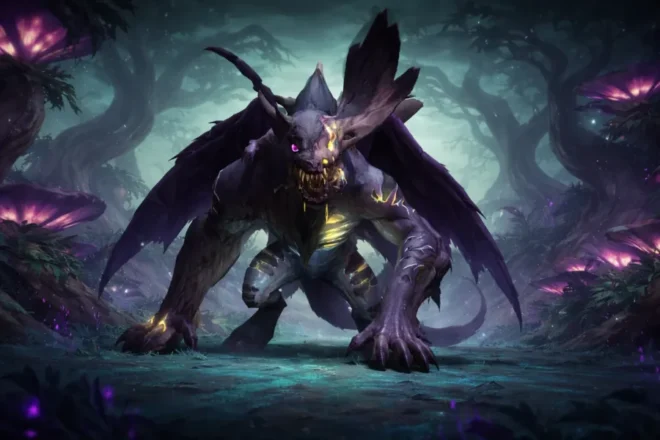
Encounter 2: Iatros, Inward-Tuned (The Wyvern)

Objective: Coordinate synchronized shots to build a series of platforms for a climber, all while managing a constantly draining hourglass to prevent a wipe. This is generally considered a simpler encounter, trading mechanical complexity for rhythmic precision.
Roles:
- Climber (1 Player): Ascends the platforms to initiate the damage phase.
- Platform Builders (3 Players): Each assigned to one of the three Vex columns, responsible for the timed shooting mechanic.
- Chronon Depositors (2 Players): Focus on killing Minotaurs and managing the hourglass timer.
Execution: The Path to DPS
Phase 1: Filling the Hourglass
The encounter starts with six Minotaurs spawning in the center. Kill them to collect Chronons. The floating hoop above the hourglass will glow a certain color, indicating where the damage phase will begin (White=Top, Blue=Middle, Red=Low). All six players must jump through the hoop with a Chronon to fill the hourglass.
Phase 2: The Diastole Climb
Once the hourglass is full, destroy the Vex diamond that appears beneath it. This begins the main phase and grants every player the “Diastole” buff. This is a timer that, upon reaching four stacks, launches players upward.
- To create platforms, the three Platform Builders must destroy the bottom Vex cube on their respective columns simultaneously. The timing is precise: the shot must land as the fourth stack of the Diastole buff fills. A successful break, sometimes indicated by two diamonds of light, spawns a set of platforms.
- The Climber must go to the Vex plate matching the encounter’s color (e.g., the lower platform for Red) and acquire the Absolute Temporality buff, allowing them to see and use the platforms.
- The Climber ascends the first set of platforms and interacts with a holographic box at the top, signaling they are ready for the next level. Let’s say the Climber is Player A and a specific Platform Builder is Player B. Player A’s signal is the cue for Player B and the other builders to prepare their next shot.
- The Platform Builders then shoot the middle boxes. This creates new platforms while deleting the old ones, so the Climber must be ready to jump. This process repeats for the final, top boxes. Interacting with the third hologram will begin the damage phase after a short delay.
Phase 3: Managing the Wipe Mechanic
The hourglass timer constantly depletes, and failed shots accelerate this. If the hourglass empties, a wipe timer (“Neomutation”) begins. Additional Minotaurs spawn throughout the encounter; Chronon Depositors must kill them and hold onto their Chronons to refill the hourglass as needed.

Damage Phase and Extension
The team should gather where the Climber’s platforms were located, as the boss will teleport there. During the damage phase, the Neomutation wipe timer will appear. A designated player must have a Chronon ready to quickly jump through the hoop to extend the DPS phase. This is a mandatory mechanic. Once the phase ends, the encounter resets.
Encounter Tips:
- The Climber will be harassed by Vex Imps. Invisibility, or a powerful ad-clear weapon like a rocket launcher, is useful for survival, as taking damage resets the interaction prompt.
- For platform-building callouts, use clear keywords (e.g., “Fire,” “Send”) to avoid confusion with the Diastole rhythm.
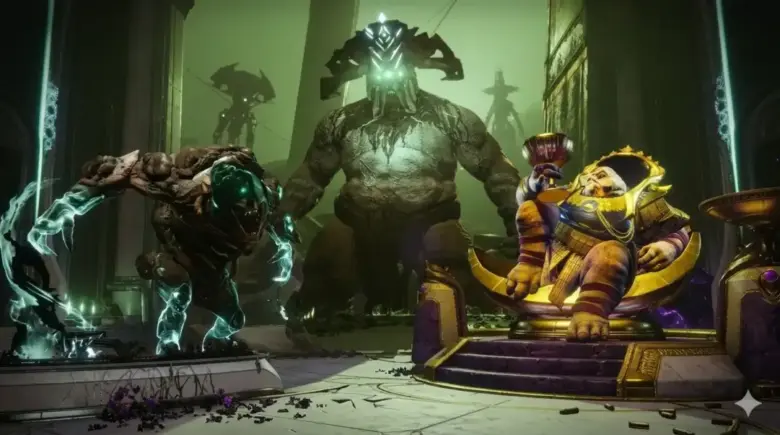
Encounter 3: Epoptes, Lord of Quanta (The Hydra)

Objective: A communication-heavy encounter where two players on opposite sides of the arena must relay information to break shields and enable a multi-stage damage phase.
Roles:
Split the fireteam into a Left Team and a Right Team. Each team will have:
- Inside Room Operator (1 Player): Enters a side room to perform the main callout mechanic.
- Outside Pillar Operator (1 Player): Stays in the central arena to handle the wipe-prevention mechanic.
- Ad Clear / Support (1 Player): Manages enemy spawns and can assist the Inside Room Operator if needed.

Execution: The Path to DPS
Phase 1: The Inside Room Mechanic
Clear ads, focusing on the Cyclopses to activate the Vex plates. The two Inside Room Operators must stand on these plates to get a Vex buff, then enter their respective side rooms. Inside, they must stand in the projected light beam from the Hydra’s shield to pause their buff timer. While in the light, an obelisk will show one of six eyes glowing. This is the callout for the player in the opposite room. This is a reciprocal process where the fireteam’s collective psyche must be in sync: call out what you see, and shoot what your partner calls out.
Phase 2: Wipe Prevention (“Blocks the Unforeseen”)
After about four eyes are destroyed on each side, this phase begins. The two Outside Pillar Operators must now get a Temporality buff. They need to stand in the light beam of the main boss in the central arena. This will allow them to see a pillar where two of three eyes will be glowing. They must call out the non-glowing eye.
- The Inside Room Operators must shoot the eye on an Apex Prism above their Hydra that matches the callout from their outside partner.
- Simultaneously, the Outside Pillar Operators must shoot the two glowing eyes on the opposite side of the pillar from their own.
Phase 3: Finishing the Shields
This will remove the Inside Room Operators’ buffs. They must exit, get re-buffed, and re-enter their rooms to finish destroying the remaining shield eyes, followed by the central flashlight eye. Once both side Hydras are destroyed, the two Inside Room Operators must break the final two shields on the main boss’s shield.
Damage Phase and Extension

The boss will almost immediately go immune and “pull two random teammates through time.”
- These two selected players must find the glowing flashlight eye on the boss’s shield visible to them and stand in the beam, rotating with it. The other four players can now damage the boss.
- The two selected players will then be presented with a new set of six eyes on the shield. They must destroy all six, then the central one, to extend the damage phase.
- This process repeats for two more rounds, with every player being selected once.
Encounter Tips:
- The right-side room is significantly more dangerous. It is advisable to have the Ad Clear player “babysit” the operator in this room.
- Players performing mechanics will have little time to generate ammo. Rotating roles can help, but a more consistent solution is using a high-damage primary like Outbreak Perfected.

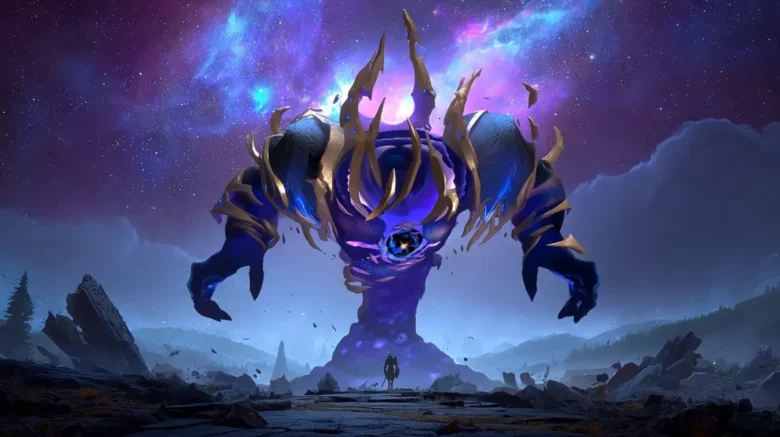
Final Encounter: Koregos, the Worldline

Objective: A complex culmination of all previous encounters, requiring the fireteam to utilize all the skills learned to manage buffs, mines, and a chaotic damage phase.
Roles (Based on Plate Buffs):
- Constant (Left Plate – 3 Players): Stun the boss and identify the color of floating mines.
- Absolute (Middle Plate – 1 Player): Identifies the hourglass color and is the only one who can break mines.
- Cyclical (Right Plate – 2 Players): Identifies if mines are “true” or “false” and are the only ones who can collect Chronons.
Execution: The Path to DPS
Phase 1: The Core Loop – Filling the Hourglass
- Get Buffs & Stun: Kill the three yellow bar Hydras on the plates to activate them, then get your Temporality buffs. The Constant players must then destroy the weapon turrets to stun the boss and spawn Temporal Oculus pools. This is the top priority as it spawns “Temporal Oculus” pools.
- Get Oculus: One Constant, one Absolute, and one Cyclical stand together in a lit Temporal Oculus pool (on a pillar) to gain the buff.
- The Information Chain: The Absolute player calls out the color of the central hourglass ring. The Constant player finds floating mines of that color and points them out. The Cyclical players verify if the indicated mine is “true” (glowing) or “false” (not glowing). The Constant and Cyclical players must have flawless communication here.
- Break and Dunk: If a mine is true, the Absolute player shoots it. A Cyclical player picks up the dropped Chronon. This process is repeated for a second Chronon. The two Cyclical players should then deposit their Chronons in rapid succession. The hourglass changes color after each deposit, so dunking them back-to-back is crucial for efficiency.
- This entire loop needs to be completed three times (for six total Chronons) to fill the hourglass, all before the “Digitization” wipe timer expires.
Phase 2: The Platform Alignment
Once the hourglass is full, platforms will lead up to the boss’s upper platform. Here, you must complete another mechanic four times. At four separate totems, there are three inward turned Vex cubes. The Cyclical and Constant players can each only see two. The Absolute player must identify the cube that is common to both their teammates’ vision and activate it. A simple way to do this is to have the Cyclical and Constant players stand where the missing Vex cube is from their perspective. The mechanical end of this phase is when all four totems are aligned, and it’s time to start DPS.

Damage Phase and Extension

After the platform mechanic is complete, the team can DPS the boss’s glowing red crit spots.
- Lasers: The arena will be swept by damaging lasers. Survival remains the top priority; move as a group to avoid them.
- DPS Extension: A hoop will appear, glowing a certain color. Three Chronons (one of each color) will also spawn at the platform’s corners. A designated player must find the Chronon that matches the hoop’s color and jump through it to extend the damage phase. This occurs three times.
Final Stand
After enough damage, the boss enters a final stand which serves as a final, intense DPS check. The lasers become more aggressive. The entire team must focus all firepower to finish the boss. Using a powerful exotic rocket launcher like the Whirling Ovation or other burst damage weapons is advised. Once it is defeated, immediately jump off the platform. Remaining on the platform when it explodes will cause a wipe. A successful clear may be met with a visual spectacle from the disintegrating Vex architecture.
Loot and The Raid Feat System
The Desert Perpetual loot table contains a full set of armor for each class and a collection of unique Desert Perpetual weapons, including the aforementioned exotic. After the first completion, the raid introduces a “Feat” system. This allows fireteams to launch the raid with custom modifiers active, such as limited revives or a full Contest Mode simulation, similar in concept to the challenge cards of the Prophecy dungeon. Playing with feats active increases the tier of gear rewards and grants five additional Spoils of Conquest per feat, per encounter. This progress towards raid mastery might be represented by an internal tracker, perhaps on a scale of 0/2–5 for basic feats up to 0/2–9 for full mastery.
Loot Table – The Desert Perpetual

The Desert Perpetual features a full set of Legendary weapons, a raid-exclusive Exotic, and the Collective Psyche armor sets. Each weapon drops with the raid’s Origin Trait, Frame of Reference — final blows grant increased damage, reload speed, and range, and the effect is “frozen” while the weapon is stowed.
Encounter Loot Sources
| Encounter | Weapon Drops | Armor Drops |
| Agraios, Inherent (The Hobgoblin) | Antedate (SMG)Lance Ephemeral (Sniper Rifle)Intercalary (Auto Rifle) | Collective Psyche Legs |
| Iatros, Inward-Tuned (The Wyvern) | Finite Maybe (Fusion Rifle)The When and Where (Rocket Launcher) | Collective Psyche ChestCollective Psyche Helmet |
| Epoptes, Lord of Quanta (The Hydra) | Opaque Hourglass (Combat Bow) | Collective Psyche ArmsCollective Psyche Class Item |
| Koregos, the Worldline (Final Boss) | Whirling Ovation (Rocket Launcher)Any Legendary Raid Weapon | Any Collective Psyche Armor Piece |

Legendary Weapons
| Weapon | Type | Element | Notable Perks |
| Antedate | SMG (Adaptive) | Arc | Rewind Rounds, Target Lock, Jolting Feedback |
| Finite Maybe | Fusion Rifle (Aggressive) | Solar | Incandescent, Controlled Burst, Desperate Measures |
| Opaque Hourglass | Combat Bow (High-Impact) | Arc | Vorpal Weapon, Master of Arms, Dragonfly |
| Intercalary | Auto Rifle (Adaptive) | Stasis | Headstone, Rewind Rounds, Target Lock |
| Lance Ephemeral | Sniper Rifle (Rapid-Fire) | Strand | Rewind Rounds, Bait and Switch, Killing Tally |
| The When and Where | Rocket Launcher (Adaptive) | Stasis | Chill Clip, Explosive Light, Bipod |
Raid Exotic

| Weapon | Type | Element | Exotic Perks |
| Whirling Ovation | Rocket Launcher | Strand | Coronal Culmination – Hold to charge; charged shots have delayed Solar payload. Anticipation – Charge speed increases over time, faster with other weapon damage. |
- Source: Final boss (Koregos).
- Drop chance increases with specific triumphs completed.
Armor – Collective Psyche
| Slot | Set Bonus (2-piece) | Set Bonus (4-piece) |
| All Classes: Helmet, Arms, Chest, Legs, Class Item | Accretion – Picking up ammo bricks grants stacking weapon swap/stow speed bonus until death. | Doppler Effect – Longer duration for Suspend, Unravel, Sever on enemies, and Radiant/Restoration on you. |
Exclusives & Collectibles
| Item | Type | Requirement |
| Atemporal | Seal | Complete all 10 Triumphs |
| Soloist Shell | Ghost Shell | Clear all encounters with active feats |
| Timeline’s Blade | Emblem | Complete Conquest mode |
| Third Unknown | Emblem | Normal raid completion |
| Mediant Flourish | Shader | Flawless raid completion |
| Envoy’s Tog | Shader | Complete “Map and Territory” quest |
Farming
- The Exotic (Whirling Ovation) is not farmable — once per character per week.
- All Legendary weapons and armor are farmable without limits by checkpoint swapping and repeating encounters.
Epiccarry: best wow boost and coaching services
Frequently Asked Questions
What is The Desert Perpetual raid in Destiny 2?
The Desert Perpetual is the endgame six-player raid introduced in Destiny 2’s Edge of Fate expansion. Set within a vast, Vex-controlled construct in the heart of the desert, the raid mixes nonlinear exploration, multi-phase boss mechanics, and tight DPS checks. It’s designed to push fireteams to their limits, blending old-school Destiny raid freedom with modern, mechanics-heavy design.
How do you start The Desert Perpetual raid?
To start, clear the initial wave of enemies in the central hub area — this is your staging ground for the entire raid. Use the Vex launcher to ascend the massive tower in the middle. At the top, you’ll find three half-sphere podiums. Interacting with a podium lets you choose one of three first encounters (Agraios, Iatros, or Epoptes). Each selection sends your fireteam down a unique traversal path before arriving in the boss arena.
Is The Desert Perpetual raid nonlinear?
Yes. You can take on Agraios, Iatros, and Epoptes in any order. This makes the early raid highly replayable and lets fireteams choose the boss they’re most comfortable with first. After clearing all three, the central hub unlocks access to the final encounter against Koregos, the Worldline.
What are Temporality buffs in The Desert Perpetual?
Temporality buffs — Cyclical, Constant, and Absolute — are time-limited debuffs that grant unique visual or interactive abilities during mechanics. For example, they might let you see which coils are charged, identify which Vex mines are real, or reveal hidden platforms. If your Temporality timer runs out before you use it, you instantly die.
What are Chronons and how do they work?
Chronons are physical pickups dropped by specific elite enemies, usually Minotaurs. Each comes in one of three colors — Cobalt (blue), Cinnabar (red), or Antimony (white) — and must be carried through a matching energy ring before being deposited into an objective, such as charging coils or refilling the hourglass. If carried for too long without depositing, the Chronon disappears.
How does the Hourglass mechanic work?
The Hourglass is essentially a raid-wide timer. Encounters require you to fill it by depositing six Chronons. Once full, a Vex diamond appears beneath it — destroying the diamond either progresses the encounter to the next phase or resets the wipe timer. If the Hourglass empties before it’s filled, a hard wipe mechanic (often called “Neomutation” or “Digitization”) begins.
What are the four encounters in The Desert Perpetual raid?
- Agraios, Inherent (Hobgoblin) – Power central coils, align them, and use a Refraction Field to reflect a sniper shot, stunning the boss for DPS.
- Iatros, Inward-Tuned (Wyvern) – Build timed platforms for a climber while keeping the Hourglass filled to avoid a wipe.
- Epoptes, Lord of Quanta (Hydra) – Exchange cross-room callouts to destroy shield eyes, prevent wipes, and expose the boss.
- Koregos, the Worldline (Final Boss) – A multi-phase culmination combining all prior mechanics with mine identification, platform puzzles, and intense DPS races.
What is the enrage timer in The Desert Perpetual?
Every boss in the raid allows a maximum of three damage phases before a wipe occurs. This means if you fail to deal enough damage across those phases, the boss will unleash an unavoidable wipe mechanic. Efficient mechanics execution and high DPS are non-negotiable.
What’s the best loadout for The Desert Perpetual raid?
Outbreak Perfected with its catalyst is one of the strongest primaries for this raid thanks to its ammo independence, consistent DPS, and super energy generation. Pair it with burst-damage specials like Legend of Acrius or Lord of Wolves for close-range encounters, or Thunderlord and precision snipers for sustained ranged damage. Class synergy is key — Well of Radiance Warlocks, Thundercrash Titans, and Golden Gun Hunters make for an ideal team composition.
How does the Agraios encounter work?
In Agraios, three players become Buff Holders with Temporality buffs, while three act as Chronon Runners. The goal is to power coils by depositing Chronons, then align them based on team callouts. Once aligned, one Buff Holder becomes the Alignment Runner, charges a Refraction Field, and uses it to reflect a sniper shot at the boss. This brings the boss down for DPS, which can be extended by repeating the reflection mechanic.
How does the Iatros encounter work?
Iatros is all about rhythm and coordination. Three Platform Builders shoot cubes at the exact moment the Diastole buff hits its fourth stack to spawn platforms for the Climber. The Climber, with the Absolute Temporality buff, uses these platforms to ascend, interacting with holograms at each stage. Meanwhile, two Chronon Depositors keep the Hourglass from running out. Missed shots or delays put the team at serious wipe risk.
How does the Epoptes encounter work?
In Epoptes, Inside Room Operators stand in beams to pause their timers and call out which “eye” they see glowing. Their partner on the opposite side must shoot that eye in their room, while Outside Pillar Operators manage wipe-prevention by identifying missing eyes on pillars. Once the side Hydras are down, all players focus on breaking the central boss’s shield to start DPS.
How does the Koregos final boss fight work?
Koregos mixes all raid mechanics with new twists. Constant players locate mines, Cyclical players determine if they’re real or fake, and the Absolute player destroys real mines and collects Chronons. After filling the Hourglass, the team completes a four-step platform alignment puzzle. DPS phases are complicated by sweeping laser walls, and extensions require dunking Chronons matching a hoop’s color.
What loot drops from The Desert Perpetual raid?
Each encounter drops specific Legendary weapons and armor from the Collective Psyche set, while the final boss also drops the Exotic Whirling Ovation rocket launcher. The loot table is fixed per encounter, and all raid weapons roll with the exclusive Frame of Reference Origin Trait.
What is the Origin Trait for Desert Perpetual weapons?
Frame of Reference grants increased damage, reload speed, and range after final blows. The perk is unique because the buff is “frozen in time” when you stow the weapon, letting you bank it for later use.
How does the Feat system work?
Once you’ve completed the raid, you unlock Feats — optional modifiers that make encounters harder, like reduced revives or Contest Mode scaling. Each active Feat increases loot quality and grants five extra Spoils of Conquest per encounter.
Can you farm The Desert Perpetual raid?
Yes — all Legendary drops and armor are infinitely farmable via checkpoint swapping. Clear up to your desired encounter on one character, swap to another that hasn’t completed the raid, join your team, wipe to claim the checkpoint, then repeat. The Exotic Whirling Ovation is limited to one drop per character per week.
How do you get the Whirling Ovation exotic rocket launcher?
It only drops from Koregos, the Worldline. Your chances improve by completing raid triumphs tied to performance and challenges, which increase your Exotic drop rate.
What are the exclusive collectibles from The Desert Perpetual?
These include the Atemporal Seal for completing all Triumphs, the Soloist Shell Ghost for clearing all encounters with active Feats, shaders like Mediant Flourish (Flawless clear), and emblems like Timeline’s Blade (Conquest Mode) and Third Unknown (normal clear).
What’s the hardest part of The Desert Perpetual raid?
Most teams agree Koregos’s final stand is the most demanding section. Lasers sweep the arena, Chronon mechanics must still be executed under fire, and the DPS check is unforgiving. Even veteran raiders can fail here without perfect team coordination.