Pantheon 2.0 is the main raid boss gauntlet of Destiny 2’s Monument of Triumph update, bringing back vaulted bosses, combined raid mechanics, new rewards, and Immortal title progress. Instead of learning one raid, your fireteam needs to handle several legacy mechanic sets in one endgame PvE challenge — from Calus symbols and Argos craniums to Gahlran’s Witch’s Blessing, King’s Fall brand swaps, Garden tethering, and Last Wish-style symbol calls.
In this guide, we’ll cover:
- How Pantheon 2.0 works in Monument of Triumph;
- Pantheon activities, difficulties, Feats, and weekly rotators;
- Calus Resplendent and Morgeth Surpassing boss mechanics;
- Every major wipe condition and DPS trigger;
- Recommended team roles and loadouts for first clears;
- Pantheon rewards, Spoils vendor rerolls, holofoil weapons, and armor ornaments;
- How Pantheon progress connects to the Immortal title and Monument rewards.

Pantheon 2.0 at a Glance
| Activity type | Raid boss gauntlet |
| Fireteam size | Up to 6 players |
| Matchmaking | No |
| Availability | Permanent |
| Launch | June 9, 2026 |
| Full gauntlet | June 13, 2026 |
| Weekly boss rotators | June 16, 2026 (two bosses at a time) |
| Rewards | New armor sets, reprised weapons, cosmetics, Triumphs, title, Spoils vendor rerolls |
Pantheon is accessed from the Raids and Dungeons node on the Destinations screen.

Pantheon 2.0 Activities and Difficulties

| Activity | Encounters | Main Mechanics |
| Calus Resplendent | Calus, Argos, Gahlran | Symbols, craniums, Witch’s Blessing |
| Morgeth Surpassing | War Priest + Totems, Confluxes + Consecrated Mind, Morgeth + Queenswalk | Brand swaps, tether/Voltaic Overflow, Taken Strength/relic symbols |
| Full Gauntlet | All Pantheon 2.0 encounters | Complete boss chain, highest coordination requirement |
| Weekly Rotators | Two featured bosses at a time | Focused farming and practice |
Difficulty tiers:
- Adventure: Power cap lifted, infinite revives, relaxed mechanic timing. Lower-tier rewards, but the safest way for new or returning guardians to learn vaulted mechanics before attempting a serious clear.
- Standard: Weekly Tier 5 drops per encounter without requiring Feats.
- Custom: Players activate Feats for guaranteed extra drops and Tier upgrades. Feat rewards are graded 0–5, with higher grades adding more Tier 4 and Tier 5 drops — these are farmable on encounter completion. Higher Feat grades are harder but significantly more rewarding.
Should You Start on Adventure Difficulty?
Start on Adventure if your team has never cleared Leviathan, Crown of Sorrow, or Garden mechanics; you are teaching multiple returning players; your callouts are inconsistent; or you want to practice Morgeth + Queenswalk before chasing Immortal title progress. It is not the best reward route, but it is the fastest practice mode available.
Pantheon 2.0 Rewards, Spoils Vendor, and Holofoil Weapons

Four Tenet vendors behind the Monument in the Tower Courtyard sell exclusive rewards for Legendary Marks earned through Monument Triumphs. Tenet of Bravery requires an initial purchase to unlock the other three.
| Tenet | Key Items |
| Bravery | New Skimmer, universal helmet ornament, Heir Apparent, Fafnir (exotic LFR) |
| Devotion | SRL cosmetics, Gryphon sparrow, Allstar Vector Skimmer |
| Sacrifice | Superblack shader, Earnable Holochip, finishers, ghost shells, ships |
| Death | Einherjar Coronet, random exotic armor ornaments, raid/dungeon cosmetics, Chatterwhite shader |
Gated highlights:
- Einherjar Coronet (flaming helmet): Requires 8 Triumphs in “Teamwork: Raid Challenges.”
- Immortal Legend Armor Ornament Set: Requires the Immortal title (8 raid + 6 dungeon challenges). Equipping chest and helmet together spawns a holographic crown on your character.
- Chatterwhite Shader: Complete a weekly Vault of Glass Deepsight quest from Hawthorne before purchasing.
Pantheon loot pool: Activities can reward reprised weapons from their source encounters, each carrying a unique Pantheon origin trait with new perks. Holofoil weapon variants are among the chase rewards tied to reprised Pantheon weapons. Pantheon includes a new armor set for each class, and reprised encounters can also reward ornaments from their original raid armor sets — Bungie confirms Leviathan ornaments, for example, can drop from Calus encounters if you have not already unlocked them.
After completing a multi-boss Pantheon activity, the final chest acts as a Spoils vendor — spend Spoils of Conquest to repurchase rerolls of items acquired during the run. This makes full clears especially valuable for weapon, ornament, and Tier 5 reward chasers.

Recommended Team Setup

Pantheon rewards assigned roles more than loose generalist play. These encounters stack mechanics across three separate raid kits simultaneously, so specialization pays off.
- 2 add-clear players: Calus, Gahlran, and the Totems encounter all have punishing adds waves. Dedicated add clear keeps wipe conditions from snowballing.
- 2 mechanic runners / relic players: Symbol calls, Brand Claimers, Taken Relics, and Vex Craniums all require fast, reliable execution. These are your highest-priority slots.
- 1 support / survivability player: Well of Radiance or an equivalent survivability anchor. DPS phases in Pantheon are long enough that healing uptime directly affects damage output.
- 1 flex player: Covers emergency swaps, handles Voltaic Overflow rotation in Consecrated Mind, and fills mechanic gaps when a runner dies. Needs fluency with every encounter’s symbols and callout language.
Best Weapons for Pantheon 2.0

There is no single meta loadout across all six encounters, but matching your weapon selection to each boss reduces avoidable wipes.
Calus (Leviathan): Burst-damage heavies — rockets, grenade launchers, or linear fusion rifles — for the timed plate DPS window. A fast-firing primary or SMG for Psion cleanup in the Shadow Realm is essential; slow kills are one of the most common team wipe causes in this encounter.
Argos (Eater of Worlds): Sustained precision damage works best, since DPS windows are opened by cranium shots rather than a fixed timer. Bring something you can fire accurately at range on moving crit spots. Defenders also need solid add clear, because cooking craniums increases enemy pressure on plates.
Gahlran (Crown of Sorrows): Close-to-mid-range burst for rapid hand stuns and focused boss damage. During DPS, the team must interrupt Gahlran by shooting his hands — weapons with fast target acquisition perform better here than slow-firing precisions.
Consecrated Mind (Garden of Salvation): The boss backs away during DPS, making this the one encounter where long-range precision weapons — snipers, linear fusion rifles, or other long-range precision options — are clearly the right call. A short-range loadout will lose significant damage to falloff.
Morgeth (Last Wish): Bring your highest-burst heavy for the damage phase, and save a portion of heavy ammo specifically for Final Stand. The post-jump-puzzle burn window is short.
Universal: One player running Divinity or another debuff exotic, where applicable, meaningfully increases team DPS across all long-phase encounters. Worth the opportunity cost on the support or flex slot.
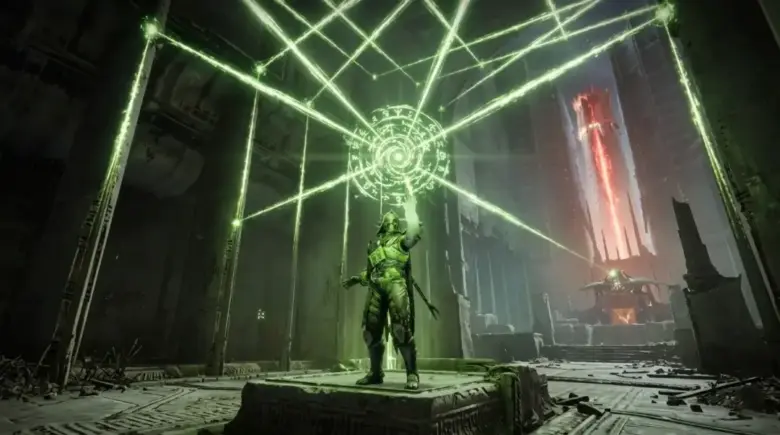
Calus Resplendent Boss Guide

Emperor Calus
- Objective: Complete four symbol rounds and build Force of Will stacks to unlock DPS.
- Team split: 3 Shadow Realm / 3 Throne Room.
- Main wipe condition: Projection Psions launching gravity grenades, failed symbol calls, or mis-timed shield breaks.
- DPS trigger: Shadow Realm team shoots Calus’s flaming skulls to build Force of Will stacks (~70–80), then Throne Room team breaks his shield to open damage.
- How it runs: Shoot the cup out of Calus’s hand to start. Clear adas until Calus claps — three players grab floating orbs to return to the Throne Room, three stay in the Shadow Realm. Each Shadow Realm player sees a symbol on Calus’s forehead (Cup, Sun, Axes, Dog) and calls it to the Throne Room team, who melee the Psion on the plate of the missing symbol to spawn the next barrier. Cross-cover your lane: left-side players shoot right-side enemies, right shoots left, center covers gaps. After four symbol rounds, the slide stops and the skull/shield phase begins.
- First-clear tip: Do not step on multiple DPS plates before coordinating — plates activate on contact and burn out over time. Accidental early activation shortens your damage window. At Final Stand, keep firing until the health bar fully depletes.
Argos, Planetary Core

- Objective: Match elemental craniums to Argos’s shield orbs to open DPS, then destroy crit spots to prevent the wipe.
- Team split: Three teams of two on Arc, Void, and Solar plates. One defends, one runs craniums.
- Main wipe condition: Failing to destroy two glowing crit spots after DPS ends.
- DPS trigger: All three teams fire matching cranium lasers at their orbs simultaneously.
- How it runs: Cook Vex Craniums at elemental plates, then fire at the matching floating orbs on Argos’s shield at the same time to open damage. Watch for homing nets trapping players — teammates shoot the net to free them. After DPS, jump to surrounding platforms and destroy two glowing crit spots on Argos’s head, arms, or back to stagger him. Note: cooking craniums increases enemy spawns — defenders should stay aggressive. Advanced teams can cook extra craniums before DPS to extend the damage window if a second shield break is available.
- First-clear tip: Suicide Harpies dive-bomb the group during DPS — one player should have eyes up for them while others focus on boss damage.
Gahlran, the Sorrow-Bearer

- Objective: Manage Witch’s Blessing timers across three pairs while clearing waves and breaking Deceptions.
- Team split: Three pairs of two, covering three sections. One player per pair starts with the Witch’s Blessing by stepping into the central pool.
- Main wipe condition: Blessing timer hitting zero, ignored crystals, or failed Deception positioning.
- DPS trigger: Break Deceptions in all three sections and shoot Gahlran’s hands when he raises them to slam down.
- How it runs: Witch’s Blessing runs on a 60-second timer. Refresh it by having a blessed and non-blessed player shoot a Void Vessel together — refresh at around 10–15 seconds remaining, not at the last moment. Assign each pair to their side’s vessel to prevent overlap. Each pair handles several enemy waves before Deceptions appear; some sides may see Ogres first, while one side gets a Deception earlier. Kill nearby Cursed Thrall before meleeing any Deception. Shielded crystals need a blessed and non-blessed player to break together — treat them as immediate priority targets; if they survive too long, expect a team wipe. Crystals often move in a predictable rotation, so call the next side after clearing yours. Pull the Deception close to the large Gahlran clone on the raised platform before triggering the slam — if the Deception is too far away, the cleaver can miss.
- DPS tips: Avoid standing directly in Gahlran’s melee range during DPS — use safe terrain or boxes if available. Blessed players must still watch their Blessing timers and refresh at a vessel if the phase runs long. A crystal can appear around the real-Gahlran reveal and DPS transition — do not tunnel vision on the boss during that window. When Gahlran raises his hands, call “Hands!” and shoot them immediately before resuming damage.
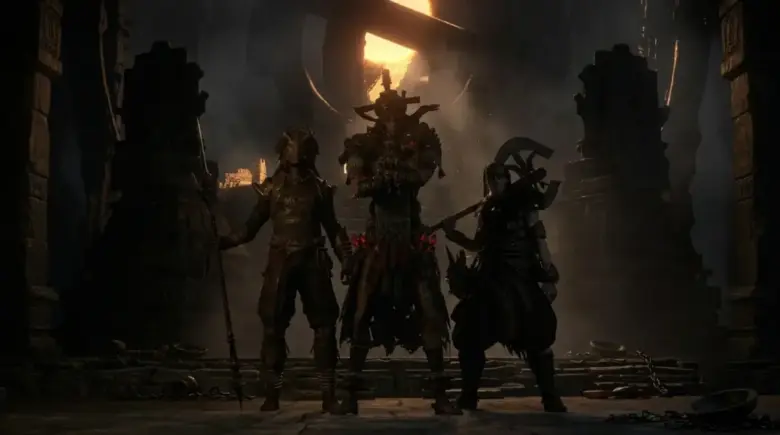
Morgeth Surpassing Boss Guide

War Priest + Annihilator Totems
- Objective: Keep both Annihilator Totems active, deposit Death Singer’s Power, then use Brand of the Initiate to damage War Priest.
- Team split: 2 players on totems, 4 in the central room.
- Main wipe condition: Brand of the Weaver timer expiring on a totem, or failing to stand in pillar shadow after DPS ends.
- DPS trigger: Fill the door meter by depositing Death Singer’s Power, then acquire Brand of the Initiate from the active plate.
- How it runs: Center players kill Wizards to spawn Taken Knights, pick up Brand Claimers, and run to steal the Brand from a totem holder before their timer expires. The relieved player returns to center, deposits Death Singer’s Power, and prepares for the next rotation. The Brand of the Initiate’s DPS aura lasts longer if more Death Singer’s Power was deposited before triggering it. When damage ends, stand in the shadow of the stone pillars to survive the arena-wide blast.
Confluxes + Consecrated Mind

- Objective: Defend five Confluxes, refresh Enlightened, collect and deposit Motes, then trigger Consecrated Mind DPS.
- Team split: Flexible coverage across five Conflux points, with a designated Mote runner.
- Main wipe condition: Vex sacrifices completing at Confluxes, or players carrying Voltaic Overflow stepping into spit a second time.
- DPS trigger: Runner deposits Motes in the center relay, team destroys red circles on Consecrated Mind.
- How it runs: Chain connections from Conflux nodes to gain the Enlightened buff. If a node is locked, kill the nearby Angelic Hydra first — the team cannot tether properly while Angelics are alive. Assign a Voltaic Overflow rotation before the pull: when the boss spits, one player steps in to reveal red circles and call out “inner” or “outer” — a different player handles the next spit. Assign at least two or three players ready for boss callouts. Do not slide through portals — it causes repeated teleport loops due to latency. Use snipers, linear fusion rifles, or other long-range precision weapons during DPS as the boss backs away.
Morgeth + Queenswalk

- Objective: Free trapped players via relic saves, complete symbol callouts in Queenswalk, and burst Morgeth down before his Taken Strength hits 100%.
- Team split: 3 left / 3 right.
- Main wipe condition: A player picking up a third Taken Strength stack (instant death), or Morgeth’s Strength meter hitting 100%.
- DPS trigger: Full team teleported to the Queenswalk arena after relic save cycles complete.
- How it runs: Collect Taken Strength to a maximum of two stacks — a third stack kills the player. When Morgeth traps a player, the relic holder shoots the two Acolyte Eyes above Morgeth to reveal symbols, then frees the trapped player — both teleport to the Queenswalk arena. Inside, the relic holder can see Last Wish symbols above Taken Strength nodes and must guide the freed player (who cannot see them) to collect the correct nodes. After the first save, another Taken Relic spawns in the Morgeth room — the next relic holder repeats the full cycle until the team is assembled. If you get trapped, stay calm: “I am contained, left side” is more useful than a panic callout.
- First-clear tip: During DPS, use the Taken Relic’s super on Morgeth to end the phase before his Strength meter hits 100%. Save at least some heavy ammo or burst Super energy for Final Stand — the post-jump-puzzle burn window is short. Players who arrive first at the final nodes should run to the furthest Taken Strength nodes, leaving the closer ones for late arrivals.
Need Help Clearing Pantheon 2.0?
Pantheon 2.0 is demanding because every boss encounter tests a different legacy raid skill — symbol calls, relic saves, buff swaps, long-range DPS, and wipe-timer control across six consecutive mechanics. If your group only needs specific Triumphs, Immortal title progress, Monument rewards, or Spoils vendor rerolls, our Destiny 2 Pantheon Boost can save time while helping you target Triumph progress, Monument rewards, Spoils vendor rerolls, reprised weapons, and holofoil drops.
Practical Tips for First Clears and LFG

Monument of Triumph is Destiny 2’s final planned live-service content update, so Pantheon 2.0 works best as a legacy challenge — a way to revisit old raid mechanics, finish title progress, and collect exclusive rewards before the game settles into its long-term state.
During high-traffic periods, avoid swapping your entire loadout mid-encounter. Server lag during these windows can glitch weapon behavior and cost you a DPS phase. Build a solid, neutral build before entering and stick with it.
Fireteams mixing veterans and returning players should consider Adventure difficulty for at least one practice run before moving to Standard. The consistent use of assigned roles — not just flexible callouts — is what separates clean first clears from repeated failed attempts.
Epiccarry: best wow boost and coaching services
Frequently Asked Questions
What is Pantheon 2.0 in Destiny 2 Monument of Triumph?
Pantheon 2.0 is a permanent raid boss gauntlet added with Destiny 2’s Monument of Triumph update. It brings back vaulted raid bosses, combines old raid mechanics into new encounters, and gives players a new endgame PvE challenge tied to Triumphs, rewards, Spoils vendor rerolls, and Immortal title progress.
How do you start Pantheon 2.0 in Destiny 2?
You can start Pantheon 2.0 from the Raids and Dungeons node on the Destinations screen. From there, select the available Pantheon activity, choose the difficulty tier, and launch with your fireteam.
Is Pantheon 2.0 permanent or a limited-time activity?
Pantheon 2.0 is permanent. Unlike the original Pantheon event from 2024, the Monument of Triumph version is not a short seasonal activity. Players can return to it for practice, rewards, weekly boss rotations, and full-gauntlet clears.
What bosses are in Pantheon 2.0?
Pantheon 2.0 launched with two main activities: Calus Resplendent and Morgeth Surpassing. Calus Resplendent includes Calus, Argos, and Gahlran. Morgeth Surpassing includes War Priest + Annihilator Totems, Confluxes + Consecrated Mind, and Morgeth + Queen’s Walk. The full gauntlet combines all Pantheon 2.0 encounters.
What is Calus Resplendent in Destiny 2 Pantheon 2.0?
Calus Resplendent is one of the launch Pantheon 2.0 activities. It focuses on three vaulted raid encounters: Emperor Calus from Leviathan, Argos from Eater of Worlds, and Gahlran from Crown of Sorrow. The activity tests symbol callouts, Vex Cranium coordination, Witch’s Blessing management, add clear, and timed DPS phases.
What is Morgeth Surpassing in Destiny 2 Pantheon 2.0?
Morgeth Surpassing is a combined-mechanic Pantheon activity built around more complex encounter hybrids. It includes War Priest with Annihilator Totems, Conflux defense with Consecrated Mind, and Morgeth mixed with Queen’s Walk mechanics. This activity is heavier on role swaps, relic usage, tethering, and symbol communication.
When does the full Pantheon 2.0 gauntlet unlock?
The full Pantheon 2.0 gauntlet unlocks on June 13, 2026. This third activity combines all Pantheon 2.0 encounters into one longer raid boss chain and is intended for teams ready to handle every mechanic set back-to-back.
How do weekly Pantheon boss rotators work?
Weekly Pantheon boss rotators begin on June 16, 2026, with two bosses featured at a time. These rotators give players a focused way to practice specific encounters, farm rewards, and work on mechanics without running the full gauntlet every time.
What is Adventure difficulty in Pantheon 2.0?
Adventure difficulty is the easiest Pantheon 2.0 option. It lifts the Power cap, allows infinite revives, and relaxes some mechanic timing. The rewards are lower than Standard or Custom, but it is the best place for new, returning, or teaching-focused fireteams to learn vaulted raid mechanics safely.
What is the difference between Adventure, Standard, and Custom difficulty in Pantheon 2.0?
Adventure is the practice-focused mode with infinite revives and relaxed pressure. Standard gives weekly Tier 5 drops per encounter without requiring Feats. Custom lets players activate Feats for guaranteed extra drops and Tier upgrades, with higher Feat grades offering better rewards but harder encounter conditions.
What are Feats in Destiny 2 Pantheon 2.0?
Feats are optional challenge modifiers used in Custom difficulty. They increase the difficulty of an encounter in exchange for better reward grades. Feat rewards are graded from 0 to 5, with higher grades adding more Tier 4 and Tier 5 drops that can be farmed on encounter completion.
What rewards can you get from Pantheon 2.0?
Pantheon 2.0 rewards include new class armor sets, reprised raid weapons, unique Pantheon origin traits, holofoil weapon variants, cosmetics, armor ornaments, Triumph progress, title progress, and Spoils vendor rerolls. It also connects with Monument of Triumph rewards sold by the Tenet vendors in the Tower Courtyard.
How does the Pantheon Spoils vendor work?
After completing a multi-boss Pantheon activity, the final chest acts as a Spoils vendor. Players can spend Spoils of Conquest to repurchase rerolls of items they acquired during the run. This makes full clears especially useful for chasing weapon rolls, holofoil variants, armor ornaments, and Tier 5 rewards.
Can Pantheon 2.0 drop holofoil weapons?
Yes, holofoil weapon variants are among the chase rewards tied to reprised Pantheon weapons. These are cosmetic-style rare weapon variants, making them valuable for collectors and players farming specific Pantheon drops.
Can Pantheon 2.0 drop original raid armor ornaments?
Yes, reprised Pantheon encounters can reward ornaments from their original raid armor sets if you have not already unlocked them. For example, Calus encounters can reward Leviathan-themed ornaments, giving returning and newer players another reason to farm vaulted boss content.
How do you unlock the Immortal title in Monument of Triumph?
The Immortal title is unlocked by completing Monument of Triumph endgame challenges, including 8 raid challenges and 6 dungeon challenges. It is also required for the Immortal Legend Armor Ornament Set, which adds a holographic crown effect when both the chest and helmet ornaments are equipped together.
What are the best weapons for Pantheon 2.0?
The best weapons depend on the encounter. Calus favors burst heavies like rockets, grenade launchers, or linear fusion rifles. Argos rewards sustained precision damage. Gahlran needs close-to-mid-range burst and fast hand damage. Consecrated Mind favors long-range precision weapons. Morgeth requires strong burst damage and saved heavy ammo for Final Stand.
What is the best team setup for Pantheon 2.0?
A reliable Pantheon 2.0 team should use assigned roles rather than loose generalist play. A strong setup is 2 add-clear players, 2 mechanic runners or relic players, 1 support or survivability player, and 1 flex player who can cover emergency swaps, Voltaic Overflow rotation, callouts, and failed mechanics.
How do you beat Calus, Argos, and Gahlran in Pantheon 2.0?
To beat Calus, split between Shadow Realm and Throne Room, call symbols, melee the missing-symbol Psion, build Force of Will stacks, and rotate between DPS plates. To beat Argos, cook Vex Craniums, match their elements to shield orbs, open DPS, and destroy crit spots after damage. To beat Gahlran, manage Witch’s Blessing, destroy crystals, position Deceptions near Gahlran clones, shoot hands, and refresh buffs during DPS.
How do you beat War Priest, Consecrated Mind, and Morgeth in Pantheon 2.0?
For War Priest + Totems, keep both Annihilator Totems active, rotate Brand Claimers, deposit Death Singer’s Power, and survive the blast behind pillars. For Confluxes + Consecrated Mind, defend five Confluxes, refresh Enlightened, rotate Voltaic Overflow, deposit Motes, and use long-range DPS. For Morgeth + Queen’s Walk, manage Taken Strength stacks, use relic saves, complete symbol callouts inside Queen’s Walk, and end DPS before Morgeth reaches 100% Strength.