
Updated November 4, 2026 for TBC Anniversary.
TBC tier sets cover Tier 4, Tier 5 and Tier 6 for all nine classes, with separate role versions for Druids, Paladins, Priests, Shamans and Warriors. You obtain them by exchanging boss tokens for armor; their set bonuses activate at two and four equipped pieces.
How to get TBC tier sets
- Target the boss that drops the token for your missing armor slot.
- Collect the token belonging to your class group.
- Redeem it at the appropriate vendor, selecting your role's version where your class has a choice.
Tier 4 and Tier 5 each cover head, shoulders, chest, hands and legs. Tier 6 starts with those same slots from Mount Hyjal and Black Temple; Sunwell adds wrists, waist and feet.
Anniversary raid availability
| Content | Anniversary release |
| Tier 4 raids | Karazhan, Gruul's Lair and Magtheridon's Lair opened February 19, 2026. |
| Tier 5 raids | The Eye and Serpentshrine Cavern arrived with Overlords of Outland on May 14, 2026. |
| Initial Tier 6 raids | Mount Hyjal and Black Temple arrived August 27, 2026. |
| Gods of Zul'Aman | This update arrived October 22, 2026. |
| Sunwell extension | Sunwell Plateau belongs to the subsequent Fury of the Sunwell phase, scheduled for autumn 2026. |
Treat the Sunwell rows below as later-phase planning rather than part of the initial Tier 6 collection.
Tier 4 token bosses

Magtheridon. Image: Blizzard.
| Slot | Boss | Raid |
| Hands | The Curator | Karazhan. |
| Head | Prince Malchezaar | Karazhan. |
| Shoulders | High King Maulgar | Gruul's Lair. |
| Legs | Gruul the Dragonkiller | Gruul's Lair. |
| Chest | Magtheridon | Magtheridon's Lair. |
Tier 5 token bosses
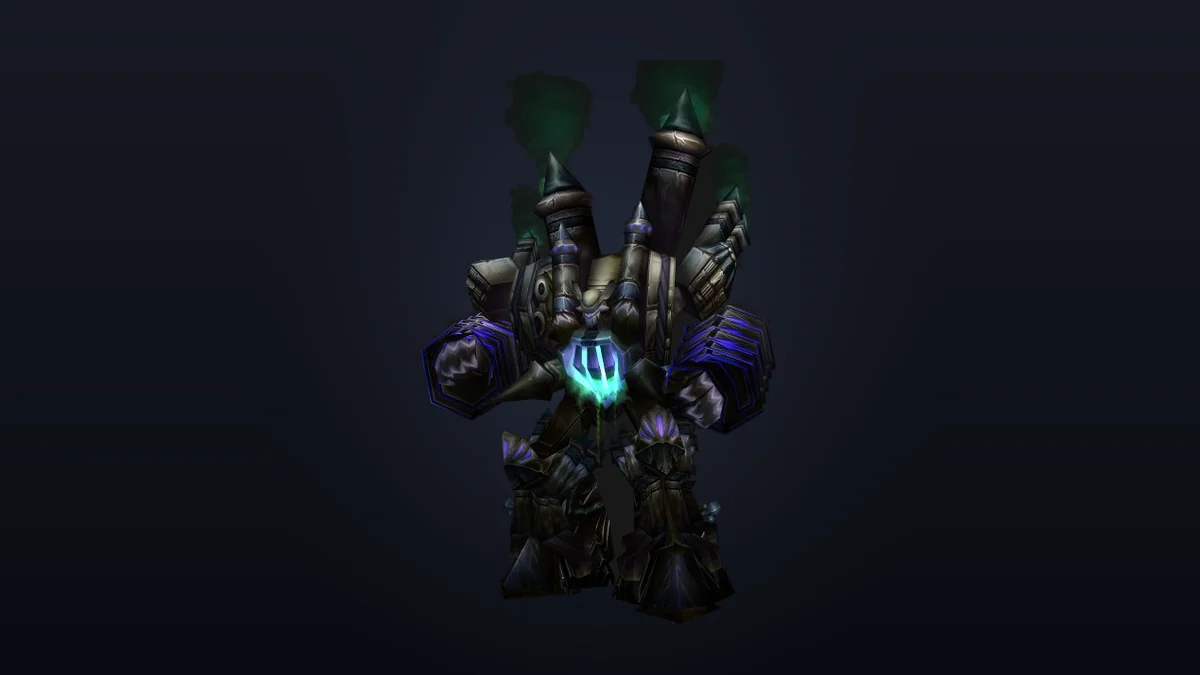
Void Reaver. Image: Blizzard.
| Slot | Boss | Raid |
| Hands | Leotheras the Blind | Serpentshrine Cavern. |
| Legs | Fathom-Lord Karathress | Serpentshrine Cavern. |
| Head | Lady Vashj | Serpentshrine Cavern. |
| Shoulders | Void Reaver | The Eye, Tempest Keep. |
| Chest | Kael'thas Sunstrider | The Eye, Tempest Keep. |
Tier 6 token bosses
| Slot | Boss | Raid |
| Hands | Azgalor | Mount Hyjal. |
| Head | Archimonde | Mount Hyjal. |
| Shoulders | Mother Shahraz | Black Temple. |
| Legs | Illidari Council | Black Temple. |
| Chest | Illidan Stormrage | Black Temple. |
| Wrists, later phase | Kalecgos/Sathrovarr encounter | Sunwell Plateau. |
| Waist, later phase | Brutallus or Eredar Twins | Sunwell Plateau. |
| Feet, later phase | Felmyst or Eredar Twins | Sunwell Plateau. |
Use the Mount Hyjal raid guide to prepare for its encounters and the Black Temple raid guide when planning that clear.

Archimonde. Image: wow.fandom.com.
For the later Sunwell slots, the first three encounters offer more focused token targets than Grand Warlock Alythess and Lady Sacrolash, whose broader loot pool makes a particular token less reliable to pursue.
TBC Anniversary Raids Boosting can take the raid-clearing work off your hands.
Token groups and exchange vendors
Tier 4 and Tier 5 class groups
| Classes | Tier 4 token family | Tier 5 token family |
| Paladin, Rogue, Shaman | Fallen Champion. | Vanquished Champion. |
| Druid, Priest, Warrior | Fallen Defender. | Vanquished Defender. |
| Hunter, Mage, Warlock | Fallen Hero. | Vanquished Hero. |
Tier 6 class groups
| Token family | Classes |
| Forgotten Conqueror | Paladin, Priest and Warlock. |
| Forgotten Vanquisher | Druid, Mage and Rogue. |
| Forgotten Protector | Hunter, Shaman and Warrior. |
Where to redeem tokens
| Tokens | Vendor | Location |
| Tier 4, Aldor | Asuur | Shattrath, Aldor's Rise, 23.6, 32.6. |
| Tier 4, Scryer | Arodis Sunblade | Shattrath, Scryer's Tier, 43.6, 90.6. |
| Tier 5, Aldor | Kelara | Shattrath, Aldor's Rise, 24.8, 27.0. |
| Tier 5, Scryer | Veynna Dawnstar | Shattrath, Scryer's Tier, 44.8, 91.6. |
| Tier 6, head/hands/legs/shoulders/chest | Tydormu | Inside the Battle for Mount Hyjal instance. |
| Tier 6, later Sunwell wrists/waist/feet | Tydormu or Theremis (on a boat in Sun's Reach Harbor, Isle of Quel'Danas) |
Paladin tier sets
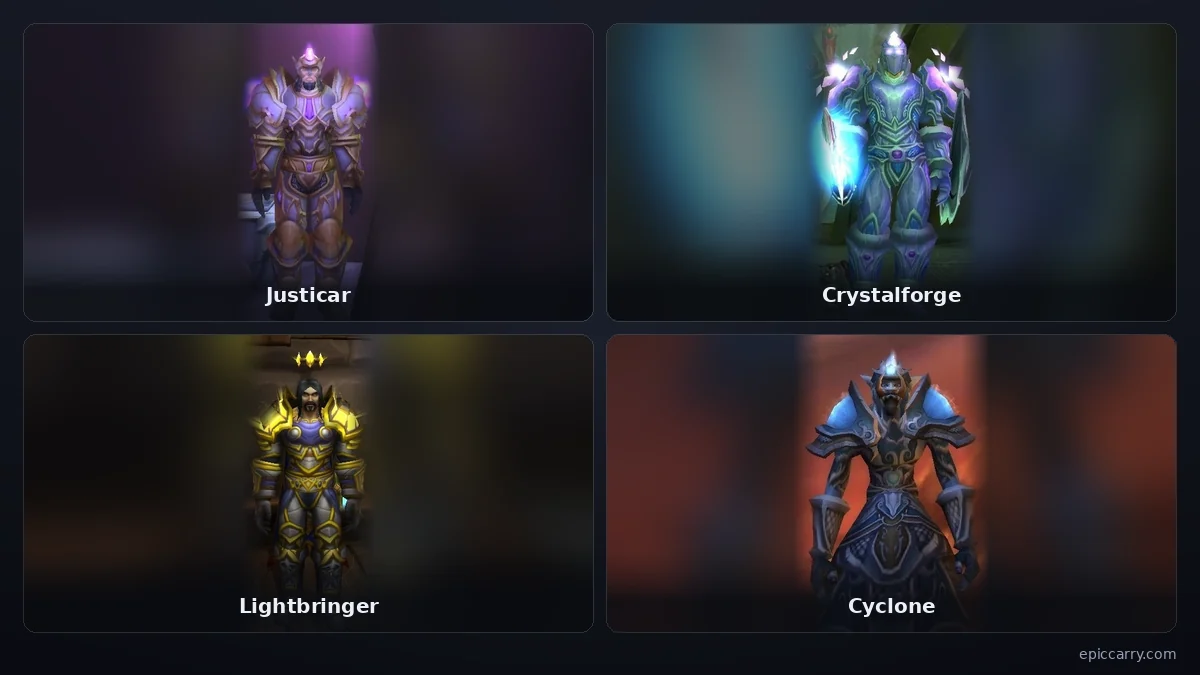
Justicar, Crystalforge, Lightbringer and Cyclone. Images: Wowhead.
Tier 4: Justicar

Justicar. Image: Wowhead.
| Role and set | Two-piece bonus | Four-piece bonus |
| Holy — Justicar Raiment | Judgement of Light heals for 20 more. | Divine Favor's cooldown decreases by 15 seconds. |
| Protection — Justicar Armor | Seal of Righteousness, Seal of Vengeance and Seal of Blood deal 10% more damage. | Holy Shield deals 5% more damage. |
| Retribution — Justicar Battlegear | Judgement of the Crusader's damage bonus increases by 15%. | Judgement of Command deals 10% more damage. |
Tier 5: Crystalforge

Crystalforge. Image: Wowhead.
| Role and set | Two-piece bonus | Four-piece bonus |
| Holy — Crystalforge Raiment | Casting Judgement restores 50 mana to your party members. | Flash of Light or Holy Light critical heals shorten your next Holy Light cast by 0.5 seconds; the effect lasts 10 seconds and can trigger only once per minute. |
| Protection — Crystalforge Armor | Retribution Aura's damage increases. | Casting Holy Shield grants 100 additional block value against one attack within six seconds. |
| Retribution — Crystalforge Battlegear | Judgements cost 35 less mana. | Judgement can trigger a heal of 244–257 on nearby party members. |
Tier 6: Lightbringer

Lightbringer. Image: Wowhead.
| Role and set | Two-piece bonus | Four-piece bonus |
| Holy — Lightbringer Raiment | Flash of Light's spell power increases by 5%. | Holy Light gains 5% critical strike chance. |
| Protection — Lightbringer Armor | Spiritual Attunement returns 10% more mana. | Consecration deals 10% more damage. |
| Retribution — Lightbringer Battlegear | Melee attacks have a 20% chance to restore 50 mana. | Hammer of Wrath deals 10% more damage. |

Shaman tier sets
Tier 4: Cyclone

Cyclone. Image: Wowhead.
| Role and set | Two-piece bonus | Four-piece bonus |
| Elemental — Cyclone Regalia | Wrath of Air Totem supplies 20 additional spell damage. | Offensive spell critical strikes can reduce your next spell's base mana cost by 270. |
| Enhancement — Cyclone Harness | Strength of Earth Totem supplies 12 additional Strength. | Stormstrike deals 30 additional damage per weapon. |
| Restoration — Cyclone Raiment | Mana Spring Totem restores three additional mana every two seconds. | Nature's Swiftness has a 24-second shorter cooldown. |
Tier 5: Cataclysm
| Role and set | Two-piece bonus | Four-piece bonus |
| Elemental — Cataclysm Regalia | Offensive spell casts can reduce your next Lesser Healing Wave's mana cost by 380. | Lightning Bolt critical strikes can restore 120 mana. |
| Enhancement — Cataclysm Harness | Melee attacks can shorten your next Lesser Healing Wave cast. | Flurry provides 5% additional haste. |
| Restoration — Cataclysm Raiment | Lesser Healing Wave costs 5% less mana. | Critical heals from Healing Wave, Lesser Healing Wave or Chain Heal can shorten your next Healing Wave cast; the effect lasts 10 seconds and can occur once per minute. |
Tier 6: Skyshatter
| Role and set | Two-piece bonus | Four-piece bonus |
| Elemental — Skyshatter Regalia | Keeping air, earth, fire and water totems active together grants 15 mana per five seconds, 35 spell critical strike rating and up to 45 spell damage. | Lightning Bolt deals 5% more damage. |
| Enhancement — Skyshatter Harness | Earth Shock, Flame Shock and Frost Shock cost 10% less mana. | Stormstrike grants 70 attack power for 12 seconds. |
| Restoration — Skyshatter Raiment | Chain Heal costs 10% less mana. | Chain Heal heals for 5% more. |
Warrior tier sets
Tier 4: Warbringer
Warbringer Battlegear is the Arms/Fury version, while Warbringer Armor serves Protection. The DPS set requires level 70 and comprises Warbringer Battle-Helm, Warbringer Breastplate, Warbringer Gauntlets, Warbringer Greaves and Warbringer Shoulderplates.
The DPS two-piece lowers Whirlwind's rage cost; its four-piece grants extra rage when your attacks are dodged or parried.
For Protection, the two-piece bonus lets parries trigger Blade Turning, a shield that absorbs 200 damage and lasts 15 seconds. At four pieces, Revenge makes your next damaging ability deal 10% more damage.
Tier 5: Destroyer
| Role and set | Two-piece bonus | Four-piece bonus |
| Arms/Fury — Destroyer Battlegear | Overpower grants 100 attack power for five seconds. | Bloodthirst and Mortal Strike each cost five less rage. |
| Protection — Destroyer Armor | Shield Block grants 100 extra block value against one attack within six seconds. | Taking a hit can grant 200 haste rating for 10 seconds. |
Tier 6: Onslaught
| Role and set | Two-piece bonus | Four-piece bonus |
| Arms/Fury — Onslaught Battlegear | Execute costs three less rage. | Mortal Strike and Bloodthirst deal 5% more damage. |
| Protection — Onslaught Armor | Commanding Shout grants 170 additional health. | Shield Slam deals 10% more damage. |
Hunter tier sets
| Tier and set | Two-piece bonus | Four-piece bonus |
| Tier 4 — Demon Stalker Armor | Feign Death is 5% less likely to be resisted. | Multi-Shot costs 10% less mana. |
| Tier 5 — Rift Stalker Armor | Your damage heals your pet for 15% of the amount dealt. | Steady Shot gains 5% critical strike chance. |
| Tier 6 — Gronnstalker's Armor | Aspect of the Viper returns additional mana equal to 5% of your Intellect. | Steady Shot deals 10% more damage. |
Druid tier sets
Tier 4: Malorne
| Role and set | Two-piece bonus | Four-piece bonus |
| Balance — Malorne Regalia | Damaging spells can restore up to 120 mana. | Innervate's cooldown decreases by 48 seconds. |
| Feral — Malorne Harness | Bear or Dire Bear melee attacks can grant extra rage; Cat Form melee attacks can grant 20 extra energy. | Bear Form gains 1,400 armor; Cat Form gains 30 Strength. |
| Restoration — Malorne Raiment | Beneficial spells can restore up to 120 mana. | Nature's Swiftness has a 24-second shorter cooldown. |
Malorne Harness requires level 70 and consists of Breastplate of Malorne, Gauntlets of Malorne, Greaves of Malorne, Mantle of Malorne and Stag-Helm of Malorne.
Tier 5: Nordrassil
| Role and set | Two-piece bonus | Four-piece bonus |
| Balance — Nordrassil Regalia | After leaving Moonkin Form, your next Regrowth costs 450 less mana. | Starfire deals 10% more damage to a target affected by Moonfire or Insect Swarm. |
| Feral — Nordrassil Harness | Leaving Bear Form, Dire Bear Form or Cat Form shortens your next Regrowth cast. | Shred deals 75 additional damage, and Lacerate adds 15 damage per application. |
| Restoration — Nordrassil Raiment | Regrowth lasts six seconds longer. | Lifebloom's final heal increases by 150. |
T4 versus T5 divides Feral players: some keep the earlier two- or four-piece bonuses, while others prefer the later set's stats.
Tier 6: Thunderheart
| Role and set | Two-piece bonus | Four-piece bonus |
| Balance — Thunderheart Regalia | Moonfire lasts three seconds longer. | Starfire gains 5% critical strike chance. |
| Feral — Thunderheart Harness | Mangle in Cat Form costs five less energy; its Bear Form threat increases by 15%. | Rip, Swipe and Ferocious Bite deal 15% more damage. |
| Restoration — Thunderheart Raiment | Swiftmend's cooldown decreases by two seconds. | Healing Touch heals for 5% more. |
Warlock tier sets
| Tier and set | Two-piece bonus | Four-piece bonus |
| Tier 4 — Voidheart Raiment | Shadow spells can grant 135 additional Shadow damage for 15 seconds; Fire spells can grant the corresponding Fire damage bonus. | Corruption and Immolate last three seconds longer. |
| Tier 5 — Corruptor Raiment | Your damage heals your pet for 15% of the amount dealt. | Shadow Bolt hits increase Corruption's damage by 10%; Incinerate hits increase Immolate's damage by 10%. |
| Tier 6 — Malefic Raiment | Each periodic damage tick from Corruption or Immolate restores 70 health. | Shadow Bolt and Incinerate deal 6% more damage. |
Priest tier sets
Tier 4: Incarnate
Priest Tier 4 has a healing set and a damage set.
The healing two-piece adds a heal over nine seconds to Prayer of Healing. With the four-piece bonus, Flash Heal reduces the cast time of your next Greater Heal within 15 seconds by 0.1 seconds per stack, up to five stacks.
For the damage set, two pieces give Shadowfiend 75 additional Stamina and extend its duration by three seconds; four pieces increase Mind Flay and Smite damage by 5%.
Tier 5: Avatar
| Role and set | Two-piece bonus | Four-piece bonus |
| Healing — Avatar Raiment | Greater Heal restores 100 mana to you when it brings its target to full health. | Renew lasts three seconds longer. |
| Damage — Avatar Regalia | Offensive spell casts can make your next spell cost 150 less mana. | Shadow Word: Pain damage can grant 100 spell power to your next spell cast within 15 seconds. |
The Avatar Regalia proc applies to the next cast only and can benefit a healing spell.
Tier 6: Absolution
| Role and set | Two-piece bonus | Four-piece bonus |
| Holy/Discipline — Vestments of Absolution | Prayer of Healing costs 10% less mana. | Greater Heal heals for 5% more. |
| Shadow — Absolution Regalia | Shadow Word: Pain lasts three seconds longer. | Mind Blast deals 10% more damage. |
Mage tier sets
| Tier and set | Two-piece bonus | Four-piece bonus |
| Tier 4 — Aldor Regalia | Gives a 100% chance to avoid interruption caused by damage while casting Fireball or Frostbolt. | Presence of Mind's cooldown decreases by 24 seconds, Blast Wave's by four seconds and Ice Block's by 40 seconds. |
| Tier 5 — Tirisfal Regalia | Arcane Blast deals 20% more damage and costs 20% more mana. | Spell critical strikes grant you up to 70 spell damage for six seconds. |
| Tier 6 — Tempest Regalia | Evocation lasts two seconds longer. | Fireball, Frostbolt and Arcane Missiles deal 5% more damage. |
Rogue tier sets
| Tier and set | Two-piece bonus | Four-piece bonus |
| Tier 4 — Netherblade | Slice and Dice lasts three seconds longer. | Finishing moves have a 15% chance to generate a combo point. |
| Tier 5 — Deathmantle | Eviscerate and Envenom deal 40 additional damage per combo point. | Attacks can make your next finishing move consume no energy. |
| Tier 6 — Slayer's Armor | Slice and Dice provides 5% additional haste. | Backstab, Sinister Strike, Mutilate and Hemorrhage deal 6% more damage. |
Choosing which set bonuses to keep
Compare the complete replacement with your current gear before spending a token. Consider which effects support the spells you actually use, how often you can trigger them and what you give up to keep them.
Plan around the bonus you want to preserve rather than treating a complete set as the goal.
Set-bonus strength disappoints some players, who regard many bonuses as poor reasons to chase tier gear and single out Paladin and Shaman bonuses as especially weak.