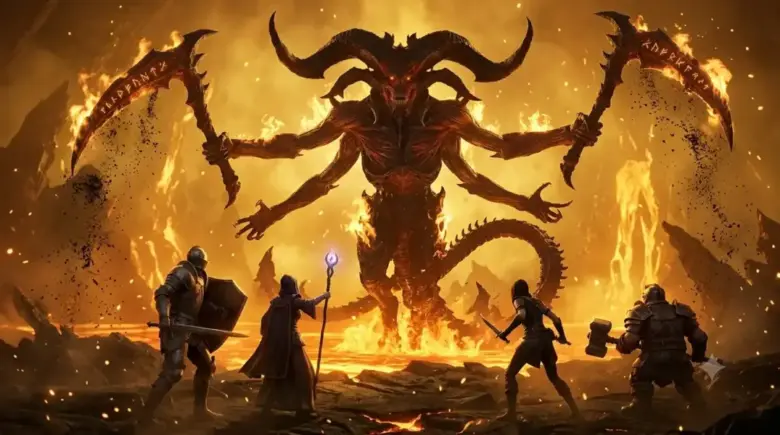
Alright, Necro enthusiasts and aspiring Masters of the Bloodwave! Get ready to ditch the personal baggage and dive deep into a truly monstrous Season 8 Necromancer build. We’re taking the raw power of the Bloodwave and cranking it up to frankly absurd levels. Forget “my experience” or “my character did this” – we’re talking theoretical devastation, hypothetical billions, and a path to dominating Sanctuary’s toughest challenges. This guide distills the wisdom into actionable steps, keeping things light, easy to digest, and packed with juicy details.
The Bloodwave Beast: Why It Rules Season 8

Right now, the Bloodwave build seems to be the top dog for Necromancers pushing the deepest layers of the Pit. It reportedly boasts incredibly high damage output combined with surprising survivability. While Blood Spear might look cool, for serious high-end content, Bloodwave appears to hold the crown. With enough optimization, this build has reportedly cleared Pit level 107 and beyond, flattened all Torment 4 bosses both solo and in groups (often as the main damage dealer), and achieved damage ticks potentially reaching 10 to 15 billion on packs and even single targets once cooldown reduction allows for wave spamming. This build offers the potential to clear all of Season 8’s relevant content and push significantly beyond. This guide builds upon foundational Bloodwave knowledge, so having a grasp of the basics is helpful! Players pushing ultra-high Pit tiers usually combine optimized gearing with efficient Diablo 4 Paragon leveling boost farming to maximize Blood Wave scaling.
Let’s talk about some key insights and how the build evolves:
Evolving Strategies: What Worked, What’s Different
Boss Powers & Bal’s Ibeams:

There was some theorycrafting around using Bal’s Ibeams for a massive Overpower multiplier linked to stealth. The idea was to activate the main boss power, gain 2 seconds of stealth, and then break it with a Bloodwave to get a huge damage boost. The catch? This requires avoiding any other action that breaks stealth before the Bloodwave. This becomes incredibly clunky when needing to regularly apply Blight, spam Corpse Explosion for buffs, or cast Decrepify. While technically functional for pure one-button spamming, it sacrifices significant damage potential from other abilities. It seems this approach, while potentially offering a massive multiplier, is simply too awkward for practical, high-performance play right now. It’s hoped this mechanic might see a rework in the future.
Flesh Eater Node Update (Season 8 Magic!):

This legendary Paragon node got a sweet upgrade. Previously, consuming five corpses granted a big damage multiplier for six seconds, and you’d have to wait for the buff to end before starting to stack again. Season 8 changed that! Now, you can overlap the buffs. While the current Flesh Eater buff is active, you can keep consuming corpses to build stacks for the next buff. This means achieving near-permanent uptime on this massive damage multiplier is now possible, especially when mobbing (where corpses are abundant) or in single-target scenarios with sufficient Lucky Hit to generate corpses consistently. The key takeaway? Spamming Corpse Explosion is more important than ever to keep this damage boost rolling!
Out with Tendrils, In with More Power:

A notable shift in the build is the potential removal of Corpse Tendrils. This skill was previously crucial, often paired with the Blighted aspect, because pulling enemies together generated Blood Orbs, which in turn helped reduce Blood Wave’s cooldown when cooldown reduction (CDR) wasn’t fully optimized. Once enough CDR is obtained through gear and other sources, Corpse Tendrils (and the associated Blood Orb generation for CDR) can be dropped. However, hold onto Corpse Tendrils until your CDR is sufficient!
Grasping Veins Farewell, Vehement Hello:

With Corpse Tendrils out of the picture, the Aspect of Grasping Veins (which provided Critical Strike Chance and Crit Damage based on Tendrils) can also be replaced. Once the build achieves a high baseline Critical Strike Chance (reportedly hitting 76% standing still, plus more from passives like Inspiring Leader in combat), Grasping Veins becomes less necessary. This frees up an aspect slot! A strong candidate for this newly available slot is the Aspect of Vehement. Casting an Ultimate Skill (like Blood Wave!) grants a large damage multiplier for 8 seconds and adds two ranks to Ultimate Skills. While the skill ranks boost Blood Wave damage, the really vital part is the further reduction to Blood Wave Cooldown, pushing towards that glorious spamming state. This aspect offers a fantastic trade-off once sufficient Critical Strike Chance and CDR are secured elsewhere.
The Ultimate Damage Cap – Know Your Limits!

There’s a cap on the “Damage while Healthy” and “Damage while Fortified” bonus that contributes to Blood Wave’s ultimate damage multiplier (Wrathmus’s Vigor key passive). This cap sits at 200%. It’s essential to reach this cap for maximum Damage Dealt, but stacking these stats beyond 200% becomes entirely wasteful. This means identifying when the cap is hit (perhaps through stats on gear like weapons or gloves) and adjusting affixes or Paragon points to gain other beneficial stats instead.
Each cast of Blood Wave feels like you briefly steal Mother’s favor, channeling her wrath into a screen-clearing tide of destruction. With these shifts in strategy and understanding, the build aims for higher Pit tiers and even faster boss destruction! Hardcore Necromancer players farming top-tier boss loot often optimize their setup through Diablo 4 boss carry packs for faster farming cycles and gearing.
| Core Mechanic / Stat | Why It’s Important | How the Build Achieves It (Overview) |
|---|---|---|
| Blood Wave Cooldown | Enables spamming the core damage skill for sustained massive damage. | Cooldown Reduction affixes (gear, jewelry), Abhorrent Decrepify procs, Vehement Aspect, Blood Orbs. |
| Overpower Damage | The primary multiplier for Blood Wave’s raw damage output. | 2H Mace inherent, Paragon boards (Bloodbath, Dominate glyph), Gear affixes, Max Life scaling. |
| Critical Strike Chance | Increases overall damage consistency and boosts damage from Crit Damage stats/glyphs. | Gear affixes, Paragon boards (Essence), Inspiring Leader passive. |
| Lucky Hit | Generates crucial corpses for Flesh Eater, procs Abhorrent Decrepify for CDR, and supports other effects. | Tempering on gear, Gear affixes. |
| Flesh Eater (Corpse Cons.) | Provides a massive, near-permanent damage multiplier from consuming corpses. | Paragon legendary node, Spamming Blighted Corpse Explosion, Hued Flesh passive, Lucky Hit corpse gen. |
| Damage While Fortified/Healthy | Scales Blood Wave’s damage via Wrathmus’s Vigor Key Passive (up to 200% cap). | Gear affixes, Paragon nodes. |
| Darkness Skill Synergy | Benefits from Reaper’s Pursuit passive, Gloom/Terror passives, and shadow glyphs/aspects. | Taking Reap, Decompose, Sever, Blight, Blighted Corpse Explosion, Ultimate Shadow Aspect. |
| Cursed Enemies | Amplifies damage via Frailty Paragon node and Amplify/Eliminator glyphs. | Decrepify skill, Cursed Aura Aspect. |
| Blood Orbs | Provides Blood Wave Cooldown reduction (Fastblood Aspect) and damage bonus (Blood Begets Blood Paragon). | Transfusion passive, Corpses with Corpse Tendrils (early), certain Elite/Boss mechanics. |
| Tidal Aspect | Mandatory aspect that makes Blood Wave cast a second time, adding additional waves that deal 40-100% of the original wave’s normal damage. | Placing the Tidal Aspect on the 2-Handed Weapon. |

The In-Depth Breakdown: Blood Wave Necromancer Skills, Passives, and Beyond

Let’s walk through the specifics, highlighting key choices:
Skills & Skill Tree:
- This build primarily utilizes Blood Wave as its main damage source, although several Core Skills and Basic skills are taken for passive benefits.
- Maximize Blood Wave all the way to Supreme. It’s the core of the build and provides Massive AoE Damage!
- Allocate one point each into Reap and Decompose. Even though they aren’t actively used for damage, having them on the skill bar benefits from the Reaper’s Pursuit passive, granting movement speed and damage increases per Darkness skill.
- One point in Sever serves the same purpose – it’s a “dead skill” for passive benefits from Reaper’s Pursuit.
- Max out Hued Flesh for the chance to spawn corpses, which are crucial for Flesh Eater and other mechanics.
- Fully max out Fuel by Death for the damage buff from consuming corpses via Corpse Explosion.
- Allocate points into Necrotic Fortitude and Titan’s Fall.
- Spiked Armor points depend on gearing. If armor cap (around 9,230 at level 100 against level 200 enemies) is reached easily through gear (like armor on chests/boots), fewer or zero points are needed here initially. If more armor is required, points can be added back into Spiked Armor.
- Other Key Passives: Maximize Death’s Embrace, Precision Decay, and Amplify Damage.
- On the Blood skill side: Take three points each in Coalesced Blood and Tides of Blood. One point in Drain Vitality and Transfusion is sufficient early on to generate Fortify (for damage while fortified) and occasional Blood Orbs (for Blood Wave CDR), though these can potentially be dropped later if no longer needed.
Curses Inflicted: Debuffing for Damage & Utility

- Decrepify is taken all the way to Abhorrent for the vital cooldown reduction procs. This not only reduces cooldowns but ensures enemies vulnerable for longer, boosting the effectiveness of critical burst windows from Blood Wave.
- Blight is actively used. Maximize it and take the Supernatural Blight upgrade for a significant damage increase when applying the debuff.
Deal Shadow Damage:

- Shadow Passives: Max out Reaper’s Pursuit (as mentioned!), Gloom, and Terror.
- Corpse Explosion is another crucial active Darkness skill. Take the Blighted upgrade to turn it into a Darkness skill (again, for Reaper’s Pursuit and scaling) and spam it constantly to trigger buffs like Fuel by Death.
- Fully level Necrotic Carapace for more Fortify generation.
- Ultimate Tree: Max out Memento Mori for huge damage boosts from minion sacrifices. One point in Standalone is typically sufficient if defenses are otherwise solid, but more can be invested if needed.
- Allocate remaining points into Inspiring Leader for Crit Strike Chance.
- Key Passive: Wrathmus’s Vigor is the cornerstone for Blood Wave’s massive scaling with Damage while Healthy/Fortified.
Book of the Dead (Sacrifices):

The sacrifices remain consistent for maximizing damage.
- Skeletal Warriors (Reapers): Sacrifice for increased Shadow damage (benefits Blighted Corpse Explosion and the Shadow-converted Blood Wave).
- Skeletal Mages (Bone): Sacrifice for increased Overpower damage (essential for Blood Wave).
- Iron Golem: Sacrifice for increased Critical Strike Damage.

Paragon Boards: Mapping the Power Surge

The Paragon board setup is crucial for amplifying this build’s strengths. A potential path involves activating key legendary nodes and glyphs for maximum effect with available points (e.g., 192 points from Level 100 and Renown). The goal is to get the core benefits online, then fill in supporting rare nodes. Getting bonuses like Resistance to All Elements, Damage while Healthy/Fortified (up to the 200% cap), and Overpower damage from the boards helps free up gear affixes. Overpower damage scales separately and stacks on top of normal damage dealt, enabling Blood Wave to spike far beyond baseline outputs, especially against fortified targets.
First Board: Essence:
Focus on the Essence legendary node for increased Critical Strikes to enemies that aren’t healthy. Points are allocated efficiently to reach and maximize this node. This board also connects to the first extension.
Second Board: Bloodbath:

This board provides a massive increase to Overpowered damage via its legendary node. Path through Suffused Resilience to the node, then take Thick Hide on the way to the glyph socket.
- Glyph: Abyssal is typically placed here due to the abundance of Dexterity nodes on this board, offering good scaling for the glyph’s effect (often +Shadow Damage and Damage Reduction vs. Elites). This board also offers nodes for Damage while Fortified/Healthy and Overpower damage.
Third Board: Blood Begets Blood:

Focus on the legendary node here, increasing damage as Blood Orbs are picked up. The board is often rotated to pick up useful rare nodes like Recuperate and Vampiric on the path.
- Glyph: Sacrificial is often placed here as it’s a good location for getting the necessary Intelligence for the glyph’s bonus (often +Damage to Minions / Damage vs. Enemies Afflicted by your damage over time). While the Intelligence requirement is met here, some optimization might be possible with more Maximum Life points to grab even better nodes. Extra nodes like Blood Damage and Invigorated are taken if points allow.
Fourth Board: Flesh Eater:

This is where the Season 8 star, Flesh Eater (consuming 5 corpses for a massive 6-second damage bonus), resides. The board is ideally rotated to rush straight to this legendary node.
- Glyph: Eliminator or Amplify are key considerations here.
- Amplify: Makes all curses inflicted enemies (which should be everything) take 10% [x] increased damage, scaling further (to 15% [x]) with the legendary bonus. This provides a consistent damage boost against all enemy types.
- Eliminator: Provides 10% [x] increased damage against Elites, scaling further (to 18% [x] total) with the legendary bonus. This is highly effective specifically against Elites.
- Decision Time: Amplify is generally better for open world content and general boss killing due to affecting all enemies. Eliminator pulls ahead in high-tier Pit pushing where Elites are the primary bottleneck. Choose based on your current focus.
Points are allocated to reach the glyph socket and surrounding Intelligence nodes. Other desirable nodes on this board (like Erudite for resistance or more Maximum Life) might be picked up later with more points.
Fifth Board: Frailty:

This board’s legendary node curses inflicted enemies, making them take 10% [x] increased damage from you and minions, scaling up to 40% [x] over time. This is excellent for longer fights, like high-tier pits and bosses.
- Glyph: Dominate is a crucial glyph for Overpower damage, ideally placed where Willpower is easily accessible. It significantly boosts Overpower damage and is often an early investment target on the paragon board by prioritizing Willpower nodes.
After activating the core legendary nodes and glyphs, the remaining points are used to fill in missing Rare nodes and generally “buff up” the boards, maximizing the benefits from connected nodes within the glyph radii. This general path represents the min-maxing route to getting the core setup online.

Gear Guide: Legendary Aspects, Uniques, and Affixes

Getting the right gear with the right aspects and affixes is where the build really takes off. Players pushing the hardest Season 8 content often combine advanced gearing strategies with Diablo 4 gold farming services to reroll affixes, masterwork gear, and optimize every stat.
Understanding Legendary Aspects: The Build Enablers
Legendary Aspects are key to how this build functions, providing unique powers that interact with your skills and stats. Pay close attention to which aspect goes on which gear slot for maximum effect (e.g., 2-Handed Weapons boost Aspect power).
Aspect Spotlight: Cursed Aura (Quality of Life Curse)
The Cursed Aura aspect is a fantastic Quality of Life choice for automatically cursing enemies, creating a sinister effect as a dark aura surrounds targets to ensure they’re debuffed before your next Blood Wave. It creates a dark aura surroundsing targets. It’s typically found on the Helmet or Boots.
Important Stat: Lucky Hit for Consistency
Lucky Hit is a valuable stat in this build, contributing to the consistent generation of corpses for Flesh Eater (especially in single-target fights) and helping trigger the Blood Wave Cooldown reduction from Abhorrent Decrepify. Look for it on Tempering options and potentially gear affixes.
Desired Affixes: Intelligence & Maximum Life (And More!)

While specific needs vary per slot, generally prioritizing Intelligence for skill damage and Maximum Life (which synergizes with Overpower damage scaling) is crucial. Other key affixes include Armor, Resistances, Critical Strike Chance, Overpower Damage, and Cooldown Reduction.
| Gear Slot | Recommended Aspect(s) / Unique(s) | Key Affix Priorities (General) | Tempering Priorities | Masterworking Targets |
|---|---|---|---|---|
| Helmet | Cursed Aura (QoL) OR Airidah’s Inexorable Will (Mythic Unique) | Total Armor, All Resistances, Intelligence, Maximum Life | Total Armor, Lucky Hit Chance | Armor, Crit Strike Chance, Lucky Hit Chance |
| Chest Armor | Hardened Bones (DR) OR Wandering Death’s Ticking Chestpiece (Boss Power) | Intelligence, Maximum Life, Total Armor, All Resistances | Total Armor, Lucky Hit Chance | Armor, Maximum Life |
| Gloves | Ultimate Shadow (Blood Wave -> Shadow) OR Cesm’s Legacy (Unique – Build Enabling!) | Intelligence, Max Life, Critical Strike Chance, Attack Speed | Offensive (Damage while Fortified early, then Overpower Damage), Lucky Hit Chance | Crit Strike Chance (to reach 100%) |
| Pants | Tibault’s Will (Unique) OR Yen’s Blessing (Boss Power – Temp Resistance) OR Utility Aspect (Flex) | Total Armor, Maximum Life, Damage Reduction, DR While Fortified | Total Armor, Chance for Blood Wave to deal Double Damage | Blood Wave Cooldown Reduction (early), Chance for Double Damage (long-term 100%) |
| Boots | Cursed Aura (if not on Helm), Movement Speed Aspect, or Utility Aspect (Flex) | Movement Speed, Total Armor, All Resistances, Intelligence | Total Armor, Movement Speed, Lucky Hit Chance | Total Armor, All Resistances |
| Weapon (2H Mace) | Tidal Aspect (MANDATORY!) | Intelligence, Maximum Life, Overpower Damage, Damage while Fortified (early) | Damage while Fortified (early), Double Damage Chance (mid), Offensive Skill Rank (end) | Chance for Double Damage (early 100%), Offensive Skill Rank |
| Amulet | Sacrificial Aspect (High % Roll) OR Fastblood Aspect (CDR) | Maximum Life, Intelligence, Cooldown Reduction, Move Speed, Offensive Passive Rank | Ultimate Skill Increases (CDR), Blood Overpower Damage | Offensive Passive Rank (Tides of Blood!), Blood Overpower Damage |
| Rings (x2) | Fastblood Aspect (CDR if needed) AND Vehement Brawler Aspect | Intelligence, Maximum Life, Critical Strike Chance, Overpower Damage | Ultimate Skill Cooldown Reduction, Blood Overpower Damage | Crit Strike Chance, Ultimate Cooldown Reduction, Blood Overpower Damage |
Helmet:

Aspect: Cursed Aura is a solid Quality of Life choice for automatically cursing enemies.
Unique Option: Airidah’s Inexorable Will (Mythic Unique). If obtained, this replaces Cursed Aura. It provides massive damage bonuses, Lucky Hit Chance, and Critical Strike Chance. The trade-off is Decrepify will need to be manually cast again.
Affixes (if not using Airidah): Aim for Total Armor, All Resistances, Intelligence, and Max Life.
Tempering: Total Armor and Lucky Hit Chance are strong choices. Armor helps reach the cap, while Lucky Hit supports CDR and other procs.
Masterworking: Prioritize Armor initially, then potentially Crit Strike Chance or Lucky Hit Chance.
Chest Armor:

Wandering Death’s Ticking Chestpiece
Aspect: Hardened Bones for Damage Reduction is a reliable defensive choice.
Unique Option: Wandering Death’s Ticking Chestpiece (Boss Power). This is a strong offensive choice, especially effective in Pit clears. It replaces the previous plan involving Bal’s Ibeams due to its consistent performance.
Affixes (if not using Wandering Death): Intelligence, Maximum Life, Total Armor. All Resistance is also highly desirable.
Tempering: Total Armor and Lucky Hit Chance.
Masterworking: Prioritize Armor or Max Life as needed for survivability.

Gloves:

Exceptional Gloves of Ultimate Shadow
Aspect: Ultimate Shadow is essential to convert Blood Wave to a Darkness skill for scaling with Shadow passives and glyphs. Once converted to a Darkness skill, Blood Wave synergizes with your passives and glyphs while obliterating all surrounding targets in its path.
Unique Option: Cesm’s Legacy. This unique is build-defining! It makes Blood Wave echo, pulls enemies together, and adds significant damage. Obtaining this is a major power spike.
Affixes (if not using Cesm’s or looking for ideal non-unique affixes): Intelligence, Attack Speed (good for speed farming/utility), and Crit Strike Chance. Ideally, aim for Intel, Max Life, Crit Strike Chance.
Tempering: An offensive slot. Damage while Fortified is good for hitting the 200% cap early. Once the cap is reached via Paragon/other gear, swap this to Overpower Damage or another offensive stat. Lucky Hit Chance is another strong choice.
Masterworking: Target Crit Strike Chance to reach 100%.
Pants:

Unique: Tibault’s Will are a fantastic generic defensive/resource unique if obtained.
Unique: Yen’s Blessing (Boss Power) can be a temporary “stat stick” for All Resistance if needed to cap resistances, but ideally, resistances are gained elsewhere to free up this slot.
Affixes (if not using Uniques): Total Armor, Max Life, Damage Reduction, Damage Reduction while Fortified/Healthy.
Tempering: Total Armor and Chance for Blood Wave to deal Double Damage. Aim to get this double damage chance as high as possible (ideally 100% from pants) to free up the weapon tempering slot.
Masterworking: Prioritize Blood Wave Cooldown Reduction if struggling early, otherwise target Chance for Double Damage.
Boots:
Aspect: Potentially Cursed Aura here if not using Airidah’s on the helm, allowing another offensive aspect on the helm.
Unique: Can be a slot for a resistance/armor unique like Yen’s Blessing if replacing it on the pants or if no other unique boots are beneficial.
Affixes: Movement Speed, Total Armor, All Resistances, Intelligence, Max Life.
Tempering: Total Armor and Movement Speed or Lucky Hit Chance.
Masterworking: Target Total Armor or All Resistances.
Weapon (Two-Handed Mace):

Inherent Affix: Overpower Damage is inherent to maces, making them ideal.
Aspect: Tidal Aspect is mandatory here, ideally on the two-hand for the maximum 2x multiplier, making Blood Wave cast a second time shortly after the first. These additional waves deal 40-100% of the original wave’s normal damage.
Affixes: Intelligence, Max Life, Overpower Damage, Damage while Fortified (early).
Tempering: Damage while Fortified (early, to hit the 200% cap). Once the cap is reached elsewhere (Paragon/gloves), replace this with Chance for Blood Wave to deal Double Damage until pants tempering reaches 100%. Once pants tempering provides 100% double damage chance, this tempering slot can be used for an Offensive Skill rank (like Frailty or Tides of Blood for significant damage).
Masterworking: Initially prioritize Chance for Blood Wave to deal Double Damage to reach 100% quickly. Once 100% is on pants, target the Offensive Skill rank.
Amulet:

Aspect: Sacrificial Aspect (if not using the Sacrificial Glyph spot on the Paragon board, or if needing the higher affix roll). However, if a high roll of the Fastblood Aspect (Blood Orb CDR) is found to provide sufficient CDR on a ring, Sacrificial can be moved here for its higher % scaling.
Affixes: Max Life, Intelligence, Cooldown Reduction, Movement Speed, and an Offensive Passive Skill rank. Aim for Tide of Blood, Gloom, or Coalesced Blood. Amplified Damage is okay but not as strong as the others. Total Armor can be a temporary “stat stick” if needed to reach the cap but ideally is not on the amulet.
Tempering: Ultimate Skill Increases (Cooldown Reduction) and Blood Overpower Damage.
Masterworking: Aim for the Offensive Passive Skill rank that provides the largest damage boost (Tides of Blood being highly desirable). Blood Overpower Damage is a good alternative.
Rings (x2):
Vehement Brawler’s Southland Loop
Aspects: Fastblood (if needed for CDR, potentially on one ring) and Vehement Brawler (if replacing Grasping Veins, provides damage & CDR from ultimate skill ranks).
Affixes: Intelligence, Max Life, Crit Strike Chance, Crit Strike Damage (though less important than Crit Chance), Overpower Damage, Resource Generation.
Tempering: Ultimate Cooldown Reduction and Blood Overpower Damage.
Masterworking: Target Crit Strike Chance, Ultimate Cooldown Reduction, and Blood Overpower Damage.
Runes & Gems: Socketing for Power

Rune choices can be flexible based on what’s available.
Jewelry Sockets (Gems): Typically go for Skulls for Armor or Diamonds for All Resistance, depending on needs to cap defenses.
Weapon Sockets (Gems): Royal Rubies are generally preferred for Maximum Life, boosting Overpower damage scaling.
Armor Sockets (Gems): Royal Topazes for Damage Reduction while Defending are standard for survivability.
Runes: (Ideal choices may depend on availability)
- Helm/Chest Runes: Zan and M are currently being used. Zan generates Offering when casting an Ultimate skill. M provides a damage increase for 6 seconds, triggering a “war cry” effect. This provides reliable Offering generation and burst damage.
- Weapon/Offhand Runes: Seir and Zh are currently being used. Seir generates Offering after casting five skills. Zh grants Max Life, increasing survivability and Overpower damage potential. These provide consistent Offering and a life boost.
- Optimal Rune setups are still being explored as Legendary runes might be scarce. Intelligence gems are typically socketed into armor slots if gem sockets are preferred over rune sockets. Players trying to fully optimize endgame rune combinations and rare drops often supplement their progress with advanced Diablo 4 Runewords boosts and late-game farming setups.
Mercenaries: Your Loyal (and Useful) Companions
Mercenaries provide valuable support and buffs.
First Slot: Subo or Rahyer.
- Subo: If defenses are already strong, Subo with Explosive Charges (for Thrillseeker) provides cooldown reduction, helping to spam Blood Wave more effectively. This is a good offensive choice.
- Rahyer: If survivability is still a concern, stick with Rahyer for increased Elemental Resistances.
Second Slot: Alikhan. Always take Alikhan and specifically skill into Flame Surge. Even if Alikhan’s damage seems low, Flame Surge applies consistent damage ticks, which reliably triggers the Abhorrent Decrepify cooldown reduction effect, helping keep Blood Wave ready!
Wrapping Up: the Bloodbath of a Blood Wave Build

And there you have it – a comprehensive breakdown of the Season 8 Bloodwave Necromancer build, stripped of personal anecdotes and focused purely on the mechanics, strategy, and optimization path. This build relies on optimizing specific stats and interactions to reach its full potential. There’s always more min-maxing to be done and potentially even greater heights to reach with further gear and Paragon optimization, but this guide provides the blueprint for building a truly ridiculous engine of destruction.
Now go forth, unleash the crimson tide, and drown your enemies in glorious, overpowered Blood Waves!
Epiccarry: best wow boost and coaching services
Frequently Asked Questions
What kind of Necromancer build is this guide about?
This guide is specifically about a highly optimized Blood Wave Necromancer build for Diablo 4 Season 8. It deviates from common Necromancer playstyles like actively summoning minions or relying heavily on Core skills like Blood Surge or Blood Lance. The entire focus of this build is on maximizing the power of the Blood Wave ultimate skill. It’s about using that powerful wave of blood as your main source of damage, aiming to hit enemies incredibly hard, and finding ways to reduce Blood Wave’s cooldown so you can cast it as frequently as possible. The build is presented as being particularly effective for tackling the most challenging endgame content currently available, rather than just a general leveling build.
Why is the Blood Wave build considered strong in Season 8?
The guide highlights that for pushing the most difficult content in Season 8, specifically high tiers of the Pit, the Blood Wave build currently appears to be the strongest Necromancer option available. Its strength lies in a combination of very high damage potential, with reports of damage ticks reaching into the billions once the build is optimized, alongside good survivability. This balance of being able to deal massive damage while also being durable enough to survive hits from powerful endgame enemies allows it to clear content efficiently where other builds might struggle to survive or deal enough damage quickly.
Is this build good for killing bosses and doing tough content?
Yes, absolutely. The guide explicitly states that this build is designed with the goal of completing all of Season 8’s difficult endgame content. This includes being highly effective at defeating all the Torment 4 bosses, whether you are playing by yourself or as part of a group (where this build often serves as the main damage dealer due to its high output). Furthermore, it is specifically built and optimized for pushing into the very high tiers of the Pit, which is considered one of the most demanding challenge activities in the current season. The strategies and gear discussed are tailored for success in these tough scenarios.
What is the main skill I will use for damage?
The central and most important skill for damage in this build is the Blood Wave ultimate. Every other choice made in this build – from the specific passive abilities you take, to the legendary aspects you prioritize on your gear, the affixes you look for, the tempering and masterworking you do, and how you build your paragon boards – is fundamentally aimed at making the Blood Wave skill as powerful as possible. The entire gameplay loop revolves around casting this skill to clear enemies and deal massive damage to single targets.
How do I make Blood Wave hit for huge damage?
Achieving the build’s reported multi-billion damage ticks on Blood Wave comes from stacking multiple damage multipliers. Overpower damage is a huge component; it inherently scales with your character’s Maximum Life and Fortified Life, and you get significant boosts to it from using a two-handed mace weapon and from specific Paragon boards and Glyphs like Bloodbath and Dominate. The Wrathmus’s Vigor key passive is also critical, as it makes Blood Wave’s damage scale based on your combined Damage while Healthy and Damage while Fortified bonuses. You need to get a lot of these stats, but be aware this bonus is capped at +200%. High Critical Strike Chance is necessary for consistent high hits and to benefit from Critical Strike Damage bonuses. Converting Blood Wave to a Darkness skill using the Aspect of Ultimate Shadow is non-negotiable because it allows Blood Wave to benefit from powerful Shadow damage passives (like Gloom and Terror) and glyphs. Finally, the Tidal Aspect on your weapon adds additional waves, essentially doubling the number of hits, even though these extra waves deal reduced damage in Season 8.
How do I get to use Blood Wave over and over again quickly?
Being able to cast Blood Wave very frequently is crucial for the build’s sustained high damage output. This requires focusing heavily on obtaining Cooldown Reduction (CDR). You will find CDR affixes on various gear pieces, most importantly on your Amulet and Rings. Tempering on jewelry can also add significant CDR. The Abhorrent upgrade for your Decrepify skill is a key source; it provides a chance to reduce cooldowns by 1 second whenever affected enemies take damage. This makes having something or someone (like Alikhan with Flame Surge) applying consistent damage ticks very valuable. The Aspect of Vehement contributes by adding bonus ranks to your ultimate skills when you cast one, and higher skill ranks inherently reduce cooldowns. Lastly, picking up Blood Orbs can reduce Blood Wave’s cooldown if you are using the Fastblood Aspect on a ring.
Do I use minions with this build?
No, despite being a Necromancer, this build utilizes the Book of the Dead feature to sacrifice all your potential minions (Skeletal Warriors and the Golem) instead of actively using them in combat. Sacrificing your Skeletal Reapers grants you increased Shadow damage, which is important because Blood Wave is converted to a Shadow skill. Sacrificing your Bone Mages gives you a substantial boost to Overpower damage, a core multiplier for Blood Wave. Sacrificing your Iron Golem increases your Critical Strike Damage. These sacrifices provide powerful, passive, and permanent damage bonuses that are essential for maximizing the build’s effectiveness without the need to manage minion health or abilities during combat. The Memento Mori passive also significantly boosts the damage from these sacrifices.
Why do I put skills like Reap, Decompose, and Sever on my skill bar if I don’t actively use them much?
Reap, Decompose, and Sever are included on your action bar for a specific passive benefit. They are all categorized as “Darkness” skills. The Reaper’s Pursuit passive ability grants a bonus to both your Movement Speed and your overall Damage dealt for each skill on your action bar that has the Darkness tag. By including these skills (along with Blight and Blighted Corpse Explosion, which you actively use, and Blood Wave converted to Darkness), you maximize the number of Darkness skills on your bar, gaining significant passive buffs to both your mobility and overall damage just by having them slotted.
How does the Flesh Eater Paragon node work in Season 8?
The Flesh Eater legendary Paragon node is a significant source of damage amplification. When you consume five corpses, you gain a large damage bonus (reportedly 40%) for six seconds. A key update in Season 8 dramatically improved its utility: consuming additional corpses while this 6-second damage buff is already active will refresh or extend its duration. This crucial change means you don’t have to wait for the buff to expire to start accumulating the five corpses for the next activation. By consistently generating and consuming corpses, primarily by constantly spamming the Blighted Corpse Explosion skill, you can maintain this powerful damage bonus for very long periods, especially against large groups or during extended boss fights.
What are some important things to get on the Paragon boards?
The Paragon boards are absolutely essential for the build’s endgame power. You must carefully plan your point allocation to reach and activate several key Legendary Nodes. These typically include Essence (boosts critical strike damage), Bloodbath (provides a massive increase to Overpower damage), Blood Begets Blood (increases damage when you pick up Blood Orbs), Flesh Eater (grants a damage bonus after consuming corpses), and Frailty (amplifies damage against cursed enemies, scaling over time). Beyond the legendary nodes, it is also crucial to select your pathing to ensure you pick up valuable Rare nodes that fall within the radius of your placed Glyphs, as these nodes provide necessary stats and further damage or defensive bonuses.
Which Paragon Glyphs are recommended?
Several specific Glyphs are highly recommended for their synergy with the build’s mechanics. Abyssal is often used early because it requires Intelligence (a primary stat for the Necromancer) and provides valuable bonuses to Shadow damage and Damage Reduction against Elites. Sacrificial is another Intelligence-based glyph that provides damage bonuses, often placed on boards with many Intelligence nodes. For amplifying damage against different enemy types, you will choose between Eliminator (provides a large bonus specifically against Elites, making it excellent for pushing the Pit) and Amplify (provides a consistent damage bonus against all Cursed enemies, generally better for open world and general bossing). Dominate is a critical glyph for any Overpower-focused build as it provides a substantial increase to your Overpower damage. It’s worth noting that older glyphs like Blood Drinker, which previously boosted Overpower, were reworked in Season 8 and are no longer effective for that purpose.
Are there any specific Unique items that are very important for this build?
Certain Unique items provide significant boosts or enable key mechanics. Cesm’s Legacy gloves are particularly impactful; they modify Blood Wave so that it both echoes (casts a second mini-wave) and pulls enemies together. This pulling effect is very important for grouping enemies to hit them with the Blood Wave’s large AoE damage effectively. Airidah’s Inexorable Will is a powerful Mythic Unique helmet if you are lucky enough to find it, granting massive damage bonuses and valuable stats like Lucky Hit Chance and Critical Strike Chance, although its effect means you have to manually cast Decrepify instead of relying on the Cursed Aura aspect. Wandering Death’s Ticking Chestpiece is also mentioned as a strong unique obtained from Boss Powers, offering significant offensive benefits, especially in Pit scenarios where it helps execute enemies.
Which Aspects are essential for this build?
Several Legendary Aspects are absolutely critical for this build to function correctly and deal its intended damage. The Tidal Aspect is mandatory and must be placed on your two-handed weapon to gain its full effect; it causes Blood Wave to cast a second time shortly after the first. While the damage of these additional waves was significantly reduced in Season 8 (dealing only 40-100% of the original wave’s normal damage), getting the second hit is still a massive damage increase overall. The Aspect of Ultimate Shadow is also essential because it changes Blood Wave’s damage type from Blood to Darkness/Shadow. This conversion is necessary for Blood Wave to benefit from all your powerful Shadow-specific passives (like Gloom and Terror), glyphs, and gear affixes. Other important aspects include Vehement Brawler, typically on a ring, which provides a damage bonus and reduces ultimate skill cooldowns when you cast an ultimate, and Hardened Bones on your chest armor for essential damage reduction.
What kind of stats should I look for on my gear?
When evaluating potential gear pieces, prioritize affixes that directly increase your damage and survivability in the most impactful ways for this build. Intelligence is your primary stat and directly boosts your overall skill damage. Maximum Life is extremely important because your Overpower damage, a major source of Blood Wave’s power, scales directly from your combined Maximum Life and Fortified Life pools. To survive high-level content, you must also aim for high Total Armor (working towards reaching the armor cap against relevant enemy levels) and All Resistances. Key offensive stats to seek include Critical Strike Chance, Critical Strike Damage, Overpower Damage, and Cooldown Reduction to cast Blood Wave more frequently.
How does Tempering help this build?
Tempering is a crucial gear crafting process that adds powerful, build-defining secondary stats to your gear slots. Tempering Total Armor onto multiple pieces (like Helmet, Chest, Pants, Boots) is essential to reach the armor cap required for high-level content, significantly boosting your physical survivability. Lucky Hit Chance is a very valuable Tempering stat to add to gear pieces like your Helmet, Gloves, and Boots, as it increases the frequency of generating corpses (which fuels the Flesh Eater bonus) and helps trigger crucial cooldown reduction effects like the one from Abhorrent Decrepify. Offensive Tempering options include Damage while Fortified (useful early on to help reach the 200% cap for the Wrathmus’s Vigor passive) and Chance for Blood Wave to deal Double Damage. Aiming to get this double damage chance to 100% on pants is ideal as it allows you to use your weapon tempering slot for other valuable stats later.
What should I focus on when Masterworking my gear?
Masterworking is the process of further upgrading the existing affixes on your gear and also adds powerful bonus ranks to certain skills at specific upgrade tiers. When Masterworking, prioritize upgrading the stats that provide the most benefit to your build or that you are currently deficient in. This could mean boosting Armor or Maximum Life to meet survivability thresholds needed for harder content, enhancing Critical Strike Chance on pieces like gloves or rings until you reach the crucial 100% threshold for consistent critical hits, increasing Blood Wave Cooldown Reduction if you are having difficulty casting it frequently enough for optimal spamming, or aiming for bonus ranks to powerful Offensive Passive Skills like Tides of Blood on your Weapon or Amulet, as these can provide significant damage increases.
What gems should I put in my gear sockets?
Your gem choices are used to supplement your defensive needs and boost core stats where possible. For armor sockets, Royal Topazes are typically the standard choice, providing Damage Reduction while Defending, which is a generally useful defensive layer. For weapon sockets, Royal Rubies are highly recommended because they significantly increase your Maximum Life. Increasing Maximum Life is crucial for this build because it directly contributes to the scaling of your Overpower damage, which is a major source of Blood Wave’s power. In jewelry sockets, you will typically choose between Royal Skulls for added Armor or Royal Diamonds for added All Resistances, depending on which defensive stat you need to prioritize to help reach the necessary caps for survivability.
Which Runes are recommended?
While the absolute “best in slot” legendary runes might be rare drops or depend on specific interactions, the guide mentions using certain rune pairs for reliable benefits. For jewelry sockets (paired runes), the combination of Zan and M is suggested; Zan helps generate Offering (a seasonal mechanic currency) when you cast an Ultimate skill, and M provides a temporary damage increase effect that can trigger a “war cry”. For weapon sockets, Seir and Zh are mentioned; Seir generates Offering after casting five skills, contributing to seasonal effects, and Zh grants Maximum Life, which boosts both your survivability and Overpower damage potential. These rune setups aim to provide consistent Offering generation for seasonal activities and useful combat bonuses.
Which mercenary should I use?
Your choice of mercenary and their skills is important for providing support. For your first mercenary slot, Subo is suggested, particularly with the Explosive Charges upgrade which provides the Thrillseeker effect. This is considered a good offensive choice because Thrillseeker contributes to your Cooldown Reduction, directly helping you spam Blood Wave more effectively. However, if your own defenses are still weak or you need specific resistances, Rahyer is a recommended alternative for his defensive bonuses. In the second mercenary slot, Alikhan is highly recommended, specifically ensuring he has the Flame Surge upgrade. Even if Alikhan’s direct damage isn’t the focus, his consistent damage-over-time ticks are vital because they reliably trigger the cooldown reduction effect on your Abhorrent Decrepify skill, which is essential for keeping Blood Wave’s cooldown low and allowing you to cast it frequently.
What is the “Ultimate Damage Cap” and why is it important?
The “Ultimate Damage Cap” refers to a specific limit on how much bonus damage Blood Wave can gain from the Wrathmus’s Vigor key passive. This passive significantly increases Blood Wave’s damage based on the combined percentage of your Damage while Healthy and Damage while Fortified bonuses. This combined bonus from all sources is capped at +200%. It’s important to understand this because while you absolutely want to stack enough Damage while Healthy/Fortified stats from your gear and Paragon to reach this 200% cap (as it’s a major damage increase), any additional percentage of Damage while Healthy or Fortified beyond that total of 200% will provide no further damage increase for Blood Wave via this specific passive. Knowing this allows you to avoid wasting valuable affixes or paragon points on redundant stats once you’ve hit the limit, and instead allocate them to other beneficial stats like Overpower Damage, Crit Chance, or CDR.