There is a special feeling when we get achievements in WoW and besides that, it rewards us with some cool, exclusive stuff. It doesn’t differ much in Shadowlands, so, apart from the fun in which we immerse while pursuing achievements, we also get some cool rewards.
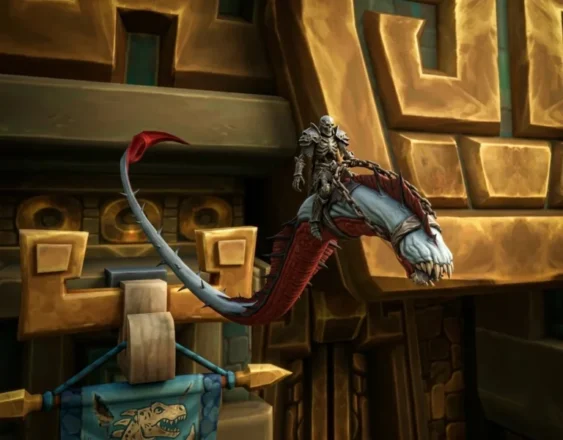
Glory of the Nathria Raider Achievement surely is a tough one which requires you to put some extra effort. But, benefits are well worth the effort. So, if you plan on getting to the Rampart Screecher, persevering is the only way!
IMPORTANT NOTE:
Dive deeper into the article to find a special PROMOCODE for a Discount to CUT ON ALL YOUR BOOSTS.

There are many guides on the web showing you how to get Nathria Raider and most are confusing. That’s why we decided to ensure you get a precise one with adding comprehensive information that cuts the clutter with all the actionable steps.
Now, let’s get straight to everything you should know in order to begin paving the way through the vicious challenges that await in the Castle.
Before We Start
Getting to the Nathria Raider Achievement requires you to first finish ten different achievements. You need to do them all at least on a Normal difficulty.
Buy Cheap WoW Gold
WoW Gold: Your Key to Greatness! We Grind, you Enjoy!

Each achievement is tied with a special boss in Castle Nathria. So, let’s start from the top, shall we?
Shriekwing
In order to complete this assignment, you are required to slay the boss named Shriekwing. Also, it’s needed to eliminate all of his minions as well. You can achieve that by locating 6 piles of rocks following these guidelines:
- The first two stones are around each side of the first bench on the left;
- 3rd stone lays beside the bench that is;
- 4th and 5th stone is behind the boss;
- 6th stone is next to the bench on the right side of the chamber.
Once you do that, it’s time to attack the Shriekwing. Now, simply wait for him to use ‘’Echolocation’’ on your party. When he does that, hide on the one pile of rocks you previously pinpointed and wait for the attack to expire. Doing this will kill one Sneaky Servitor and you should use the same technique to kill the rest and ultimately kill the boss itself.
Voila, you got yourself your first achievement!
Huntsman Altimor
Funny task like this revolves around strolling hounds to the Huntsman Altimor’s chamber pointers. When you position one hound into the corner, it will pass its waste meaning you’re good to move onto the next one.
Buy The War Within Starting Pack
Enjoy instead of grind!

Although this sounds easy, expect a bit of trouble when the Crushing Stone attack gets activated as it will start the Shattering Stone attack. What’s more, this attack will inflict 6186 Natural damage to all party members. To ride this out the most effectively, spare cooldowns from raids as your group will need a lot of healing.
Sun King’s Salvation
Main thing to do here is to light up braziers positioned in a place where you’ll be fighting – the Chamber. Moving on to the next phase, Shade of Kael’thas will spawn, and you should use their powers to light the braziers up.
- Embered Blazier is easy to light – Simply wait for Shade of Kael’thas to use Ember Blast on someone.
- To light this one up, the group’s tank should be in front of Fiery Blazier when the boss uses Fiery Strike
- Blazing Blazer will be lit up when the boss does a Blazing Surge attack on a tank that positioned itself near it.
- For Smoldering Blazier lure a Reborn Phoenix over it to set it on flames.
Next, slay the big one and take your achievement home!
Artificer Xy’Mox
The minute before you step into the boss’s chamber you will see three Anima Glimmers, and only 3 people from the party should take them. Once you do that, it’s important to start brawling with the MIGHT ONE – Don’t do anything special until he casts Dimensional Tear!
Now, quickly transfer Anima into the center of each slot. These slots are positioned behind the boss. Not to forget, players equipped with Glimmers should save their heads during the fight – It’s important.
Hungering Destroyer
In case you want to complete this properly, you need everyone to line up directly in front of the Anima Canisters. Now, the boss will cast Volatile Ejection, and, it’s important to use that spell to destroy Canisters. What’s more, this attack deals 12373 Shadow Damage which is quite powerful.
Quick Tip – With the help of World Markers, you let everyone from the party know exactly where to position.
Buy Mythic+ Dungeons Boost
Claim New Loot And Great Vault Rewards

Once every Canister is obliterated, it’s easy to deal with the big one.
Lady Inerva Darkvein
Entering this battle, it’s best to call Dark Animus pet for aid! This will trigger a 4-minute timer, and start absorbing Anima. After time expires, Dark Animus comes into picture, so you will have only 66 seconds to eliminate him.
The rest is easy – Once you kill this guy, taking down Lady Inerva will be a piece of cake.
Council of Blood
As silly as it sounds, you will actually need to take wine bottles from Belligerent Waiters here. Then, simply break a bottle on one of the guests and repeat the whole thing for a couple of times.
Simple as it gets, it’s only left for you to kill this nasty boss and take your prize!
Note: Don’t come anywhere close to Gargoyles (in the corners) as they will rock you up.
Sludgefist
To complete this task, go and talk to the Dirtflap who is on the right wing from the Sludgefist’s chamber. When you start the fight, Dirtflap will appear above one of the pillars in the boss’s chamber.
When this happens, lure the boss to hurl into a pillar and repeat the process for the rest of the pillars. Once all four pillars are demolished, you will be able to kill the boss and get the achievement.
Stone Legion Generals
Each of the group members needs to pick up a rose from the left side of the bridge leading to the boss’s chamber. Afterward, a 10-minute timer will start and the party will need to transform the roses into a Blooming Bouquet of Sanguine Roses. You will be able to kill the boss after the roses have transformed and mark this task as done. Not to forget, make sure no one dies before the roses bloom as you will need to restart the challenge.
Buy The War Within Starting Pack
Enjoy instead of grind!
Sire Denathrius
This is a healing-intensive, fast-paced task so keep your focus up. Each group member must deplete their Burden of Sin stacks before the boss uses March of the Penitent on them. Before unleashing this attack, there are two prerequisites. Either Denathrius strikes six times with Cleansing Pain or he loses 30% of health to trigger the March of the Penitent.
To deplete the Burden of Sin stacks, each of the players needs to get hit by Cleansing Pain four times. Here is the best strategy to do it, without anyone dying:
- Split up the raid into two groups
- Group 1 takes the first Cleansing Pain hit
- Group 2 takes the second hit
- Group 1 takes the third hit
- Both groups take the fourth hit
- Both groups take the fifth hit
- Group 2 (and those without depleted stacks) take the sixth(final) hit
Buy Cheap WoW Gold
WoW Gold: Your Key to Greatness! We Grind, you Enjoy!
Finally, when all of the stacks are depleted, you can slay the boss and get the final achievement.
Final words
After you successfully defeat all of the 10 bosses in the previously described manner, you will get marvelous Glory of the Nathria Raider Achievement. Rampart Screecher will become available and you will be able to show off everywhere you fly to. Nonetheless, keep in mind to have a lot of fun and enjoy this interesting challenge, and of course, engage in teamwork.