Updated October 18, 2026 for TBC Anniversary.
Zul'Aman is a 10-player catch-up raid set in the Ghostlands of the Eastern Kingdoms, featuring six boss encounters and a timed hostage event. Entering the instance requires no attunement, and the raid resets on a 3-day lockout. Defeating all four animal avatars quickly enough rewards extra gear chests alongside the rare Amani War Bear mount.
Raid Overview and Entry
Characters must be at least level 68 to step inside, though level 70 is strongly recommended. The entrance sits on the southeastern edge of the Ghostlands, where a nearby flight path serves both factions. Horde characters can follow the road south from Tranquillien past the Sanctum of the Sun, while Alliance members must travel north from the Eastern Plaguelands through the mountain pass.
A full run awards 13 Badges of Justice, providing two per avatar encounter and three from Zul'jin. Boss drops range between item level 128 and 138, and timed chests grant rings up to item level 141. For players looking to skip the scheduling hassle, the TBC Anniversary Zul'Aman Boost secures all six bosses and handles the timed execution challenges.
Timed Event and Amani War Bear
The timed event starts the moment a player bangs the gong at the front gates. To rescue every hostage and claim the Amani War Bear, your group must slay the first four avatar bosses before the timer expires. Simply pulling a boss will not pause the clock; the boss must die before the countdown reaches zero, or the captive will be executed.
Saving each prisoner extends the active clock and unlocks a bonus chest. Killing Nalorakk adds 15 minutes and Akil'zon adds 10 minutes to the timer. Killing Nalorakk adds 15 minutes and Akil'zon adds 10 minutes to the timer, while each player death penalizes the group by 10 seconds.
| Reward Chest | Item Level | Notable Gear Types |
| First Hostage Chest | 128 | Armor and cloaks (Shadowcaster's Drape, Mantle of Ill Intent) |
| Second Hostage Chest | 132 | Weapons and ranged items (Trollbane, Rage, Umbral Shiv) |
| Third Hostage Chest | 141 | Epic rings (Signet of Primal Wrath, Mana Attuned Band) |
| Fourth Hostage Chest | Mount | Amani War Bear |
Akil'zon
The trash gauntlet leading to Akil'zon demands steady forward movement up the ramp to stop troll reinforcements from respawning behind your group. Raid members must interrupt and focus down Amani'shi Wind Walkers because they cast Chain Heal.
Akil'zon stands at the top platform and does not hit the main tank especially hard, allowing threat-focused gearing. The raid must spread at least 10 yards apart across the platform to stop Static Disruption from arcing between players. Keep everyone topped up, as Gust of Wind launches random players into the air, causing substantial fall damage. Mages can cast Slow Fall or Blink, while Priests can use Levitate to negate the impact.
When Akil'zon casts Electrical Storm, a shadowy vortex appears beneath an airborne player. The entire raid must immediately collapse under that target inside the shadow, or anyone outside takes lethal damage. Once the storm ends, spread back out instantly. Soaring Eagles will spawn during the fight; ranged DPS can destroy them if incoming damage begins overwhelming the healers.
- Bloodstained Elven Battlevest: Plate Chest, item level 128, 1607 Armor, +46 Strength, +69 Stamina, +35 Crit Rating
- Brooch of Nature's Mercy: Neck, item level 128, +33 Spell Haste Rating, +24 Intellect, +19 Spirit
- Akil'zon's Talonblade: One-Handed Sword, item level 132, +25 Stamina, +18 Haste Rating
Nalorakk
Trash before Nalorakk features Amani'shi Warbringers riding bear mounts. When reduced to low health, the rider separates from the bear, which then casts Crunch Armor to strip the tank's physical mitigation.
Nalorakk requires two tanks and shifts between two forms on a strict timer. During his 45-second Troll Form, both tanks must stack directly in front of him to share the physical burst from Brutal Swipe. Nalorakk casts Surge at the furthest target, charging them for increased damage and knocking down nearby players. The player hit by Surge must immediately step closer to the boss so they do not take another hit while the debuff persists.
After 45 seconds, Nalorakk shifts into Bear Form for 30 seconds. The off-tank must taunt immediately because the boss inflicts Mangle, which massively amplifies the damage taken from Rend Flesh and Lacerating Slash. Nalorakk uses Deafening Roar to silence nearby players for several seconds, so healers should roll heal-over-time spells before the roar hits. When the boss returns to Troll Form, the original tank taunts back.
- Fury: Fist Weapon, item level 132, +20 Hit Rating, +20 Stamina
- Jungle Stompers: Plate Feet, item level 128, 1105 Armor, +43 Stamina, +20 Defense Rating, +28 Block Rating
- Bladeangel's Money Belt: Leather Waist, item level 128, 227 Armor, +25 Agility, +27 Stamina, +21 Crit Rating
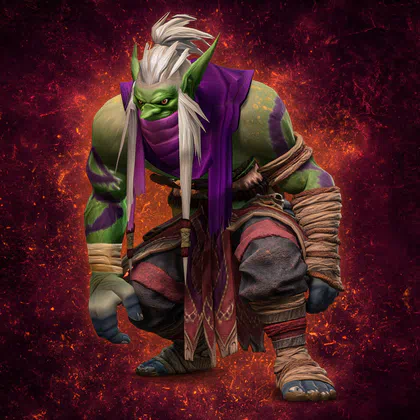
Jan'alai
The gauntlet toward Jan'alai is defined by Amani'shi Scouts. These scouts run toward nearby drums to summon reinforcements; stun and burst them down before they sound the alarm.
Tank Jan'alai in the middle of his platform and spread out to reduce the number of targets struck by Flame Breath. Periodically, the boss teleports all players to his position and drops dozens of Fire Bombs across the floor. Everyone must quickly find a safe pocket between the bombs before they detonate.
Two Amani'shi Hatchers will enter the room to crack open the egg clutches on the bridges. Designate one side to kill immediately while letting the opposite hatcher release a controlled wave of dragonhawks. The off-tank picks up the Amani Dragonhawk Hatchlings so DPS can burn them down with area attacks. Do not kill both hatchers right away: at 35% health, Jan'alai automatically forces all unhatched eggs to spawn at once. At 20% health, Jan'alai enrages, requiring defensive cooldowns from the tank and heavy burst from DPS.
- Wub's Cursed Hexblade: Dagger, item level 132, +13 Spell Hit Rating, +20 Spell Crit Rating, +21 Intellect
- Bulwark of the Amani Empire: Shield, item level 128, 5400 Armor, +42 Stamina, +19 Block Rating
- Arrow-fall Chestguard: Mail Chest, item level 128, 900 Armor, +39 Agility, +25 Stamina, +38 Intellect, +30 Haste Rating
Halazzi
Stealth packs of Amani Lynx roam the area before Halazzi, making them capable of shredding non-tanks if pulled carelessly. Pulling troll packs backward around platform corners makes line-of-sight grouping much cleaner.
Halazzi requires two tanks stacked together to split the damage of Saber Lash. Hunters must dispel his Frenzy using Tranquilizing Shot, or tanks will need defensive cooldowns. Range casters and healers should position 30 yards away from the boss to outrange Flame Shock and Earth Shock.
At 75%, 50%, and 25% health, Halazzi splits into his troll self and the Spirit of the Lynx, casting Transfigure for raid-wide damage. The off-tank must pick up the Lynx while DPS focus on burning either target down to 20% to force them to merge back into Phase 1. Swap quickly to kill Corrupted Lightning Totems whenever they drop, and dispel the Flame Shock damage-over-time effect from afflicted players.
- Shoulderpads of Dancing Blades: Leather Shoulder, item level 128, 303 Armor, +33 Agility, +39 Stamina, +16 Hit Rating
- Skullshatter Warboots: Plate Feet, item level 128, 1105 Armor, +30 Strength, +37 Stamina, +29 Crit Rating
- The Savage's Choker: Neck, item level 128, +37 Stamina, +25 Haste Rating
Hex Lord Malacrass
The path to Hex Lord Malacrass features Amani Berserkers that are completely immune to taunts, forcing tanks to build threat directly through attacks.
Malacrass fights alongside four random adds selected from a fixed pool, and each add can be managed with specific crowd control:
- Far Left: Thurg (breaks CC early) or Alyson Antille (heals), controlled via Sap or Polymorph.
- Left: Lord Raadan or Slither, controlled via Hibernate.
- Right: Gazakroth or Fenstalker, controlled via Banish.
- Far Right: Darkheart or Koragg, controlled via Shackle Undead or Turn Evil.
Groups should either crowd control the adds or kill them before pushing Malacrass below 80% health. Every 30 seconds, Malacrass channels Spirit Bolts across the entire raid, followed by Soul Drain. Soul Drain grants the boss abilities based on the classes present in your raid, including Mage spells, Priest heals, or Paladin buffs. Interrupt dangerous stolen spells such as heals, purge stolen buffs like Avenging Wrath or Lifebloom, and stay out of ground effects like Rain of Fire or Consecration.
- Hex Shrunken Head: Trinket, item level 133
- Heartless: One-Handed Sword, item level 132, +20 Haste Rating, +30 Stamina
- Hood of Hexing: Cloth Head, item level 133, 181 Armor, +24 Stamina, +33 Intellect, +31 Spell Hit Rating, +24 Spell Crit Rating
Zul'jin
This encounter only requires a single tank, allowing the second tank to swap to a DPS or healing spec. Zul'jin drops aggro at each 20% health milestone, shifting through five distinct animal phases.
Phase 1: Troll Form (100% – 80%)
Zul'jin attacks with basic melee swings and Whirlwind, which melee DPS must step away from. His Grievous Throw inflicts 5000 physical damage and applies a severe bleed that only disappears once the victim is healed to 100% maximum health. Dwarves can clear the bleed using Stoneform, while Mages and Paladins can remove it with Ice Block and Divine Shield.
Phase 2: Bear Form (80% – 60%)
Zul'jin shifts into a bear, striking the tank hard with Overpower. He periodically afflicts the raid with Creeping Paralysis. Priests and Paladins must cleanse this magic effect immediately, prioritizing tanks and healers before the six-second countdown triggers a stun.
Phase 3: Eagle Form (60% – 40%)
Zul'jin moves to the center and drops his threat table entirely. Feathers swirl through the arena; players must constantly dodge the roaming Feather Vortexes. zul'jin's Energy Storm deals electrical damage whenever a player casts a spell, so casters and healers should monitor their own health closely between casts.
Phase 4: Lynx Form (40% – 20%)
The Lynx phase puts immense pressure on healers. Zul'jin charges across the raid with Lynx Rush, applying a heavy bleed to multiple targets. He will also fixate on a random target with Claw Rage, tearing into them with rapid strikes. The fixated player must rotate personal defensive cooldowns, and Paladins should use Blessing of Protection to save vulnerable allies.
Phase 5: Dragonhawk Form (20% – 0%)
The tank must face Zul'jin away from the raid to prevent Flame Breath from hitting other players. The boss casts Flame Whirl, dealing raid-wide damage and applying a stacking debuff that increases fire damage taken by 50%. Move immediately out of summoned Flame Columns and burn the boss down before the fire vulnerability overwhelms your healers.
- Jin'rohk, The Great Apocalypse: Two-Handed Sword, item level 138, +49 Stamina, +45 Haste Rating
- Berserker's Call: Trinket, item level 133
- Blade of Twisted Visions: One-Handed Sword, item level 138, +33 Stamina, +21 Intellect, +21 Spell Haste Rating

Frequently Asked Questions
Does Zul’Aman require an attunement questline?
No attunement is needed to enter Zul'Aman. While an optional quest line begins just outside the gates with Budd Nedreck, it is not required for entry.
What is the raid lockout for Zul’Aman?
Zul'Aman operates on a 3-day reset lockout rather than the standard 7-day schedule used by larger raids.
In what order can you kill the first four bosses?
The four avatar bosses—Akil'zon, Nalorakk, Jan'alai, and Halazzi—can be tackled in any order the raid prefers before Hex Lord Malacrass becomes accessible.