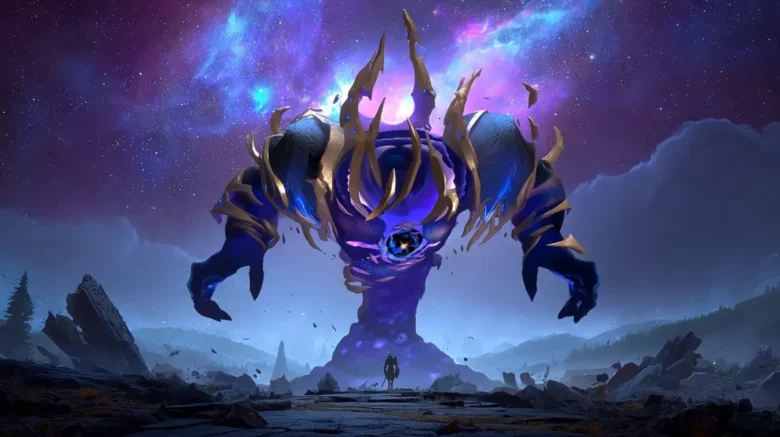
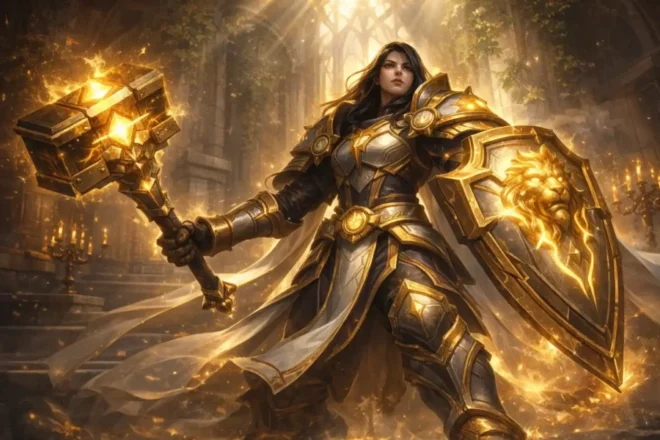
This guide breaks down the Chimaerus, the Undreamt God, a one-boss raid in the Dreamrift introduced in World of Warcraft: Midnight Season 1. While designed as an entry-level raid, Dreamrift quickly punishes poor execution, requiring strong coordination between two realms, consistent interrupt discipline, and precise add control.
In this guide, we’ll cover:
- Core fight structure and the dual-realm loop
- How Alndust Upheaval and realm phasing works
- Add handling, priority, and control strategies
- Tank responsibilities and positioning
- Healer challenges, including Rift Sickness and sustained damage
- Intermission mechanics and survival strategy
- Heroic-only adjustments and optimization tips
- Common wipe causes and how to avoid them
 | Epiccarry")
Raid Location and Preparation
You’ll find the Dreamrift raid in Harandar, positioned near the zone’s main entry point. The fastest way to reach it is by using the portal in Silvermoon City at /way #2393 36.8 68.4.
If the portal hasn’t appeared yet, you’ll need to progress further through the Midnight campaign. Completing the quest The Root Cause unlocks access to Harandar and the raid entrance. Because success depends on a “phased” mechanic, the raid must be organized before the pull.
- Raid Composition: For Heroic difficulty, a standard 2-4-14 (2 Tanks, 4 Healers, 14 DPS) setup is ideal.
- The Split: Divide the raid into two equal groups: Group A and Group B. Each needs 1 Tank, 2 Healers, and 7 DPS.
- Initial Pull: Use Bloodlust/Heroism on the pull to maximize single-target boss damage before the arena becomes cluttered with manifestations.
- Recommended Positioning: Chimaerus should be positioned near the edge of the arena to allow maximum space for add movement and puddle management. Downstairs tanks should drag manifestations toward the outer edges before breaking shields, ensuring adds spawn as far from the boss as possible when they transition. Upstairs players should spread loosely to avoid overlap while maintaining clear lines to intercept incoming adds.
- Utility Requirements: Ensure the raid has access to displacement tools such as grips, knockbacks, and slows. These abilities are essential for controlling and preventing movement during high-pressure moments and preventing them from reaching the boss.
 | Epiccarry")
Fight Flow Overview
 | Epiccarry")
The encounter follows a repeating loop based on alternating group phases:
- Group A soaks the first Alndust Upheaval and enters the Shadow Realm.
- Group B remains upstairs, handling fixated adds and boss damage.
- After 40 seconds, Group A returns as Group B prepares for the next soak.
- Groups alternate continuously for the duration of the fight.
- At 100 Energy, the encounter transitions into the Air Phase before resetting the loop.
Add Spawn Behavior: Manifestations are present throughout the encounter, spawning both during the realm cycle and during the intermission phase. This means the raid must constantly prioritize add control rather than treating them as isolated events.
Phase 1: The Dual-Realm Loop
The fight alternates between the Normal Realm (Upstairs) and the Shadow Realm (Downstairs), also known as the Aln. Chimaerus remains in the Normal Realm for the entire encounter. Only players and adds transition between realms, which makes coordination between the two groups essential. Manifestations are triggered by abilities such as Rift Emergence and intermission mechanics, meaning add waves are predictable and tied to boss ability timing rather than random spawns. Manifestations are the primary mechanic of the encounter rather than optional adds. Managing their timing, positioning, and transition between realms is the central challenge of the fight
1. The Phasing Mechanic: Alndust Upheaval
Chimaerus targets the current tank with Alndust Upheaval, a 10-yard soak circle.
- The Debuff: Entering the Aln applies a 90-second debuff that increases damage from subsequent Upheavals by 600%.On Heroic difficulty, this debuff (Rift Vulnerability) prevents players from soaking twice in a row, enforcing strict group rotation between Group A and Group B.On Normal and LFR, this debuff is not present, meaning the same group can handle multiple soaks if needed, making the mechanic more forgiving.
- Soaking Alndust Upheaval grants Alnsight, allowing players to see and damage Manifestations in the Shadow Realm.
 | Epiccarry")
 | Epiccarry")
2. The Shadow Realm (Downstairs)
Manifestations spawn here protected by an Alnshroud (absorb shield).
- The Objective: Damage the adds until the shield is destroyed. Once a shield “pops,” the manifestation is instantly teleported to the Normal Realm.
- Puddles: Breaking a shield causes the add to drop a void puddle. These should be stacked as tightly as possible at the edges of the arena.
- Puddle Behavior: When Manifestations transition or die, they leave behind void pools that persist on the ground. These zones limit available space and must be managed carefully, especially on Heroic, where they are not automatically cleared.
- Time Constraint: Players only remain in the Shadow Realm for approximately 40 seconds. All shields must be broken, and positioning must be set within this window, as any remaining objectives will carry over into the next cycle and create additional pressure upstairs.
- Pre-Break Positioning: Before breaking shields, adds should be grouped together and positioned as far from the boss as possible. Breaking multiple shields in a controlled location ensures that all adds transition in a predictable path, making them easier to intercept and kill upstairs.
- Edge Positioning Optimization: Pulling manifestations to the outer edges before breaking their shields increases the distance they must travel after transitioning upstairs. This gives the raid more time to intercept and kill them before they reach the boss, significantly reducing pressure during heavy add waves.
3. The Normal Realm (Upstairs)
The players remaining upstairs handle the boss and any adds that have transitioned.
- Absolute Priority Rule: If any add is active in the Normal Realm, all DPS must immediately stop attacking the boss and switch to the add. Delaying even briefly can result in the add reaching Chimaerus, triggering a wipe or an unrecoverable situation.
- Advanced Add Control and Pathing: Manifestations follow a predictable path directly toward Chimaerus. Players should actively intercept adds midway instead of waiting near the boss. Slows, knockbacks, grips, and stuns (e.g., Ring of Peace, Typhoon) must be used proactively to delay their movement.
- Fixate Behavior: Manifestations ignore threat and will always move directly toward Chimaerus. They cannot be tanked or permanently controlled, making slows and displacement effects the only reliable way to delay them.
Damage Optimization
 | Epiccarry")
If the downstairs group consistently clears manifestations before the 40-second duration, one or two DPS players can remain upstairs to maintain continuous boss damage.
This optimization should only be used if add control remains fully stable. Losing control of adds will negate any gains from increased boss uptime.
Plan offensive cooldown usage around:
- The initial pull for maximum uptime
- Intermission add waves for efficient clearing
- Final burn phases where add pressure stabilizes
Efficient cooldown usage can significantly reduce encounter duration without increasing risk.
 | Epiccarry")
Add Priority and Interrupt Coordination
Interrupts are mandatory and should never be handled reactively. Raids must assign a clear interrupt rotation for Haunting Essence casts.
- Colossal Horror (High Priority): These require a tank. They cast Roar, dealing escalating raid-wide damage. These must be focus-targeted first.
- Haunting Essence (Interrupt Priority): These cast Fearsome Cry. Missing this interrupt fears the entire raid, disrupting positioning and healer throughput. Assign a dedicated rotation for these kicks.
- Swarming Shades (Low Priority): Minor filler adds that must still be killed before they reach the boss.
- Burst Windows: Mobs should be eliminated quickly after transitioning into the Normal Realm. Delayed damage increases the risk of overlap with new waves, making control significantly more difficult.
Boss Mechanics and Tank Management
 | Epiccarry")
Tanks should swap control of Chimaerus after each Alndust Upheaval or following significant bleed stack buildup from Rending Tear.
- Rending Tear: A frontal cone aimed at the tank. It applies a bleed and a knockback; the active tank must always face the boss away from the raid.
- Caustic Phlegm: A persistent, 20-second raid-wide DoT. Healers must maintain high throughput on the entire raid in both realms.
- Healing Absorbs: Manifestations apply absorption shields to random players. These must be healed off immediately.
- Defensive Cooldown Planning: Defensives should be used proactively. Relying solely on healing will overwhelm the group during add waves combined with Caustic Phlegm and Roar casts.
Rift Sickness
Each wave of Manifestations applies a stacking raid-wide healing absorb effect (Rift Sickness). This creates constant pressure on healers throughout the fight and becomes especially dangerous during heavy add overlap or intermission phases.
Healers must prioritize clearing these absorbs quickly, as leaving them active will reduce effective healing and increase the risk of players dying to follow-up damage.
 | Epiccarry")
Phase 2: The Air Phase (100 Energy)
 | Epiccarry")
Upon reaching 100 Energy, Chimaerus becomes immune and takes flight.
- Corrupted Devastation: The boss performs three strafing runs across the arena. Players must move perpendicular to the flight path to avoid lethal damage. Bait these runs toward the edges to preserve safe space in the center.
- Coordinated Movement: Assigning a lead player or marker for the raid to follow during strafing runs can significantly improve consistency. Moving as a group reduces the chance of players being clipped by the breath and keeps positioning predictable for healers. The raid should remain loosely grouped to control where strafing lines are placed. By baiting these paths toward the edges of the arena, the center remains clear for add handling and safe movement during later mechanics.
- Intermission Adds: Packs of manifestations spawn during these runs. All DPS should gather and “rinse” these adds down immediately.
- Ravenous Dive: The boss ends the phase by slamming into the center. On Normal, this clears floor puddles. On Heroic, it does not.
- Intermission Failure Condition: During the intermission phase, Chimaerus takes massively reduced damage (effectively immune). The raid should fully commit to add control and survival rather than attempting to deal damage to the boss. If any adds remain alive when Chimaerus begins Ravenous Dive, they will be instantly consumed upon impact. Each consumed add heals Chimaerus for 500% of its remaining health and grants a +50% damage increase (stacking). This also deals additional raid-wide damage. This makes it critical to kill or heavily damage every add before the boss lands. Even one add significantly increases difficulty; multiple adds will quickly overwhelm the raid and almost always result in a wipe.
- Intermission Damage Profile: The intermission phase combines heavy movement with sustained raid-wide damage from abilities like Caustic Phlegm. Some variations of the encounter refer to Caustic Phlegm as Caustic Flame. Regardless of naming, this effect functions as a persistent raid-wide damage-over-time and should be treated as the primary source of rot damage. Healers should prepare cooldown rotations for this phase, as damage intake is both constant and unpredictable.
Heroic Difficulty Adjustments
 | Epiccarry")
Heroic mode shifts the focus toward disciplined environmental maintenance.
- Consuming Miasma (Dispel Optimization): Random players receive a 60-second DoT and a 10-yard ring. When dispelled, the ring clears any floor puddles within its radius.
- Dispel Discipline: The player with the ring must run to a cluster of puddles. Healers must avoid “itchy fingers”—wait for the player to be correctly positioned and isolated before dispelling.
- Efficient Pool Clearing: Players targeted with the clearing debuff should aim to stand on multiple puddles before calling for a dispel. Clearing several pools at once significantly improves space management and reduces pressure in later stages of the fight.
- The Soft Enrage: Since Ravenous Dive does not clear the floor on Heroic, the Miasma mechanic is the only way to manage space.
- Miasma Damage Profile: Consuming Miasma deals heavy ticking damage to the affected player before being dispelled. Players should use personal defensive cooldowns while moving to their assigned puddle to reduce incoming damage and ease healer pressure.
Common Wipe Causes
- Adds reaching Chimaerus due to slow target switching or poor crowd control.
- Missed interrupts on Fearsome Cry, leading to raid-wide fears.
- Poor positioning during Corrupted Devastation strafing runs.
- Breakdown in group rotation during Alndust Upheaval phases.
- Overlapping damage without proactive defensive cooldown usage.
 | Epiccarry")
Quick Strategy Cheatsheet
 | Epiccarry")
Role Summary (Quick Reference)
| Mechanic | Responsibility | Strategy |
| Alndust Upheaval | All | Alternate Group A and Group B for the soak. Never enter twice. |
| The Fixate | DPS | Adds > Boss. Swap immediately to any add that transitions upstairs. |
| Interrupts | DPS/Tanks | Assigned rotation for Fearsome Cry. Missed kicks = wipe. |
| Add Control | Utility | Use grips, slows, and knocks to keep manifestations away from the boss. |
| Caustic Phlegm | Healers | Main priority; maintain high throughput to combat the 20s DoT. |
| Consuming Miasma | Healers/All | (Heroic Only) Stand in a puddle before calling for a dispel. |
| Ravenous Dive | All | Top off the raid and use a defensive CD before the boss lands. |
Mechanics Cheatsheet
| Role | Key Responsibility |
| Tanks | Swap after Alndust Upheaval. Face Rending Tear away from the raid. Downstairs: Pull adds to the room’s edge. |
| DPS | Phase Group: Break shields. Normal Group: Kill fixated adds before they reach the boss. |
| Healers | Focus on Healing Absorbs and the Caustic Phlegm DoT. Heroic: Coordinate Miasma dispels on puddles. |
| Interrupts | Fearsome Cry must be interrupted immediately to prevent a raid-wide fear. |
| Movement | Dodge the strafing breath during the Air Phase. Move out of the frontal cone. |
| Priority | If an add gets close to the boss, stop all boss DPS to kill the add instantly. |
 | Epiccarry")
Loot and Rewards
 | Epiccarry")
Despite being a one-boss raid, Dreamrift offers a wide range of rewards, including gear, tier set tokens, profession recipes, and cosmetic items. Because of its short clear time, it is one of the most efficient raids for weekly loot and Great Vault progress.
Item Level by Difficulty
Chimaerus drops gear scaled by difficulty:
- Raid Finder: Item Level 237 (Veteran Dawncrest)
- Normal: Item Level 250 (Champion Dawncrest)
- Heroic: Item Level 263 (Hero Dawncrest)
- Mythic: Item Level 276 (Myth Dawncrest)
Each kill also rewards the corresponding Dawncrest currency, used to upgrade gear through the seasonal system.
Tier Set Tokens
Chimaerus drops Chest tier set tokens shared across armor types. These tokens are tied to class groups:
- Alnwoven Riftbloom (Cloth): Warlock, Priest, Mage
- Alncured Riftbloom (Leather): Demon Hunter, Rogue, Monk, Druid
- Alncast Riftbloom (Mail): Evoker, Hunter, Shaman
- Alnforged Riftbloom (Plate): Death Knight, Paladin, Warrior
Because Dreamrift only has one boss, it is a consistent and efficient way to target tier set progression early in the season.
Gear Drops
The encounter provides a focused loot pool across multiple armor types and slots:
- Dream-Scorched Striders — Cloth Feet
- Scorn-Scarred Shul’ka’s Belt — Leather Waist
- Scornbane Waistguard — Mail Waist
- Greaves of the Unformed — Plate Feet
- Alnscorned Spire — Two-Handed Staff
- Tome of Alnscorned Regret — Off-Hand
- Gaze of the Alnseer — Trinket
- Undreamt God’s Oozing Vestige — Trinket
In addition to these items, the tier chest pieces listed above are also part of the loot table.
Cosmetics and Housing Rewards
Chimaerus also drops player housing decorations, with additional rewards unlocked on higher difficulties:
- Eerie Iridescent Riftshroom (all difficulties)
- Dreamrift Vanquisher’s Argent Trophy (Normal)
- Dreamrift Vanquisher’s Aureate Trophy (Heroic)
- Dreamrift Vanquisher’s Gleaming Trophy (Mythic)
These items are purely cosmetic but serve as progression markers for higher-difficulty clears.
 | Epiccarry")
Profession Recipes
Two profession recipes can drop from the encounter:
- Formula: Enchant Weapon – Worldsoul Cradle (Enchanting)
- Pattern: World Tender’s Barkclasp (Leatherworking)
Great Vault Contribution
Defeating Chimaerus contributes toward raid progress in the Great Vault. Because Dreamrift consists of a single boss, it provides a quick and reliable way to secure at least one Vault slot each week, making it especially valuable for gearing alts or maintaining multiple characters.
Epiccarry: best wow boost and coaching services
Frequently Asked Questions
What is the Dreamrift raid in WoW Midnight?
The Dreamrift is a one-boss raid introduced in Midnight Season 1. It features Chimaerus, the Undreamt God, and focuses on dual-realm mechanics, add control, and coordinated execution.
Where is the Dreamrift raid located?
The Dreamrift raid is located in Harandar, near the zone’s main entry point. It becomes accessible after progressing through the Midnight campaign and unlocking the area.
How do you defeat Chimaerus the Undreamt God?
To defeat Chimaerus, players must manage Manifestations across two realms, prevent adds from reaching the boss, and survive intermission phases while minimizing healing from consumed adds.
What is the main mechanic of the Chimaerus boss encounter?
The core mechanic revolves around Manifestations, which spawn in a separate realm and must be weakened before being handled in the main arena. Managing their timing and positioning is key.
What are Manifestations and why are they important?
Manifestations are the primary adds in the fight. They must be weakened in the opposing realm and killed quickly in the main arena before they reach the boss and trigger healing.
How does Alndust Upheaval work?
Alndust Upheaval forces players to soak a split damage mechanic, granting access to the opposing realm where they can attack Manifestations and break their shields.
What happens if adds reach the boss?
If Manifestations reach Chimaerus, they are consumed, triggering Cannibalized Essence, which heals the boss and deals raid-wide damage.
What is Cannibalized Essence?
Cannibalized Essence is a stacking buff gained when Chimaerus consumes adds. It increases the boss’s power and can quickly lead to a wipe if too many adds are not controlled.
How should DPS handle adds in the fight?
DPS must split responsibilities: one group attacks Manifestations in the opposing realm, while the other focuses on killing fixated adds before they reach the boss.
What is the best strategy for handling small adds and big adds?
Small adds should be slowed, controlled, and killed quickly, while priority targets (big adds) must be focused immediately to prevent dangerous overlaps or boss healing.
What is Rift Sickness and how do you handle it?
Rift Sickness is a stacking raid-wide debuff caused by Manifestations. It must be managed through healing throughput and by reducing add uptime.
What happens during the intermission phase?
At 100 energy, Chimaerus becomes airborne, takes reduced damage, and bombards the raid while spawning additional adds. The focus shifts entirely to survival and add control.
What is Corrupted Devastation?
Corrupted Devastation is a sweeping breath attack during intermission. Players must move across the arena to avoid it while continuing to handle adds.
What does Fearsome Cry do?
Fearsome Cry is a cast from adds that must be interrupted. If it completes, it fears the entire raid and usually results in a wipe.
How important are interrupts in this fight?
Interrupts are critical. Missing even one Fearsome Cry can disrupt positioning and lead to immediate failure during high-pressure moments.
What changes on Mythic difficulty?
On Mythic difficulty, mechanics become less forgiving, with stricter add control requirements, higher damage intake, and tighter execution windows.
What loot does the Dreamrift raid drop?
Chimaerus drops gear, tier tokens (chest slot), trinkets, profession recipes, and cosmetic rewards, making it a valuable raid despite having only one boss.
Does Dreamrift drop tier tokens?
Yes, the raid drops chest tier set tokens for all armor types, making it one of the fastest ways to progress set bonuses early in the season.
Is Dreamrift worth doing every week?
Yes. Because it has only one boss, it can be cleared quickly and provides consistent rewards, including Great Vault progress and tier pieces.
What is the biggest mistake players make in this fight?
The most common mistake is failing to prioritize adds. Allowing even a few Manifestations to reach the boss can cause rapid healing and make the encounter unmanageable.