Howdy, adventurer! Get ready to dive deep into a Rogue build that’s making some serious noise in Season 8 – the Endgame Death Trap spammer! This isn’t just a build; it’s a transformation. It takes the foundational Death Trap you might have started with and elevates it into a whirling vortex of explosions capable of dismantling the nastiest challenges Sanctuary can throw at you, from high-tier Pit levels to those grumpy Uber bosses. This guide is your roadmap to turning Death Trap into your primary (sometimes only) offensive ability, resulting in eye-watering death traps damage, surprising durability, and mobility that lets you dance through demon packs!
Think of this as the advanced class for your Rogue. And if you’re looking for a powerful starter variant that scales into the deepest content, this is one of the most forgiving high-end Rogue builds. We’ll break down how this magic happens, the crucial gear pieces, and how to reach the point where Death Traps are practically firing themselves!
Death Trap Rogue D4: Endgame Focus

This build isn’t a one-trick pony; it’s a versatile powerhouse:
- Boss Demolisher: Single targets? Consider them flattened. This build makes quick work of challenging boss encounters, turning them into brief, explosive affairs.
- Speed Runner: Zooming through content like The Pit (a new endgame activity!) to rapidly level Glyphs? This build excels. Its inherent mobility and the ability to chain movement skills (thanks to cooldown resets) make traversing areas feel incredibly fast and fluid. Aiming for tiers like Pit 65 can be particularly efficient for quick Glyph leveling.
- Infernal Horde Annihilator (Corrected Terminology): Those chaotic mass monster events (also new endgame activities!)? This build turns them into pure, satisfying carnage. Death Trap pulls everything into a tidy pile, and the relentless spam simply vaporizes them. It’s like standing perfectly safe inside an explosion.
Rogue Specializations: Why Preparation is Our Path (Leaving Inner Sight & Combo Points Behind!)

As a Rogue, you get to choose a special ability that defines how you play. While some Rogue builds focus on generating Combo Points for big hits or utilizing Inner Sight for unlimited energy bursts, this Death Trap build takes a different route entirely! We rely on the Preparation specialization. This ability has a special trick related to cooldowns, which is absolutely essential for making our Death Trap spam work. We don’t use Basic Skills here for energy generation like many other builds; our energy comes back differently! So, if you’re used to managing Combo Points or proccing Inner Sight, get ready for a different rhythm focused entirely on maximizing Preparation’s benefit!
Core Skills That Make Death Trap Shine
How can a skill with a cooldown become something you unleash non-stop? The answer lies in hitting specific crucial thresholds related to your maximum energy and your Death Trap cooldown.
The goal is simple: when you cast Death Trap, it spends a bunch of energy. By hitting the right numbers, that energy spent instantly gives you back significant energy and a huge chunk of cooldown reduction, making the skill available again almost immediately.
The Energy Game: Fueling the Fire!

To keep the traps popping, you need a large energy pool. There are two key maximum energy numbers to chase:
- The First Breakpoint (225+ Energy): This is the minimum needed for the first level of “spam.” Reaching 225 maximum energy or more is necessary to leverage a core cooldown reduction mechanic (Preparation!).
- The Second Breakpoint (275+ Energy): This is the ultimate goal! Hitting at least 275 maximum energy enables a specific unique item interaction (Banished Lord’s Talisman) that can potentially cause every single Death Trap cast to Overpower, leading to absolutely massive damage spikes!
So, how do you build up this formidable energy reserve?
- Boots of Power: Unique boots, especially Beastfall Treads, are incredibly important. They grant a large base amount of maximum resource, and crucially, interact with your ultimate skill casts (like Death Trap will be!). Look for these with high rolls or even a Greater Affix (GA) for maximum resource if you can find one.
- Helmet Help: Your helmet is another prime spot for maximum resource. While a highly sought-after unique like Harlequin Crest (Shako) is fantastic (providing maximum life, resource, CDR, and damage reduction!), a well-rolled rare helmet with maximum resource can also get the job done, especially when combined with other sources and Masterworking (a gear upgrade system!). Even without a GA on the helmet, hitting the initial 225 might be achievable.
- Momentum Power: The Rogue’s Momentum key passive is non-negotiable. By gaining stacks through movement or specific hits, your total maximum energy is multiplied significantly. Reaching 10 stacks provides a massive boost to your energy pool.
- Elixir Boost: Don’t forget consumables! An Elixir of Resourcefulness II (Added specific Elixir based on common S8 usage) gives a temporary chunk of maximum resource, which is a helpful push to hit those breakpoints while gearing up or in challenging content where stacks might be harder to maintain constantly.
- Ring Aspect: A specific legendary aspect, Galvanized Slasher (found on rings), also grants a notable boost to maximum energy.

Basic Skills: Are They Even Needed in This Build?
Nope! Unlike many other Rogue builds that rely on Basic Skills to generate energy or Combo Points, this Death Trap spam build focuses entirely on its unique energy loop. You won’t have a Basic Skill as a core part of your damage rotation or resource generation. You’re too busy making things explode!
Cooldown Compression: Death Trap on Demand

Getting the cooldown down is the other half of the spamming puzzle. You need to reduce Death Trap’s base cooldown drastically to cast it near-instantly. Note that in Season 8, Death Trap’s base cooldown was increased from 50s to 60s, making cooldown reduction even more critical!
Preparation Specialization:
This Rogue Specialization is absolutely key. Since ultimate skill increases both the potential for cooldown refunds and energy restoration via Aftermath, this creates a feedback loop. In Season 8, this is 5 seconds per 100 energy spent. Spending 75 energy? Get 5 seconds off. Spending 150? 10 seconds off. Spending 225 energy? You get up to 15 seconds off! While the full 15s technically requires spending 300 energy, achieving three 5-second triggers per cycle by spending 225+ is the goal, giving you a massive 15 seconds off! This is why hitting that 225+ energy breakpoint is so vital – simply casting Death Trap (which core skill consumes all of your energy) gives you a huge chunk of cooldown back instantly!
Overpower Bonus:
Death Trap itself has a built-in cooldown reduction: when it Overpowers or kills an enemy, its cooldown is reduced by another 5 seconds. If you reach the 275+ energy breakpoint and set up your gear correctly (with the Banished Lord’s Talisman!), you can make almost every cast Overpower, adding another consistent 5 seconds off per trap!
Gear Affixes:
Look for affixes on your gear that provide Death Trap Cooldown Reduction. Rings are a primary location, often requiring Tempering (another gear customization system!) to add this stat. Your helmet (again, Harlequin Crest is great here) can also offer CDR.
Adding Attack Speed:

While not the primary focus, Attack Speed on gear can still subtly benefit the build by making your quick Casts of Concealment feel snappier and potentially helping apply on-hit effects faster, though it’s not as critical as CDR or Max Energy. Look for it on Rings and Weapons.
Skill Ranks:
Increasing the rank of your Death Trap skill lowers its base cooldown. Items that grant +Ranks to Core Skills (as Death Trap gains the Core Skill tag with the unique Scundra’s Leather chest!) like gloves or a unique amulet (Banish Lord’s Talisman) are excellent for this. This is a crucial synergy!
Paragon Assists:
Early on, before gear is perfected, certain nodes on your Paragon board can provide Trap CDR. These are a great temporary help in reaching that 15-second target.
Rune Alternatives:
In some setups, specific Runes can offer active cooldown reduction for ultimate skills based on spending Offering (like Zach paired with Zan). This can provide a supplemental source of CDR, though some runes have internal cooldowns that might create slight snags in the spamming flow.
Utilizing Boss Powers:
From season-specific mechanics or items, certain Boss Powers can grant a percentage of cooldown reduction, further aiding in hitting the needed threshold. These can be a valuable boost!
By stacking these sources – the massive reduction from Preparation’s energy spend, the potential bonus from Overpowering, gear affixes, skill ranks, and possibly other temporary boosts – the Death Trap cooldown becomes low enough for near-constant use.
The Essential Gear Pieces (Your Arsenal of Annihilation!)
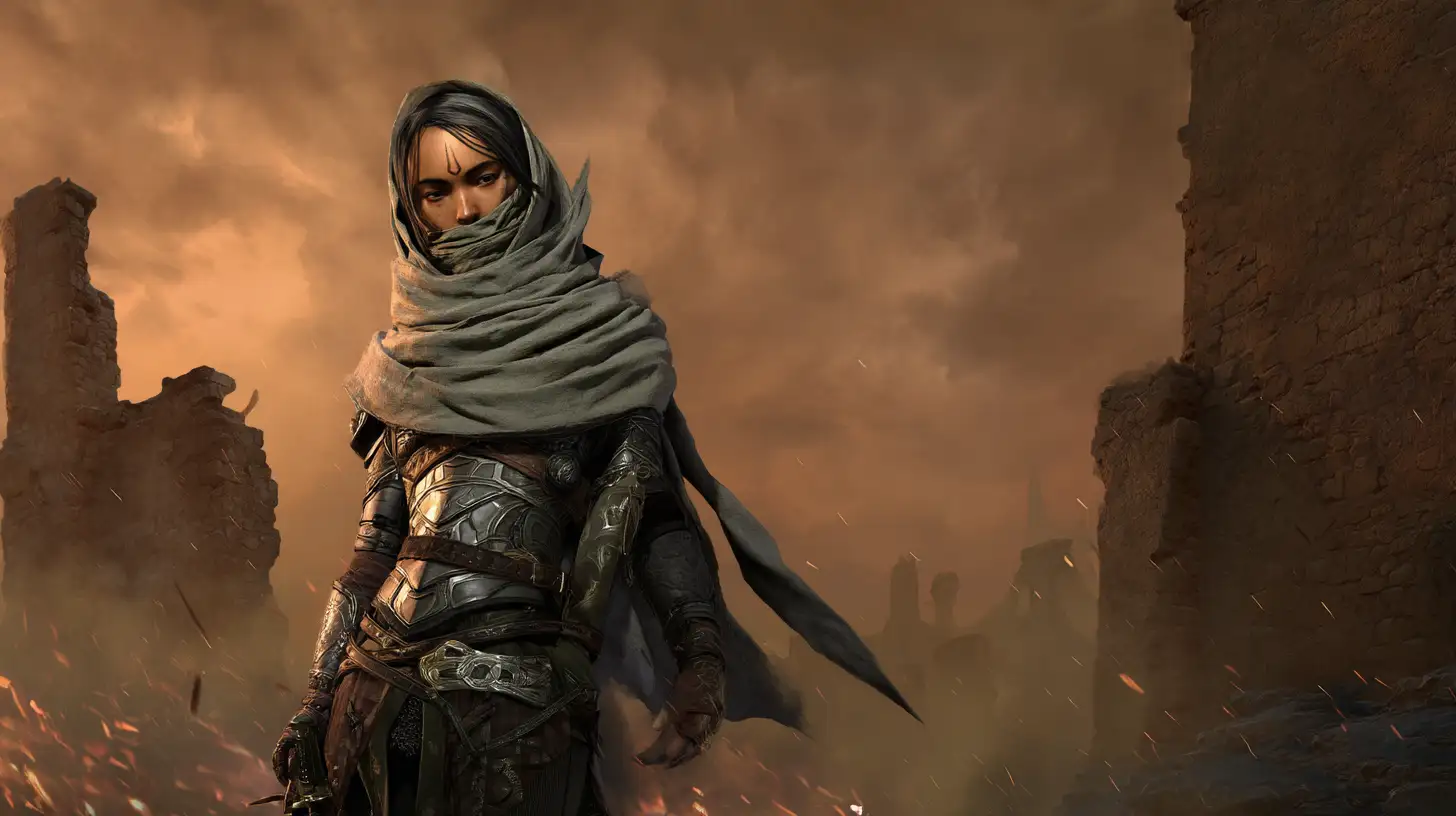
Several key unique items (and some specific aspects/affixes) are non-negotiable for making this build function at its highest level:
Beastfall Treads (Boots):
Absolutely essential for its Max Resource and the core interaction that makes your Death Trap consume all your energy when cast after an ultimate.
Scundra’s Leather (Chest armor):
The “secret sauce”! This unique chest piece gives Death Trap the Core Skill tag (allowing it to work with Beastfall and other Core Skill synergies) and confirms it as an Ultimate Skill (allowing it to trigger Aftermath and Preparation). Without this, the spam doesn’t happen! Notably, in Season 8 (Patch 2.2.0), Scundra’s gained powerful new inherent affixes like +Movement Speed, +Damage to Trapped, and +Trap Damage, making it truly best-in-slot for trap builds. Its old teleport effect on trap cast was also removed, as reflected in the current build.
Banish Lord’s Talisman (Amulet):

The “Overpower Enabler”! This unique grants +Ranks to Core Skills (boosting Death Trap’s level!) and makes your next Core Skill Overpower after you spend 275 of your primary resource. Since Scundra’s makes Death Trap a Core Skill, this amulet allows you to make your traps Overpower – the goal is for this to happen often, potentially every single cast when you hit that 275 energy threshold! This is where a huge chunk of your endgame damage comes from, especially when paired with guaranteed critical strikes. To be extra clear: Yes, Death Trap itself is the ‘next Core skill’ that gets this guaranteed Overpower when you wear Scundra’s Leathers!
Eye in the Dark (Pants):
Crucial for getting the necessary ranks in the Aftermath passive (see below!) to fuel your energy return. It provides a large +Ranks bonus and a damage boost to Death Trap. This unique also causes your Death Trap to re-arm once, meaning it automatically activates a second time shortly after the first, giving it a chance to deal double damage or reapply crowd control. This essentially gives your Death Trap a massive base damage boost (up to a ~5x multiplier at max roll!).
Doombringer (Unique Sword):
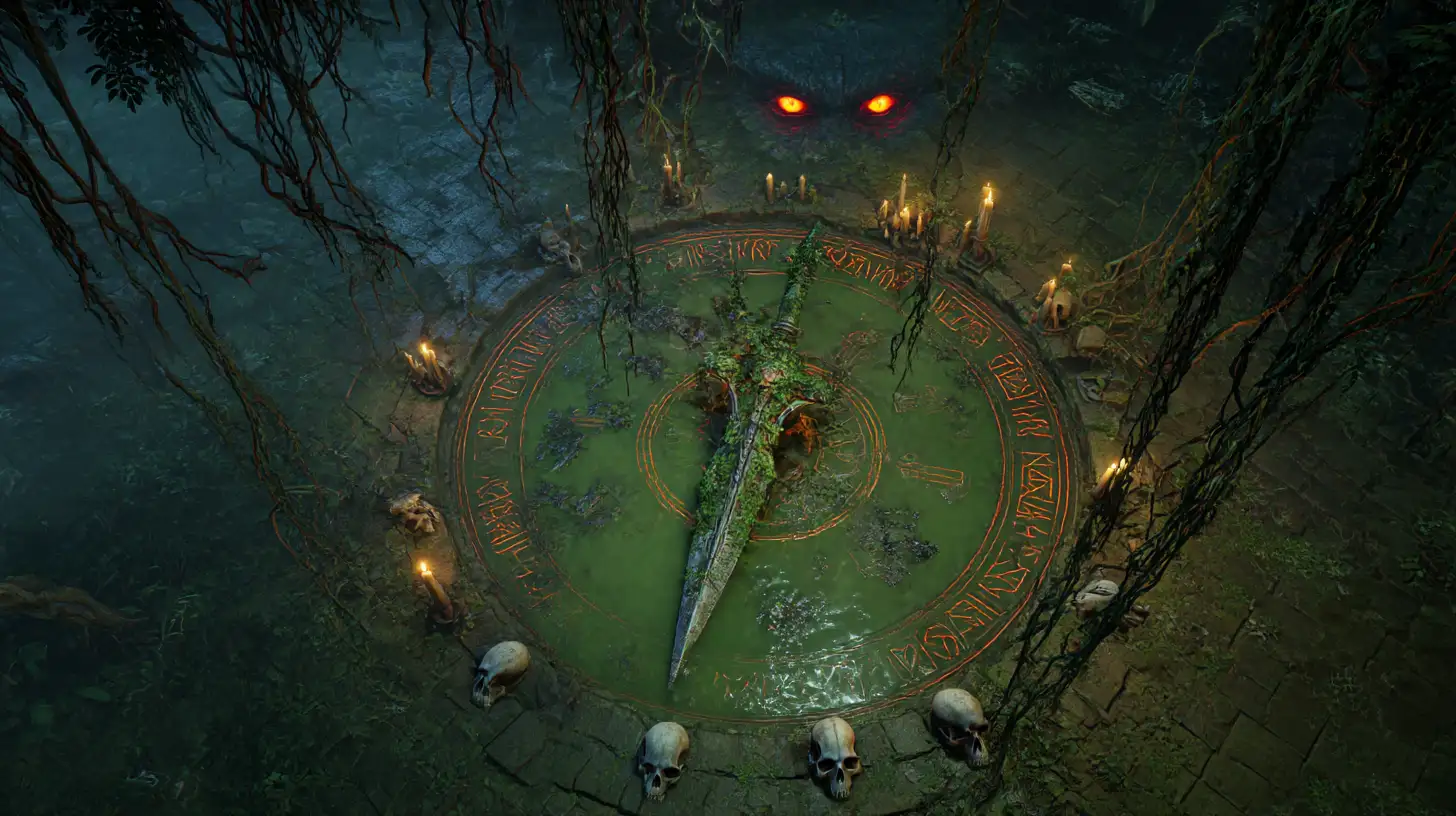
A best-in-slot weapon for endgame, typically used in one of your sword slots. It provides a massive chunk of Maximum Life (which scales your Overpower damage and barrier!) and grants a powerful Shadow Barrier based on your Life. This unique offers a huge offensive and defensive boost.
Rings:
Look for rings with Death Trap Cooldown Reduction (often via Tempering!), Maximum Life, Dexterity, and Attack Speed. The unique Starless Skies ring is a dream endgame piece for its Core Skill cost reduction, damage, and crit stats, and often has +Ranks to Core Skills as well (which buffs Death Trap).
Helmet (Rare or Harlequin Crest):
Max Resource and CDR are key here. Harlequin Crest is ideal, but a well-rolled rare can work. Harlequin Crest also provides +4 Ranks to All Skills, which benefits Death Trap’s level since Scundra’s makes it a Core Skill!
The Aftermath: Getting Energy Back (And Then Some!)

Okay, so Beastfall Treads makes your Death Trap consume all your energy. How do you instantly refill it for the next cast? The answer is the Aftermath passive skill in the Rogue’s Skill Tree, heavily boosted by gear and Momentum!
Aftermath Mechanics: Aftermath generates energy whenever you use an Ultimate Skill on your action bar. Since Scundra’s Leather makes Death Trap count as an Ultimate Skill, every time you cast it, Aftermath activates and restores energy to you.
Ranks are Key: To get enough energy back to keep the spam going, you need specific ranks in Aftermath.
- For the 225 energy version of the build, you likely need around Rank 7 in Aftermath. This is relatively easy to achieve without perfect gear.
- For the 275+ energy version (to fuel near-constant Overpowers), you typically need Rank 9 in Aftermath. This usually requires the unique Eye in the Dark pants, potentially combined with a Greater Affix for +Ranks to Aftermath or high masterworking rolls.
Momentum Synergy: Momentum’s key passive effect, the 30% energy regeneration bonus, applies to the energy granted by Aftermath, dramatically increasing how much energy you get back per cast!
With high enough Aftermath ranks (primarily from Eye in the Dark) and full Momentum stacks, you can restore potentially 300+ energy per Death Trap cast, easily refilling your huge energy globe for the next explosion and ensuring you meet the 275 energy spend requirement for the next Banish Lord’s trigger! The 25 energy restored immediately by Beastfall Treads when you use a cooldown also contributes, helping to keep you topped up.
The Damage Machine: Why Everything Explodes!

This build’s damage comes from multiple powerful layers stacking on top of each other:
Overpower:
Life = Damage: The bonus damage from Overpower hits scales incredibly strongly with your Maximum Life and your current level of Fortify! Think of it like this: Overpower damage is calculated based on your current Life + your Fortified Life. So, the more Life you stack on your gear (from affixes, unique items like Doombringer, or simply stacking Life affixes) and the closer your Fortify level is to 100% of your Maximum Life, the bigger your Overpower hits become. Having 100% Fortify basically doubles the amount of additive Overpower damage you gain from your Life! This is why stacking life and maintaining Fortify are so important for damage, not just survival!
Applying Vulnerable: A Crucial Damage Multiplier:

Casting Concealment right before Death Trap is key. The Subverting Concealment upgrade guarantees your next skill (Death Trap) is a Critical Strike and applies Vulnerable for 6 seconds! Critical Strikes have their own multiplier and also empower the Overpower damage. Spamming Concealment and Death Trap together ensures every massive Overpower hit is also a Crit and hits a Vulnerable enemy! This also procs the Danse Macabre legendary Paragon node for even more damage on the next hit!
The Quirky Grenade Synergy:
This is where it gets fun! Certain legendary aspects (Trickster’s, Opportunist’s, Barbed Sword of Surprise, Artful Initiative) boost the damage of Stun Grenades. The Trickster’s Aspect has a special power that says your Cowtrops, Smoke Grenades, AND your Death Trap receive all the benefits from your Stun Grenade passive skills and legendary aspects! So, even though you don’t have the actual Stun Grenade skill on your bar, equipping gear pieces with these Stun Grenade damage aspects applies their huge damage multipliers directly to your Death Trap! This is how the build replaces the grenade generation and damage bonuses from the old Exposure passive in Season 8, maintaining constant crowd control and massive damage layering. It sounds odd, but it adds a colossal amount of damage.
Apogee’s Fervor:
This aspect boosts your ultimate skill damage every time you gain a stack, and the bonus resets when you hit 10 stacks. Since Death Trap is an ultimate and you’re spamming it, you constantly benefit from this escalating damage multiplier.
Subterfuge/Mobility Buffs:

Paragon nodes and other passives often grant damage bonuses after using a Subterfuge skill (like Concealment) or a Mobility skill (like Dash). Using Concealment before Death Trap, or Dashing into a pack, triggers these multipliers. The Danse Macabre legendary Paragon node is a prime example, triggered by Subterfuge skills like Concealment.
Eldritch Bounty Synergy (Paragon):
Using a Shadow Imbued Dash into a group (Death Trap resetting your Dash cooldown makes this easy!) can make enemies take increased non-physical damage (via the Mixed Shadow Imbuement upgrade). If your Death Trap also deals shadow damage (perhaps via the Eldritch Bounty legendary Paragon node), it benefits from this vulnerability. While not strictly necessary for Eldritch Bounty (which procs off using an Imbued Mobility/Subterfuge skill), applying the debuff helps damage.
Deadly Ambush:
This passive grants increased Critical Strike Damage specifically against enemies affected by your traps (including Death Trap!). Notably, the Deadly Ambush legendary Paragon node was buffed in Season 8 to provide even more trap Critical Damage, making it even stronger!

Dark Shroud Synergy: Contributing to the Explosions!
- Dark Shroud Synergy: Aspects that provide bonus damage per active Dark Shroud shadow are strong. The build often maintains high Dark Shroud stacks through lucky hits or critical strikes (potentially via the Umbral aspect), adding another consistent damage layer in addition to its usual defensive benefits.
- Deadly Ambush: This passive grants increased Critical Strike Damage specifically against enemies affected by your traps (including Death Trap!).
Survivability: Surprisingly Unkillable!

Despite being a damage monster, this build is often incredibly durable, frequently to the point where you don’t need to prioritize traditional defensive stats like Armor or Resistances on every gear piece or even many Paragon nodes.
- Second Wind (Passive): This absolutely vital passive skill grants a significant barrier based on your Maximum Life every time you spend 100 energy. Since you’re constantly spending hundreds of energy with Death Trap, you gain massive, overlapping barriers that make you extremely resilient to incoming damage. Players often observe that enemies struggle to even break through this constantly refreshing barrier!
- Doombringer’s Barrier: If you have the unique sword Doombringer, it not only provides a huge Maximum Life boost but also grants a powerful Shadow Barrier based on your Life on hit, adding yet another layer of powerful defense directly tied to your main scaling stat.
- Fortify via Mercenary: Rogues don’t have a natural, easy way to generate Fortify quickly. However, hiring a mercenary from the Vessel of Hatred expansion, typically the Rahir mercenary, and equipping them with the Shield Charge setup allows them to constantly apply Fortify to you. This ensures you maintain that crucial 100% Fortify needed for the massive Overpower damage boost. The barrier from Second Wind also helps prevent enemies from depleting your Fortify! Note: Without the Vessel of Hatred expansion (or if playing solo without a mercenary), you won’t have a reliable way to generate Fortify, and your Overpower damage will be significantly lower.
- Constant Concealment: Spamming Concealment (which the build facilitates) makes you immune to crowd control for its duration, preventing frustrating stuns or disables at key moments.
Your Skill Bar Setup
Here’s a common arrangement for your active skills:
- Dash: Your essential movement skill for traversal and positioning.
- Cowtrops: Provides some initial crowd control and damage, contributing to the Grenade synergy. Many players take the Disciplined Cowtrops upgrade for extra crit chance (just in case not every single Death Trap cast fully benefits from Concealment’s guaranteed crit, though that’s a debated point!).
Imbuement Skills: Adding a Shadowy Punch (Yes, We Use One!)
While this isn’t a traditional Imbuement-spamming build, we do utilize one key Imbuement interaction.
- Smoke Grenade (Subverting): Usually converted to deal Poison damage. Used mainly to easily apply the Poison status to activate the Chemical Advantage passive for bonus damage against poisoned enemies.
- Poison Trap: A solid choice that adds damage, applies Poison for Chemical Advantage, and provides a knockdown effect (synergizing with the Malice passive). It’s often used instead of Shadow Step, as the build’s high mobility from Dash spamming and CC immunity from Concealment make Shadow Step less critical for survival or positioning.
- Concealment: Cast this religiously before every Death Trap! The Subverting Concealment upgrade guarantees your next skill is a Critical Strike and applies Vulnerable! With low cooldown and high energy, you can weave this in constantly. (A friendly, slightly cheeky note: Some players use macros to automate the Concealment -> Death Trap sequence to reduce wrist strain from rapid clicking, as Concealment’s cast time is virtually zero).
- Death Trap: The skill you’re building around! You’ll be using this constantly.
The Paragon Board: Dexterity, Dexterity, Dexterity!
The Paragon strategy for this build, especially once core nodes are acquired, becomes surprisingly focused: prioritize Dexterity.
Why Dex? Because the Overpower damage scales so intensely with your Maximum Life and Fortify, the damage increase you get from adding points into Dexterity is often proportionally much higher than taking nodes that give specific additive bonuses (+% Trap Damage, +% Core Skill Damage, etc.). Every 5 points of Dexterity provide a consistent damage increase that applies to your skill damage, including those massive Overpower crits.
Progression: Early on, prioritize activating your Glyph Sockets, securing key Legendary Nodes (like Danse Macabre or Eldritch Bounty), and grabbing essential Life or defensive nodes. Once those fundamentals are covered, the game changes: actively path your board to acquire as many Dexterity nodes as possible. Don’t overthink grabbing every single additive damage node; the most efficient damage scaling comes from Dexterity!
Choosing Momentum Over Exposure: While the Exposure key passive was reworked in Season 8 to give trap damage stacks, this build prioritizes Momentum instead. Momentum provides crucial Maximum Energy and damage reduction which are more vital to this build’s core loop and survivability than the extra trap damage from Exposure.

Rotation and Playstyle: The Infinite Trap Loop

The core of this build is the rapid alternation between Concealment and Death Trap, creating a near-infinite loop of explosions and resets!
- Pre-Pull Setup: Before engaging a big pack or boss, stack up your Momentum to full (usually by Dashing through enemies). This maximizes your energy pool. If you need it, drink an Elixir of Resourcefulness II. (Momentum stacks persist, so you only need to do this initially or after long breaks or zoning.)
- Initiate: Cast Shadow Imbuement.
- Engage & Apply Debuff: Use Dash into the target(s) you want to hit. This applies the Shadow Imbue debuff (via Mixed Shadow Imbuement upgrade) and helps position you. Stay at Distant range if beneficial for Deadeye/other damage bonuses, but be mindful of the Supreme Death Trap bug on bosses (see below).
- First Concealment: Cast Concealment (Subverting upgrade). This makes your next skill a guaranteed Critical Strike and applies Vulnerable. It also provides energy regeneration (via Enhanced Concealment upgrade) and triggers bonuses from items/Paragon like Danse Macabre.
- Unleash Death Trap: Immediately cast Death Trap. It consumes all your energy (via Beastfall + Scundra’s), gets the guaranteed crit (from Concealment), potentially Overpowers (via Banish Lord’s if you hit 275+ energy spent), and applies your layered “Stun Grenade” synergies.
- Energy & Cooldown Reset: The Death Trap cast triggers Preparation (reducing its cooldown by up to 15s), activates Aftermath (restoring energy), and if it Overpowers/Kills, reduces its own cooldown by another 5s. This massively lowers Death Trap’s cooldown.
- Concealment is Ready: Because Death Trap is an ultimate, its cast also resets the cooldown of your other skills (including Concealment!) via the Preparation specialization’s ultimate reset effect.
- Repeat the Loop: Concealment is now off cooldown and you have high energy. Cast Concealment again, then Death Trap immediately after. Repeat this cycle of Concealment -> Death Trap -> Concealment -> Death Trap relentlessly! This creates a near-infinite loop of guaranteed crits, Overpowers, and explosions fueled by constant energy and cooldown resets.
Resource Management Deep Dive:

To ensure Step 6 works and you constantly fuel the next trap: every time you cast Death Trap, you need to spend at least 225 energy (for the 15s Preparation reduction) or ideally 275+ energy (for the Banish Lord’s Overpower trigger). The good news is, your build is designed to give you more energy back than you need!
Enhanced Concealment: Using Concealment restores 40 energy.
Beastfall Treads: Casting Concealment (a cooldown) and Death Trap (a cooldown) triggers Beastfall’s effect twice, restoring 25 energy each time, totaling 50 energy.
Aftermath Passive: Your Rank 9 Aftermath (primarily from Eye in the Dark) grants 225 Energy every time you cast Death Trap (an ultimate).
Momentum: Your full Momentum stacks (+30% energy regeneration) multiply the energy gained from Aftermath and Enhanced Concealment!
- In one cycle (Concealment -> Death Trap), you gain: 40 (from Concealment) + 225 (from Aftermath) + 50 (from Beastfall cooldown uses) = 315 base energy. Multiplied by 1.3 from Momentum, that’s over 400 energy! More than enough to fill your 275+ globe for the next cast!
Overpower Explanation:

As mentioned, Overpower damage scales based on your Life + Fortified Life. Without Fortify (like if you lack the Mercenary or expansion), your Overpower damage will be significantly lower. Overpower hits are indicated by teal damage numbers in-game. This build leverages high Maximum Life and consistent Fortify (from your mercenary) to make these Overpower hits absolutely devastating!
Important Notes on Playstyle & Bugs:
- Supreme Death Trap Bug: Be aware of a current bug (likely still present in S8) with the Supreme Death Trap upgrade. Its effect (reducing Death Trap’s cooldown on kill) naturally only matters against bosses, but the bug requires you to stand very Nearby to the boss for it to register. While you might be hitting the boss visually from range, you might not get that specific 5s cooldown refund unless you’re close. Your primary cooldown reduction comes from Preparation and Overpowers, but this bug is worth knowing!
- Stun Grenade Crowd Control: Thanks to the Trickster’s Aspect and other grenade aspects, your Death Traps and Cowtrops will constantly drop Stun Grenades. This provides incredible crowd control, often keeping lesser enemies stun-locked around your traps.
Gearing Up: What to Look For

| Priority | Stat Name | Primary Reason for Priority | Where to Find (Common Slots) |
|---|---|---|---|
| #1 | Maximum Life | Scales Overpower Damage & Barrier, Essential for Bulk | Chest, Pants, Amulet, Rings |
| #2 | Death Trap Cooldown Reduction | Essential for Rapid Spamming | Helmet, Rings, Amulet |
| #3 | Maximum Resource | Needed for Energy Breakpoints (225/275+), Fuels Aftermath | Helmet, Boots, Rings (Aspect) |
| #4 | Dexterity | Primary Stat, Increases All Damage (Including Overpower) | All Gear Slots, Paragon Board |
| #5 | Overpower Damage | Direct Damage Increase for Overpower Hits | Weapon, Gloves, Rings, Amulet |
| #6 | Critical Strike Damage | Multiplies Crit & Overpower Damage | Weapons, Rings, Amulet, Gloves |
| #7 | Trap Damage % | Direct Damage Increase for Death Trap | Chest, Pants, Amulet, Boots, Paragon Board |
| #8 | All Stats | Provides Dexterity & Meets Node Requirements | Amulet, Rings, Helmet, Chest, Pants |
| #9 | Damage Reduction | General Survivability (Though less critical due to Barrier) | Chest, Pants, Amulet, Rings, Helmet |
| #10 | Attack Speed | Makes Skill Usage Feel Snappier (Lower Priority) | Weapons, Gloves, Rings |
When hunting for gear, prioritize affixes like: Death Trap Cooldown Reduction, Maximum Life, Dexterity, All Stats, Attack Speed, and +Ranks to relevant skills (like Core Skills or Aftermath).
A common question: If a unique or item has Greater Affixes but a lower percentage roll on its legendary aspect, is it still better? Often, the aspect percentage matters significantly! A high percentage roll on crucial aspects (like the Grenade synergy ones) can provide a much larger damage boost than having a Greater Affix on a less impactful stat, especially early in the gearing process. For some breakpoints (like Rank 9 Aftermath), a Greater Affix on a specific piece (like pants) might be mandatory, but for damage, prioritize those high aspect rolls!
Acquiring the Key Gear
Finding these specific unique items is part of the endgame grind:
- Beastfall Treads: Can drop from the Beast in the Ice boss, but also have a chance to drop from any Uber boss (as they drop 50% boss-specific loot and 50% from a general pool). Some players specifically target Lord Zir for them.
- Eye in the Dark (Pants): Primarily drops from Varshan.
- Scundra’s Leather (Chest) & Banish Lord’s Talisman (Amulet): These often drop from Duriel and Andariel, or the Harbinger of Hatred boss.
- Doombringer (Unique Sword): This is an Uber Unique, meaning it has a very rare chance to drop from any Uber boss. Your best chance (though still very low) is typically from Duriel and Andariel.
The Betrayer’s Husk endgame activity can also be a source for targeting specific loot types and potentially finding Greater Affix items or uniques.
Final Thoughts: Death Trap Rogue Endgame Dominance

The journey to unleash the full power of this Death Trap Rogue build in Diablo 4 Season 8 is a process of refinement. It’s about bringing together the right unique gear, aspects with high percentage rolls, and carefully selected Paragon nodes. The culmination of this effort is a build that is incredibly powerful and surprisingly durable, capable of conquering the toughest endgame content Sanctuary has to offer. It truly stands out as a top contender among the best Rogue endgame options this season!
For those of you transitioning from a leveling build or an earlier version of Death Trap, your focus should be on acquiring the key uniques step-by-step. Prioritize pieces that enable the energy spam, then work towards powerful additions like Eye in the Dark and Banish Lord’s Talisman as your gear improves. Don’t hesitate to utilize external build planners and guides specifically focused on the leveling process; they can be invaluable resources to help visualize skill points and Paragon pathing as you work towards this setup.

This Death Trap Rogue build provides a fantastic pathway into high-level endgame play. While even higher-damage, squishier variants might exist for pushing the absolute deepest tiers of The Pit, for the vast majority of content, this setup is a top-tier choice and firmly earns its spot among the best Rogue builds and, indeed, the best Rogue endgame options this season!
Good luck assembling this explosive force of nature! May your traps hit hard and your energy bars always be full! Happy monster slaying!
Epiccarry: best wow boost and coaching services
Frequently Asked Questions
What’s this Endgame Death Trap build all about?
Alright, imagine your standard Death Trap ability, but it’s had a few too many energy drinks and is bouncing off the walls! This build takes that skill – which normally has a rather long cooldown – and turns it into something you can fire off almost as fast as you can press the button. The core magic is setting up a system where casting Death Trap, spending a huge chunk of your energy in the process, actually fuels the next cast by giving back tons of energy and drastically cutting the cooldown. This lets you create a constant, overlapping stream of massive explosions. It’s like having a personal, portable demolition crew, designed to clear out entire rooms of demons in a flashy, very satisfying way, and absolutely melt the health bars of tough bosses faster than they can say “Unholy power!” It’s the ultimate fantasy of covering the battlefield in traps that just keep going off!
Why would I want to spam Death Trap like crazy instead of using other Rogue skills?
Because it’s not just about spamming; it’s about efficiency and overwhelming power! For tackling dense groups of monsters, like those found in The Pit or during Infernal Hordes, Death Trap is amazing because it sucks all the enemies into one spot before exploding. When you can do that over and over, you create a perpetual motion machine of monster deletion. For single targets like bosses, you’re constantly applying huge bursts of damage, especially as the build ramps up to make those traps Overpower and Crit on almost every hit. Beyond just damage, the very act of using Death Trap in this build helps reset the cooldowns of your other skills, including important ones like Dash. This means you’re incredibly mobile, always ready to zip across the screen, reposition, or escape danger. So it’s not just about being glued to one button; it’s about that button enabling a super fast, super deadly playstyle that feels amazing against almost all content.
How do I even make Death Trap a skill I can spam? Doesn’t it normally have a long cooldown?
Absolutely it does! If you just clicked Death Trap without this build’s special setup, you’d be waiting around twiddling your thumbs for the cooldown. The trick is layering several mechanics together. The biggest piece of the puzzle comes from a special Rogue ability called Preparation. This ability gives you a massive chunk of cooldown reduction on your ultimate skill (which Death Trap becomes!) whenever you spend enough energy. So, by getting your maximum energy pool huge and setting up gear to consume all that energy with Death Trap, Preparation becomes your primary cooldown cutter. On top of that, certain gear pieces specifically reduce Death Trap’s cooldown, increasing its rank lowers the base cooldown, and other mechanics like making the trap Overpower or getting kills can shave off even more seconds. All these pieces working in harmony mean the cooldown finishes just as you’re ready for the next trap!
Okay, so I need high energy. How much maximum energy do I need for the spamming to start working well?
Think of it like having a big gas tank for your explosions! To really kickstart the Death Trap spamming, you need a minimum “gas tank” size of at least 225 maximum energy. This specific number is crucial because the Rogue’s Preparation specialization grants a huge 15 seconds of cooldown reduction on your ultimate skill only when you spend 225 energy or more. So, reaching this threshold means every single Death Trap cast (which consumes your energy) gets that massive cooldown cut instantly. But the build can go even further! For the truly peak performance where you can leverage a unique amulet to make almost every trap hit with a devastating Overpower, the goal is to get your “gas tank” size up to 275 maximum energy or higher. More energy means more powerful Overpower hits more often.
Where does all that extra maximum energy come from in this build?
It’s a team effort from several gear pieces and abilities! The most important contributors are typically: Beastfall Treads, unique boots that provide a solid chunk of maximum resource and enable the core energy-spending mechanic. Your helmet is another key spot for getting maximum resource as an affix; a well-rolled rare one can contribute significantly, and the super-rare unique Harlequin Crest (Shako) is a dream item here as it gives a huge amount. The Rogue’s Momentum key passive is also huge; by keeping its stacks up (usually from Dashing through enemies or hitting with skills), it acts as a multiplier on your total maximum energy, helping you easily cross those breakpoints. Consumables like the Elixir of Resourcefulness provide a temporary but substantial maximum resource boost, which can be very helpful while you’re still perfecting your gear or for tackling specific content. Finally, certain legendary aspects, like Galvanized Slasher often found on rings, can grant an additional boost to your maximum energy pool.
You mentioned the Rogue’s Preparation specialization helps with cooldown using energy. How does that work exactly?
Preparation is one of the Rogue’s unique specialization options (different from Inner Sight or Combo Points, which other builds use!). Its special trick is directly linked to how much energy you spend. The more energy you dump in a short period, the more cooldown it shaves off your ultimate skill. It works in tiers: spending 75 energy reduces your ultimate cooldown by 5 seconds, spending 150 energy reduces it by 10 seconds, and the big one – spending 225 energy or more reduces it by a massive 15 seconds. Since this build uses gear (Scundra’s Leather and Beastfall Treads) to make Death Trap count as your ultimate skill AND consume all your energy, hitting that 225+ energy breakpoint means every time you cast Death Trap, Preparation instantly knocks 15 seconds off its cooldown. This is the foundational mechanic that makes the rapid-fire traps possible!
What gear pieces are absolutely essential for this Death Trap spamming build to function at the endgame?
Think of these as the core pieces of the Death Trap engine. You definitely need the unique boots called Beastfall Treads for their maximum resource and the crucial energy-spending interaction. The unique chest piece, Scundra’s Leather, is also mandatory because it changes Death Trap to count as both a Core Skill and an Ultimate Skill, which is essential for making it work with Beastfall and other parts of the build. For fueling your energy return, the unique pants called Eye in the Dark are vital because they provide the high ranks needed in the Aftermath passive. For maximizing your damage with Overpower hits, the unique amulet Banish Lord’s Talisman is key once you reach the higher energy breakpoint. Beyond these specific uniques, you’ll need well-rolled rare gear, particularly rings with high Death Trap Cooldown Reduction (often added via Tempering) and a helmet with a solid amount of maximum resource.
Could you explain again why the Beastfall Treads boots and the Scundra’s Leather chest piece are needed together?
They are like the two gears that make the whole energy system turn! Normally, Death Trap is just a Utility skill with a cooldown. Scundra’s Leather is the magic chest that changes Death Trap’s labels – it makes it count as both a Core Skill and an Ultimate Skill simultaneously. Now that Death Trap is an Ultimate Skill, the unique Beastfall Treads power kicks in: when you use an Ultimate Skill (your newly labeled Death Trap!), your next Core Skill (still your Death Trap!) consumes all your energy and deals bonus damage based on how much energy was spent. So, this pair creates the loop: you use Death Trap (it’s an Ultimate), which sets up the next Death Trap (it’s a Core) to consume all your energy, which triggers Preparation for massive cooldown reduction, and fuels your energy return via Aftermath. They make the non-stop cycle possible!
After Death Trap consumes all my energy, how does it come back so fast for the next cast?
This is where the Aftermath passive skill in your Skill Tree shines, combined with your large energy pool and the Momentum ability! Aftermath is a passive effect that triggers whenever you use an Ultimate Skill on your action bar. Since Scundra’s Leather makes Death Trap an Ultimate Skill, every time you cast it, Aftermath activates and restores energy to you. The amount of energy Aftermath gives back depends on the number of ranks you have in Aftermath and your total maximum energy. With a high number of Aftermath ranks (which the unique Eye in the Dark pants provide in abundance!) and a large maximum energy pool (especially 275+), the energy restored by Aftermath, boosted further by the energy regeneration bonus from full Momentum stacks, can be more than enough to instantly refill your entire energy globe, making you ready to cast the next Death Trap immediately!
Tell me more about the Banish Lord’s Talisman amulet. Why is it so important for damage in this build?
Ah, the Banish Lord’s Talisman is the key to unlocking the build’s absolutely massive damage potential in the endgame! This unique amulet gives you bonus ranks to your Core Skills, which directly buffs your Death Trap’s level (since Scundra’s makes it a Core Skill!). Its most powerful effect, though, is making your next Core Skill hit as an Overpower after you spend 275 of your primary resource. If you’ve successfully reached the 275+ maximum energy breakpoint and are constantly spending all that energy with Death Trap, the Banish Lord’s Talisman will try to make every single Death Trap cast an Overpower hit. Since Overpower damage scales incredibly hard with your Life and Fortify (as we’ll discuss!), and you’re combining it with guaranteed Critical Strikes (from Concealment), this amulet is the primary driver behind those enormous, record-breaking damage numbers you see!
Where does all that HUGE damage from Overpower actually come from in this specific Death Trap build?
Overpower damage is special because its extra damage bonus scales directly and incredibly powerfully with two things: your Maximum Life and your current level of Fortify! Think of it like this: every point of Maximum Life you have adds a certain amount of extra damage to your Overpower hits. Now, multiply that by having high Fortify! Specifically, having 100% of your Maximum Life as Fortify provides a massive bonus – it essentially doubles the amount of additive Overpower damage you gain from your Life! So, by stacking as much Maximum Life as possible on your gear (from affixes, unique items like Doombringer and Harlequin Crest), and making sure you’re always Fortified (thanks to a mercenary like Rahir!), you’re boosting your Overpower damage exponentially. This is why items that give you Max Life are incredibly valuable for damage, not just survival!
How do I get Fortify so reliably in this build if Rogues don’t usually have built-in ways to generate it?
This is one of the clever tricks of the build! Since Rogues don’t have many natural ways to generate Fortify quickly, the Death Trap build often relies on external help. The most common method is to hire a mercenary, typically the Rahir mercenary, and equip him with the Shield Charge skill. Rahir’s Shield Charge has a passive effect that applies Fortify to you whenever he uses it (which is fairly often!). By keeping Rahir with you and letting him do his thing, he can consistently apply Fortify to you, helping you maintain that crucial 100% Fortify needed for the massive Overpower damage bonus. Your constant barrier generation from the Second Wind passive also helps protect your Fortify from being instantly depleted by incoming damage.
Why do you put gear stats or aspects that boost “Stun Grenade” damage if you don’t even use the Stun Grenade skill? That seems weird!
It is weird, but it’s also incredibly effective and a key part of the damage! It’s all thanks to a specific legendary aspect called the Trickster Aspect. This aspect has a special power that says your Cowtrops, Smoke Grenades, AND your Death Trap receive all the benefits from your Stun Grenade passive skills and legendary aspects! So, even though you don’t have the actual Stun Grenade skill on your bar, any legendary aspects that boost the damage of “Stun Grenades” (like Opportunist, Barbed Sword of Surprise, Artful Initiative) will apply their damage bonuses directly to your Death Trap! It’s like your Death Trap gets secretly boosted by a whole category of damage increases meant for a different skill. By stacking several of these “Stun Grenade” aspects on your gear, you add massive multipliers that make your Death Traps hit exponentially harder!
When should I start focusing on the Paragon board, and what’s the main strategy there for this build?
You should start using your Paragon board as soon as you unlock it, but the strategy changes as you level up and acquire gear. Early on in Paragon, focus on activating your Glyph sockets quickly, grabbing essential Legendary Nodes that benefit the build, and taking life or defensive nodes if you feel squishy. However, once you have your core gear pieces and mechanics working (especially reaching higher energy levels and getting Overpowers!), the main strategy becomes surprisingly simple: stack Dexterity! Because this build gets so much damage from Overpower scaling with your Maximum Life, adding points to Dexterity provides a consistently high damage increase compared to taking additive damage nodes (+% to traps, +% to core skills, etc.). Every 5 points of Dexterity boost your overall skill damage, including those big Overpower hits.
This build sounds like a damage monster, but is it like a glass cannon? Is it tough to survive in high-level content?
Believe it or not, this build is often incredibly durable, sometimes to the point where it feels almost unkillable in regular content! The main reason is a key passive skill called Second Wind. This passive grants you a significant barrier based on your maximum life every time you spend 100 energy. Since Death Trap in this build consumes hundreds of energy with every cast, you are constantly triggering Second Wind and generating massive, overlapping barriers based on your high Maximum Life pool. These barriers absorb huge amounts of incoming damage, making you extremely resilient. Players often find that monsters can’t even break through their barrier before the next one is generated by the next Death Trap! If you also have the Doombringer sword, its Shadow Barrier on hit further adds to this amazing survivability. You might find you don’t need to put many affixes or Paragon points into traditional defenses like Armor or Resistances because you’re protected by these constant, huge barriers!
Which active skills should I have on my action bar for this specific Death Trap spamming build?
Here’s the typical lineup you’ll see: Dash is essential for movement, traversal, and positioning. Cowtrops provides utility like crowd control and contributes to the “Stun Grenade” synergy damage via the Trickster aspect; many players take the Disciplined Cowtrops upgrade for extra crit chance. Smoke Grenade, usually modified with the Subverting upgrade to apply Poison, is used primarily to easily trigger the Chemical Advantage passive for bonus damage against poisoned enemies. Poison Trap is another strong choice often used in this build; it adds more damage, applies Poison for Chemical Advantage, and provides a useful knockdown effect which synergizes with the Malice passive for bonus damage. Concealment is absolutely vital; you cast it right before Death Trap to guarantee that trap is a Critical Strike. And finally, the star of the show, Death Trap, which you’ll be spamming!
I see this build often uses Poison Trap, but not Shadow Step. Why drop Shadow Step if it’s so good for movement?
Shadow Step is indeed fantastic for movement and escaping effects in many Rogue builds, but this Death Trap spam build approaches mobility and survivability differently. For movement, you get plenty of speed and traversal by constantly spamming Dash, especially since Death Trap’s cooldown resets your other skills, including Dash! For survival and escaping bad situations, the build’s near-constant Concealment casting provides immunity to crowd control for its duration, meaning you’re rarely locked down and needing to Shadow Step out. Since those two needs are covered differently, swapping Shadow Step for Poison Trap is a common choice. Poison Trap adds more damage to your overall output and provides another reliable way to apply the Poison status needed for various damage multipliers. It’s simply more efficient for this build’s specific playstyle.
Wait, why doesn’t this build use Basic Skills or Combo Points? Aren’t those key parts of playing a Rogue in Diablo 4?
You’re absolutely right, Basic Skills and Combo Points are fundamental to many, many Rogue builds! However, this specific Death Trap spam build takes a unique approach to its resource and damage systems. Instead of generating energy with Basic Skills and spending it on Core Skills powered by Combo Points, this build focuses on building a massive energy pool and then spending all of it with Death Trap thanks to the Beastfall Treads interaction. Its energy return comes from the Aftermath passive and Momentum, not Basic Skills. Its damage scaling comes from Overpower, Critical Hits, unique item interactions, and layered aspects, rather than relying on amplified damage from Combo Points. This build also uses the Preparation specialization for cooldown reduction, which is different from the Inner Sight or Combo Points specializations used by other builds. It’s simply a different philosophy of playing the Rogue, leveraging Death Trap’s specific mechanics and unique item synergies rather than the standard Basic Skill/Combo Point flow!
When hunting for gear, does it matter if a unique item or a piece with Greater Affixes has a lower percentage roll on its legendary aspect? Or are the big stats/GAs more important?
This is a great question, and the answer is that the percentage roll on the legendary aspect matters significantly for your damage! While Greater Affixes on key stats are fantastic, a lower percentage roll on an aspect that provides a large multiplier (like one of those “Stun Grenade” damage aspects, or the Eye in the Dark’s Death Trap damage) can mean you’re missing out on a huge amount of damage. For example, a perfect 150% aspect roll is worth way more damage than a low 100% roll, even if the lower roll is on a piece with a Greater Affix on a defensive stat. For maximizing damage in this build, you often need to prioritize finding gear with high percentage rolls on the crucial legendary aspects, sometimes even more so than getting Greater Affixes on every single slot early on. Of course, some breakpoints (like Rank 9 Aftermath) might require a Greater Affix, but for raw damage, the aspect percentage is key!
Where should I go to try and find the specific unique items needed to get this build going?
Finding these key unique items is definitely part of the endgame grind! Unique items can drop from many sources in Diablo 4, but targeting specific endgame bosses often gives you a better chance for certain pieces. The unique boots Beastfall Treads can drop from the Beast in the Ice boss, but they also have a chance to drop from any Uber boss (bosses like Lord Zir, Duriel, Andariel, Grigoire); some players specifically target Lord Zir as a good source. The unique pants Eye in the Dark primarily drop from the boss Varshan. The unique chest Scundra’s Leather and the unique amulet Banish Lord’s Talisman are often farmed from Duriel and Andariel, or potentially the Harbinger of Hatred boss. The incredibly rare Uber Unique sword Doombringer can theoretically drop from any Uber boss, but your best chance (though still very low) is from Duriel and Andariel. The Betrayer’s Husk endgame activity is also a good source for targeting specific item slots and hunting for uniques or gear with Greater Affixes! Keep farming those bosses, and may the loot gods be with you!
