Alright, Tarnished, gather ’round! It’s time for a comprehensive and hopefully very helpful guide to overcoming the formidable Elden Ring Nightreign Bosses! We’re diving deep into the squishy spots and tricky moves of these main special bosses you’ll encounter in Elden Ring: Nightreign. Consider this your go-to for tackling the key bosses in Elden Ring: Nightreign.
First things first, let’s chat about some universal wisdom for taking down any Elden Ring: Nightreign bosses. Enjoy progress and fun gameplay with professional Elden Ring: Nightreign services. These aren’t just suggestions; these are your new best friends in battle!
Universal Wisdom for Tackling Elden Ring Nightreign Bosses

- Embrace the Weakness! Seriously, if a boss has a weakness, use it! It’s not just about boosting damage numbers (though that’s nice!). The right element can trigger unique effects on the boss, boost stagger buildup, and often leads to precious interruptions – a total fight-saver! You can infuse your gear with elements using Relics, mods, or smithing stones from mining tunnels. hunt for locations that reward specific elemental gear. Don’t forget spells, incantations, and Ashes of War can also pack that elemental punch! Committing to the correct element for the encounter truly makes a massive difference.
- Purple Grab Counter! Keep those eyes peeled for new grab attacks that shine with a distinct purple glow! This is your cue for a special counter move, perhaps feeling a bit like a certain counter from a different FromSoftware game involving a grappling hook. When an enemy’s grab glows purple, rolling into them (yes, into the danger!) triggers a unique animation and builds up significant stagger. Many bosses use these purple grabs, and the glow is your friendly invitation to perform this counter!
- Blocking Just Works! In Nightreign, blocking is quite effective; it simply negates incoming damage. Blocking with your weapon, even when two-handing, is a viable defense. The stamina cost varies, but against most attacks, if you’re unsure how to evade, giving blocking a try can save you a world of hurt.
Alright, armed with those basics, let’s jump into the Elden Ring Nightreign bosses themselves!
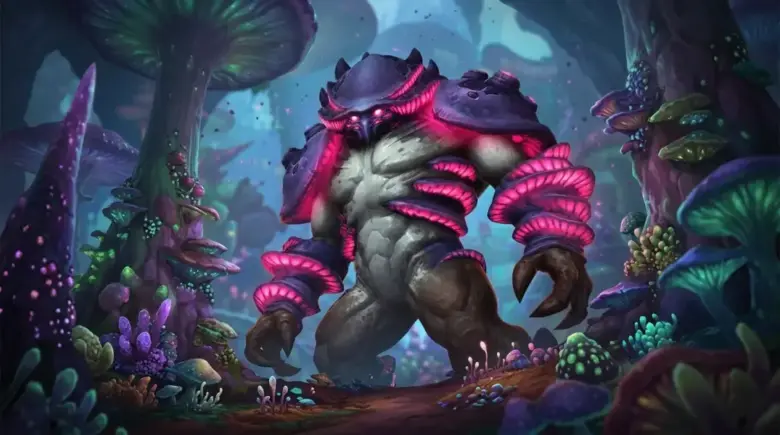
Defeating the First Night Lord: Gladius, Beast of Night (The Tricephalos)

This three-headed doggo might be one of the first big “uh oh” moments most players face! Don’t just focus on its health bar; things get chaotic fast when one big dog suddenly becomes three smaller ones! Preparation is key to minimizing the mayhem when you beat this boss. Gladius is often the first major roadblock players encounter during their early Expeditions.
Character Choice: Consider your character! Melee fighters like Raider, Wilder, and Guardian can get up close and personal, while folks using ranged attacks (like Ironeye with arrows) might feel safer keeping their distance. Choose who you feel most comfortable bringing to the dog park!
Weakness: Holy!
Special Interaction: Holy damage boosts overall damage and stagger buildup, especially in the split phase. It can potentially cause the split phase to end early and seems to help stun the three smaller dogs it transforms into, giving you precious attack windows. You’ll know you’ve landed holy damage when you hear a satisfying crack, the boss briefly flinches, and it glows with golden rays. Holy attacks also cause micro-stagger on the main boss.
Prep: Stack Holy damage on your weapons, spells, or Ashes of War.
Appearance and Strategy:

Tricphilos moves around a lot! Focus on shorter combos or big, charged hits (jump attacks, charged spells/Ash of War) during brief openings. Stagger opportunities exist, but aren’t constant.
Attacks to Watch:
- Bites: Expect typical dog bites! Slower ones use all heads (rears back); faster ones involve a quick dash lunge.
- Sword Swings: These are the widest-reaching attacks. Master the dodge timing early to avoid consistent damage!
- Purple Grab Attack: If a mouth glows purple, it’s prepping a grab. These have limited range; dodge by backing up or getting behind it. (Remember the universal purple grab counter too!).
- Fire Breath: This attack can be sudden and unpredictable. As soon as a mouth starts flaming, get out of the way! Watch out – the smaller dogs can also do this later!
Split Mechanic: Tricphilos transforms into three fiery orbs that become three smaller, one-headed dogs. This transformation is a longer animation – use this moment to heal or buff! During this phase, one player is marked with a red circle and becomes the sole target. Holy damage seems to slow down these clones, making them less aggressive and more susceptible to being cornered.
Split Phase Strategy: If you’re the marked player, running backwards to outrange the wolves or rolling into the first charging wolf can create space or a temporary barrier. If you’re not the marked player, seize the opportunity! The dogs are distracted, so rush in and get damage in. After their initial rush, they sometimes adopt a slower side-walk, offering another potential DPS window.
Adel, Baron of Night (The Gaping Jaw Expedition)

This gnarly creature, sometimes likened in appearance to a gaping dragon (though thankfully not quite as large!), has a serious hunger problem! Defeating it on your expedition requires smart tactics.
Weakness: Poison!
Special Interaction: Landing a Poison proc is fantastic! It triggers a unique, lengthy “vomit” animation (around 8 seconds!) that immediately interrupts whatever Adel is doing, even potentially breaking an active grab! Since a grab leaves Adel exposed, other players can quickly land Poison to interrupt and rescue their teammate. While the Poison damage itself might not be huge early on, the utility of the interrupt is immense. Adel is also susceptible to other statuses like Frostbite, Rot, and Sleep, but Poison seems the most impactful for providing those huge damage windows. Unlike some bosses, its grab offers a unique interrupt window.
Prep: Bring Poison sources (weapon, Ash of War, or quick Poison Pots).
Mechanics & Strategy:

Adel features many forward-moving and wide-sweeping attacks.
General Strategy: Stick close, hugging its legs and circling towards its back. Rolling into its attacks often positions you perfectly for DPS. Adel might also try to eat a teammate; landing large stagger attacks or poise damage while it’s doing this can interrupt the grab and spit the teammate back out, often creating a small damage window.
Phase 2 Additions (Gravity Lightning):
- Rock Lines: Appear on the floor and explode after a delay – roll or jump clear.
- Huge Lightning AoE: A channeled explosion – sprint far away to outrange this!
- Lightning Bolts: Marks appear before bolts strike – evade them!
- Whips & Leaps: Whips around and leaps into a slam. Roll these, but stay close – it’s vulnerable afterwards and looks quite silly upside down!
Phase 2 Focus: Dodge charges by rolling into them to land nearby. Constantly evade ground waves, lightning, and outrange the big AoE. Even if you’re not the target, many attacks have large AoEs that can catch bystanders, so stay ready to roll!
Gnoster, Wisdom of Night (The Sentient Pest Expedition)

Prepare for a fight against two bug buddies who eventually team up! Defeating Sentient Pest on your expedition often feels like a significant hurdle. Many players consider this encounter one of the first true progression checks before tackling harder Night Lords and farming valuable Remembrances.
Weakness: Fire!
Special Interaction: Fire is the hot ticket item (pun intended) for both parts of this fight – the scorpion and the moth! Fire damage boosts overall damage against both and applying Fire to the moth can cause damage over time. It might also encourage the scorpion to enter its stone form more often in Phase 1, limiting its dangerous moves (though potentially extending the fight duration). Enough Fire damage can also contribute to knocking the boss down.
Prep: Stack Fire damage wherever possible – spells, incantations, Ashes of War, and weapons. Prioritize upgrades that boost Fire damage or incantation/sorcery damage. Look for seals with fire attacks. FP management is crucial for spellcasters – prioritize FP recovery and reductions to FP consumption via items, talismans, or relics. Poison mitigation is also important, as Noster deals significant poison damage; consider relics, talismans, or Boluses. Ranged options (bow, staff, projectile art) offer more consistent damage and safety than pure melee. Armaments or passives that reduce enemy targeting are highly beneficial for dedicated fire-casters.
Mechanics & Strategy:

This fight can feel like a war of attrition, especially for melee, as you manage two targets. Noster’s fight transitions significantly between its two phases.
Phase 1 (Scorpion & Moth Separate):
- Noster appears as two distinct entities: a scorpion and a moth.
- The moth continuously sprays poison mist, building up your poison meter (this mist is hard to recover from without wasting healing). The scorpion relies on devastating rock attacks, especially up close.
- Ranged attacks are essential for damaging Noster while avoiding the scorpion’s dangerous close-range hits and staying out of the worst of the moth’s poison mist.
- An effective strategy involves some players focusing on keeping the scorpion busy (potentially with melee or summons) while others (kitted for Fire) concentrate damage, often on the moth initially.
- Scorpion Stasis Mode: The scorpion will occasionally enter a “stasis” or “rock mode.” This offers a prime opportunity for players to rush in and land significant damage while it’s vulnerable.
- Managing the Moth’s Aggro: Having one player specifically manage the moth’s attention can prevent it from harassing the rest of the team, allowing others to focus or survive more easily. Sometimes, simply being a distraction and creating space by backing off is crucial for survival.
- The scorpion may burrow underground and resurface with a devastating attack. It’s advisable to back away from its position when it burrows to avoid this.
Phase 2 (The Merge):
- Around half health, the boss transitions (the map might change). The moth and scorpion link together.
- Their attacks combine and intensify, potentially dealing massive damage.
- Immediately upon transition, gain as much distance as possible!
- This phase is less about constant aggression and more about survival and patiently chipping away at health when safe.
- If you are the primary Fire damage dealer, standing back and unleashing fire with reduced targeting is key.

Knockdown Mechanic: Consistent Fire damage can knock the boss down.
Teamwork for Critical Hits: When Noster is knocked down, teammates should rush in for critical hits (front stabs/repostes). Coordinate this!
- Summoning might still help draw aggro, creating small windows.
- Staying alive is paramount! If the team wipes, the run resets. Focus on evasion if needed until an opening presents itself.
- Saving powerful abilities (like an Ultimate that revives) for emergencies in this high-damage phase is smart. Watch out for a giant beam of light in Phase 2 that deals large AoE damage – don’t stand in it!
Team Composition Ideas (Hypothetical): Consider a team with a primary Fire Damage Dealer (focused on FP, reduced targeting), Tanky/Distraction characters (Raider, Wilder, Guardian – stack HP, keep scorpion busy), Support/Revival (Guardian), and potentially other players with Ranged Flex to contribute from afar.
Strategic Pauses & Reviving: Reviving downed teammates near the boss is risky; it can draw aggro and cause a chain wipe. If a teammate goes down near the boss, drawing aggro away before attempting the revive is safer. Don’t rush revives – patience prevents losing the run.
Maris, Fathom of Night (The Augur Boss)

This floating fella loves to keep its distance and put you to sleep! This is considered a highly mechanical nightlord boss fight requiring patience and reaction to beat.
Weakness: Lightning (good to have, helps mess it up and contributes damage/stagger) & Ranged Attacks (ESSENTIAL!).Managing Madness correctly becomes even more important during high-level encounters and future Everdark Sovereign challenges.
Crucial Prep: Don’t Sleep on These Tips!
- Stack Sleep Resistance: Augur’s move fills a sleep meter, potentially causing a knockout leaving you vulnerable. A relic with improved Sleep Resistance is highly advisable. Sufficient resistance can allow you to avoid the full knockout effect. Look out for upgrades boosting resistance to all ailments too.
- Bring Ranged Attacks: This is non-negotiable for a smoother fight! Bows, magic staffs, projectile weapon arts – have a way to damage it from afar. Melee-only is possible but much longer and requires significantly more dodging. Upgrading a basic ranged tool and boosting ranged attack power is a solid plan.
- Team Composition Ideas (Hypothetical): Ranged Damage dealers (Ion Eye, Recluse), Support/Resurrection characters (Guardian, potentially Revenant), and Distraction (Revenant summons) can make the mechanical challenges easier.
The Battle Rhapsody: Mechanics & Strategy:

Augur is about patience, positioning, and reacting to specific cues, not a quick sprint.
General Strategy: Focus on surviving attack phases by dodging and keeping distance unless an opening appears. Chip away health with ranged attacks. It occasionally becomes still for brief melee chances, but prioritize dodging over risky hits.
Basic Attacks: Expect it to shoot forward or sweep waves (roll sideways!). Sends slow-moving homing jellyfish (keep moving!).
Minor Annoyance: Tentacles: Summons ground tentacles that damage if too close. Not usually the primary threat, but clear them if they block movement or are near downed teammates. Don’t risk boss hits to clear them unnecessarily.

Key Mechanic 1: The Sleep Channel: Augur emits sleep, filling meters.
- With Sleep Resistance: Avoids full knockout. Crucially, this is a major DPS window! Stay close (or relatively close) and unload damage during this lengthy animation. Players without resistance will likely need to run far away, missing this opportunity.
Key Mechanic 2: Teardrop Bombs: Drops exploding sleep/damage bombs. MUST destroy these with ranged attacks before they hit the ground! Coordinated fire prevents devastation.
Critical Phase 2 Mechanic: The Bubble Attack: Around half health, fires a giant bubble from the center.
- Countering the Bubble: MUST be broken before it lands! If it hits unbroken, it causes huge damage and widespread forced sleep. Use ranged attacks, spells, or powerful breaking abilities/Ultimates to pop it mid-air. Save specific abilities for this!
- Failure Consequence: Massive damage and widespread forced sleep. If you can’t break it, get far away, but you’ll still take damage/risk sleep. Breaking it can sometimes stagger Augur.
Strategic Pauses & Support: If the team is low, retreat to the back to heal/regroup. Revenant summons can draw Augur’s attention during this, or distract from grenade attacks.
Wrapping Up: Being prepared for mechanics is key. Sleep resistance lets you exploit the sleep channel. Ranged damage is essential for chipping and destroying bombs/bubble. Patience, reaction, and utilizing ranged options are vital.
Libra, Creature of Night (The Equilibrious Beast)

This boss throws a lot at you, especially Madness! This fight escalates significantly if its core mechanic isn’t managed.
Weakness: Madness (if reliable sources are found!), Fire, Holy.
Most Important Interaction: Libra’s core mechanic is its “meditative stance” or chant, where it floats in an immune bubble. If it finishes channeling, mechanics intensify, Madness ramps up, and the fight becomes significantly harder (sometimes requiring a full retreat!).
Prep: Prepare for Holy and, crucially, Madness damage! Boost Madness resistance (Boluses are great!) and bring Clarifying Boluses to cleanse buildup mid-fight. Standard physical and Holy resistance are also important.
Pre-Fight: Libra might offer a deal (options vary!). This could involve temporary stats loss for a later boost. Rejecting the offer is a safe bet.
Mechanics & Strategy:

This fight escalates if the chant isn’t managed.
Early Phase: Mix of Holy seals (ground ones pause, then explode – roll with the delay; air ones fire forward – run sideways!) and minor Madness buildup (sprouts from above; holy nodes on the ground cleanse buildup – grab these!). Simple staff combos.
Countering the Chant: This is the key!
- Break the golden seals around it to interrupt the channel and trigger a melee frenzied mode. Ranged tools help with this!
- Land a big poise-breaking hit (like from an Ultimate) to interrupt directly. Saving a powerful interrupt for the second bubble phase (which has more seals) is strategic.
- A fully charged ability from certain characters (like Raider’s Retaliate when empowered) does incredibly high stagger damage and can single-handedly break Equilibrious Beast out of the chant.
- Melee Frenzy: Triggered by seal breaks. Expect a triple melee slam followed by a big Madness AoE. Ground versions have safe gaps; air versions are harder – sprinting clear might be needed!
- Super Attack (Madness Channel): Libra channels massive Madness buildup. Actively run around grabbing the Holy nodes to counter this! Interrupting the channel stops it.
Overall: Manage Madness buildup! Interrupt the bubble chant whenever possible using seals, Ultimates, or high-stagger abilities. Expect escalation if the chant completes. Madness resistance is your best friend!
Fulghor, Champion of Nightglow (The Darkdrift Knight)

This mobile horseman, reminiscent of a Night’s Cavalry in appearance, loves to charge around! Defeating this field boss relies on careful positioning and exploiting its weakness.
Weakness: Lightning (Excellent!)
Special Interaction: Lightning is incredibly effective! It causes a brief stagger and explosion, can proc repeatedly, and applies the standard debuff (takes more damage, deals less). Another interruption can land after the previous Lightning effect fades. Lightning is also key to interrupting its attempts to empower itself.
Prep: Stack Lightning damage! Try to time Lightning procs to interrupt dangerous animations.
Mechanics & Strategy:

Fulghor is quite mobile, charging and jumping frequently.
General Strategy: If you have aggro, evade attacks while trying to stay relatively still to keep Fulghor somewhat contained. Rolling into and behind its spear combo charges is key to staying close and controlling its position. Consistently interrupting its power-up attempts with Lightning keeps it from going into a dangerous empowered stance.
Attacks to Watch:
- Leap Slams: Create ground fissures on impact. Players without aggro also need to evade or outrange these expanding zones!
- Glowing Spear Attack (Prime Interrupt Target!): Pauses, powers its spear, and slams it. After a delay, Holy spears erupt under every player simultaneously! There’s no outranging this – you must roll with the timing. Leaves lingering damage zones. Definitely try to interrupt this with a Lightning proc!
Phase 2 (Poison Arm): Grows a big, gross Poison Arm with extended reach.
- Many attacks now leave lingering poison waves. Rolling backwards or sideways becomes risky! Commit to rolling into and behind Fulghor, constantly circling.
- Combos extend (some up to 5-6 hits!). Sticking close and rolling into these keeps Fulghor busy for ages, creating fantastic DPS windows for allies.
Overall: Interrupt key attacks (especially the Holy spears and empowerment attempts!) with Lightning procs. Use Ultimate iframes as a backup for long combos. If you have aggro, stick close and circle to control its movement.
Caligo, Miasma of Night (The Fissure in the Fog)

This icy dragon, perhaps making you think of a chilly Boreal Valley, has a massive health pool but offers good opportunities to beat it!
Weakness: Fire & Bleed!
Special Interaction: Fire is the natural counter! Fire procs leave red debuff lights (lowers attack/defense – very useful against its high HP). It might also reduce the severity of its Frostbite effects. Bleed is also generally effective against large health pools like Caliggo’s.
Prep: Stack Fire damage. Consider Bleed damage options.
Appearance and Mechanics:

Caligo has a wide variety of icy attacks.
General Strategy: Many attacks leave hazardous ice patches – avoid standing in them! Capitalize on the numerous DPS windows that open up after its longer animations. Expect a lengthy battle.
Attacks to Watch:
- Ice Breath: Sweeping (run away or get past it!), straightforward blasts, double wing channel forward. Often sidestepped, leaving decent DPS windows.
- Tail Attacks: Whip and slam in a line (roll sideways!).
- Underbelly Ice: Breathes ice under itself if you linger too long – run out!
- Flying Drive-by (Nasty!): Channels ice shards and hoses you down like a machine gun while flying past (often two passes). The range is wild – sprint sideways and roll at the very last moment!
- Special Fly-Away Tricks (Creating Fog): Two types:
- Listen for tinkling ice, find the dragon channeling huge ice above it. Hide directly under it for safety, or try sprinting very far away to outrange it.
- Look for wind being sucked towards it. Rush into the wind flow and hide behind a pillar to avoid the massive ice blast that follows.
Later Phase Additions: Might combine a forward sweep spreading exploding ice bombs with a tail slam. Manage your spacing during this chaotic move!
Overall: Despite the volume of mechanics, Caligo’s attacks often have clear tells and good recovery windows. Stack Fire/Bleed and capitalize on those many DPS opportunities!
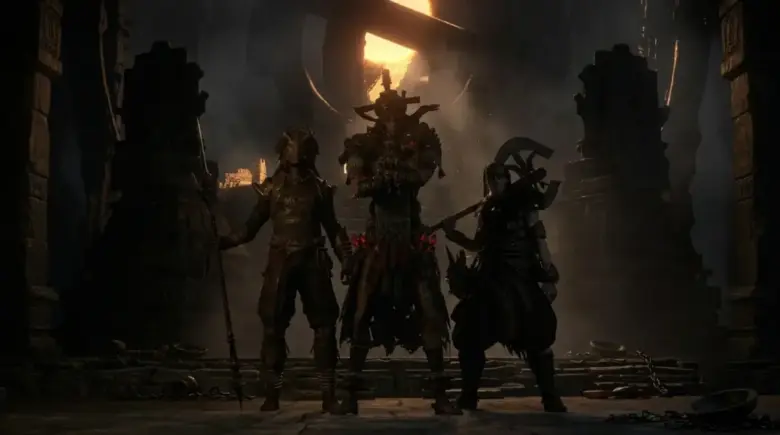
Heolstor, The Nightlord: The Final Boss

Alright, Tarnished, you’ve made it to the final boss! Say hello to Heolstor, a hulking heap of bad vibes and blade swings who’s here to test every flask, nerve, and Ultimate Art you’ve got. This is the ultimate nightlord boss challenge.
Weakness: Holy! (He really, really hates Holy damage!) Scarlet Rot also works wonders for a long, slow death.
Prep Like a Pro:
- Aim for at least Level 14. Anything lower and Heolstor might mistake you for an hors d’oeuvre.
- Stock up on Holy damage sources – Holy Grease, Holy Water Pots, Holy-infused weapons or spells.
- Consider a balanced team: Tanks (Guardian, Raider) to keep him busy, Big Damage Dealers (Duchess, Iron Eye – especially with Holy!) to dish out pain, and Fast/Support characters (Wylder) for dodging, poking, and retreating.
Phase by Phase: The Many Moods of Heolstor

Phase 1: “Just Stretching My Legs”
- What’s He Doing?: Slow approaches, basic swings. The calm before the gothic storm.
- What Should You Do?: Play it cool. Study his combos, then sneak in attacks when he’s catching his breath.
Phase 2: “Okay, Now I’m Mad”
- New Tricks: Elemental attacks start flying, and his combo game gets real spicy.
- Your Move: Zen Mode – don’t rush, let him flail, then whack him during cooldowns. Big Boom Time – use your Ultimate Arts here for good staggering opportunities. Remember: Greed = Death! Two hits max, then retreat!
Phase 3: “I Am Become Night, Destroyer of Timelines”
- Ascension Time: Heolstor floats up and absorbs a random elemental buff from one of the previous Night Lords.
- Counterplay Vibes: Detective Work – figure out which buff he’s rocking and adjust your gear/tactics accordingly (swap resistances if needed!). SKY SPLITTER ALERT – when he winds up this flashy move, backpedal like your life depends on it – because it does! Each buff brings new chaos, so be ready to rethink your rhythm.
Big Brain Bonus Tips:
- Bonk Interrupts: Certain abilities (like Iron Eye’s Single Shot or Wylder’s Onslaught Stake) are great for cutting his combos short and making space.
- Flask Management 101: Don’t chug like a frat bro. Heal only when safe, or it’s back to the nearest Site of Grace.
- Team Synergy FTW: Aggro management, coordinated bursts, and in-fight calling out (“LEFT FLANK!” or “RUNNNN!”) go a long way.

Heolstor might look like the villain from an album cover, but with a bit of planning, teamwork, and Holy firepower, you’ll turn this boss fight into a goth-flavored victory lap. Good luck, Tarnished—and don’t forget to emote on the corpse. Just once. Respectfully.
And there you have it! A helpful guide to conquering all the Elden Ring Nightreign bosses by understanding their weaknesses and key mechanics. Stop struggling and start strategizing! Using these tips can turn those tough encounters into manageable challenges. Good luck out there, Tarnished!