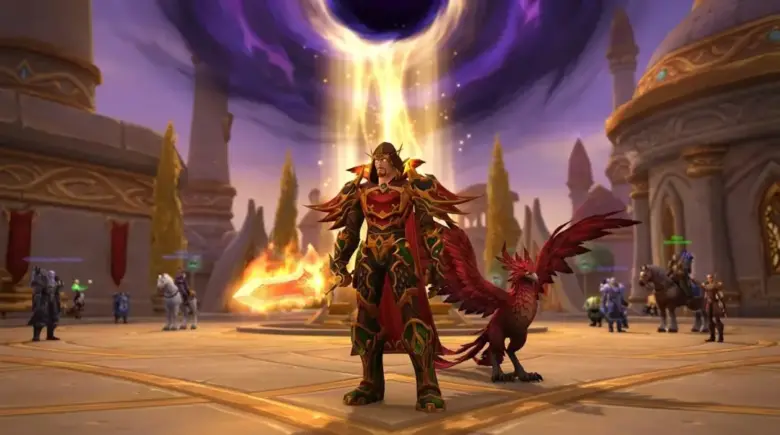
The March on Quel’Danas is the premier raid of World of Warcraft: Midnight Season 1, serving as the final encounter of the opening tier. Set on the Isle of Quel’Danas after the Sunwell’s corruption into the Darkwell by Xal’atath, this raid focuses on tightly tuned mechanics, coordination, and execution rather than extended boss progression.
In this guide, we’ll cover:
- Full March on Quel’Danas raid overview, including location, requirements, and access
- The Light vs Void Polarity system and how it impacts every mechanic
- Complete Belo’ren boss strategy, including Phase 1, Phase 2, and role responsibilities
- Key mechanics, overlap scenarios, and common wipe causes
- Midnight Falls encounter breakdown and core strategy tips
- All loot, rewards, and progression systems tied to the raid
 | Epiccarry")
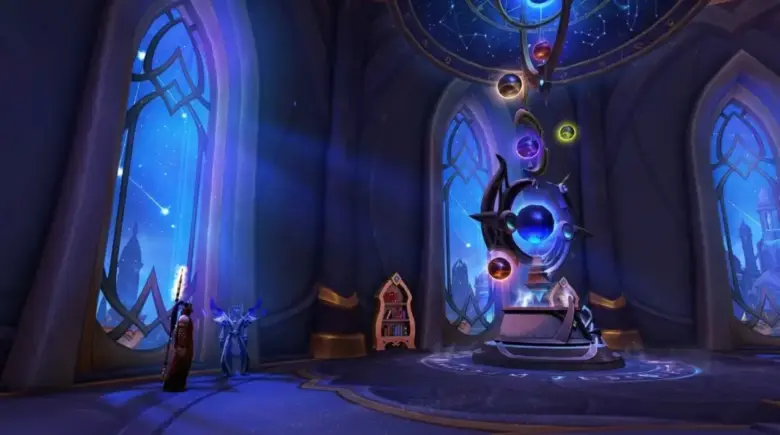
Raid Overview, Location & Requirements
The March on Quel’Danas is a two-boss raid located on the Isle of Quel’Danas, accessible via flight paths from Silvermoon City or portals within new expansion hubs. The raid begins with Belo’ren, Child of Al’ar and the final encounter is Midnight Falls, making it a compact experience focused on mastering a small number of tightly tuned mechanics rather than extended boss progression.
- Raid Entrance Coordinates: /way #2424 52.6 87.5 (Sunwell Plateau).
- Required Level: 90.
- Available Difficulties: Story Mode, Raid Finder, Normal, Heroic, and Mythic.
- Release Schedule: Normal, Heroic, and Mythic: Week of March 31; Raid Finder (LFR) and Story Mode: Week of April 7
 | Epiccarry")
If your goal is to clear the raid on Heroic without spending time stuck on polarity mistakes, missed soaks, or undergeared randoms, our March on Quel’danas Heroic Boost is the cleanest option. For players who want a stronger early-season gearing route we offer Midnight Heroic Raid + Free Normal package also works well because it gives you both Heroic progress and an extra Normal clear for additional loot chances.
Core Mechanic: Light vs Void Polarity System Explained
 | Epiccarry")
The defining design philosophy of the March on Quel’Danas is the Light vs. Void Polarity. This system dictates player survival and coordination throughout the raid and applies to nearly every major mechanic in the Belo’ren encounter.
- How Feather Assignment Works (Light vs Void): Players are infused with either a Light Feather (Gold) or a Void Feather (Purple). This assignment determines which mechanics they can safely interact with and which responsibilities they can fulfill during the fight.
- Damage Mitigation & Absorption Explained: These feathers provide powerful elemental mitigation. Being infused with a specific feather grants absorption against its matching element, which is required to survive high-damage mechanics such as Dive soaks, Edicts, and other color-based effects.
- Polarity Rules (What Instantly Kills You): Interacting with the opposing color (e.g., a Light-infused player touching a Void orb or attempting to soak a Void mechanic) is typically lethal. This applies consistently across the encounter, making correct positioning and awareness critical at all times.
- Team Coordination Requirements: Several mechanics require cross-group coordination, especially orb clearing and soak setup. For example, clearing orb paths or soaking damage correctly often enables safe movement or survival for players of the other polarity. Misalignment between groups is one of the most common causes of wipes.
- Accessibility & Colorblind Settings: Due to the high reliance on color-coded gameplay, it is recommended to enable the Tritanopia filter in the settings for optimal visual clarity.
As Midnight Season 1 winds down and Season 2 gets closer, March on Quel’Danas becomes less about long-term progression and more about finishing what you still need: Heroic clears, missing loot, tier pieces, and late-season rewards. The Midnight Season 1 Heroic Raid Battle Pass fits players who want several organized Heroic runs before the season ends instead of paying for separate clears each week.
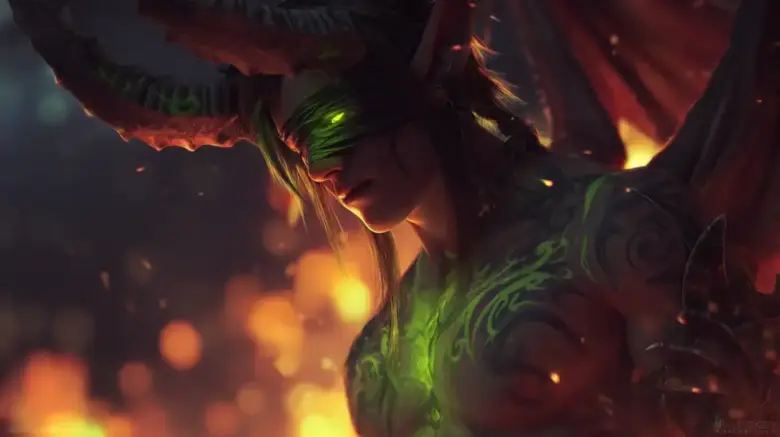
Belo’ren Boss Guide (Phase 1 & 2 Strategy)
 | Epiccarry")
Belo’ren is a complex, two-phase battle centered on a Rebirth cycle. Belo’ren’s actual health pool is tied to the Immortal Flame, represented by the boss’s stationary Egg form.
 | Epiccarry")
Phase 1: Phoenix Form Mechanics & Strategy
Belo’ren begins in Phoenix form. This phase serves as an execution check that must be cleared before meaningful damage can be dealt to the boss’s true health.
- Light and Void Ember Phoenixes: The boss summons adds that target players of the opposite color with a Dive attack. These adds must be controlled and positioned quickly, as improper placement will disrupt soak positioning and limit safe space in later overlaps.
- Split Damage: To survive the Dive, players of the matching color must stack within the circle to split the damage. Failing to properly split the soak is typically lethal and often results in immediate raid destabilization.
- Optimization: The recommended strategy is to stack these circles behind the boss. This allows for immediate cleave damage once the adds land and keeps the arena controlled for upcoming mechanics.
- Rebirth Prevention: Once a Light or Void Ember Phoenix is defeated, it becomes a small egg. These must be destroyed within 15 seconds, or the add respawns at full health. Failing to clear eggs consistently leads to exponential add pressure in later cycles and is one of the most common wipe conditions.
- Radiant Echoes (Bouncing Orbs): Walls of orbs float across the arena. Contact with the wrong color is typically lethal, making orb management a strict polarity check rather than a soft positioning mechanic.
- Clearing Lanes: Matching-color players must clear 3–4 orbs to create a gap. This is a selfless mechanic; you are creating a lane for players of the opposite color to pass safely. On higher difficulties, these orbs can bounce off the arena walls, making their paths less predictable and increasing the importance of early clearing.
- Movement Philosophy: Movement in this encounter should be proactive rather than reactive. Players should always position themselves with their next safe location in mind, especially when orb walls and quills overlap. Because orb clearing is a cross-team responsibility, players must anticipate where the opposite color group will need space and act early. Late movement is the primary cause of deaths during overlapping mechanics.
- Infused Quills: A player is targeted by a quill of the opposite color. After a 6-second delay, the quill fires. A player matching the projectile’s color must stand in the path to act as a bodyguard. Failure to intercept correctly will result in lethal damage to the targeted player.
Common Wipe Causes (Failure Cascades Explained)
Most mechanics in this encounter are interconnected, and failures rarely occur in isolation. Mistakes tend to compound, quickly escalating into unrecoverable situations.
Missed interrupts, failed soaks, or delayed reactions can overlap with other mechanics, creating scenarios where recovery is no longer possible. Because of this, mistakes compound quickly, making recovery unlikely once overlaps begin—clean execution of each mechanic is what prevents the fight from spiraling out of control.
Advanced Strategy & Decision-Making Tips
Success in this encounter depends heavily on coordination and pre-planned responsibilities. Interrupts should be assigned by polarity to avoid overlap, and add control tools should be used deliberately to maintain tight positioning.
As the fight progresses and mechanic density increases, players must adapt dynamically rather than relying on fixed positioning or rigid assignments. Good decision-making comes from anticipating upcoming overlaps and adjusting early, ensuring the raid maintains control as pressure ramps up.
 | Epiccarry")
On Mythic, these failure cascades matter even more because small polarity mistakes, missed Edicts, or delayed egg damage can ruin an otherwise clean pull. If your group does not have the consistency for Mythic progression but you still want the highest item-level rewards from the raid our March on Quel’danas Mythic Boost is the most relevant option.
Tank Guide: Guardian’s Edict Mechanics
 | Epiccarry")
Tanks must manage a rigid three-step sequence. If an Edict fails to hit a target, Belo’ren gains a significant damage increase buff, which can quickly lead to a raid wipe. This makes correct positioning and timing non-negotiable, as even a single missed soak can destabilize the encounter.
- Light Edict Strategy: A frontal cone soaked by the Light-feathered tank. Proper positioning is critical to ensure no other players are clipped, as incorrect soaking can cause unnecessary raid damage or misalign subsequent mechanics.
- Void Edict & Tank Swap: Immediate taunt swap; soaked by the Void-feathered tank. The swap must be clean and immediate, as delays can result in incorrect polarity soaking or missed coverage.
- Voidlight Edict (Heroic+): A dual-color frontal. Both tanks must stand in front of the boss, splitting the cone (Void on left, Light on right). Misalignment between tanks can cause one side to go unsoaked, triggering the boss damage buff and often resulting in a wipe.
- Post-Edict Damage Window: The active tank takes massive physical damage for five melee hits following an Edict. Mitigation should be saved for this window, with external cooldowns and healer attention pre-planned. This is the most dangerous point of the fight for tanks, especially in later cycles when overall raid pressure is higher.
Tanks should minimize unnecessary boss movement throughout the sequence. Even slight repositioning can disrupt soak setups, add stacking, and orb pathing, creating avoidable risk for the rest of the raid.
Belo’ren Role Guide (Tanks, Healers, DPS)
- Tanks: Tanks are responsible for executing the Guardian’s Edict sequence correctly, including clean taunt swaps and proper positioning for each soak. The primary danger comes from the post-Edict vulnerability window, which must be managed with mitigation and external support.
- Healers: The primary responsibility is managing Eternal Burns. This debuff applies a high-damage DoT alongside a healing absorb, and the absorb must be cleared immediately with burst healing to stop the damage.Eternal Burns functions as a scaling throughput check. As healing reduction stacks increase from repeated rebirths, clearing these absorbs becomes progressively more difficult. Healers should prioritize affected targets immediately—even over general raid healing—as leaving the debuff active quickly leads to unmanageable damage and potential chain deaths.Cooldown planning is critical during the Egg phase, where constant movement and pulsing raid damage overlap. Healers should prepare mobility-friendly tools and coordinate throughput cooldowns to stabilize the group during these high-pressure windows. As the encounter progresses, efficient cooldown rotation becomes more important than raw healing output.
- DPS: Prioritize targets in the following order: small Phoenix eggs > Ember Phoenix adds > Belo’ren. Small eggs must be eliminated immediately to prevent add respawns, while active Ember Phoenixes should be controlled and cleaved efficiently to reduce raid pressure.Damage output should be focused on correct target selection rather than boss uptime. During Phase 1, boss damage is secondary to maintaining control of adds and preventing escalation. During the Egg phase, however, all cooldowns should be committed.Efficient cleave, fast target swaps, and disciplined cooldown usage are essential. Misallocated damage will extend the fight and increase raid pressure.
Phase 2: Immortal Flame (Egg Phase Strategy)
At 0% health, the Phoenix performs a Death Drop. Move to the edges to reduce damage and knockback before quickly repositioning toward the center to resume control of the arena. Poor positioning here can lead to immediate disorientation and failed setup for the phase.
- How To Stop The Rebirth Cast: The Egg is actively casting Incubation of Flames. If the cast completes, Belo’ren rebirths and returns to Phase 1, continuing the encounter cycle. This phase represents the primary opportunity to deal meaningful damage to the boss.
- Immortal Flame DPS Strategy: Damage dealt to the Egg is permanent and directly reduces the boss’s true health pool. It is optimal to save Bloodlust/Heroism and major cooldowns for this phase to maximize progress and reduce the number of required cycles.
- The Pinwheel Dance Mechanic Explained: The Egg emits rotating “Pinwheel” beams. Players must rotate with the beams, staying strictly within their matching color slice. Incorrect positioning or slow movement will result in lethal damage, particularly as other raid damage continues during the phase.
- Soft Enrage& Scaling Difficulty: Every rebirth applies a stacking 10% healing reduction to the raid, eventually making the encounter unhealable. As cycles progress, healing throughput becomes increasingly strained, and mistakes that were previously recoverable will quickly become fatal.
Failure to deal sufficient damage during this phase extends the fight and accelerates mechanical overlap and healing pressure, making later cycles significantly more difficult to manage.
 | Epiccarry")
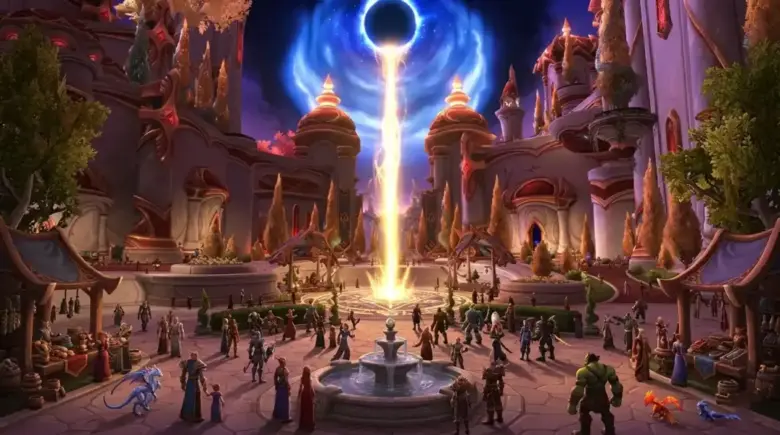
Midnight Falls Boss Guide (Final Encounter Strategy)
 | Epiccarry")
Following the defeat of Belo’ren, the raid culminates in the Midnight Falls encounter. While Belo’ren serves as the mechanical gatekeeper, Midnight Falls represents the final confrontation against the Void-corrupted Sunwell, now transformed into the Darkwell.
This encounter shifts focus from strict polarity execution to sustained raid-wide pressure and environmental control. Players can expect heavy incoming damage, positioning requirements, and overlapping mechanics that test coordination and recovery rather than isolated execution.
Unlike Belo’ren, where progress is tied to a cyclical damage window, Midnight Falls functions as a more traditional end-boss encounter. Success depends on maintaining control of the arena, managing incoming damage, and executing mechanics consistently under increasing pressure.
Key Strategy Tips
At a high level, the fight emphasizes:
- Sustained raid damage and healing throughput
- Controlled positioning and movement
- Consistent execution during overlapping mechanics
As the final encounter, Midnight Falls serves as the raid’s ultimate test of coordination, bringing together the mechanical discipline learned throughout the raid into a single sustained encounter.
Since Midnight Falls is the final encounter of the raid, this is the boss most players will care about for Heroic completion and seasonal achievement progress. If your main goal is securing the Heroic final-boss kill our Ahead of the Curve Boost – WoW AotC Carry is the most direct service.
Loot, Rewards, and Progression
The March on Quel’Danas is a compact two-boss raid, with loot split between Belo’ren and Midnight Falls. Each boss drops its own distinct pool of armor, accessories, weapons, and special items, making both encounters important for gearing progression.
 | Epiccarry")
Belo’ren Loot
Belo’ren can drop the following items:
- Whisper-Inscribed Sash
- Echoing Void Mantle
- Radiant Clutchtender’s Jerkin
- Eternal Flame Scaleguards
- Darkstrider Treads
- Emberborn Grasps
- Sin’dorei Band of Hope
- Radiant Plume
- The Eternal Egg
- Belo’melorn, the Shattered Talon
- Belo’ren’s Swift Talon
- Thalassian Dawnguard
Belo’ren is also tied to one of the raid’s most desirable collectible rewards: the Ashes of Belo’ren mount. If your main goal is not item level or tier progress, but securing this mount before Season 1 ends, the Ashes of Belo’ren Boost is the most relevant option. It fits collectors who want the Belo’ren mount without relying on repeated weekly raid groups or random drop luck.
Midnight Falls Loot
Midnight Falls can drop the following items:
- Robes of Endless Oblivion
- Mask of Darkest Intent
- Oblivion Guise
- Extinction Guards
- Amulet of the Abyssal Hymn
- Eye of Midnight (Very Rare)
- Light of the Cosmic Crescendo
- Shadow of the Empyrean Requiem
- Lightless Lament
- Alah’endal, the Dawnsong
- Brazier of the Dissonant Dirge
If your main goal is not just clearing the raid but targeting rare Season 1 drops, the WoW Midnight Very Rare Items Boost is the better fit. This is especially relevant for players chasing items like Eye of Midnight, special boss drops, or high-value raid rewards before Season 1 fully ends.
 | Epiccarry")
Players who want to build their character beyond raid loot alone should consider combining raid clears with dungeon gearing. Our Midnight Heroic Raid and Mythic+ Dungeon boost fits this progression path well, since Heroic raid drops and Mythic+ rewards together create a stronger weekly gearing route than relying on one activity.
Item Level & Difficulty Scaling
 | Epiccarry")
Gear from March on Quel’Danas scales by difficulty, with higher tiers offering stronger rewards and upgraded currencies.
| Difficulty | Belo’ren (Boss 1) | Midnight Falls (Boss 2) | Crest Dropped |
| LFR | 240 | 243 | Veteran Dawncrest |
| Normal | 253 | 256 | Champion Dawncrest |
| Heroic | 266 | 269 | Hero Dawncrest |
| Mythic | 279 | 282 | Myth Dawncrest |
Tier Sets & Chiming Void Curio
The final boss, Midnight Falls, drops the Chiming Void Curio, a flexible tier token that can be exchanged for any set piece.
- Turn in Curios to Kirana, located near the raid entrance
- Allows targeted acquisition of tier set gear
- One of the most efficient ways to complete your set bonuses early
If your priority is completing set bonuses as quickly as possible instead of waiting on random drops, our Midnight Raid Tier Sets Boost is the most relevant option here. It directly matches players who are reading this section because they care about tier tokens, Chiming Void Curio drops, and early-season power gains.
Belo’ren Cheat Sheet (Quick Mechanics Guide)
| Mechanic | Action | Penalty for Failure |
| Polarity | Purple = Void, Gold = Light. Match your color. | Lethal damage. |
| Dive Soaks | Target = opposite color. Soak = matching color. | Lethal if not split. |
| Eruption | Interrupt matching color Phoenix. | Raid Wipe. |
| Orb Walls | Matching players clear lanes for the opposite team. | Lethal interaction; bouncing orbs. |
| Guardian’s Edict | Light -> Void -> Dual Soak. | Major Boss Damage Buff. |
| Eternal Burns | Healers: Burst heal through the absorb. | Lethal DoT on target. |
| Egg Phase | Primary DPS Check. Rotate with Pinwheels. | Overwhelming mechanical scaling. |
Mechanic Overlap Scenarios (Advanced Tips)
 | Epiccarry")
As the encounter progresses, mechanics begin to overlap in increasingly complex ways. Common high-risk overlaps include orb walls appearing simultaneously with quill targeting, or Dive soaks occurring during movement-intensive phases. In these scenarios, players must prioritize survival mechanics first (correct positioning and color matching), followed by secondary responsibilities such as soaking or interrupting. Understanding which mechanics are immediately lethal versus recoverable is key to surviving later cycles.
Common Mistakes & How to Avoid Wipes
Common mistakes in this encounter include:
- Failing to re-check polarity after rebirth, leading to instant deaths.
- Over-clearing orbs and leaving no safe path for the opposite team.
- Mismanaging Phoenix eggs, causing add overload in later cycles.
- Incorrect tank positioning during the Edict combo, resulting in boss damage buffs.
- Delayed reactions to quill targeting, especially during overlapping mechanics.
Avoiding these errors is often more important than perfect execution of advanced strategies.
 | Epiccarry")
Final Tips for Clearing March on Quel’Danas
Execution in the March on Quel’Danas is less about raw output and more about consistency under pressure. Most wipes occur from small mistakes compounding during overlaps rather than a single major failure.
Keep these priorities in mind:
- Polarity always comes first. Incorrect color interactions are the fastest way to die and often unrecoverable.
- Play for the team, not your parse. Clearing orbs and handling mechanics for the opposite group is mandatory, not optional.
- Save cooldowns for the Immortal Flame. This is the only phase that meaningfully progresses the fight.
- Control adds and eggs early. Letting Phoenix eggs respawn quickly snowballs into unmanageable pressure.
- Respect overlap scenarios. When mechanics stack, prioritize survival positioning over secondary tasks.
- Stability beats greed. One clean cycle is worth more than squeezing extra damage and risking a wipe.
As the fight progresses, healing reduction and mechanical density will naturally tighten the margin for error. Groups that stay disciplined and maintain clean execution will consistently push further each cycle and eventually secure the kill.
Check out more WoW Midnight guides:
Epiccarry: best wow boost and coaching services
Frequently Asked Questions
What is the March on Quel’Danas raid in WoW Midnight?
The March on Quel’Danas is the final raid of Season 1 in World of Warcraft: Midnight. It features two boss encounters—Belo’ren and Midnight Falls—and focuses heavily on Light and Void mechanics that require coordination and positioning.
How many bosses are in the Quel’Danas raid?
The raid has two bosses: Belo’ren, Child of Al’ar (first boss), and Midnight Falls (final boss). Despite the small size, both encounters are mechanically dense.
Where is the March on Quel’Danas raid located?
The raid takes place on the Isle of Quel’Danas, accessible through the Midnight expansion’s main progression path. The entrance is near the Sunwell area, now transformed into the Darkwell.
What is the Light and Void Polarity system?
The Polarity system assigns players either Light or Void alignment. Taking damage or interacting with the opposite polarity incorrectly can result in lethal damage, making positioning and awareness critical.
How do Light and Void attacks work in the raid?
Light attacks typically deal Holy damage, while Void attacks deal Shadow damage. Players must match mechanics with their assigned polarity to mitigate damage and avoid instant death.
How do you beat Belo’ren, Child of Al’ar?
To defeat Belo’ren, players must manage Phoenix adds, soak dive mechanics correctly, and handle orb patterns while maintaining proper polarity. The fight transitions into an egg phase where DPS coordination becomes essential.
What does Light Edict do in the Belo’ren fight?
Light Edict is a tank mechanic that applies heavy Holy damage and requires proper positioning and mitigation. Tanks must manage it carefully to avoid lethal spikes and raid-wide damage.
What is Voidlight Convergence?
Voidlight Convergence is a high-pressure mechanic where Light and Void effects overlap, requiring precise movement and coordination. Mistakes during this phase often lead to wipes.
How do you handle the Phoenix adds in Phase 1?
Phoenix adds must be soaked and controlled properly. If handled incorrectly, they leave behind eggs that can respawn and overwhelm the raid in later phases.
What happens during the Immortal Flame phase?
During Phase 2, Belo’ren transforms into the Immortal Flame. Players must quickly destroy the central target while avoiding rotating mechanics and increasing raid damage pressure.
What is the biggest cause of wipes in this raid?
Most wipes occur due to polarity mistakes, failed coordination during overlap mechanics, or poor orb clearing. Small errors quickly escalate into unrecoverable situations.
What is Midnight Falls and how do you beat it?
Midnight Falls is the final boss of the raid, centered around Void magic and high raid-wide damage. Success depends on proper positioning, cooldown management, and handling heavy overlap mechanics.
What item level gear drops in the Quel’Danas raid?
Item levels scale by difficulty, ranging from 240 in LFR up to 282 in Mythic, with higher-tier bosses dropping slightly stronger gear than earlier encounters.
What rewards drop from Midnight Falls?
Midnight Falls drops high-end gear and the Chiming Void Curio, which can be exchanged for a tier set piece of your choice.
How do tier sets work in the Midnight raid?
Players can obtain tier gear using the Chiming Void Curio token dropped by the final boss. This allows targeted acquisition of set pieces for faster progression.
What are Dawncrest currencies used for?
Dawncrest currencies (Veteran, Champion, Hero, Myth) are used to upgrade gear obtained from the raid. Higher difficulties reward better versions of these currencies.
What difficulty should I start the raid on?
Most players should begin on Normal difficulty to learn mechanics, then progress into Heroic and Mythic once they are comfortable with polarity and coordination requirements.
How important are DPS cooldowns in this raid?
DPS cooldowns are crucial, especially during Phase 2 and final burn windows. Proper timing significantly reduces fight duration and prevents overwhelming overlap mechanics.
Is the Quel’Danas raid beginner-friendly?
While the raid has only two bosses, it is not beginner-friendly due to its heavy reliance on coordination, polarity mechanics, and punishing mistakes.
What is the main goal of the March on Quel’Danas raid?
The goal is to stop Xal’atath’s forces from fully corrupting the Sunwell and prevent the spread of Void magic across Azeroth.