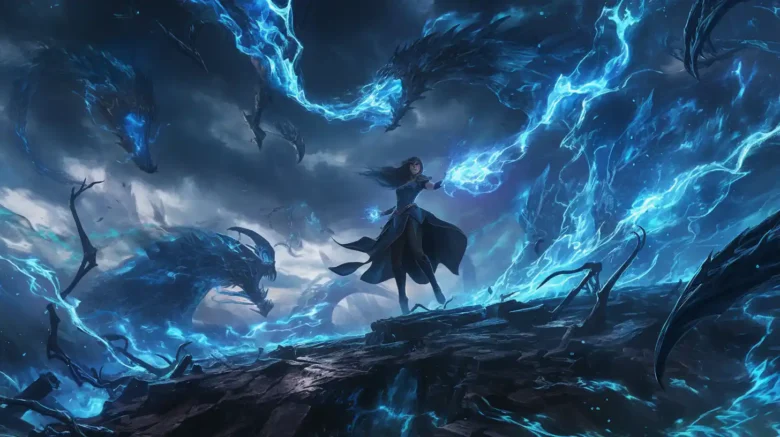
Imagine a tall dungeon, just for solo players, with 20 challenging floors. Each floor has a unique, strong boss. Taedal’s Tower is tough, but with the right skills and gear, you can make it to the top! Every floor gives better rewards, like Quality Growthstones, Recovery Crystals, and rare Morphs.
You’ll learn:
- What gear and skills you need to climb.
- Which boss moves are dangerous and how to dodge them.
- Where to find rare Growthstones and how to use them.
- How to stay safe from poison, fire, lightning, and other tricks.
Plus, we cover:
- How Taedal’s Tower works and how to enter.
- Best ways to fight each boss.
- Recommended Gear Score (GS) for each floor.
- Tips to unlock Chapter 3 and get extra rewards.
Throne and Liberty Taedal’s tower | Overview
Taedal’s Tower is a solo-based, boss-focused tower in Throne and Liberty, part of the game’s Secret Dungeons. Here, players tackle 20 floors, each with unique bosses and challenges. As players ascend, the battles become tougher, and rewards grow better. Key items like Rare Armor Growthstones, Quality Recovery Crystals, and Precious Weapon Growthstones are available at different stages. Completing Ashien’s Strange Painting Quest in Chapter 3 unlocks the tower.
| Feature | Description |
| Structure | 20 floors with increasing difficulty, solo instanced content |
| Boss Types | Various bosses with unique mechanics, e.g., Giant Ant Commander, Despair Dark Enforcer, Queen Spider |
| Key Mechanics | Mechanics include fury attacks, melee attacks, spin attack, teleportation, ranged attacks, and lightning jump attacks |
| Notable Boss Moves | Fury Attacks, Jump Attack, Spinning Attack, Fire Tornado |
| Rewards | Includes Precious Growthstones, Recovery Crystals, Rare Armor Growthstone, and Velvet Raven Glide Morph |
| Key Items Required | Allied Resistance Forces Contract Scroll II: Taedal’s Tower, available at Stonegard Sundries Merchant |
| Boss Examples | Charging Gatekeeper, Rushing Queen Spider, Incomplete Giant Goblin, Chaos Archwizard |
| Special Areas | Starlight Observatory Ruins, Flame Desert Wizard |
| Notable Effects and Areas | Blue orb and blue shield mechanics, purple circle AoE, entire arena attacks, rectangular AoE, and explosive ants |
| Entry Requirements | Unlocked in Chapter 3, starting with Ashien’s Strange Painting Quest |
| Strategic Skills | Skills that boost healing, evasion, and defense recommended |
| Types of Damage | AoE damage, massive damage attacks, and hard-hitting attacks that need precise timing to avoid |
| Important Mechanics | Fire Damage, Red Orbs, Light Orbs, and Blue Rock for specific fights |
Throne and Liberty Taedal’s tower | all bosses and rewards
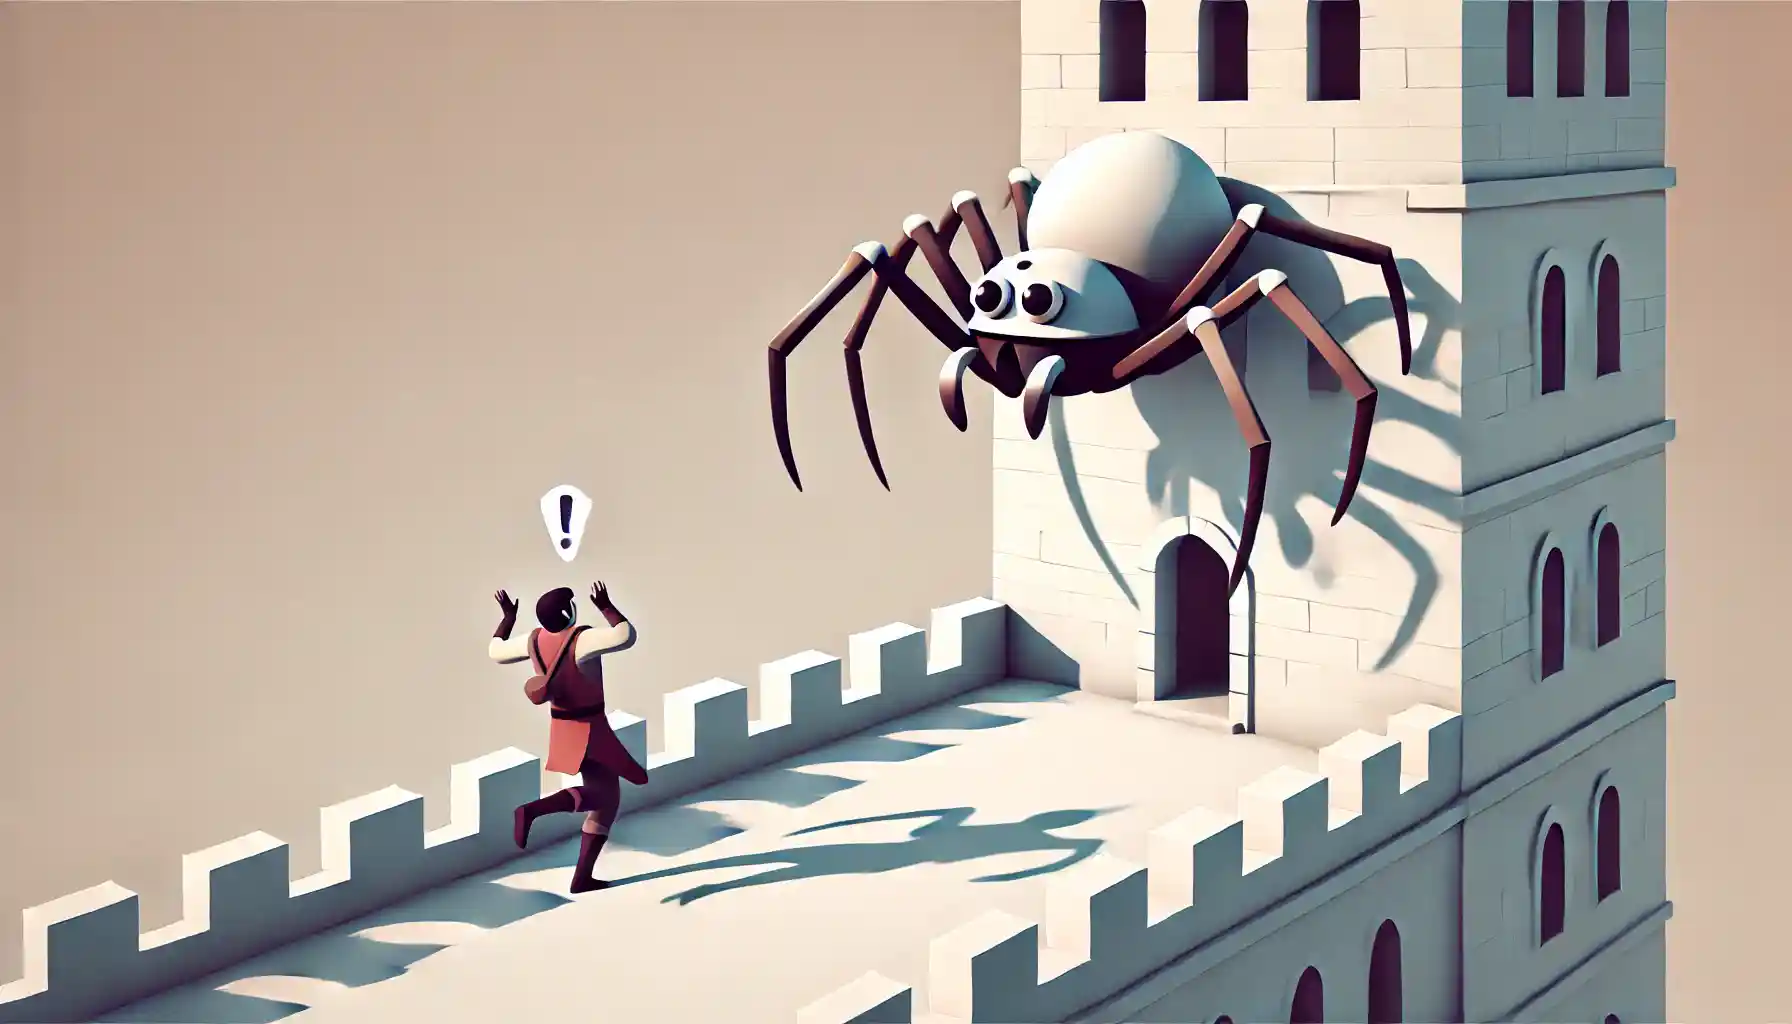
Taedal’s Tower has 20 challenging floors, each featuring a unique boss that players must defeat to advance to the next floor. The rewards range from rare growthstones to precious items, essential for character progression. As players climb, bosses get stronger and introduce mechanics like lightning jumps, fury attacks, and boss smashes that deal heavy damage. Proper gear and careful timing to avoid damage are key to success.
| Floor | Boss Name | Rewards | Mechanics/Notes |
| 1 | Charging Gatekeeper | 7,827 Sollant — Quality Weapon Growthstone x10 — Recovery Crystal x10 | – |
| 2 | Rushing Queen Spider | 8,742 Sollant — Quality Weapon Growthstone x20 — Recovery Crystal x10 | – |
| 3 | Screams and a Healing Song | 9,917 Sollant — Quality Weapon Growthstone x25 — Recovery Crystal x10 | Avoid zombie explosions |
| 4 | Whirling Goblins | 11,451 Sollant — Quality Weapon Growthstone x35 — Recovery Crystal x10 | Avoid spinning attack |
| 5 | Warrior’s Cry | 14,283 Sollant — Crafty Joker Amitoi — Rare Weapon Growthstone x12 | – |
| 6 | Finding the Piton in Flames | 15,954 Sollant — Rare Weapon Growthstone x15 — Recovery Crystal x10 | Grapple pillars to avoid damage |
| 7 | The Bound | 18,098 Sollant — Rare Weapon Growthstone x16 — Recovery Crystal x10 | Two bosses; defeat one to win |
| 8 | Poisons, Explosions, and Detox | 20,896 Sollant — Rare Weapon Growthstone x18 — Recovery Crystal x10 | Detox with herbs during poison phase |
| 9 | Dance of the Flashing Sword | 24,618 Sollant — Rare Weapon Growthstone x20 — Recovery Crystal x10 | Heavy damage; healing needed |
| 10 | Commander’s Shadow Strike | 30,486 Sollant — Velvet Raven Glide Morph — Precious Weapon Growthstone x4 | Jump to avoid ground slam |
| 11 | Maze of Death | 33,593 Sollant — Precious Weapon Growthstone x5 — Rare Recovery Crystal x10 | Escape maze before energy reaches you |
| 12 | Answers in the Sand | 37,523 Sollant — Precious Weapon Growthstone x5 — Rare Recovery Crystal x10 | Move scorpions into sandstorm |
| 13 | Fall, Shock, Destroy! | 42,566 Sollant — Precious Weapon Growthstone x6 — Rare Recovery Crystal x10 | Transfer energy to rocks during fight |
| 14 | Out of Sight | 49,148 Sollant — Precious Weapon Growthstone x7 — Rare Recovery Crystal x10 | Avoid unblockable AoE attack |
| 15 | Thieves and Retrievers | 57,901 Sollant — Mischievous Joker Amitoi — Rare Recovery Crystal x20 | Use light orb to see in darkness |
| 16 | Precise Moment | 69,796 Sollant — Precious Weapon Growthstone x8 — Rare Recovery Crystal x20 | Grapple to pillars at key moments |
| 17 | Shield of Stalwart Cooperation | 86,365 Sollant — Precious Weapon Growthstone x10 — Rare Recovery Crystal x20 | – |
| 18 | Swirling Firestorm | 110,102 Sollant — Precious Weapon Growthstone x12 — Rare Recovery Crystal x20 | Use fire tornado to dodge attacks |
| 19 | Reaching Higher | 145,216 Sollant — Precious Weapon Growthstone x14 — Rare Recovery Crystal x20 | Climb platforms to avoid worst attack |
| 20 | Revenge and Resurrection | 199,098 Sollant — Fierce Taion Dash Morph — Rare Recovery Crystal x30 | Defeat boss twice; manages summoned enemies |
Throne and Liberty Taedal’s tower | gear requirements
In Taedal’s Tower, each floor has a recommended Gear Score (GS) to handle the boss fights and mechanics effectively. The floors get harder as you go higher, so better gear is needed to survive hard-hitting attacks, boss teleports, fury attacks, and AoE mechanics. Be sure to check your GS and upgrade your equipment if needed to reach these suggested levels.
| Floor | Recommended GS |
| 1 | 150 |
| 2 | 200 |
| 3 | 250 |
| 4 | 300 |
| 5 | 350 |
| 6 | 400 |
| 7 | 450 |
| 8 | 500 |
| 9 | 550 |
| 10 | 600 |
| 11 | 650 |
| 12 | 700 |
| 13 | 750 |
| 14 | 800 |
| 15 | 850 |
| 16 | 900 |
| 17 | 950 |
| 18 | 1000 |
| 19 | 1100 |
| 20 | 1200 |
Throne and Liberty Taedal’s tower | How to Enter
To enter Taedal’s Tower in Throne and Liberty, players need to progress through the main storyline to Chapter 3 and complete Ashien’s Strange Painting Quest. Once unlocked, you can access the tower through the main menu or by visiting the Starlight Observatory Ruins. Before entering, it’s recommended to purchase Allied Resistance Forces Contract Scroll II: Taedal’s Tower from the Stonegard Sundries Merchant for extra rewards and use Rare Attack Remedies for higher floors.
| Step | Instruction |
| 1 | Progress to Chapter 3 in the main storyline. |
| 2 | Complete Ashien’s Strange Painting Quest to unlock the tower. |
| 3 | Go to the Starlight Observatory Ruins or select Taedal’s Tower in the menu. |
| 4 | Buy Contract Scroll II from the Stonegard Sundries Merchant for rewards. |
| 5 | Equip necessary items like Rare Attack Remedies and healing skills. |
| 6 | Enter Taedal’s Tower and start the challenge on Floor 1. |
Throne and Liberty Taedal’s tower | Floor 1 guide
In Floor 1, players face the Chief Orc Gatekeeper, a melee boss with powerful moves like charge and ground hits. The key to winning this battle is to stay alert and dodge at the right moments. Watch for his yellow-orange glow before a charge, dodge to the sides, and be ready to avoid his hook attack if you’re at a distance. With quick reflexes and movement, this boss fight can be handled smoothly.
| Tactic | Description |
| Dodge Charge Attack | Boss glows yellow-orange, then charges forward — move to the side to dodge. |
| Block or Dash from Hook | If at a distance, boss throws a hook to pull you in — block or dash away to avoid it. |
| Evade Ground Hit | Boss raises mace, then slams it twice in a line — dodge to either side to avoid straight-line damage. |
Rewards for Floor 1
- Quality Weapon Growthstone x1
- Quality Armor Growthstone x2
- Quality Accessory Growthstone x1
- Recovery Crystal x5
- 1,354 Coins
- 1,986 EXP
Throne and Liberty Taedal’s tower | Floor 2 guide
On Floor 2, you’ll face the Venomous Queen Spider, a ranged boss with powerful web attacks and a jump ability that can deal both immediate and ongoing damage. The key to victory is staying alert to her movements and dodging attacks like her jump slam and web spray, which reduce movement speed. Keep your distance to avoid the back spray debuff and use ranged attacks to chip away at her health.
| Tactic | Description |
| Dodge Jump Attack | Boss jumps high, landing with instant and DoT damage — move quickly out of the area or use CC skills. |
| Avoid Rush Attack | Boss charges forward, attacking with front legs — keep distance and use ranged attacks to stay safe. |
| Stay Clear of Back Spray | Boss sprays from behind three times, reducing movement speed if hit — keep distance to avoid the debuff. |
| Avoid Web Launch | Boss raises legs, gathering energy to launch a web — avoid area to prevent movement speed reduction. |
Rewards for Floor 2
- Quality Weapon Growthstone x1
- Quality Armor Growthstone x2
- Quality Accessory Growthstone x1
- Recovery Crystal x5
- 2,707 Coins
- 3,973 EXP
Use careful movement and quick reactions to avoid the Venomous Queen Spider’s slowing abilities and win the fight on Floor 2.
Throne and Liberty Taedal’s tower | Floor 3 guide
On Floor 3, you’ll battle the Starving Giant Zombie, a ranged boss who relies on projectile attacks and ground smashes. You’ll also be joined by the Lost Adventurer NPC, who offers cover from certain attacks. To start, eliminate four smaller Starving Zombies using long-range attacks to keep safe. During the boss fight, keep your distance to avoid projectiles and take cover behind the Lost Adventurer when he calls out. Near the end, be prepared to handle another summoned Starving Zombie.
| Tactic | Description |
| Eliminate Small Zombies | Start by defeating the four Starving Zombies at range to avoid close combat. |
| Dodge Projectiles | Boss throws projectiles causing DoT damage — stay mobile and keep a safe distance. |
| Avoid Smash Attack | Boss hits the ground, damaging in front — stay to the sides or at range to avoid. |
| Take Cover | When Lost Adventurer shouts, stand behind him to block multiple incoming projectiles. |
| Prepare for Summon | Near the end, the boss summons another Starving Zombie — defeat it quickly to focus on the boss. |
Rewards for Floor 3
- Quality Weapon Growthstone x2
- Quality Armor Growthstone x4
- Quality Accessory Growthstone x3
- Recovery Crystal x5
- 4,061 Coins
- 5,959 EXP
Throne and Liberty Taedal’s tower | Floor 4 guide
On Floor 4, you’ll face the Incomplete Giant Goblin, a boss known for powerful spinning and jump attacks. The Spinning Attack deals significant damage in a close radius, so keep your distance when he shouts No one! can! stop me! Additionally, watch for his jump and pull moves, which can bring you into melee range unexpectedly. Stay mobile to avoid these attacks and prepare for quick dodges.
| Tactic | Description |
| Dodge Spinning Attack | When the boss shouts, he begins spinning — move away to avoid significant damage. |
| Evade Jump Attack | The boss jumps to your location, causing damage and stun — quickly dodge to the side to avoid impact. |
| Break Free of Pull | Boss pulls you close, then strikes — keep distance and be ready to dash away after the pull. |
| Watch for Push Move | Boss pushes you away, often following up with a jump — stay alert to dodge the follow-up jump attack. |
Rewards for Floor 4
- Quality Weapon Growthstone x2
- Quality Armor Growthstone x4
- Quality Accessory Growthstone x3
- Recovery Crystal x5
- 5,414 Coins
- 7,946 EXP
Throne and Liberty Taedal’s tower | Floor 5 guide
On Floor 5, you’ll encounter the Rusted Armor Warrior, a close-range boss who relies on powerful slashes, spins, and projectile attacks. Listen for his shouts like Kill. Kill. Kill. and Die. Die. Die. to anticipate heavy strikes and stuns. He can also jump to your location with an unblockable attack. Stay mobile, dodge his moves, and be ready to avoid his spin attack by maintaining distance.
| Tactic | Description |
| Dodge Forward Slash | After he shouts Kill. Kill. Kill., he slashes forward — dodge quickly to avoid getting stunned. |
| Avoid Projectile Attack | When he shouts Do not… interfere…, he launches three projectiles, then charges — keep moving sideways. |
| Stay Clear of Spin Attack | At No one… can… pass, he spins forward, damaging the area around him — maintain distance to avoid it. |
| Prepare for Stun Strike | At Die. Die. Die., he swings twice, with a chance to stun — move to the side to avoid. |
Rewards for Floor 5
- Amitoi: Crafty Joker
- Quality Weapon Growthstone x2
- Quality Armor Growthstone x4
- Quality Accessory Growthstone x3
- Recovery Crystal x5
- 6,768 Coins
- 9,932 EXP
Throne and Liberty Taedal’s tower | Floor 6 guide

On Floor 6, you’ll face the Mad Red Pyromancer, a ranged boss with fire-based attacks and teleporting abilities. Key to this fight is using the pillars that appear in the arena to avoid his floor-wide fire attack, which deals massive damage. Stay mobile to dodge the floor explosions he casts under you and be prepared for him to teleport to evade attacks or reposition himself for powerful spells.
| Tactic | Description |
| Use Pillars for Fire | When the boss casts Floor Fire, climb any available pillar to avoid high-damage floor flames. |
| Dodge Teleports | Boss teleports to dodge your attacks or close in on you — keep adjusting your position accordingly. |
| Avoid Floor Explosions | When boss raises staff, move away from any lit ground to avoid explosions that follow shortly. |
Rewards for Floor 6
- Quality Weapon Growthstone x4
- Quality Armor Growthstone x8
- Quality Accessory Growthstone x5
- Recovery Crystal x10
- 8,121 Coins
- 11,918 EXP
Throne and Liberty Taedal’s tower | Floor 7 guide
On Floor 7, you’ll face two bosses: Bound Shadowmancer (ranged) and Despair Dark Enforcer (melee). To win, you only need to defeat one, as they’re linked. Shadowmancer uses powerful area and lightning attacks, while Dark Enforcer specializes in close-range spin and lightning strikes. Watch out for blue circles on the floor, as they indicate incoming damage zones. Focus on attacking one boss and dodging both their attacks, using mobility to stay safe.
| Tactic | Description |
| Avoid Blue Circles | Move out of blue circles on the floor, indicating AoE damage. |
| Evade Shadowmancer’s Area Strike | When Shadowmancer turns blue, a damaging area forms around him — stay clear of this zone. |
| Parry Forward Ray | Shadowmancer launches lightning forward — use parry or move sideways to avoid. |
| Dodge Lightning Line | When Dark Enforcer’s scythe lights up, he releases lightning forward — move away from his front. |
| Avoid Spin Strike | Dark Enforcer spins, dealing area damage with his scythe — maintain distance during the spin. |
Rewards for Floor 7
- Quality Weapon Growthstone x4
- Quality Armor Growthstone x8
- Quality Accessory Growthstone x5
- Recovery Crystal x10
- 9,475 Coins
- 13,905 EXP
Throne and Liberty Taedal’s tower | Floor 8 guide
On Floor 8, you’ll face the Giant Ant Commander, a boss with poison-based attacks that stack over time and explosive ant minions. In this challenging fight, the Giant Ant Commander launches three waves of poison that will cover the entire arena, dealing damage that grows stronger with each wave. Move through the Detox Herbs that spawn to clear poison stacks and restore some health. Be alert for Explosive Ants that approach and pause briefly before exploding; avoid these by stepping back at the right moment.
| Tactic | Description |
| Clear Poison Stacks | Avoid accumulating poison stacks by moving through the Detox Herbs to heal and clear poison. |
| Avoid Explosive Ants | When an Explosive Ant reaches you, step back quickly to dodge its powerful explosion. |
| Stay Mobile | Constant movement helps you avoid poison areas and gives time to handle explosive ant threats. |
Rewards for Floor 8
- Quality Weapon Growthstone x4
- Quality Armor Growthstone x8
- Quality Accessory Growthstone x5
- Recovery Crystal x10
- 10,829 Coins
- 15,891 EXP
Throne and Liberty Taedal’s tower | Floor 9 guide
On Floor 9, you face the Dancing Giant Butcher in this secret dungeon challenge. Unlike the previous floor’s enemies, the Giant Butcher is a fast and relentless lightning jump attacker who deals both close and ranged fury attack damage. He has a hard-hitting attack that can be difficult to block, requiring precise timing and quick movement to avoid his dagger throws and sudden teleports. Listen for his voice line, Death… Eternal… Death…! as he prepares for a powerful series of attacks that deal significant damage.
| Tactic | Description |
| Dodge Teleport Attack | The boss teleports and hits from behind with a dagger — stay alert and move to avoid the hard hit. |
| Block Ranged Attacks | During Death… Eternal… Death…!, the boss launches multiple attacks — block attacks to survive. |
| Keep Moving | Avoid staying in one spot to counter the boss fires and dodge the teleport attacks. |
Rewards for Floor 9
- Rare Weapon Growthstone x1
- Rare Armor Growthstone x2
- Rare Accessory Growthstone x1
- Recovery Crystal x10
- 10,829 Coins
- 17,877 EXP
Throne and Liberty Taedal’s tower | Floor 10 guide
The 10th floor of Taedal’s Tower presents the Oblivion Skeleton Commander, a powerful boss with challenging mechanics. The Immortal Guardian holds an unbreakable shield that absorbs damage, while the wizard’s eye creates attacks similar to those on previous floors. Expect the nightmare conductor effect, which deploys red rock and a blue area that needs positioning strategies. The Revenger Skeleton Commander will use attacks stacking up to three stacks, each adding a one stack debuff. Standing inside the blue area will trigger three orbs of damage, adding up quickly if you’re not careful.
| Boss Mechanic | Tactic | Reward |
| High Jump | Jump when the Skeleton Commander hits the ground to avoid the shockwave. | Morph: Velvet Raven (Glide) |
| Pull | Stay out of the boss’s line of sight to avoid getting dragged in. | Rare Weapon Growthstone x1 |
| Jump & Pull Combo | Once HP is below half, quickly move away after being pulled to avoid explosive damage. | Rare Armor Growthstone x2 |
| Rush | Evade the rush to avoid getting stunned. | Rare Accessory Growthstone x1 |
| Three-Stack Attack | Avoid standing in the blue area to prevent stacking debuffs from wizard’s eye. | Recovery Crystal x20, 13536 Coins, 19864 EXP |
Throne and Liberty Taedal’s tower | Floor 11 guide
The 11th floor of Taedal’s Tower, known as the Maze of Death, features the Roaring Avolos Umbramancer, a boss with intense boss mechanics and deadly moves. The old wizard’s eye activates a similar attack pattern from the previous floor, pulling players into the center, where a maze forms around them. Players have only a few seconds to escape and avoid deadly dark energy. The boss covers the field with circles, and players must dodge these to avoid devastating damage.
| Boss Mechanic | Tactic | Reward |
| Maze of Death | Quickly find your way out of the maze to avoid the advancing dark energy. | Rare Weapon Growthstone x2 |
| Lightning Circles | Move out of the circles within a few seconds to avoid the lightning strikes. | Rare Armor Growthstone x4 |
| Light Beam Attack | Stand to the side of the boss to avoid the direct light beam. | Rare Accessory Growthstone x2 |
| Falling Circles | Dodge the six circles that appear when the boss’s HP drops below half. | Quality Recovery Crystal x5, 14889 Coins, 21850 EXP |
Throne and Liberty Taedal’s tower | Floor 12 guide
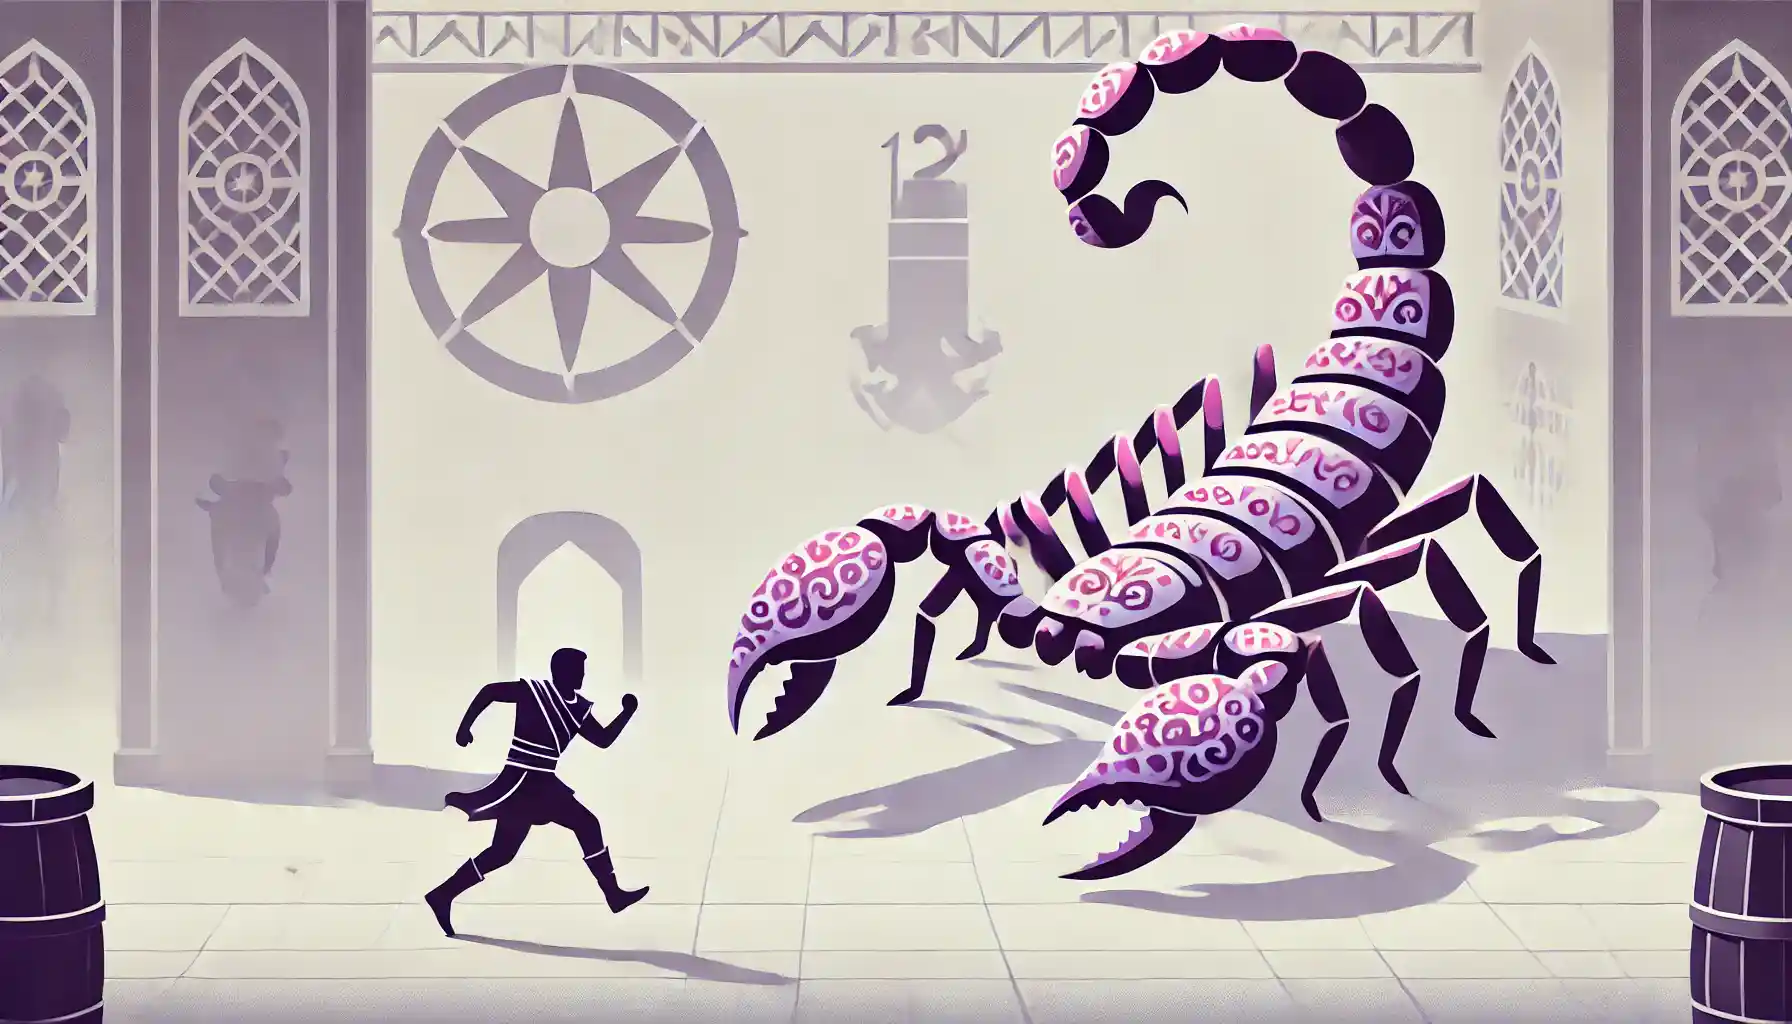
On the 12th floor of Taedal’s Tower, the arena is covered in sand, and the boss Tower Crystal Scorpion Scorpos awaits. Players must deal with deal damage and tricky mechanics, including Tower Explosion Scorpions that must be lured into whirlpools to summon Scorpos. Scorpos uses teleportation, sand whirlwinds, and hiding techniques to confuse players. Follow the purple-patterned scorpion to find the boss’s hiding place and avoid the dangerous spinning attack that deals high damage.
| Boss Mechanic | Tactic | Reward |
| Tower Explosion Scorpion | Lure the scorpion to the sand whirlpool to make the main boss appear. | Rare Weapon Growthstone x2 |
| Teleportation | Keep moving to avoid appearing next to Scorpos when he reappears. | Rare Armor Growthstone x4 |
| Hide in Sand | Follow the purple-patterned scorpion to locate the boss’s hiding spot. | Rare Accessory Growthstone x2 |
| Spinning Whirlwind | Keep your distance to avoid getting caught in the sand whirlwind. | Quality Recovery Crystal x5, 16243 Coins, 23837 EXP |
Throne and Liberty Taedal’s tower | Floor 13 guide

On the 13th floor of Taedal’s Tower, players face the Lightning Jump Attacker, who deals powerful electric attacks over a wide area. To summon the boss, activate three stones in sequence, starting with the red rock and ending with the blue one. The Lightning Jump Attacker’s jumps, stomps, and lightning punches deal heavy damage. Players must dodge lightning bolts that paralyze and time their movements to avoid wide-area attacks.
| Boss Mechanic | Tactic | Reward |
| Summon Sequence | Activate red, then blue rocks to summon the boss. | Rare Weapon Growthstone x3 |
| Jump Attack | Move quickly out of the area to dodge the high-damage landing. | Rare Armor Growthstone x6 |
| Lightning Step | Block or dodge the initial stomp, and stay in lightning-free areas to avoid paralysis. | Rare Accessory Growthstone x4 |
| Lightning Punch | Step back to avoid wide-area electric punches and paralysis. | Quality Recovery Crystal x5, 17596 Coins, 25823 EXP |
| Escape Phase | Activate stones to dodge lightning strikes and bring the boss back to the arena. |
Throne and Liberty Taedal’s tower | Floor 14 guide
The 14th floor of Taedal’s Tower pits players against the Old Wizard’s Eye, a boss that uses powerful area attacks. Be prepared for its smash attack, hitting the ground three times with area-wide damage, and twist moves that damage players close to it. Stay on the move to avoid fire circles appearing beneath you, and avoid the fire zone fan-shaped attack in front of the boss.
| Boss Mechanic | Tactic | Reward |
| Smash | Time your jumps to avoid the three consecutive area-wide attacks. | Rare Weapon Growthstone x3 |
| Twist | Keep a distance to avoid taking damage from the boss’s spin. | Rare Armor Growthstone x6 |
| Fire Circles | Move constantly to avoid circles that ignite under your position. | Rare Accessory Growthstone x4 |
| Fire Zone | Stay out of the fan-shaped area in front of the boss to avoid high-damage attacks. | Quality Recovery Crystal x5, 18950 Coins, 27809 EXP |
Throne and Liberty Taedal’s tower | Floor 15 guide
The 15th floor of Taedal’s Tower presents a dark arena where you’ll face Stealer of Light Dren, who uses powerful blood magic and light manipulation. To summon Dren, interact with the central light, and stay on the move to avoid Blood Wall attacks that deal high DPS. When the lights go out, make your way back to the central light to reveal the boss while avoiding shadows that deal damage if approached.
| Boss Mechanic | Tactic | Reward |
| Blood Discharge | Stay at a distance to avoid the spin and ranged blood magic attack. | Amitoi: Mischievous Joker |
| Blood Wall | Keep moving to avoid the blood wall that appears after the boss teleports. | Rare Weapon Growthstone x3 |
| Lights Off | Move carefully along the edge of the arena to reach the light without getting hit by shadows. | Rare Armor Growthstone x6 |
| Stun Phase | Once lights are back on, use the short stun window to deal extra damage to the boss. | Rare Accessory Growthstone x4, Quality Recovery Crystal x5, 20304 Coins, 29796 EXP |
Throne and Liberty Taedal’s tower | Floor 16 guide
On the 16th floor of Taedal’s Tower, the Immortal Guardian wields a massive hammer and powerful area attacks that demand precise timing. Avoid Hammer Smash and Mortal Hammer by timing jumps or blocks, and climb the pillar when the burning floor effect is triggered to avoid high DPS damage. Positioning behind the boss minimizes the risk from his frontal hit.
| Boss Mechanic | Tactic | Reward |
| Hammer Smash | Time your jump to avoid the area-wide shockwave from the hammer. | Rare Weapon Growthstone x3 |
| Mortal Hammer | Block or evade to avoid damage and stun from this area attack. | Rare Armor Growthstone x6 |
| Burning Floor | Climb the pillar to avoid high DPS damage, stay behind the boss for safer positioning. | Rare Accessory Growthstone x4 |
| Frontal Hit | Stay at the boss’s side or back to avoid his forward strikes. | Quality Recovery Crystal x10, 21657 Coins, 31782 EXP |
Throne and Liberty Taedal’s tower | Floor 17 guide
The 17th floor of Taedal’s Tower introduces the Chaos Archwizard and a unique ally, Adventurer Going to the Summit, whose shield can protect you from deadly area attacks. Stay close to your ally’s shield for cover against the Purple Mist and teleport mechanics. The boss uses moves like Dark Shockwave and Energy Burst that require careful dodging or blocking to avoid damage.
| Boss Mechanic | Tactic | Reward |
| Purple Mist | Run along the arena edge to reach the ally’s shield and jump over violet lines to avoid damage. | Rare Weapon Growthstone x4 |
| Dark Shockwave | Block to avoid taking damage from the arena-wide shockwave. | Rare Armor Growthstone x8 |
| Light Beam | Stay out of the boss’s line of sight to avoid being hit and stunned. | Rare Accessory Growthstone x6 |
| Energy Burst | Move to the sides of the boss to dodge the Energy Burst attack. | Quality Recovery Crystal x10, 23011 Coins, 33768 EXP |
| Dark Spot | Move constantly to avoid dark energy halos that could teleport you to the edge. |
Throne and Liberty Taedal’s tower | Floor 18 guide
On the 18th floor of Taedal’s Tower, you face the Exploding Flame Desert Wizard, a boss who uses intense fire attacks across the arena. When the boss jumps back, dodge his Flamethrower by moving behind him. During Firestorm, use the fire whirlpool to lift yourself and glide to avoid arena-wide flames, then land on the safe spot to continue the fight.
| Boss Mechanic | Tactic | Reward |
| Flamethrower | When the boss jumps back, quickly move behind him to avoid the fan-shaped flame attack. | Rare Weapon Growthstone x4 |
| Firestorm | Use the fire whirlpool to lift yourself and glide over the flames, then land on the safe zone. | Rare Armor Growthstone x8 |
| Rare Accessory Growthstone x6, Quality Recovery Crystal x10, 24364 Coins, 35755 EXP |
Throne and Liberty Taedal’s tower | Floor 19 guide
On the 19th floor of Taedal’s Tower, players face the Nightmare Conductor, a boss who uses powerful orbs and arena-wide attacks. Watch out for the Red and Blue Orbs—block the blue orb and avoid red ones to reduce area damage. When the Light Beam and Shockwave attacks occur, use shield abilities to minimize damage. Finally, when teleported to the edge, quickly climb the Platforms to avoid a heavy arena-wide attack.
| Boss Mechanic | Tactic | Reward |
| Red and Blue Orbs | Block the blue orb and stay out of range of the red orbs to avoid area damage. | Rare Weapon Growthstone x4 |
| Light Beam | Block to avoid damage and stun effects. | Rare Armor Growthstone x8 |
| Shockwave | Use shield abilities to reduce damage from this unavoidable attack. | Rare Accessory Growthstone x6 |
| Platforms | Quickly climb platforms when teleported to avoid arena-wide damage. | Quality Recovery Crystal x10, 25718 Coins, 37741 EXP |
Throne and Liberty Taedal’s tower | Floor 20 guide
On the 20th floor of Taedal’s Tower, you face the Revenger Skeleton Commander, a challenging boss who uses area attacks and summons skeleton minions. Be prepared for his Fire Blast and Fire Circle attacks, which deal damage over a wide area. When he jumps, time your own jump to avoid the impact. Beware of his Recharge ability, which allows him to fully restore his health once, extending the battle. As the fight continues, a Fire Ring will shrink the arena, limiting movement and increasing DPS risk.
| Boss Mechanic | Tactic | Reward |
| Summon Skeletons | Quickly eliminate summoned skeletons that appear every 20 seconds. | Morph: Fierce Tyger (Dash) |
| Fire Blast | Block the shockwave to avoid taking damage. | Precious Weapon Growthstone x1 |
| Fire Circle | Move out of the area to avoid DPS damage. | Precious Armor Growthstone x2 |
| Jump | Time your jump to avoid damage from the boss’s landing. | Precious Accessory Growthstone x1 |
| Recharge | Be prepared to battle the boss again after his health recharge. | Quality Recovery Crystal x20, 27071 Coins, 39728 EXP |
| Fire Ring | Stay clear of the outer ring, which will ignite and shrink the arena, increasing DPS risk. |
Conclusion
Taedal’s Tower is a special area in Throne and Liberty where players fight many different bosses on 20 floors. Each floor has one boss, and each boss has unique attacks. As players move up, the bosses become harder, and the rewards become better. Players can get important items like stones to help their armor and weapons grow stronger.
The tower opens in Chapter 3 after completing a quest. The higher players go, the stronger their gear should be, or else it will be very difficult to survive. Each boss has special moves that require dodging, blocking, or careful movement. For example, some bosses can jump or spin with strong hits, so players need to move fast to avoid damage. Many floors also have extra challenges, like poison, explosions, or puzzles to solve.
Overall, Taedal’s Tower is a test of skill, timing, and strategy. Players need to bring good gear, healing items, and be ready to react quickly to each boss’s unique abilities. The tower provides great rewards that help players become much stronger in the game.
Epiccarry: best wow boost and coaching services
What is Taedal’s Tower?
Taedal’s Tower is a 20-floor, solo dungeon in Throne and Liberty where players fight different bosses. Each floor has unique challenges, with bosses that become stronger as players advance.
How do I unlock Taedal’s Tower?
Complete Ashien’s Strange Painting Quest in Chapter 3 of the main storyline to access Taedal’s Tower.
What rewards can I earn in the tower?
Rewards include Quality and Precious Growthstones (for armor, weapons, and accessories), Recovery Crystals, coins, experience points (EXP), and unique morphs like the Velvet Raven Glide Morph on Floor 10 and Fierce Taion Dash Morph on Floor 20.
How difficult is each floor?
Each floor increases in difficulty. Floor 1 has a recommended Gear Score (GS) of 150, and this increases to GS 1200 by Floor 20.
What gear should I bring?
Check your Gear Score (GS) and upgrade as needed to handle high-damage attacks. Floors progressively need better armor and weapons to survive boss abilities.
What should I look out for in battles?
Key boss moves include poison, fire, lightning jumps, spin attacks, area-of-effect (AoE) attacks, and teleportation. Some floors have extra hazards like explosive ants or maze traps.
Can I play with friends in Taedal’s Tower?
No, Taedal’s Tower is solo-only content; each player must fight alone on every floor.
How do I enter the tower?
After unlocking it, go to the Starlight Observatory Ruins or select Taedal’s Tower in the main menu. For extra rewards, buy Allied Resistance Forces Contract Scroll II from the Stonegard Sundries Merchant before starting.
What strategies work best against these bosses?
Dodge fast moves, use pillars or cover to avoid certain attacks, and stay aware of debuffs (like poison) by clearing them with items such as Detox Herbs.
What if I can’t beat a boss?
Upgrade your gear and try again, practicing dodging and timing moves. Each boss has specific patterns to learn for a smoother fight.
What unique areas and mechanics should I know about?
Some floors have special zones, like the Flame Desert and Starlight Observatory Ruins, and specific attacks like red and blue orbs, poison phases, and blue shield zones.
How long does it take to complete the tower?
Time depends on skill and gear level. Higher floors have tougher bosses with more complex moves, so they take longer.
Do I get anything special from higher floors?
Yes, unique items include the Velvet Raven Glide Morph (Floor 10), Fierce Taion Dash Morph (Floor 20), and Rare Armor and Weapon Growthstones from many bosses, which help boost your character’s growth and abilities.
