Embracing the Shimmering Void: The Chaos Inoculation Gamble
So, you’ve decided to walk the path less… fleshy. Welcome to the Chaos Inoculation club! The entry fee? Your entire life pool, bar one symbolic point. The reward? Sweet, sweet immunity to Chaos damage (effectively infinite chaos resistance) and the potential to stack Energy Shield so high you’ll need a telescope to see the top. Think of it as trading your mortal coil (sacrificing all maximum life bonuses) for a personal force field woven from pure arcane energy. It’s fantastic! Until something, well, hits you.
See, with only one measly life HP, the game’s calculations for stuns and freezes go a little haywire. A stiff breeze could theoretically stun you. A slightly chilly monster might turn you into a popsicle. This Invoker Monk build in Path of Exile 2 focuses on turning that fragile bubble of energy into an unyielding fortress. And this is where the real fun begins!
Monk Class in Path of Exile 2: Your Monk’s Early Game Leveling Guide Strategy


Leveling your Monk towards the endgame Lightning Invoker build involves navigating the early campaign effectively, utilizing various Monk’s abilities. You have two primary approaches, primarily differing in weapon choice and initial skill focus. Both converge towards the same core passive tree structure and the eventual Chaos Inoculation transition.
| Level 1-14 | Stormcaller Arrow | Bow | Lightning Infusion, Marshall Tempo | Best early clear for Bow start |
| Level 14-16 | Stormcaller Arrow, Lightning Rod (Single Target) | Bow | Scatter Shot, Close Combat, Chain (for Rod triggers) | Setup for bosses, then prepare to swap to Staff |
| Level 16+ | Storm Wave | Staff | Marshall Tempo, Lightning Infusion, Primal Armament | Core clearing skill of main build |
| Level 20+ | Storm Wave (Clear), Tempest Flurry + Tempest Bell (Boss) | Staff | Practiced Combo, Close Combat, Concentrated Effect | Bossing combo: Flurry builds charges, Bell finishes |
Phase 1: The Flexible Bow Start (Optional, Recommended Levels 1 ~ 16+)
For the smoothest experience in the very first acts, before powerful staff skills like Storm Wave are available, starting with a Bow offers excellent ranged safety and solid clearing.
- Rationale: Leverages readily available bow skill gems and allows comfortable clearing while pathing towards core Monk/Lightning passives. Requires respeccing ~15-20 XPs later.

Core Skill Gems (Bow):
- Clearing: Stormcaller Arrow. Link initially with Lightning Infusion + Marshall Tempo support gems. Later add Primal Armament or Rising Tempest.
- Single Target: Lightning Rod (Link: Scatter Shot + Concentrated Effect + Close Combat support gems) triggered by Lightning Arrow (Link: Chain is crucial. Can swap Marshall Tempo here for bosses).
- Utility: Freezing Salvo (Link: Hourglass + Glaciation) for occasional campaign boss/rare control.
Auras & Spirit Gems (Bow Phase):
- Herald of Thunder (Link: Innervate).
- Consider Ghost Dance (Hybrid Gear) or Wind Dancer (Evasion Gear) for defense if Spirit allows.
- Utility options: Clarity (Mana), Cannibalism (Sustain), Precision (Accuracy).

Passive Tree Pathing (Bow Phase):
- Start Monk area (grab Flow State early).
- Path down towards the Ranger area for Projectile Damage, Attack Speed, Dexterity, Harness the Elements, and the Blinding Strike cluster.
- Grab key Lightning nodes like Wild Storm and Alternating Current.
- Consider Conservative Casting (near Witch) if mana is an issue. It’s a common mistake to run out of mana frequently early on.
- Delay defensive clusters (Subterfuge Mask, Mindful Awareness) and distant damage nodes (Coming Calamity) until later levels (50+ or early maps) as you progress.
Ascendancy Order (Bow Start):
- I am the Thunder
- Lead Me Through Grace (If Spirit is needed early)
- Unbound Avatar
- Thunder My Enemies (Best when Crit Chance is higher)
Gear Focus (Bow Phase):
- Weapon: Best available Bow (Dual String base ideal). Prioritize Physical Damage/Elemental Damage, Attack Speed. Use Storm Soul Cores.
- Quiver: Accuracy, Attack Speed, Bow Damage.
- Armor/Other: Hybrid evasion and energy shield gear if possible. Prioritize Life and Capped Elemental Resistances. Look for Attack Speed, Lightning Damage, Movespeed, needed Attributes.
- Runes: Use Resistance runes on gear freely.
Phase 2: Transitioning to / Starting with Storm Wave (Level 16+)

Around Level 14-16, you gain access to Storm Wave, the core skill gem for the staff-based endgame build. You can either transition from the Bow start now (respeccing XPs from the Ranger area) or choose to level directly with staves from this point onwards.
Rationale: Aligns directly with the endgame build’s primary skill for dealing damage and passive pathing, minimizing later respeccing. Might feel slightly clunkier than the bow before level 16 if starting directly.
Core Skill (Staff):
- Storm Wave.
- Initial Links: + Marshall Tempo + Lightning Infusion.
- Adding Links: Prioritize Primal Armament (3rd link). Add Upheaval + Ambush (4th/5th links) for more damage. Ambush shines with ~50%+ base Crit Chance.
- Auras & Spirit Gems (Staff Phase):
Herald of Thunder (Link: Innervate. Link Cannibalism early for life recovery before CI).
Herald of Ash (Keep gem low level to minimize STR req. Link: Magnified Effect + Precision Herald). Provides good clear boost.
Movement: Add Blink once Spirit allows.
- Passive Tree Pathing (Staff Phase / Post-Respec):
Start Monk class area (grab Flow State early, respec later. Ancestors of the Storm is good).
Path towards core Lightning/Elemental nodes: Wild Storm, Alternating Current, potentially up towards Eka and Thunder.
Prioritize Critical Strike Chance nodes: Killer Instinct, Villain Assault, Martial Artistry, Heart Stopping, Heartbreaking, Critical Exploit, Moment of Truth.
Add Critical Strike Multiplier: Juggler, Deadly Force, nearby Jewel Sockets.
Ensure sufficient Accuracy: Tenfold Apex nodes, Heartbreaking implicit.
- Ascendancy Order (Staff Focus): I am the Thunder, Sunder My Enemies (More impactful once Crit is scaling), Lead Me Through Grace (Good for enabling Blink/Auras)
(Note: Unbound Avatar is less crucial if skipping the Bow phase but still strong later)


Gear Focus (Staff Phase):
- Weapon: Best available Staff (High physical damage or high Added Lightning Damage is key). Crit Chance is a bonus. Use Iron Soul Cores (Phys) or Storm Soul Cores (Ele).
- Armor/Other: Hybrid evasion and energy shield preferred. Prioritize Life and Capped Elemental Resistances. Look for Attack Speed (Gloves), Lightning Damage, Movespeed, needed Attributes (STR for HoA/Gear).
- Runes: Use Resistance runes on gear freely.
- Flasks: Keep Life Flasks updated; increased recovery rate is good.

Common Leveling Principles (Both Paths):
- Resistances: Capping Elemental Resistances (Fire, Cold, Lightning) at 75% should be your absolute highest gear priority throughout the campaign. Failing to do so can seriously harm your survivability.
- Life: Stack Maximum Life on every piece of gear possible until you are ready for the full Chaos Inoculation transition much later.
- Runes: These are vital for early power. Use appropriate damage runes (Storm/Iron) on your weapon and don’t hesitate to use even Lesser resistance runes on armor to easily cap resists.
- Attributes: Keep an eye on Strength and Intelligence requirements for gear and gems (especially Herald of Ash and hybrid armor). Get these stats on gear where needed.
- Flexibility: The Monk starting area provides a solid foundation. Even if you start with the bow path, respeccing into the staff build is relatively inexpensive and straightforward once Storm Wave feels strong. We recommend taking the path that feels best for you.

Choose the path that feels best for you. The Bow start offers early comfort, while the direct Staff start gets you into the final playstyle sooner. Both effectively lead towards the powerful endgame Lightning Invoker Monk.
Dodging the Knockout Punch: The Anti-Stun Cha-Cha
Being stun-locked as a Chaos Inoculation character isn’t just annoying; it’s often a one-way ticket back to town. Everything, and I mean everything, suddenly has the stopping power of a charging rhino aimed squarely at your concentration. Forget those flimsy jewel mods promising stun threshold based on ES; while helpful, they’re like bringing a water pistol to a dragon fight on their own these days.

Bigger Guns Needed: Passive Tree Solutions
No, we need bigger guns. We delve into the passive tree, seeking salvation in nodes that understand our plight. First stop: Self-Mortification. This gem grants you a chunk of stun threshold based on 20% of your max ES – a solid down payment on not getting knocked silly.

Metaphysical Balance Beam: Asceticism
But why stop there? Let’s grab Asceticism too. This beauty recalculates your base stun threshold using 30% of your ES instead of that pathetic single life point. Suddenly, your energy shield isn’t just ablative armor; it’s your metaphysical balance beam.
Jewel Fortification
With both these passives humming and maybe a couple of those aforementioned “Gain additional Stun Threshold equal to 10% of maximum Energy Shield” jewels sprinkled in for good measure, you’ll find yourself shrugging off hits that would previously send you into a daze. It’s about layering defenses until you’re practically immovable.
Giving Freeze the Cold Shoulder (Before It Gives It To You)
If getting stunned is a knockout punch, getting frozen is being flash-frozen in carbonite. You’re helpless, watching doom approach in slow motion. Again, that single life HP makes you terrifyingly susceptible. Relying solely on a charm(like a Stone Charm) for freeze immunity can feel like a band-aid on a gaping wound when facing challenging boss encounters where bosses love dishing out arctic blasts designed to freeze enemies solid.
The Ice Breaker Pilgrimage
The solution? We embark on a pilgrimage through the passive tree to the Ice Breaker cluster. The crown jewel here is the node literally named Ice Breaker. Its gift? A whopping 50% of your maximum Energy Shield is added to your freeze threshold.
Thermal Underwear of Defiance
Let that sink in. If you’re rocking 5,000 ES, that’s an extra 2,500 points monsters need to overcome just to chill you. It’s like wearing thermal underwear woven from pure defiance. Yes, it costs a few precious passive points to get there, wandering through some chilly-sounding minor nodes that add even more freeze threshold, but trust me – the ability to ignore icy doom is worth every single one. Being constantly frozen is simply not chic.
The Never-Ending Energy Fountain: Keeping Your Shield Juiced
Alright, so you’re tough to stun and hard to freeze. But what happens when your shimmering ES bubble takes a hit? We need reliable ways to patch it up, fast.
Flask Magic: Eternal Youth
First, the obvious: flasks! Thanks to the Eternal Youth keystone passive, your trusty Life Flask undergoes a magical transformation. Instead of healing that nonexistent life pool, it now directly replenishes your Energy Shield. Slamming that flask becomes your go-to panic button, instantly injecting arcane vitality back into your defenses. Pro-tip: Snag a belt with “% of Flask recovery applied instantly” – it turns that steady heal into a much-needed burst when things get hairy.
Proactive Recovery: Ghost Dance
But flasks are reactive. Let’s get proactive with Ghost Dance. This skill gem passively grants you ethereal Ghost Shrouds (up to four). When you take a hit, one shroud poofs, instantly restoring ES equal to 5% of your Evasion Rating.
The Evasion Conundrum & Subterfuge Mask
“But wait,” you cry, “I’m wearing pure ES gear! I have the evasion of a particularly clumsy rock!” Ah, my friend, behold the genius of Subterfuge Mask! This isn’t a piece of gear; it’s a powerful passive notable we sneak onto our Amulet via the magic of Anointing (you’ll need the right combo of sacred oils: Distilled Emotions + Iron Suffering + Paranoia – brew carefully!). Subterfuge Mask performs an alchemical miracle: it grants you 2 flat Evasion Rating for every 1 point of maximum Energy Shield on your equipped Helmet.

The Synergy Loop
Suddenly, that ridiculously high-ES helmet you’ve been hunting isn’t just protecting your noggin; it’s generating thousands of points of Evasion out of thin air! Aim for a helmet with at least 300 ES, but if you can find a glorious 500+ ES monstrosity? You’ll be surprisingly slippery for someone clad in what amounts to magical plate mail. This synergy is key: stack ES for survival, get Evasion via your helmet, and let Ghost Dance provide constant, passive ES recovery based on that Evasion. It’s a beautiful, self-sustaining loop of arcane resilience involving evasion and energy shield. Don’t forget to grab those passive nodes that grant both %ES and %Evasion – they’re doing double duty for this setup!
Charting the Starfield: Passive Tree Navigation
Think of the passive tree not as a rigid path, but a celestial map guiding you towards power. Our journey starts near the Monk class area, naturally, making a beeline towards Chaos Inoculation.
The Critical Core Path
We swing left, scooping up vital Critical Strike nodes like Critical Exploits, Alternating Current, and Moment of Truth. Gotta make those hits count!
The Defensive Bastion Nodes
This is where we grab our anti-stun tech: Self-Mortification and Asceticism. Don’t skimp here.
Southern Comfort (and Damage) Route
Heading down, we pick up goodies like Heart Stopping, Heartbreaking, and Struck Through. Coming Calamity is usually a solid choice, playing nice with our lightning damage and Heralds. However, if you’re feeling spicy, you could path towards Eka and Thunder for a different damage flavor – check your stats and see what feels right.

Accuracy Anchors & Essentials
Don’t forget Tenfold Apex and the Accuracy implicit on Heartbreaking. Missing attacks feels terrible. We need enough Accuracy Rating (AR) to ensure our cosmic energies actually connect.
Northern Exposure & Jewel Sockets
Our ascent towards CI isn’t just about the keystone. Grab that nearby Jewel Socket – it’s prime real estate for a stun threshold jewel or something universally useful like Careful Assassin.
The Double-Dip Zones (ES/Evasion)
Remember those nodes offering both %ES and %Evasion and Energy Shield? Sprinkle them in wherever the path allows. They’re pure gold for this monk build.
An Arctic Alternative: Ice Strike, Glacial Cascade and Killing Palm

Should the path of crackling lightning not resonate, the Monk offers mastery over biting frost as well. A compelling alternative, often favored during the leveling journey towards different endgame goals, harnesses the synergy of Ice Strike, Glacial Cascade, and the versatile Killing Palm. Using Ice Strike provides inherent damage conversion from physical to cold, enabling chill and freeze effects.
Relying solely on a charm for freeze immunity can feel like a band-aid on a gaping wound when facing challenging boss encounters where bosses love dishing out arctic blasts designed to freeze enemies solid. Following up, Glacial Cascade blankets areas with damaging ice, reaching foes at a distance. Killing Palm remains valuable here, consistently helping you gain power charges that fuel your icy assaults or set the stage for later skill transitions (like Falling Thunder) aiming for more power charges.
Choose this frigid path if you enjoy dictating the pace of combat through freezes and shatters… or are specifically building towards a Cold Damage focused Monk archetype later on. However, if the high-voltage, Lightning build detailed in this guide is your primary aim, this icy detour may not be the most direct route.

Conducting the Cosmic Symphony: Skill Gems & Setup Overview
Now for the flashy part – dealing damage and making things explode with style. We have two modes: smooth cruising and ‘Oh dear, that boss looks angry’.
Mode 1: Mapping Bliss with Storm Wave
This is your bread and butter, your main source of clear speed, clearing maps with contemptuous ease using the star of the show: Storm Wave.
- The Setup: SW linked with Marshall Tempo (for skill speed), Upheaval, Primal Armament, and Lightning Fusion. These skill gems form your wave of automated destruction. Click (or hold), and watch monsters dissolve.
- Backup Singers (Heralds):
- Herald of Thunder (with Innervate and Deadly Herald): More lightning, shock, and zoom.
- Herald of Ash (with Magnified Effect and Precision Herald): Some fiery overkill and utility. Crucial Tip: Keep Herald of Ash at Level 4! This drastically lowers its Accuracy requirement, making gearing easier.
- Escape Artist (Blink): Linked with Inutility and Arcane Tempo. Get out of bad stuff, reposition, look cool. Essential for high mobility.
- Silent Guardian (Ghost Dance): Just slot it in. It does its thing passively.
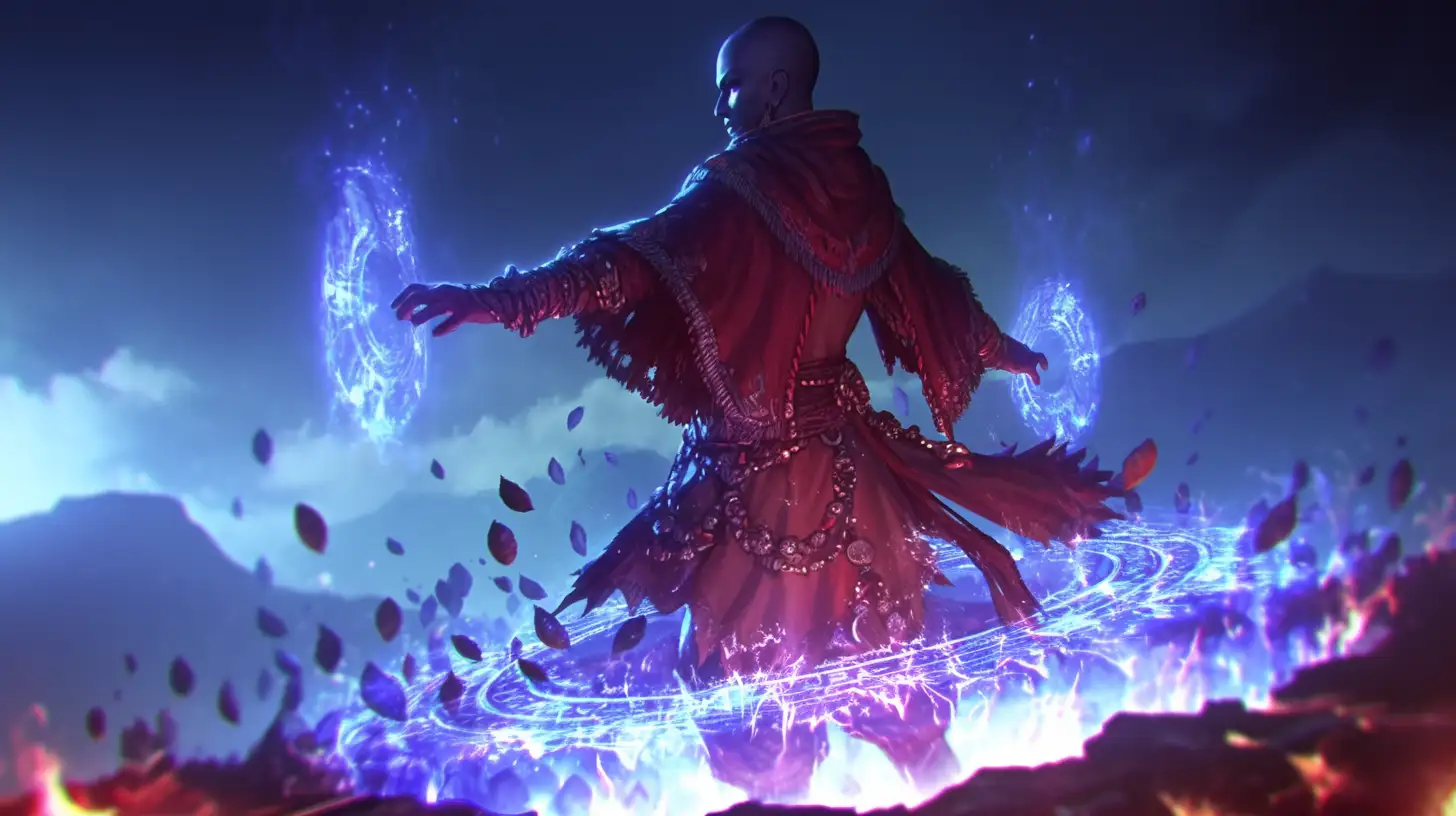
Mode 2: Tempest Bell & Falling Thunder – Boss Deletion Combo
When facing down a Pinnacle Boss, tough boss fights, or something particularly nasty, we shift gears.
- Power Up: Temporarily disable Blink (we need the mana/button space).
- Activate the Doom Aura: Slap on Custom Shock (linked with Combat Inspiration and Impetus). This aura adds significant punch and utility for tough fights.
- Bring out the Big Guns:
- Tempest Flurry (The Combo Starter): Link it with Practiced Combo (absolutely essential!). Now, borrow Marshall Tempo and Primal Armament from your Storm Wave setup and link them here too. Yes, you’re temporarily weakening SW, but Flurry needs the juice.
- Tempest Bell (The Finisher): Link it with Close Combat, Concentrated Effect, and a flexible fourth support like Heavy Swing or maybe Overabundance if you’re feeling clicky.
- The Rhythm: Hit tough melee enemies (or bosses) with Tempest Flurry to rapidly build combo charges (thanks, Practiced Combo!). Once charged, unleash devastating haymakers with Tempest Bell’s powerful melee attacks. Repeat until the boss is a fine paste.
- Return to Cruising: Once the threat is neutralized, move Marshall Tempo and Primal Armament back to Storm Wave, deactivate Custom Shock, and turn Blink back on. Resume effortless map clearing.

Accessorizing the Apocalypse: Gear Recommendations
While the Monk class inherently possesses potential for devastating unarmed combat and can use Quarterstaff Strike skills, this specific Invoker build focuses on maximizing damage and utility through the use of a powerful Charged Staff. Let’s adorn ourselves with banging items for maximum power and resilience. Remember, ES is king, but the right supporting stats make all the difference.

The Smashing Stick (Weapon – Charged Staff):
Go for broke. Either a staff with colossal base Physical damage or one stacked with juicy Elemental Damage (Lightning preferred). Look for: High Added Elemental Damage with melee attacks (70%+ is a good target), Critical Strike Chance, Attack Speed, and the coveted +Level to All Melee Skill Gems. Match your Soul Core runes (Elemental/Physical) to your staff’s strengths.
The Mind Palace Protector / Evasion Generator (Helmet):
This needs MASSIVE flat Energy Shield. Seriously, push for 300+, and if you see 500+, grab it and run. This fuels your Evasion via Subterfuge Mask. Accuracy or Rarity are nice bonuses.
The Core Carapace (Body Armour):
Pure, unadulterated flat Energy Shield. Find the biggest number you can wear. Everything else is secondary.
The Swift Gauntlets (Gloves):
Focus on offense and utility: Attack Speed is paramount, +Level to Melee Skills (aim for Lvl 4!), maybe some Added Lightning Attack Damage. Flat ES is less critical here.

The Speedy Stompers (Boots):
Movement Speed is non-negotiable. After that, pile on Energy Shield and Resistances.
The Utility Belt:
Mana, Mana, Mana! And Resistances! That glorious “% of Flask Recovery applied instantly” mod is god-tier here. High ES is a bonus.
The Bling Rings:
Cap your Resistances! This is priority one. After that, look for Intelligence (we need it), Added Lightning/Physical Attack Damage, and Mana. Need a decent amount of resists here.
The Command Amulet:
This holds the keys to the kingdom. First, Anoint Subterfuge Mask (Distilled Emotions + Iron Suffering + Paranoia). Then, stack Critical Strike Chance, Critical Strike Multiplier, Maximum Mana, and Maximum Energy Shield.

Reaching Critical Mass: The ES Threshold
How much ES do you need to feel like an arcane juggernaut instead of a fragile glass cannon?
- Bare Minimum: Around 3,000 ES gets you in the door. It’s playable, but you’ll feel occasional bumps.
- Comfort Zone: Push for 4,000 – 4,500+ ES as soon as possible. This is where the build starts to feel truly robust, letting you handle endgame content with confidence. More is always better!
The Grand Finale: Master of Your Own Energy

Stepping into the endgame as a Chaos Inoculation Invoker Monk is a trip. It demands specific gearing, careful passive planning, and understanding its unique defensive mechanics. You trade raw life for a massive energy buffer, Chaos immunity, and a surprisingly dynamic playstyle that shifts between effortless wave clearing and focused boss takedowns. It might take some getting used to, living life on the edge with only one hit point, but mastering the flow of Energy Shield, mitigating stuns and freezes, and unleashing waves of crackling power using the Monk’s abilities is an incredibly satisfying experience.
If this build doesn’t really tickle your fancy, we have a classic, at this point, Leech Witch, Bleed Huntress, and/or Ranger-danger build guides as well! Make sure to give them your attention as well, appreciate it. Good luck out there!
Frequently Asked Questions
Why does the build use Chaos Inoculation (CI) and not just life-based defenses?
Chaos Inoculation completely removes your life pool, setting it to 1, but in exchange, makes you completely immune to Chaos Damage — one of the nastiest damage types in Path of Exile 2. For Monk builds that focus on stacking Energy Shield (ES) and avoiding random chaos DoT deaths, CI offers stability, especially in higher-tier content where chaos damage becomes far more frequent and deadly.
Is leveling with a Bow really better than going Staff right away?
Yes, for the early acts (1-14+), Bow leveling offers a much smoother and safer experience. Bow skills like Stormcaller Arrow and Lightning Rod provide ranged safety and efficient clear before strong staff options like Storm Wave become available around level 16. It’s a temporary choice designed for comfort, with easy respec later.
How expensive is respeccing from Bow to Staff later?
Respeccing in PoE 2 mostly costs passive refund points, which are not very hard to obtain during the campaign. The Bow path typically spends around 15-20 extra points towards the Ranger area, which can be refunded by early mapping. It’s absolutely a worthwhile tradeoff for an easier leveling experience.
Why is Storm Wave considered the core skill of the build?
Storm Wave offers consistent AoE lightning damage with solid scaling and efficient supports. It’s easy to use while mapping and synergizes perfectly with the critical strike and lightning-themed passives of the Monk class. Later, it pairs extremely well with Tempest Flurry and Tempest Bell for boss encounters.
What’s the role of Tempest Flurry and Tempest Bell in the build?
Tempest Flurry is your combo-builder for bosses. It generates combo charges rapidly thanks to the Practiced Combo support gem. Tempest Bell is your heavy-hitting finisher, consuming those charges for massive single-target burst damage. This clear + boss setup creates a flexible playstyle perfect for endgame content.
What Ascendancy order should I follow for this build?
Most players will want to follow this order:
- I Am The Thunder – Strong early power and damage boost.
- Lead Me Through Grace – Helps with Spirit management and aura usage.
- Unbound Avatar – Excellent damage scaling for late game.
- Thunder My Enemies – Final crit-scaling boost once gear improves.
- Bow starters may prefer Grace early, while staff users can rush Thunder nodes sooner.
What makes Subterfuge Mask so important in this build?
Subterfuge Mask is a passive that grants flat Evasion based on your helmet’s Energy Shield. Since the build already stacks massive ES, this node turns your ES helmet into a huge source of Evasion. Combined with Ghost Dance, this creates a powerful loop of passive ES recovery and defense, despite wearing heavy ES armor.
How do I mitigate being stunned or frozen with Chaos Inoculation?
Your stun and freeze thresholds are tied to your life — which is only 1 with CI. To overcome this, we use passive nodes like Self-Mortification and Asceticism to recalculate stun resistance based on your ES instead. For freeze immunity, the Ice Breaker cluster adds 50% of your ES to your freeze threshold, making it very hard to freeze you once ES is stacked properly.
What’s the role of Ghost Dance in this build?
Ghost Dance generates Ghost Shrouds that recover Energy Shield when you take a hit. Combined with Subterfuge Mask giving you absurd Evasion, Ghost Dance essentially becomes free passive sustain in combat. The more ES you have on your helmet → more Evasion → better Ghost Dance recovery.
Is physical damage scaling important for this Monk build?
Yes and no. While the Lightning Invoker Monk focuses primarily on elemental (Lightning) damage, physical damage scaling remains valuable for weapon choices. Staves with high base Physical DPS convert effectively with elemental supports like Lightning Infusion. This hybrid approach ensures your attacks still pack a punch even before full elemental conversion.
Why is Accuracy so important for this build?
Missing your melee hits feels terrible — especially since this build relies heavily on on-hit effects like Shock or building combo charges. Nodes like Tenfold Apex and Heartbreaking ensure your Accuracy Rating stays high enough to maintain consistency, especially as you transition fully into staff usage.
What weapon bases should I use when leveling?
Early on, for the Bow phase: look for Dual String Bows for extra projectiles.
Later, transitioning into Staff: prioritize Charged Staffs or any staff base with high Physical or Lightning Damage. Attack Speed and Critical Strike Chance are excellent bonuses but not mandatory early.
Can I start with the staff directly without using the Bow phase?
Yes, but expect a slightly slower and rougher leveling experience in the early acts before level 16. Staff-based skills like Storm Wave become truly efficient only after acquiring proper supports and gear. If you’re experienced or enjoy melee gameplay from the start, staff leveling is totally viable.
What are the most important support gems for Storm Wave?
Marshall Tempo for moving while channeling, Lightning Infusion for flat elemental scaling, Primal Armament for added damage, and Upheaval for area control. Ambush is a great late addition once your Critical Strike Chance is solid (~50%+).
What are the best Spirit Gems to run?
- Herald of Thunder (always linked with Innervate)
- Herald of Ash (low level, linked with Magnified Effect and Precision Herald)
- Blink (for mobility)
- Cannibalism (before CI for life sustain)
- Ghost Dance (for passive ES recovery)
What are the key Passive Tree routes for this build?
- Start in Monk area, grab Flow State early for mana comfort. Then move towards:
- Lightning nodes: Wild Storm, Alternating Current.
- Crit nodes: Killer Instinct, Moment of Truth.
- Damage multipliers: Heart Stopping, Martial Artistry.
- Defensive nodes: Self-Mortification, Asceticism, Ice Breaker (later).
How does this build handle melee enemies?
Storm Wave offers enough AoE to control melee packs easily. Against tougher melee enemies or bosses, Tempest Flurry → Tempest Bell combo allows you to deal heavy single-target damage while repositioning using Blink or Evasion tactics.
What’s the general gameplay loop like?
While mapping:
- Storm Wave clear everything
- Maintain Heralds
- Blink to reposition
For bosses:
- Activate Custom Shock
- Tempest Flurry → build charges
- Tempest Bell → massive burst
- Swap supports back to Storm Wave for clearing
How good is this build for new players?
It’s excellent once set up, but expect a learning curve managing Energy Shield, stun/freeze mitigation, and the Storm Wave playstyle. The optional Bow start makes the early game easier for beginners. Later, the build shines in both clearing and bossing, making it highly satisfying and powerful for both new and veteran players willing to learn its layers.
When should I transition to Chaos Inoculation?
Usually during early mapping — around level 50+. The exact timing depends on your ES pool and gear. Aim for at least 3,000 ES minimum before taking CI comfortably. Until then, stay life-based with hybrid gear.






One of the best build guide’s I’ve read, bar none. Upon finishing the article I realized how captivated I was and that I was throughly Informed in the ways of poe2’s monk class! Such a stellar performance. Thank you.
Thank you, dude, appreciate it!