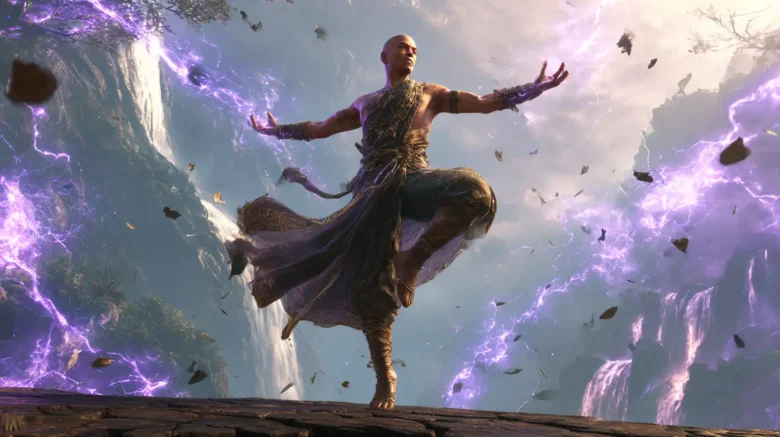
Ranger Build – Zap ’em, loot ’em, roll credits (not really, but close)

Path of Exile 2 just unleashed Patch 0.2 Dawn of the Hunt, and with it, a glorious wave of chaos. Bow skills got reworked, balance is doing somersaults, and if you’re a new player, figuring out what actually works now is a bit like reading ancient prophecy—vague, frustrating, and full of traps. Good luck figuring out what still works!
But don’t worry, I got you covered. This Ranger build is safe, smooth, and clears fast – it still slaps! It’s designed to carry you through early content without face-planting into a wall of zombies. Even better? It leaves you full freedom to pivot into just about any Ranger endgame setup once you’re ready.
So if you want a strong start in Dawn of the Hunt without getting bricked halfway through, let’s get you set up with the right skills and gear—and a roadmap for tweaking things to your liking as you go. Let’s get into it!
Step One: Wake Up, Grab a Bow, Talk to the Wounded Guy


Your journey basically kicks off from wherever we start in the game – vague danger, some poor NPC gasping for help, and a very convenient weapon just lying around. Talk to the first wounded fella, grab your starter bow, and get ready to shoot stuff. That’s technically what you want to do when you play an archer or ranger, right?
At this point, it’s just you and your bow—and honestly, that’s all you need. Sure, it’s a two-handed weapon, but you’ll also come across off-hand items (called quivers) that can be equipped in your off-hand slot. But when we’re making builds, the most important stuff are the skills that we use.
Lightning Arrow: Your First (and Very Trusty) Tool
Your first skill gem will be Lightning Arrow, a classic and effective bow attack. Just slap it on your bar and go. There’s not much choice early on, but honestly, you don’t need anything else right now. It’s simple, it’s strong, and it hits multiple enemies by chaining between them like a tiny electric vengeance god – it will bounce around enemies and destroy multiple enemies at once without any problems.

Your first mini-boss encounter is a beefy zombie dude. He’ll do some dramatic stomping (watch out for AoE!), summon hordes of zombies, and generally try to ruin your day. Just await his attacks, dodge his stomps, and when he summons hordes of zombies, spam Lightning Arrow – its chains are great for hitting him and his backup dancers, defeating multiple enemies at once. You’ll defeat him pretty easily with your skills.
Loot in Path of Exile 2: Filters Are Your Friend
After defeating this brutal zombie, your first glorious heap of loot hits the floor. Welcome to the eternal loot vortex that is Path of Exile 2. There’s a lot of loot in the game!
This is also the moment when your screen might turn into a rainbow mess of dropped items. Highly recommend setting up a loot filter ASAP—it’ll clear out the crap off the screen and keep your sanity intact.

Post-Town: New Skills, New Toys
Once you hit town and chat with Renly, you’ll receive your first uncut skill gem. That’s when the real build-crafting starts to unfold—but more on that in the next section.
Into the Fray: Finding Early Projectile Skills & Gems (Like Lightning Rod)
Once you’re out of town, you’ll head into the first area—Clearfell. While blasting your way through, keep an eye out for the Abandoned Camp. It’s tucked off to the side, but you’ll want to stop by. Why? Free skill gem loot, of course.
At the camp, you’ll get your hands on an uncut skill gem. These things are like blank canvases for abilities—they have levels, and you can cut them into any skill you like, and you will get the same level of the skill matching your current character level. Easy, flexible, and a great way to test new skills on the fly.

Next, push into Mud Burrow (yes, it’s as pleasant as it sounds), which you’ll find in the same area. There’s another uncut skill gem waiting there, too. Now we get two uncut skill gems to work with—and here’s what we’re turning them into:
- First gem → Lightning Rod
- The second gem → Frost Bomb

Skill Breakdown: What Do They Actually Do?
- Frost Bomb: Simple, satisfying, and cold as your ex’s heart. It will detonate after a few seconds and deal AoE cold damage. And at early levels? It’s arguably one of the best damaging skills available at level one, making it a fantastic early addition. Early on, items with flat cold damage can give this a slight boost. While we don’t heavily invest in supports for Frost Bomb in this specific leveling path, gems like Cold Damage Support or Added Cold Damage Support exist in the game and could be experimented with later if you want to diversify your damage types.
- Lightning Rod: A little more technical, but very fun. You fire an arrow, it will drop down, sticking into the ground. Then you shoot this arrow again, triggering a cascade of chain lightning that fries nearby enemies. Think of it as a two-step combo with double the payoff – you can treat it as a kind of double-damage skill.

Both Lightning Arrow and Lightning Rod deal significant elemental damage, specifically lightning, which synergizes well with shock effects.
Fighting the Mud Burrow Boss: Mini Boss, Major Zap
Here’s how you handle the first proper boss fight in Mud Burrow. The strategy is to identify when the boss is standing still:
- Wait until the boss stops moving.
- Then you shoot Lightning Rod near him.
- You’re placing Frost Bomb for delayed AoE.
- Then start spamming Lightning Arrow to trigger the rod and soften up adds.

This will detonate the Lightning Rod. Frost Bomb will detonate in the near future, and that’s how you multiply damage sources at the same time—by dotting the battlefield with explosions and lightning. It’s surprisingly effective, even with minimal gear.
Shopping Guide: Gearing Up (Body Armor, Movement Speed Boots & Flat Damage)
After defeating this boss in Mud Burrow, make sure to take the teleport back to Clearfell. In the encampment you can talk with Renley once again, and he will give you an uncut support gem. That’s really important for us!
While you’re still in town, don’t skip the shops. Renley got a shop, and other NPCs in town also got shops. It’s really hard to identify which item is good early on, so here’s a trick: use the shop search filter.
| Flat Damage (Attacks) | High | Increases base damage significantly |
| Movement Speed (Boots) | Very High | Improves clear speed and dodging |
| Life | High | Survivability |
| Elemental Resistances | High (Increasingly) | Defensive necessity |
| Quality Gems | Medium | Salvage for valuable resources |
| Energy Shield (Hybrid) | Low/Situational | Potential extra defense layer |
Items with flat damage (especially ‘extra damage to attacks’), life (or potentially some Energy Shield on hybrid gear), and—most importantly—movement speed on boots, and crucial defensive stats like Elemental Resistances (especially Lightning).

Pro tip: Shops refresh every time you level up. So it’s really advised to go back to shops every time you level up. Make a habit of popping back into town and browsing—especially if you’re feeling underpowered or your bow looks like it’s made of twigs and hope. Keep an eye out for quest rewards too; some early bosses, like one potentially found back in Clearfell, might drop items granting valuable permanent stats like resistances.
Next Stop: Graewood and the Red Wail
With good items and also the nice skill setup that we’re using, you will have no problems destroying any enemy in the early game. Head out to Graewood, the next zone. You’ll find checkpoints here—one near a bubbling cauldron. You can activate it to get some flasks, but most importantly, it will summon an elite monster.

When you destroy this rare monster, he will drop another support gem. Now we get two of them, and now we can cut them, as well as our skill gems!
Push onward to the next location, Red Wail. Right now, you can get level two uncut skill gems. You can use them to upgrade Lightning Arrow this time. But since other skills require different attributes (for example, Frost Bomb needs more Intelligence, and we’re not planning to improve our intelligence), we need to find a way to advance our power in different ways. So that’s where uncut support gems join the party!
The Power of Support Gems for Your Attack Skills
Naturally, your skills will have two free support sockets by default. Here’s what that means:
- Even if a skill feels weak or slow, you can slot support gems to increase or change its properties.
- For example, Lightning Arrow might start pretty slow with just one single arrow, but with the right support, you can scale up damage or attack speed instantly.

Initially, you won’t find a lot of options to upgrade your skills. So make sure to find the “Show All” button or tick on the screen in the gem menu. This will give you almost unlimited possibilities in customizing your skills.
| Martial Tempo | Increases Attack Speed | Always |
| Scattershot | Adds 2 Projectiles (Lowers Damage) | Clearing Packs / Mapping |
| Concentrated Effect | Massively Boosts Damage (Shrinks AoE) | Boss Fights / Tough Single Targets |

First Upgrade: Martial Tempo
Your first real support pairing? Cut one of those uncut support gems into Martial Tempo. Think of it as an early game version of the classic Faster Attacks Support gem; it boosts your attack speed, which makes everything feel snappier and helps your Lightning Arrow feel a lot more satisfying right away.
Support Gems, Arrow Clones, and the Moment Your Build Starts Popping Off
Now that you’ve got Martial Tempo boosting your attack speed, it’s time to add a second support: Scattershot.
Scattershot will lower our damage a bit, but here’s the trade-off: it will make our arrow shoot three arrows instead of one. That’s a massive win for clearing speed – this is an insanely good setup to clear enemies, level up fast, and go through the zones faster while getting all the experience you need.
In other words: more arrows, more zaps, more dead mobs. You’ll start flying through zones, scooping up XP like it’s free candy, and your screen will be permanently lit with lightning.
Keep Up or Get Swarmed

There will be a lot more monsters now than in the first areas. Enemies start swarming harder around this point in the campaign. That’s where you need to understand: your character should be able to clear packs of monsters fast, or they will surround and destroy you. But with Lightning Arrow + Scattershot + Martial Tempo, you’ll be handling mobs with ease.

Enter: Concentrated Effect
If RNG smiles on you, cut your new support gem into Concentrated Effect. This one’s for boss fights and big damage moments. While it shrinks your skill’s area, it gives your damage a massive boost—perfect for popping elites or chunky rares. You can put it on any skill you like right now, it doesn’t matter too much since you’ll be clearing packs easily with just Lightning Arrow + Scattershot + Martial Tempo.
Here’s how you can use it smart:
- While clearing? Stick with Scattershot for that wide area coverage.
- About to fight a boss? Pause the game (a key PoE 2 feature!), open your skills menu, swap Scattershot for Concentrated Effect on your Lightning Arrow, and melt that health bar.
That quick swap gives you the best of both worlds—fast clears and high-impact single-target bursts.

With this full support setup:
- Lightning Arrow chains harder
- Lightning Rod gets more value
- And everything just hits… harder
Boss Fight Incoming: Setup and Shred
When you’re reaching the next boss fight, if you got the full setup instantly, here’s the play:
- Drop Lightning Rods (yes, plural—if you still have Scattershot slotted from clearing, you can scatter shot lightning road and summon three lightning rods quickly! Otherwise, just place one or swap supports first).
- Toss in a Frost Bomb if you’re still using it.
- Fire off Lightning Arrows with Concentrated Effect slotted.
Your screen lights up, the boss goes down fast. It’s pretty easy and fast! But most importantly, this boss will drop your next major prize: a Level 3 uncut skill gem.
Stormcaller Arrow: It’s Over for Everything Else (Build Becomes Completely Broken)

It’s time to forget every skill you’ve used up to this point. You won’t need them at all! Seriously.
Cut that level 3 gem into Stormcaller Arrow. On paper, its DPS looks underwhelming—don’t let that fool you, it’s a bit of a fun “Nope trap!” On the surface, DPS is insanely low. This is one of those “you have to see it to believe it” skills. Yes, even with Scattershot swapped out. Yes, even while you’re getting away scattershot and changing it to Lightning Arrow, it still will have lower DPS initially.
The secret lies in how the skill actually works.
Stormcaller Arrow: AKA, “Why Is Everything on My Screen Dead?”
Here’s the real juice. Basically, you fire an arrow that will deal some damage up front—like, barely noticeable, it deals almost no damage! You might even think, “Huh, is this thing bugged?”
And then BOOM. Then it will strike a lightning bolt upon the enemy that absolutely demolishes everything. That’s the secret.

Let’s break it down:
- The arrow itself converts 20% of your physical damage to lightning and the actual damage of the skill is about half your base attack damage. It’s just there to set the stage.
- The bolt, on the other hand, that follows? That’s the main act. It changes all your damage, 100% of your physical damage, to lightning damage and hits for 185% of your attack damage.
Oh, and there’s the possibility to shock enemies, too—meaning they take 20% more damage from everything for a short time. It’s not a single-target damage; it’s actually the area of effect damage, so anything nearby also gets fried. Basically, you shoot once, and a whole group of enemies forgets how to exist! The AoE lightning and shock give your clear speed a massive boost compared to single-target focused skills.
What Makes It So Good?

- The coolest part about this build: You don’t need to change your support gems. That’s right—Martial Tempo, Scattershot, Concentrated Effect—they all work beautifully.
- Just remember: Swap out Scattershot and switch in Concentrated Effect for boss fights, and they’ll melt like cheap wax in a heatwave.
Why This Build Slaps (and Then Slaps Again) – Insanely Flexible!
Here’s my favorite part: it’s flexible. Like, really flexible. Stormcaller Arrow is all you need to cruise through the campaign, but if you want to experiment, the door is wide open! While we’re basically using only Stormcaller Arrow right now, yeah, you don’t need to use anything else. And now you can do whatever you like! For example:
- Want to pivot into poison arrows for bosses? Do it.
- Need an escape shot like me to be able to juke and await boss attacks or other enemies’ attacks? Go for it.
- Feel like adding a splash of ice via Added Cold Damage Support, traps, Burning Arrow for fire damage, Mirage Archer Support for clear, or something weird just to try it out? Go wild! Maybe when enemies surround you, you can use an ice attack and shots?
- Don’t forget a Movement Skill! While not a direct damage dealer, grabbing something like Blink Arrow or Dash early on is crucial for dodging enemy attacks and repositioning quickly.

From this point on, you’ve got full control. You can flex this build into whatever other build you like, use it as a leveling one, and then change it later without any problem. Just check the skills that you want to try, that you want to have fun with! Cut any skills you like and have a lot of fun because you won’t have any problems versus bosses; you’ve got the firepower to handle any boss in the story. Just stand and shoot this Stormcaller Arrow and just melt them.
That’s the core loop:
Shoot → Zap → Laugh at the ashes.
And that, my friend, is how you Ranger your way through Path of Exile 2 like a bolt-slinging maniac.
But Wait—We’re Not Done Yet (Time to Get Buff – Extra Layers!)
Okay, so you’ve been melting bosses and shocking packs into crispy loot explosions, but don’t get cocky yet—the build is not finished yet! We need extra layers to become extra powerful and be ready to clear the whole campaign.

To take this build from “strong” to “campaign vaporizer,” we need to layer in some extra power. After defeating a few more bosses and getting to the Hunting Grounds, make sure you find Freeturn. That’s the location where you need to find multiple ritual sites, clear them, and then when you find and clear three sites, you will find one big one. That’s where you will summon the boss. And we need to defeat the boss.
Now, spoiler alert: this boss? He’s going to explode just like the rest – it will be pretty easy as any other boss before because the build is so broken and overpowered. But the reward is what matters…
Spirit Time: Buffs, Baby
Defeating this boss will unlock Spirit. Spirit is another resource in Path of Exile 2 that will fuel special buff skills—and yes, we’re using them. Make sure to use this skill!
Now you can cut Herald of Thunder—our first spirit-based skill and an absolute banger for this build. Instantly activate it!
Why Herald of Thunder?
- You shock enemies constantly with Stormcaller Arrow.
- Herald of Thunder gives you a buff when you destroy any shocked enemy.
- That buff makes your lightning damage skyrocket – it will double our damage, our lightning damage especially!

It’s a natural synergy. Just cut the gem, activate it, and watch the fireworks. Suddenly, your screen’s full of lightning bolts that you didn’t even cast. That’s Herald of Thunder working in the background!
Supercharge It: Support Gems for Your Spirit
If you’ve lucked out and snagged more uncut support gems (remember, they’re rare!), now’s the time to use them. Make sure to cut:
- Inner Weight – increases buff effects
- Lightning Infusion – gives more lightning damage
By dropping these onto Herald of Thunder, it will give you extra lightning damage almost all the time, and you’ll be passively nuking the battlefield without lifting a finger.
That’s how Herald of Thunder looks like in a battle: In combat, you kill shocked enemies, you will see a little lightning icon appear when the buff is active, and then you will use it upon attacking enemies, and it will shoot them with lightning. That’s your cue: get in there and watch the shockwaves roll.
At this point, your clear speed is, scientifically speaking, bonkers.

Secret Tech: Not Just for Rangers (Works on Witch & Warrior Too!)
Here’s a fun twist—this build isn’t exclusive to Ranger! You can use this exact setup, for example, on a Witch and/or a Warrior as well. It works.
So technically, you can use the same setup for any character and have fun in the campaign. The skills scale with base stats and items you’ll get no matter what class you start as. So if you somehow ended up here and you’re not playing Ranger… guess what? You can still run this whole setup and roll through the campaign like it’s a loot piñata.
Final Note: The Specialization Book

But right now, let’s destroy the boss from the Hunting Grounds (which should take all of 10 seconds), because he will drop a Book of Specialization book that will give you passive skill points.
Use it. It grants passive points, which are huge for rounding out your damage, survivability, or flexibility—depending on how you’re customizing your build.
Loot Boxes, Passives & Your Act One Power Spike
Then we will move to the next area, the Augum Farmlands. That’s the location where you find a loot box. Go find it, pop it open, and scoop whatever you can get.
After that, head back to Clearfell Encampment, do your quests, and you’ll get a bunch of skill points for the passive skill tree, which means… it’s tree time.
Passive Tree Path: Easy Damage, Shock & Movement Speed (So Simple It Feels Like Cheating!)
Technically, it’s insanely easy. The beauty of this Ranger build is how low-maintenance its Passive Skill Tree path is. We don’t need any extra stats. Just grab nodes that make you shoot faster, hit harder, and move smoothly.

Here’s your Act 1 path:
- Start with Projectile Damage x4
- Pick up Honed Instincts node for more dexterity (always useful).
- Then go with more Projectile Damage, Clean Shot, more Projectile Damage, and +5 to Dexterity.
- Then take two steps backward to take Ailment Chance and Vile Wounds—this increases chances to shock enemies, and you will also deal more damage to shocked enemies.
- Additionally, you could take a smaller path. Start with Life and Mana Flask Recovery, then Combat Alchemy, Blur.
- This little detour is pure value—more survivability, better clearspeed, and power to defeat Act 1.
Further down the Passive Skill Tree, you might consider pathing towards Keystones like Point Blank if you find yourself fighting closer to enemies, which significantly increases damage at short range but reduces it further away. However, for this initial leveling path, focusing on consistent damage and mobility is key. Also, ensure you pick up a Movement Skill gem as soon as possible! As you progress further into the Skill Tree, remember to prioritize picking up life nodes and essential Elemental Resistances, particularly Lightning Resistance, as enemy elemental damage increases.
Level 5+ Skill Gems: Barrage & Beyond

Towards the end of Act 1, we will get level five skill gem access. This is where the build really blossoms. You’ll get access to a bunch of extra skills, and while again, you can technically cut any skills you like, here are two standout options:
- Electrocuting Arrow – Great for disabling enemies, especially bosses. A fantastic crowd-control tool.
- Barrage – Works wonders. Use Barrage with Premeditation to increase the power of your skills. It lets you pre-load your skill for a stronger hit.
How Barrage Works (And Why It’s Great)
Normally, you shoot only one arrow. But when you use Barrage before using the skill, you’ll shoot two arrows at once—for double-damage now and then while the skill is off-cooldown. That means stronger bursts when you need them the most, say, like for bosses or chunky rare mobs. Again, that’s an insanely powerful setup.
And yes, it’s effective. Anecdotally, experienced players reported clearing the full three acts in less than 3 hours during the testing phase. They were able to finish the whole campaign in about 6 hours; it just goes to show the build’s capacity.
Don’t Spam. Be Smart.

One more tip: if you want to be extra effective, make sure not to waste a lot of arrows and a lot of mana. Don’t burn through all your arrows and mana like a headless chicken.
Make sure to understand how many attacks you need to destroy enemies. Most of the time, we need two attacks. So:
- Just do attack one.
- Attack two.
- And go away.
They will be defeated in the meantime. Let your lightning finish the rest. It’s efficient, it’s fast, and it saves you from running out of gas mid-fight.
TL;DR – Build Snapshot

To make this full build your working horse, you just need:
- 1 skill gem (Stormcaller Arrow)
- 2 support gems (Martial Tempo and Scattershot… or Concentrated Effect if you’re bossing) – technically.
Okay, maybe 3 total to flex in and out for bosses—but that’s it. No overthinking, no overcomplicating. You shoot, you zap, they die. That’s the end of the story.
And if this build doesn’t really tickle your fancy, we have a classic, at this point, Leech Witch and/or Bleed Huntress build guides as well! Make sure to give them your attention as well, appreciate it.
Epiccarry: best wow boost and coaching services
Is this build suitable for players new to Path of Exile 2, especially with the recent patch changes?
Absolutely. The guide is specifically designed with new players in mind, acknowledging that recent patch changes (like bow skill reworks and balance shifts) can make figuring out what works feel like deciphering “ancient prophecy”—vague and full of traps. This build is presented as a safe, smooth, and fast-clearing option that “still slaps” despite the chaos. Its primary goal is to carry you through the early content effectively, helping you avoid “face-planting into a wall of zombies” or getting your character “bricked” halfway through the campaign. Furthermore, it provides a strong foundation that leaves you with the freedom to pivot into almost any other Ranger endgame setup later on.
What is the very first skill I should use as a Ranger in this build?
After waking up, grabbing the conveniently placed starter bow, and talking to the wounded NPC, your first offensive tool will be the Lightning Arrow skill gem. The guide emphasizes that early on, there isn’t much choice, but Lightning Arrow is all you need. You should just “slap it on your bar and go.” It’s described as a classic, simple, yet strong bow attack that functions like a “tiny electric vengeance god” by chaining between enemies. This bouncing effect allows it to destroy multiple enemies at once, making it effective right from the start.
How do I deal with the first mini-boss (the beefy zombie)?
The guide advises a straightforward strategy for the first beefy zombie mini-boss. You need to watch out for his attacks, particularly his “dramatic stomping,” which indicates an Area of Effect (AoE) attack you should dodge. His other main mechanic is summoning hordes of zombies. When he does this, the guide recommends spamming Lightning Arrow. The skill’s inherent chaining ability is highlighted as being great for this situation because the lightning will bounce between the boss and his summoned “backup dancers,” allowing you to damage multiple enemies simultaneously and defeat him relatively easily.
The guide mentions loot filters. Why are they important early on?
Loot filters are highly recommended very early in the game, specifically right after you defeat the first mini-boss and experience your “first glorious heap of loot.” The guide describes Path of Exile as an “eternal loot vortex” where your screen can quickly become a “rainbow mess” of dropped items. A loot filter is crucial because it automatically hides the less valuable items (the “crap”) from view, cleaning up your screen. This helps significantly in managing the sheer volume of drops and, as the guide puts it, keeping your “sanity intact.”
What are uncut skill gems and how do they work?
Uncut skill gems are introduced as special items you start finding after reaching the first town (Renly gives you the first one) and exploring early areas like Clearfell (Abandoned Camp) and Mud Burrow. The guide describes them as “blank canvases” for abilities. They come with a pre-set level, and their key feature is flexibility: you can “cut” them into any skill gem you choose. Crucially, the resulting skill gem will have a level matching your current character level. This makes them “easy, flexible,” and a great way to test out new skills on the fly without needing to find or level them individually.
What two skills should I cut from the first two uncut gems found in Clearfell and Mud Burrow?
After acquiring your first two uncut skill gems—one found in the Abandoned Camp off the side in Clearfell, and another within the Mud Burrow area—the guide provides specific instructions. You should use these two gems to acquire your next core skills:
* Cut the first uncut gem (from Abandoned Camp) into Lightning Rod.
* Cut the second uncut gem (from Mud Burrow) into Frost Bomb.
What does Frost Bomb do, and is it good early?
Frost Bomb is described as “simple, satisfying, and cold as your ex’s heart.” Functionally, it’s a skill that places a bomb which detonates after a few seconds, dealing Area of Effect cold damage. The guide strongly endorses its early-game power, stating it’s “arguably one of the best damaging skills available right at level one,” making it a “fantastic early addition.” While the build doesn’t focus heavily on supporting it, the guide notes that items with flat cold damage can provide a slight boost, and support gems like Cold Damage Support or Added Cold Damage Support exist in the game if you choose to experiment later.
How does Lightning Rod work?
Lightning Rod is presented as a more technical but fun skill. The process involves two steps: first, you fire an arrow which sticks into the ground where it lands. Second, you need to shoot that specific arrow you just placed (“yes, really”) with another attack, such as Lightning Arrow. Doing so triggers a “cascade of chain lightning” that fries nearby enemies. The guide explains this as a “two-step combo with double the payoff,” treating it as a “kind of double damage skill.” It also notes that, like Lightning Arrow, it deals significant lightning damage and synergizes well with shock effects.
What’s the basic strategy for the Mud Burrow boss using these early skills?
The guide outlines a specific sequence for tackling the first proper boss in Mud Burrow, focusing on maximizing damage when the boss is vulnerable. The strategy is to first identify when the boss is standing still. Once it stops moving, you should:
1. Shoot a Lightning Rod near the boss.
2. Place a Frost Bomb for its delayed AoE damage.
3. Begin spamming Lightning Arrow. This serves two purposes: triggering the waiting Lightning Rod and softening up any additional enemies (adds) the boss might have.
By doing this, you “multiply damage sources,” effectively “dotting the battlefield with explosions and lightning.” The guide assures that this approach is “surprisingly effective, even with minimal gear.”
What kind of gear should I look for in shops early on?
The guide recommends actively checking shops (Renly’s and other NPCs’ in town) after defeating the Mud Burrow boss and especially after each level-up, as shop inventories refresh then. Since identifying good items early can be hard, using the shop’s search filter is advised. Key things to look for include:
* Items granting flat damage, particularly mods like ‘extra damage to attacks’.
* Gear with Life (or potentially some Energy Shield on hybrid pieces).
* Movement Speed on boots (highlighted as very important).
* Crucial defensive stats like Elemental Resistances (with a specific mention of Lightning resistance being useful).
* Quality gems, which can be salvaged for valuable resources.
Additionally, the guide suggests keeping an eye on quest rewards, as some early bosses (potentially one back in Clearfell) might drop items granting permanent stats like resistances.
How do support gems work in PoE2 according to this guide?
Support gems are introduced as a way to enhance your skills significantly. You receive your first uncut support gem from Renly after the Mud Burrow boss, and can find another by defeating a specific rare monster near a cauldron checkpoint in Graewood. The guide explains that skills naturally come with two free support sockets by default. You can slot support gems into these sockets to modify or increase the skill’s properties. Even if a skill feels weak or slow initially (like Lightning Arrow potentially starting with just one arrow and feeling slow), support gems can instantly scale up its damage, attack speed, add projectiles, or change how it functions. The guide also points out the “Show All” button in the gem menu, which reveals “almost unlimited possibilities” for customization.
What are the first two support gems I should get for Lightning Arrow, and what do they do?
Once you have two uncut support gems (one from Renly post-Mud Burrow, one from the Graewood rare monster), the guide recommends cutting them into specific supports for your main attack skill (initially Lightning Arrow):
* Martial Tempo: This is described as an early-game version of the classic Faster Attacks Support. Its function is to boost your attack speed, which makes everything feel “snappier” and makes Lightning Arrow feel “a lot more satisfying right away.”
* Scattershot: This support comes with a trade-off: it slightly lowers your damage per arrow, but it makes your skill shoot three arrows instead of one. The guide calls this a “massive win for clearing speed” and an “insanely good setup” allowing you to clear zones faster, gain XP quickly, and handle the increasing number of monsters. It results in “more arrows, more zaps, more dead mobs,” making your screen “permanently lit with lightning.”
The guide mentions Concentrated Effect. When should I use it?
Concentrated Effect is presented as a potentially powerful third support gem you might acquire if “RNG smiles on you” and you find another rare uncut support gem. Its purpose is specifically for boss fights and big damage moments against tough elites or rares. While it significantly boosts your skill’s damage, it does so at the cost of shrinking its area of effect. The guide recommends a smart usage strategy: keep Scattershot socketed for clearing regular monster packs due to its wide coverage. When you’re about to fight a boss, use PoE2’s pause feature, open your skills menu, quickly swap out Scattershot and swap in Concentrated Effect onto your main damage skill (like Lightning Arrow or later Stormcaller Arrow). This allows you to melt the boss’s health bar quickly. Afterwards, you swap back to Scattershot for clearing. This quick-swapping gives you the “best of both worlds”—fast clears and high single-target burst.
What skill replaces Lightning Arrow as the main damage dealer, and when do I get it?
The guide introduces Stormcaller Arrow as the game-changing skill that effectively replaces everything you’ve used up to that point. It strongly emphasizes this shift, saying “It’s time to forget every skill you’ve used up to this point. You won’t need them at all! Seriously.” You acquire this powerful skill by cutting the Level 3 uncut skill gem that the guide states is dropped as a major prize by the boss you fight immediately after the section discussing the use of Concentrated Effect (implying the boss at the end of the Red Wail sequence or shortly after).
Stormcaller Arrow’s initial DPS looks low. Why is it considered “completely broken”?
The guide acknowledges that Stormcaller Arrow’s on-paper DPS looks underwhelming and calls this a “fun ‘Nope trap!'” The skill’s true power isn’t in the initial arrow hit, which is described as dealing “barely noticeable” damage (converting only 20% physical to lightning and dealing about half your base attack damage), potentially making you think it’s bugged. The real “juice” comes from the lightning bolt that strikes the enemy after the arrow impacts (“And then BOOM.”). This bolt is the “main act,” converting 100% of your physical damage to lightning and hitting for a massive 185% of your attack damage. Furthermore, this bolt hits in an Area of Effect, frying nearby enemies, and has a chance to shock targets, making them take 20% increased damage from all sources. This combination means you “shoot once, and a whole group of enemies forgets how to exist,” providing a massive boost to clear speed.
Do I need different support gems for Stormcaller Arrow?
No, one of the major advantages highlighted by the guide is that you don’t need to change your core support gems when you switch to Stormcaller Arrow. The same supports work beautifully: Martial Tempo for attack speed, Scattershot for clearing packs of enemies, and Concentrated Effect for maximizing damage against bosses. The guide reinforces the strategy of swapping between Scattershot and Concentrated Effect depending on the situation (clearing vs. bossing). It emphasizes that this setup, even with “vendor trash gear,” allows bosses to “melt like cheap wax in a heatwave” and enables “miracle-tier clears.”
What is Spirit and how do I unlock it?
Spirit is introduced later in the guide as another resource system in Path of Exile 2, needed to fuel special buff skills. It’s presented as an “extra layer” required to take the build from “strong” to “campaign vaporizer.” You unlock the Spirit system by progressing to the Hunting Grounds area. There, you need to find the location called Freeturn, clear multiple ritual sites you find there, and after clearing three, you’ll find a big one. Activating this summons the area boss. Defeating this boss (who the guide predicts will “explode just like the rest” due to the build’s power) unlocks the Spirit resource and rewards you with your first uncut spirit gem.
What Spirit skill does the guide recommend, and why?
Upon unlocking Spirit and receiving the uncut spirit gem from the Hunting Grounds boss, the guide strongly recommends cutting it into Herald of Thunder. It calls this skill an “absolute banger” for the build and advises activating it instantly. The reason for its effectiveness is the perfect synergy with Stormcaller Arrow:
* Your main skill (Stormcaller Arrow) constantly shocks enemies.
* Herald of Thunder grants you a powerful buff whenever you defeat a shocked enemy.
* This buff makes your lightning damage skyrocket, with the guide estimating it will “basically double our damage.”
It’s described as a “natural synergy” that fills your screen with extra lightning bolts you didn’t cast, working passively in the background. If you find more uncut support gems, slotting Inner Weight (increased buff effect) and Lightning Infusion (more lightning damage) onto Herald of Thunder further enhances this passive damage, leading to what the guide calls “insanely insane. Bonkers” clear speed.
What is the recommended early passive skill tree path?
The guide emphasizes that the passive tree path for this build in Act 1 is “insanely easy” and “low-maintenance,” requiring no extra stats beyond what the Ranger naturally gets. The focus is purely on damage, speed, and some utility. The suggested path is:
1. Go straight forward, taking nodes for extra projectile skills damage.
2. Pick up a nearby node providing more dexterity.
3. Continue taking nodes for more projectile damage and potentially piercing chance linked to dexterity.
4. Take two steps backwards on the path to grab the shock synergy node (increases shock chance and damage against shocked enemies).
5. Take a “small road” detour that provides Life Flask recovery, more dexterity, movement speed, and evasion rating.
This detour is highlighted as “pure value” for survivability, clear speed, and smoother gameplay. Looking ahead, the guide briefly mentions considering keystones like Point Blank later (if fighting close range) and the importance of picking up life nodes and elemental resistances (especially Lightning) as you progress further, along with acquiring a Movement Skill gem.