This is a complete guide to the Classic version of the Ulduar raid – one of the most detailed instances not only in the Wrath of the Lich King Classic, but in the entire World of Warcraft game. You will learn everything you need to know about the raid itself, its bosses, strategies, and various tips and tricks, which will ease your journey. We will cover both, Normal and Hard modes, giving you some pieces of advice concerning both dungeon variations. We will also answer some burning questions. Let’s begin.
General Facts About Ulduar

So why is Ulduar considered the best raid in World of Warcraft? This is a very complicated question that requires a complex answer. In short, it is the pinnacle of design and engineering thought. Enormous spaces and tiniest details, bosses, mechanics – everything is so thought out that players still admire it even many years and dozens of other raids later.
Buy Cheap WoW Classic era Gold
WoW Gold: Your Key to Greatness!

Ulduar is the biggest titan complex in Azeroth and includes two dungeons and one raid, available in a Normal mode with optional hard modes for some encounters. The dungeons are called the Halls of Lightning and the Halls of Stone, and they have become a part of the Titan Rune dungeons system that changes a customary instance completion experience upon the usage of a mysterious titanic relic.
Ulduar is a prison for Yogg-Saron, the Old God, resembling a monstrous blind amoeba with many sharp-toothed mouths and tentacles that corrupted all guards and made them its loyal servants. Yogg-Saron is a final boss of the Ulduar vault that drives mad both players and their characters altogether for many years already.
WoW Classic WotLK Ulduar Patch Release Date

The WoW classic version of the Ulduar raid has been already released. The exact date was January 19, 2023. All bosses became available at once, so there is no need to wait for anything. Go and kill Yogg-Saron already!
By the way, a new boss, Emalon the Storm Watcher, became available in the east wing of the Vault of the Archavon Raid on January 23, 2023. This boss’ drop contains Ulduar Raid Set items, among other things, so it might be useful to change location every once in a while.
WoW Classic Anniversary Professions Kits Boost
Enough resources to upgrade your profession to the maximum level!

You may even visit Argent Tournament grounds, complete a daily quest hub to get some PvP loot for a new arena season, especially if you work on Deadly gladiator PvP sets.
Ulduar Location in WotLK Classic

But where is the Ulduar location? How to find this masterpiece of prison architecture? The raid plus dungeons complex is located at the very North of the Storm Peaks zone, making this place the northernmost place not only for Northrend, but for the entire planet. The raid entrance is at the central building of the complex. There is a summoning stone right outside the gates and a flight point by coordinates: 44.4, 28.2, Storm Peaks. Both Horde and Alliance members may use this flight point.
Both Titan Rune dungeons may be found on both sides of the Ulduar itself; the Halls of Stone to the West, and the Halls of Lightning – to the East.
An interesting fact: you can’t get to the Ulduar plateau in Storm Peaks by ground, only by using a flying mount or by taxi.
Finding the Entrance to Ulduar Raid
WoW Classic Anniversary Leveling Boost
Let professionals expedite your power leveling

As we have mentioned before, the entrance to the raid is right at the front gates of the biggest building of the entire complex. Get closer to it to find the instance portal, as it may not be seen from afar.
WotLK Ulduar Overview

WotLK Classic Ulduar Layout
Ulduar layout in the Wrath of the Lich King Classic is not very difficult. Just follow the order and the end boss will be glad to meet you.
Algalon the Observer, an additional Ulduar boss, may be found in the Antechamber of Ulduar, and becomes available together with other bosses of that wing.
To make the life of a raid group easier, the developers had placed several teleporting platforms here and there, which are very useful, especially after a wipe.
10-Player vs. 25-Player Ulduar in Wrath of the Lich King Classic

All WotLK raids have two versions and players may choose which one they want to play; an easier for a party of 10 people and a more challenging for a larger group of 25 champions. In addition, nine out of fourteen bosses have a Hard mode that activates either before a fight or right in the middle of it. Needless to say that it’s way harder to beat an encounter, especially the end boss in Hard mode.
WoW Classic Anniversary Hourly Driving
Any Customizable boost on your pleasure

Another substantial difference between the 10 and 25-ppl variations is loot, of course. The loot dropped in Hard mode is always better, has high-level gear and weapons, and the quantity of items is surely increased. Thus, a 25 players dungeon run on Heroic difficulty is the toughest variation, but will bring you the best results, achievements (as they also differ for both 10 and 25-ppl versions) and loot.
WotLK Ulduar Bosses and Tactics
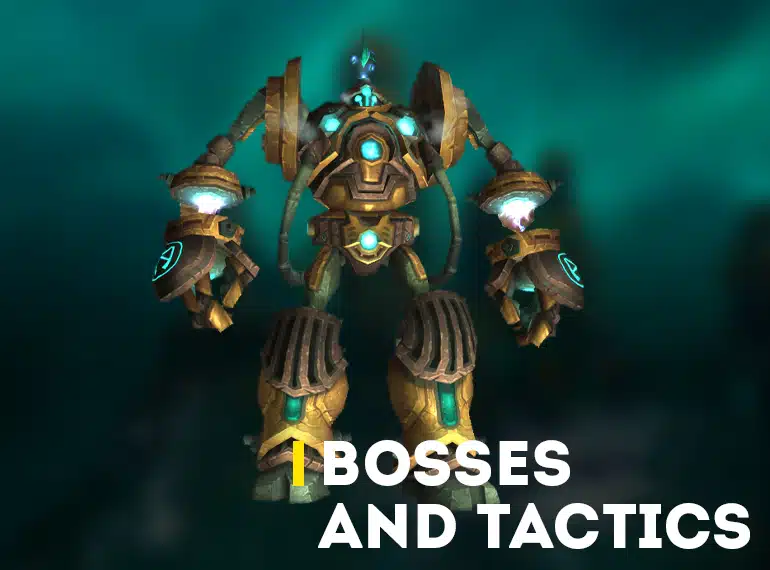
Ulduar Bosses
So how many bosses are in Ulduar? There are 14 encounters, which are divided into five groups according to a number of instance wings:
The Siege of Ulduar
The Antechamber of Ulduar
The Keepers of Ulduar
The Descent into Madness
Celestial Planetarium
Triggering Hard Modes in Ulduar in Wrath of the Lich King Classic

Almost every boss in Ulduar has an optional increased difficulty level, and this is officially the first raid in World of Warcraft with Normal and Heroic difficulty alternatives. This practically means that players need to activate Hard mode manually before the fights with each encounter, or in the process. The newly added mysterious titanic relic system does not work here. Below we will tell you all the steps you must do to trigger tougher variations to this or that Ulduar boss.
Flame Leviathan
To activate hard mode for the first boss of the raid, players are to leave untouched at least one of four towers during the gauntlet event. Someone should talk to Lore Keeper of Norgannon at the Expedition Camp (at the entrance grounds) to start a sequence.
XT-002 Deconstructor
A raiding party may activate a Hard mode for the second boss, XT-002 Deconstructor, during the first Exposed Heart phase. You need to destroy the exposed Heart of the Deconstructor (how cruel indeed) and to deal with the aftermath of your actions. XT-002 will heal up to 100% and start using new abilities.
The Assembly of Iron
Just leave Steelbreaker for a dessert, killing him last of all, and you will engage the Hard mode. The ability, this boss gets is called Overwhelming Power, and it massacres a current tank every minute, giving the raid only two attempts before they wipe altogether.
Hodir
The only thing you need to do to get access to Hodir’s Hard mode is defeating him in less than 2 minutes’ time. Should you do that, and an additional loot chest will appear next to the ordinary one.
Freya
To activate hard mode for Freya, leave all three Elders safe and sound. They will become Drained of Power, meaning they won’t be able to fight you; however, they still can and will increase the health of both Freya and her adds, and give her additional buffs.
Mimiron
There is an enormously massive red button on the back wall of Mimiron‘s room. Its title clearly says: “DO NOT PUSH THIS BUTTON”. Ah, yeah, as if such a lettering has ever stopped anyone. Anyway, push it to activate Hard mode. Well done! Now you have 8 minutes to kill Mimiron, or everything will explode.
There will be several additional debuffs. Emergency Mode gives 30% of additional health and damage to the boss. He will also set the whole place on fire just in case you thought the welcoming wasn’t warm enough. Some mechanics in each phase will also change.
Thorim
Make Thorim jump down to the arena within 3 minutes of the end of the pre-Phase to activate his Heroic mode. Sif will assist Thorim, using several skills. Touch of Dominion won’t be active right now, so beware, as the boss will become thicker and his damage will increase. You can’t do any harm to Sif, but she can and will.
General Vezax
To activate General Vezax‘s Hard mode, let all 6 Saronite Vapors spawn, and don’t you dare kill them! The boss has to be still alive. Saronite Animus covers the boss with the Saronite Barrie that makes him immune to all damage while the barrier is up. Defeat Animus to break the barrier and gain control over the fight again.
Yogg-Saron
As soon as you’ve shown your true power to four Keepers of Ulduar, they will offer their assistance in killing the final boss of the raid – the Old God Yogg-Saron. The less help from various bosses you have, the more challenges you are going to face. To engage a Hard mode, you have to survive with no Keepers’ help. And, by the way, the only way to have Mimiron’s Head mount on the loot table is to kill Yogg-Saron on Heroic difficulty.
Boss Strategies for Ulduar Raid in Wrath of the Lich King Classic

This part of our guide will help you prepare for the combat with all Ulduar bosses and survive their multiple and diverse attacks on all raid members. We will cover all aspects of each boss’s mechanic, including the burning question, just how many tanks do you need for Ulduar? Quick answer – up to 3. We’ll also tell you about important friendly and enemy mobs, party members positions, and action sequences. We are sure everyone will find something relevant in our strategy guide. Enjoy your reading
Flame Leviathan Tactics
The Flame Leviathan Ulduar boss has 70M HP in 25-man and 23M HP in 10-man modes; it uses the following skills:
- Missile Barrage. Deals 3770 to 4230 damage to a random player. Unavoidable.
- Battering Ram. Deals damage and knocks the target forward. Damage taken increased by 50% for 20 seconds. Flame Vents inflicts 3000 Fire damage every second to everyone within 50 yards of the caster. Last 10 seconds. Interruptible.
- Gathering Speed. Movement speed increased by 5%. Stacks up to 20 times.
There are three types of vehicles which play leading roles in this fight. Each vehicle has its abilities and positions, so it’s better to know what your transport is capable of.
Salvaged Siege Engine is the slowest and the heaviest vehicle of all; accommodates a Driver, a Turret, and two Passengers, who have no abilities. Salvaged Siege Engine has to be in a melee zone.
Salvaged Demolisher accommodates a Driver and a Turret, considers being a ranged damage dealer, so only RDD should pick up this vehicle. May deal enormous fire damage as long as you keep 10 stacks of Hurl Pyrite Barrel on the boss.
Salvaged Chopper contains a Driver and a Passenger (the latter has no abilities). This is the fastest but the weakest vehicle of all. We recommend it specifically for players with low DPS and average ilvl.
Flame Leviathan strategy

The boss is going to chase one Salvaged Siege Engine or Salvaged Demolisher till the end of a fight, changing a target every 30 seconds. Kite the boss around the arena to take less melee range damage. Choppers should drop puddles of Tar between a tank and the boss to slow it down. Leviathan increases speed all the time; luckily, the speeding buff reboots when the boss goes on Systems Shutdown.
Select RDD for riding on top of the boss, as Defense Turrets stay spread and players can’t move. Healing abilities are very much appreciated here. When all 4 turrets are destroyed, the boss will be stunned for 20 seconds, while the incoming damage will increase by 50%. After the Systems Shutdown is over, players must jump off the boss; nearby Salvaged Choppers should pick them up, provide healing and give them a ride to their original Demolishers.
Make sure you have all 10 stacks of Blue Pyrite at all times! There always should be someone to shoot down a new Blue Pyrite from above, so the paratrooper should be replaced immediately.
One of the nastiest spells is Flame Vents that Leviathan channels every 20 seconds. Siege Engine pilots must interrupt it as fast as possible using Electroshock.
Hard mode activates the following additional skills and abilities:
Each tower buffs Flame Leviathan with 40% of extra health and gives one but powerful ability; so the more towers players have left undefeated, the harder it is to deal with the boss. Right up to the moment, it becomes almost immortal. The abilities are:
- Tower of Nature – The Freya’s Ward ability deals 13,500 to 16,500 Nature damage to all nearby enemies and summons Guardians of Nature to surround players. Another buff, called Tower of Life, decreases all fire damage taken by Leviathan by 10%.
- Tower of Flames – This tower gives Flame Leviathan a Mimiron’s Inferno ability. This skill deals 150,000 fire damage to everyone in the close radius and leaves flaming traces behind. It also grants Leviathan with Tower of Flames buff that increases the fire damage it deals by 50%.
- Tower of Frost – Leaving this tower up gives Hodir’s Fury to the boss. The ability deals 150,000 frost damage to everyone in the nearest area and entombs them in ice for a minute. It also buffs the Leviathan with an additional 10% HP.
- Tower of Storms – Grant Thorim’s Hammer, that deals massive AOE damage. The second buff is called Tower of Storms, and it increases all physical damage the boss deals by 25%.
Ignis the Furnace Master Tactics
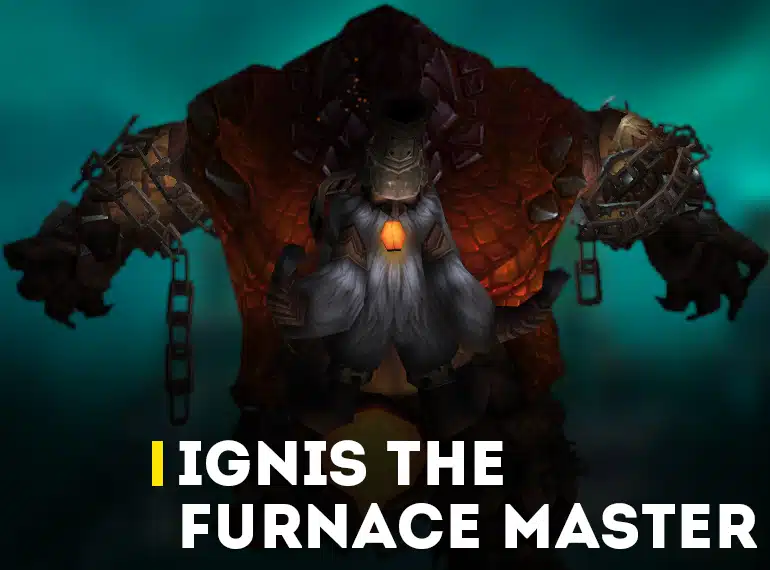
Ignis, the Furnace Master, is in the Siege of the Ulduar wing. It has 23.4M HP in 25-man mode and 6.7M HP in 10-man mode. Seems like he constantly freezing in Northrend, as all his abilities are fiery:
- Scorch. Deals 3770 to 4230 Fire damage every half-second for 3 seconds. The ground becomes scorched, dealing 3016 to 3384 damage every second to everyone within 13 yards’ distance.
- Flame Jets. A raid group suffers 8483 to 9517 Fire damage. It also interrupts players for 6 seconds. The target suffers additional 2k damage per second for 6 seconds.
- Slag Pot. Immobilizes the target and inflicts 6000 Fire damage every second for 10 seconds. If the target survives, their haste increases by 100% for 10 seconds.
- Activate Construct. Defends the caster.
Preferable Raid Composition
Tanks: 2 — One tank concentrates on a boss, the other – on the Iron Constructs. DK is a perfect choice for an Off-tank, as they can deal with adds with little suffering.
Healers: 3-5 — Ignis deals heavy fire damage towards the entire raid party about every 25 seconds, so it becomes easy to lose a fight, especially when he is buffed with the Strength of the Creator.
DPS: 18-20
Ignis the Furnace Master strategy
The Scorch sets a tank on fire every 25 seconds and burns him for 3 seconds. The area is left scorched after the effect is over, damaging everyone who stands there for 45 seconds. Taking this into consideration, the tank should face the boss away from other raid members and change location after each Scorch. The best idea will be to change locations in a triangle next to one of the water pools; thus, the raid may stand at one place while a tank waltzes with the boss.
Do not forget to stop any casting before a Flame Jets‘ cast is finished (which is 2.7 seconds), or you will be silenced for 6 seconds. This is a vital thing, especially for healers, not mentioning the rest of the RDDs, for the whole party will suffer a significant instant and over time damage.
All these abilities can be resisted by using correct Paladin’s talents and auras. Make sure you have Fire Resistance Aura and Aura Mastery or Divine Sacrifice in a hotkey.
Every 20 seconds, the boss will kidnap a random raid member, except for the main tank, and put them into the Slag Pot. They cannot attack, but still can heal themselves and others. Should they survive severe incoming damage for 10 seconds, they are sent back with a Slag Imbued buff that increases their haste by 100% for 10 seconds.
Iron Constructs
Each Iron Construct in an active form buffs the boss for 20% of increased damage. To remove the buff an Off-tank should move the add into one of the scorched areas, left by Ignis’ Scorch ability. Keep the add there until it will gain 10 stacks of Heat and move it after to one of the water pools at the arena sides. Each time your party destroys another add, Ignis loses a stack of Strength of the Creator buff. This means that the more adds you destroy, the less damage everyone will get.
Razorscale Tactics

Razorscale is a huge proto-drake that flies high above the arena. She has 12.6M HP in a 25-man mode and 3.9M in a 10-man mode. There is a flying mount that looks identical. A very cool mount indeed. Razorscale has the following skills.
- Fireball. Spits a Fireball, dealing 12k fire damage.
- Devouring Flame. Casts a Lava Bomb, inflicting 8075 to 8925 Fire damage per tick.
- Flame Breath. Inflicts 17500 to 22500 Fire damage to everyone in front of the caster.
- Flame Buffet. Increases the Fire damage by 1500 for a minute.
- Wing Buffet. Knocks back everyone who stands within 35 yards of the boss.
- Fuse Armor. Reduces the armor, attack speed, and movement speed by 20% for 20 seconds.
Preferable Raid Composition
Tanks: 1-2 — If you have low DPS, better have two tanks. If DPS is high, one will be enough.
Healers: 3-5.
DPS: 18-21 — The more DPS you got, the faster will be a fight.
Razorscale Strategy
Buy Cheap WoW Classic era Gold
WoW Gold: Your Key to Greatness!

Air Phase
There are 2 harpoon turrets (4 for 25-ppl mode), which you need to repair to drag the boss to earth, and you will require the help of Expedition dwarves mobs, as you can’t repair turrets yourself. Deal with Dark Rune Iron, who constantly appear at the far edge of a fighting arena while the good dwarves repair turrets. Razorscale meanwhile will spit fireballs and Devouring Flames to keep you entertained. Select a player who will activate turrets once they are repaired.
Once Razorscale reaches the floor, she will be stunned for 40 seconds. Use all your cooldowns now, including Bloodlust/Heroism to drop her HP below 50%. Here, the encounter will switch to the next phase. You will have to start again if you lose this part of a fight.
After the beginning of the second phase, Razoscale will stay on the ground and instantly cast Flame Breath in front of her and a Wing Buffet to push the whole raid away. Using a regular WoW Classic tactic, place everyone except for the tank behind the boss to minimise the threat. She will also choose a random (usually MDD) player to spit Devouring Flame at them, so watch out.
Every 10 seconds a tank will get a stack of Fuse Armor debuff and if there will be 5 stacks, a tank will lose all the armor, freeze, unable to act, and on top, become petrified for 20 seconds, which leads to probable wipe. Here you either manage to kill Razorscale in a minute, or have two tanks, who change every 2 stacks of the Fuse Armor.
Beware of the Flame Buffet debuff that increases the incoming damage. The dragon casts it every 10 seconds, meaning, at some point, it may easily wipe your raid party.
The XT-002 Deconstructor Tactics
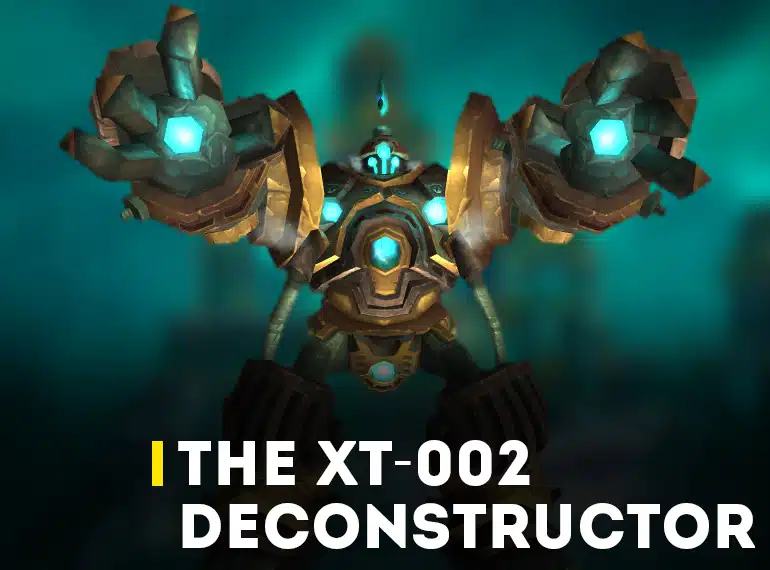
The XT-002 Deconstructor has 25M HP in a 25-man version and 6M HP for 10-ppl raid. It has the following skills.
- Searing Light. Deals 3500 AoE damage every second for 9 seconds.
- Gravity Bomb. Explodes in 9 seconds and pulls in all nearby allies, dealing damage. Stay spread to avoid.
- Tympanic Tantrum. Deals 10% damage of max HP every second for 12 seconds. Dazes nearby players.
Preferable Raid Composition
Tanks: 1-2 — If your DPS is high enough and you manage to deal with the encounter in 2 Exposed Heart phases, you will need only one tank.
Healers: 3-5
DPS: 18-21 — A Hard mode for XT-002 is the highest DPS check in the game right now. So the more damage dealers you have, the better.
The XT-002 Deconstructor strategy
Place the boss somewhere in the middle of two junk piles on the left or right wall. Such positioning decreases the number of spawn spots by two, after the Exposed Heart phase will begin.
To minimize the damage from Searing Light, place all MDD at the left foot of the boss, and when someone is hit by this spell, they will run to the right foot. RDD may practice the same technique, but at a distance. The debuff is removable with Cloak of Shadows, Divine Shield, Ice Block, etc.
Players, affected by Gravity Bomb, should run to the left, on the contrary, so they could not meet with the other debuffed group.
You might need raid-wide defensive cooldowns, Divine Sacrifice, for example, to avoid redundant deaths while Tympanic Tantrum is active. However, if your raid’s DPS is high and you can remove 25% of the boss’ HP in less than a minute, the Exposed Heart phase won’t happen at all.
Exposed Heart Phase
The Heart of the Deconstructor has 10M HP and activates every 25% of the boss’ HP, you’ve managed bereave of. The Heart suffers doubled damage and once the boss comes back online, it will lose the same amount of health points. Killing the Heart of the Deconstructor the first time it shows will activate a Hard Mode for this encounter. Just stop all DPS if it wasn’t your goal.
There are also three types of small robots, which spawn in this phase to aid their master:
- XS-013 Scrapbot — Have a small amount of HP, move slowly towards the boss, and heal it in case they reach their destination.
- XE-321 Boombot — Kill them first and only with RDDs.
- XM-024 Pummeller — The best way is to leave them with an Off-tank, who should distract them from the primary target.
Hard mode
WoW Classic Anniversary Professions Kits Boost
Enough resources to upgrade your profession to the maximum level!

Congratulations! You’ve just broken XT-002’s heart! Now you have 6 minutes till it will break yours. The following abilities will be used in the process:
- Heartbreak – This buff increases XT-002’s damage by 15% and health points by 60%.
- Void Zone – Causes all Gravity Bombs to spawn Void Zones, which inflict certain damage to all players standing in them. The ability lasts for 3 minutes.
- Life Spark – A Searing Light spawns a Life Spark. And Life Spark, in its turn, casts Static Charged that inflicts a small amount of Nature damage to the entire party every 3 seconds.
Get ready to gain enormous damage from Tympanic Tantrum till the end of the fight.
The Assembly of Iron Tactics
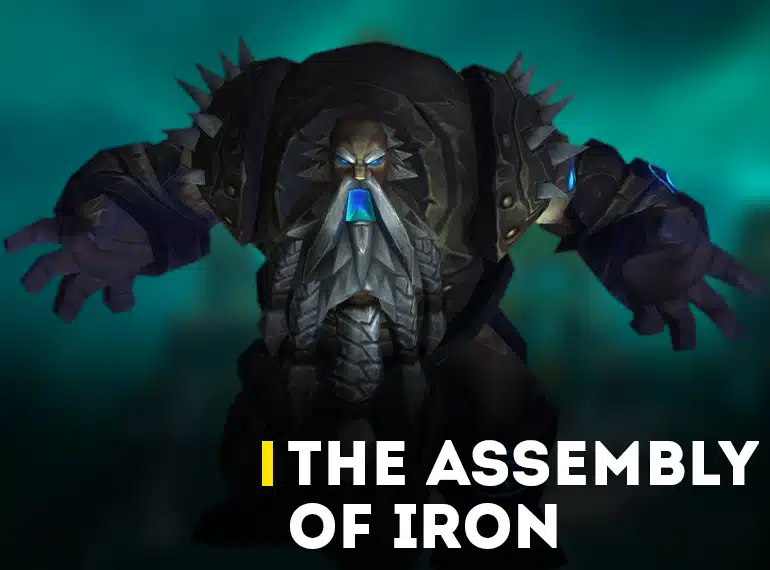
This is a company of three bosses made of iron: Steelbreaker the giant, Runemaster Molgeim the vrykul, and Stormcaller Brundir the dwarf. Common Health Bar is 30M in the 25-man version and 9M in 10-man mode. Every time one of them dies, the others heal to full HP instantly. Each of the three has their own skills:
Steelbreaker
- High Voltage. Inflicts 3000 Nature damage every 3 seconds. Unavoidable.
- Fusion Punch. Inflicts 35000 Nature damage instantly and an additional 20000 Nature damage per second.
- Static Disruption. Deals 7000 AOE damage and increases Nature damage taken by 75% for 20 seconds.
- Electrical Charge. Steelbreaker heals for 40% of his maximum HP and increases his damage by 25% each time someone dies.
- Overwhelming Power. The incoming damage is increased by 200%; a skill causes a meltdown after 25 seconds.Runemaster Molgeim Ability
- Rune of Power. Will summon a Rune of Power that increases damage by 50% for everyone within 5 yards. Lasts 1 minute.
- Shield of Runes. Absorbs up to 50000 damage. Damage from this figure converts into a buff that increases damage by 50% for 15 seconds.
- Rune of Death. Will summon a Rune of Death that deals 3500 Shadow damage every half-second to anyone within 13 yards.
- Rune of Summoning. Occasionally summons Lightning Elementals, which explode, dealing damage.Stormcaller Brundir Ability
- Chain Lightning. Jumps from one player to another; may affect up to 5 personas, damaging each.
- Overload. Deals 20000 damage to all enemies within 20 yards and knocks them down in 6 seconds.
- Lightning Whirl. Spins around, dealing 5655 to 6345 Nature damage with each lightning.
- Stormshield. Shields the caster, causing 250 Nature damage when hit. The caster becomes immune to stun effects.
- Lightning Tendrils. Deals 5000 Nature damage to everyone around the caster every second.
Preferable Raid Composition
Tanks: 2
Healers: 4-5 — Be ready to deal with the increasing damage from High Voltage in Hard mode.
DPS: 18-19 — As usual, the more DPS you have, the higher are your chances to gain bonus items.
The Assembly of Iron strategy
Normal mode recommends making Steelbreaker your first target, then comes Runemaster Molgeim, and Stormcaller Brundir will be the last. One tank takes care of Steelbreaker, while the other keeps other guys away from the group. But keep all bosses together to control them; such strategy works as well.
Lightning-themed skills represent the biggest challenge, so keep Aspect of the Wild and Nature Resistance Totem on hand.
Paladin is a good tanking choice for this encounter. Even though you can’t see Steelbreaker’s High Voltage aura, it is still here and deals damage to the entire raid. Dispel a debuff, left by a Fusion Punch, as it attacks you for 20k per tick for 4 seconds. Once Steelbreaker is dead, the other two will restore their full power and, in addition, get a stack of Supercharge buff. The off-tank should move Stormcaller Brundir for everyone to start from a beginning.
Move everyone away from the Rune of Power ASAP, keep DDs, however, closer, if possible, so they could still get the buff.
Destroy the Shield of Runes with Purge or steal them with Mages’ Spellsteal. There are high chance that the Rune of Death will cross with the Rune of Power, canceling it. To avoid it, everyone should move away from the Rune of Power 5 seconds before Molgeim uses the Rune of Death and return to the primordial position several seconds after.
The last boss, Stormcaller Brundir will again have a full HP and a stack of Supercharge, which will increase its damage towards the rest of the raid by 50% and unlock 2 more abilities.
You may interrupt Chain Lightnings with all the ways you’ve got, but it’s not your key priority if you don’t have enough interrupts. Two stacks of Supercharge make an Overload spell crucial for most classes, so avoid it.
Keep an interrupt or a stun for Lightning Whirl. MDDs should keep a distance until the end of intermission.
Hard Mode
After you have dealt with two out of three bosses, it is time to take care of Steelbreaker. Position three of your healers far away from other party members so they could survive under the pressure of Static Disruption being cast every 10 seconds. Mortal Strike, Aimed Shot or Wound Poison is absolutely necessary spells right now.
Use Soulstone on tanks, as they will die every other minute because of Meltdown debuff. Each death heals the boss and you can’t prevent it anyhow, so just minimize a number of deaths, or you will have to start over.
Use the advantage of a Rune of Power from a previous boss and use all your most powerful cooldowns.
Kologarn Tactics

Kologarn is a static boss with 15.3M HP for the 25-man mode and 3.6M for a 10-man version. This is what he uses:
- Overhead Smash. Deals physical damage to an active tank and applies a stack of Crunch Armor (maximum 4). Deals less damage per arm destroyed.
- Focused Eyebeam. Inflicts 3238 to 3762 Arcane damage to enemies within 3 yards. Provide safe areas for the targeted players.
- Petrifying Breath. Inflicts 18750 to 21250 Nature damage every second and increases damage taken by 20% for 8 seconds.
- Shockwave. Inflicts 13875 to 16125 Nature damage.
- Stone Grip. Stunns 3 players and inflict 3413 to 3587 Physical damage every second until you die or the arm takes 450k damage.
- Stone Nova. Inflicts 5550 to 6450 Physical damage to targets within 10 yards, increasing damage taken by 5% for 10 seconds.
Preferable Raid Composition
Tanks: 2 — Switch tanks every stack of Crunch Armor.
Healers: 3-5 — Control your mana.
DPS: 18-20
Kologarn Strategy
A funny fact: you can fall off from the platform.
WoW Classic Anniversary Leveling Boost
Let professionals expedite your power leveling

Tanks may try to dodge the Overhead Smash to avoid unnecessary damage, which may be 125% of a basic. Be also ready for an Overhead Smash Tremor that happens approximately every 15 to 20 seconds. Switch tanks every two, or better even each stack of Crunch Armor debuff, that reduces their armor by 25% for 45 seconds and stacks up to 100%. Make sure you have run out of the 3 yards’ damaging area, left by a Focused Eyebeam.
Another very important thing. There should always be someone in a melee zone, better tanks, of course. If Kologarn won’t find anyone in a direct reach, he will channel Petrifying Breath, dealing about 20k damage every second, which obviously leads to wipe.
His right arm (it is on the left side of you) is your major priority while fighting Kologarn. He will kill all three players in his hand if other party members won’t either deal 480.000 damage to this arm in 10 seconds or even tear it off. You are surely interested to do it as fast as you can to stop such a massacre for about a minute till the arm will respawn.
Even though the healing isn’t very intensive, it is still a good thing to give your healers to catch their breath by destroying the left arm as well.
Each time you tear off one arm, 5 Rubbles will appear, each having 105k HP. The off-tank should aggro them and pull aside, as they represent certain danger to MDDs. You RDDs should kill them before the tank will die under the stacking debuff. And make sure you’ve finished all Rubbles before killing another arm.
Auriaya Tactics
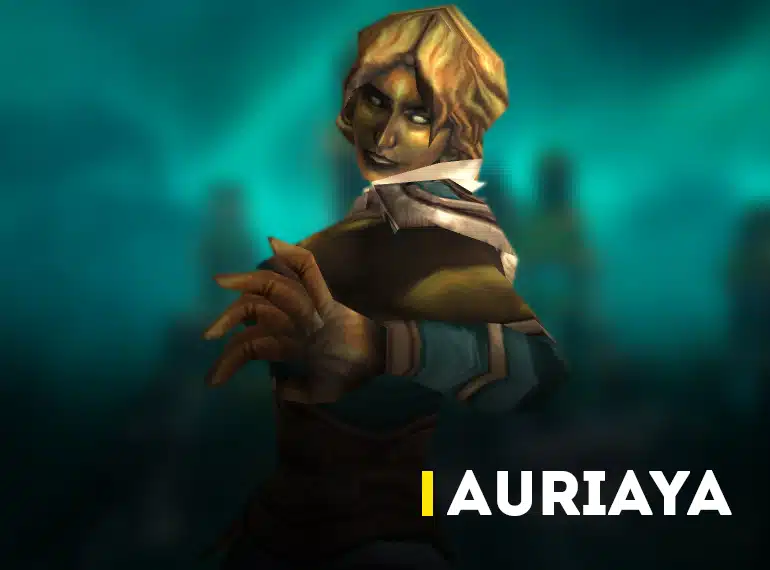
- Auriaya is the only patrolling boss in Ulduar and has 16.73M HP in a 25-man mode and 3.2M in a 10-man version. She is followed by four Sanctum Sentry. Auriaya uses:
- Terrifying Screech. Terrifies all nearby players for 5 seconds.
- Sentinel Blast. Inflicts 6000 Shadow damage and increases damage taken by 100% for 5 seconds.
- Sonic Screech. Deals 190k to 210k Physical damage to all enemies in its path. Luckily, the figures split between everyone affected.
- Guardian Swarm. Targets a player to be assaulted by the Guardian Swarm.
Preferable Raid Composition
Tanks: 2 — One tank for the boss herself; another for all adds.
Healers: 2-4
DPS: 19-21
Auriaya Strategy
Strangely enough, the biggest difficulty with this encounter is the pulling moment, as the adds may and, probably, will one-shot the players they aim at. The solution is elegant yet simple: place the whole raid behind one of the stairways of the Observation Ring, obscuring the line of sight. The adds can’t use their destructive ability in a melee zone. Use a Hunter‘s trap, or Shaman‘s totems, or even Rogue’s Tricks of the Trade to pull the boss.
The latter ability is also very handy when helping an Off-tank to take care of all 4 Sanctum Sentry while the main-tank is busy with Auriaya. You may need to activate Bloodlust/Heroism on adds, cos if the off-tank dies, everyone else will die as well.
A perfect timing for the Tremor Totem helps a lot, as well as Fear Ward, Berserker Rage, or Will of the Forsaken. Otherwise, every 40 seconds, the entire party is getting feared and suffers heavy AoE damage right after.
Unlike regular WotLK WoW Classic tactics and your inner instincts, place as many players as you can on tank’s heads to split damage from Sonic Screech between everyone. If not, the tank will die.
Ignore Swarming Guardians, just use a bit more AOE to get rid of them.
While the pull is in process, Auriaya will summon an add – a Feral Defender. This kitty has 612k HP and acts very much alike previous 4 with the difference that it doesn’t care much about aggro percentage – it rushes towards a random player wishing to eat them. Fortunately, it reacts to stunning, silencing, rooting, sheeping and whatever else you’ve got.
It also leaves a suspicious puddle after death; the puddle deals around 9k damage every second to those standing in there. You may actually try to lead the add somewhere aside, where it can die in peace; or change a location yourself. Whatever way you choose, remember about the fear and its chaotic directions.
No time to relax, as Feral Defender resurrects every 40 seconds to everyone’s joy, and leaves the same puddles after each death. This means the entire party has to move further and further.
Freya Tactics

Freya has 4.2M HP in a 25-man and 1.4M in a 10-man mode. She uses:
- Touch of Eonar. The boss is healed for 24000 HP every second.
- Attuned to Nature. Increases the incoming healing by 8%. Starting point – 150 stacks.
- Sunbeam. Inflicts 7400 to 8600 Nature damage to enemies within 8 yards of the target.
- Nature Bomb. Inflicts 8775 to 9225 Nature damage to enemies within 10 yards of the caster, knocking them back.
Preferable Raid Composition
Tanks: 2 — One for the boss, another for adds.
Healers: 3-5
DPS: 18-20
Freya Strategy
Start a fight by killing everything inside the boss’ area to activate normal mode and leave all the mobs alive, if you want to deal with this lady in Hard mode.
The three Elders who help Freya in a fight are: Elder Stonebark (find him on the eastern side of the Conservatory of Life), Elder Ironbranch (occupies the northeast corner), and Elder Brightleaf (northwest corner of the arena).
Elder Stonebark consideres being the most dangerous one, due to the possibility to buff himself with Fists of Stone, which increases his damage by 250% for 10 seconds with a chance to drop your tank’s avoidance to 0. The good news is, the buff slows the caster significantly, so you can kite it away for a time. Stonebark has another damaging ability, Ground Tremor – besides dealing damage, it silences players for 8 seconds. Consider stopping casting in time.
Elder Ironbranch roots random players and deals around 6k damage every 2 seconds with Iron Roots until you free poor guys. In addition, a tank suffers massive damage and is stunned for 5 seconds with Impale.
Elder Brightleaf casts Solar Flare that damages several players with 9k and periodically heals itself.
Right from the beginning of a combat you’ll see two permanent buffs on Freya. Touch of Eonar restores 24k HP every second, while Attuned to Nature gives additional health until she has 1200% of a basic HP. Removing the summoned Allies of Nature is the only opportunity to resist this buff. Speaking of which: there are 6 waves of Allies of Nature of three kinds. They are summoned randomly every minute.
The first type of Waves includes 10 Detonating Lashers. You should gather and flood them with AOEs. Use all knock backs you have (Thunderstorm, Typhoon, Blast Wave, etc) at 15-20% of their HP, as they explode. This is not the only possible solution – you may find your own way.
The next comrades from the Freya’s nature alliance come in a party of three. They are: a Storm Lasher, an Ancient Water Spirit, and a Snaplasher. You must kill all of them in a 12 seconds period, or they will resurrect. The most irritating one is Snaplasher, as it constantly increases the damage it does up to 990% each time you attack it; unfortunately, you can’t just tank the add in the usual way. A Hunter should kite this “flower”, while other party members slow, stun, and focus it with various Ranged attacks. Keep all three mobs close to each other to maximize damage.
Ancient Conservator is the last type of summoning adds that pacify the entire party. Find a giant orange mushroom nearby and stand close to it to get a Potent Pheromones buff that ignores the add’s aura. Beware the Nature’s Fury debuff that affects a random player and those around him. Fortunately, you can remove this debuff with Cloak of Shadows, Divine Shield, Ice Block, or other similar talents.
Try to stick together when Nature Bombs are being used, as it will minimize a number of harmful areas. A river at the centre of a fighting arena is a very convenient reference point. Cross the river each time Freya casts Nature Bombs.
To activate a heroic regime, leave all three Elders alive. They will give Freya additional health points (up to almost 8M HP) and buff her and her summoned adds with:
- Elder Brightleaf – The boss can now cast Unstable Energy skill, which places up to 3 Sun Beams on the ground. Each Sun Beam inflicts a medium amount of Nature damage every second to a random player within 8 yards’ distance for 10 seconds. This elder also buffs Freya and her Allies with Brightleaf’s Essence.
- Elder Ironbranch – Allows Freya to cast Strengthened Iron Roots. The Iron Roots spell keeps inflicting medium Nature damage every 2 seconds, bounding a victim until someone will free them. Adds are also buffed with Ironbranch’s Essence that increases their physical damage by 50%.
- Elder Stonebark – Freya now casts a Ground Tremor approximately every minute. The skill inflicts physical damage to the entire raid and interrupts any spell-casting for 8 seconds. Another buff, called Stonebark’s Essence, increases Freya’s physical damage dealt by 75%.
Hodir Tactics

Hodir has 32.5M in a 25-man and 8.4M HP in a 10-man mode. He uses:
- Biting Cold. Stacking DoT debuff. Moving removes one stack, so change position all the time.
- Freeze. Damages nearby enemies, immobilizing them for up to 10 seconds. An NPC Priest can dispel it.
- Ice Shards. Deals 14000 Frost damage on impact.
- Flash Freeze. Encases the target in a block of ice.
- Frozen Blows. Physical damage is reduced by 70%, however attacks deal 40k additional damage. In addition, all enemies suffer 4000 Frost damage every 2 seconds for 20 seconds.
Preferable Raid Composition
Tanks: 1-2 — If your tank has enough gear to withstand the Frozen Blows buff, you won’t need a second one.
Healers: 1-4 — Frozen Blows may also be a trouble for healers.
DPS: 19-23 — Your bonus powerful loot depends on your DPS.
Hodir Strategy
There are 8 frozen figures spread throughout the fighting arena. Free them to get all the bonuses they offer. Among them you’ll find:
Two druids create a Starlight zone at random spots. DDs should use the benefits of these zones as often as they can, dodging Ice Shards at the same time.
Two shamans will buff a random player with Storm Cloud. And while it does practically nothing to this character directly, the 4 closest others will get a Storm Power buff that increases their Crit up to 135% for 30 seconds.
Two mages are probably the strongest among all other friendly NPCs. Free them in the first place, as they will help you rescue others. If you don’t know who is who, the Horde’s mages are called Veesha Blazeweaver and Amira Blazeweaver, while the Alliance has Missy Flamecuffs and Sissy Flamecuffs… Twins, apparently.
Anyway, their Toasty Fire prevents you from receiving harmful debuffs. In addition, your spells and ranged skills have a 33% chance to deal bonus damage and apply an unpleasant debuff on Hodir.
Two priests just keep their fellows alive, which is a truly important thing – you don’t need to think about saving your NPC friends all the time.
However, Hodir keeps freezing all eight every 50 seconds and you are to free them again and again.
Don’t forget to move constantly throughout the entire combat, or the stacking debuff will kill you at the end. Also, MDDs should beware of a combination of a Freeze and Ice Shards abilities, as together they are very dangerous. Luckily, Mass Dispel helps a lot.
To make a long story short, just move. Continuously. Every second. And what’s more, think about your next step. We also recommend checking your graphic options and set Projected Textures to “enable” to have a better view of an AOE area.
Another very important thing to remember: take some Frost resistance high level gear for this encounter. This refers to tanks mostly, but it surely wouldn’t be redundant for others as well.
Save the defensive cooldowns till the Frozen Blows phase; you are going to need them all, especially if you are up to the additional powerful loot that becomes available in Hard mode. Speaking of which: to activate heroic mode and get heroic loot, just finish the guy in 2 minutes.
Thorim Tactics
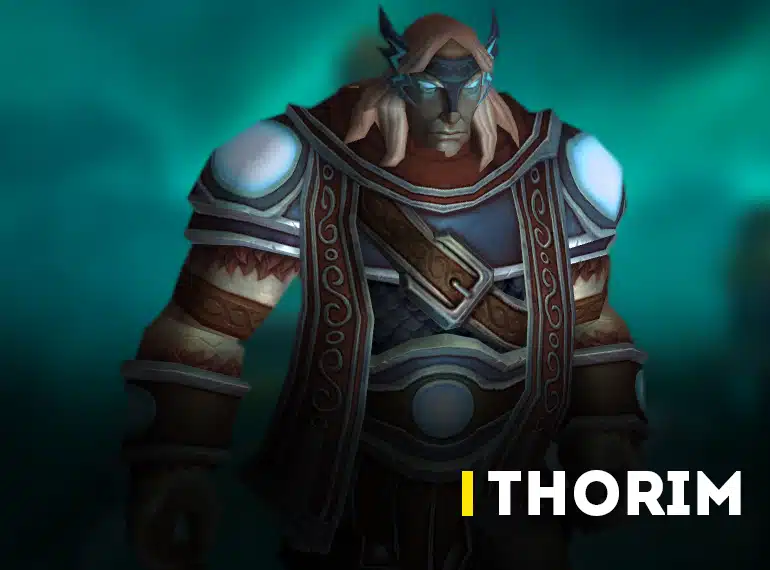
Thorim has 14.6M HP in a 25-man and 2.9M HP in a 10-man version. He is accompanied by a powerful add, Sif, who helps him in a Heroic mode. Thorim uses:
- Charge Orb. Fires static bolts every second for 15 seconds.
- Stormhammer. Dealing 2451 to 2551 damage knocks down and stuns the target for 2 seconds.
- Summon Lightning Orb. A wiping mechanic. Activates when either there is no one at the arena or you fail to reach Thorim in 5 minutes.
- Chain Lightning. Inflicts 4625 to 5375 Nature damage. Jumps to nearby allies, damaging them too.
- Lightning Charge. Inflicts Nature damage in a cone and buffs a caster.
- Unbalancing Strike. Inflicts 200% weapon damage and reduces players’ defense by 200 for 15 seconds.Sif (HM only)
- Frostbolt. Damages a player and reduces their movement speed for 4 seconds.
- Frostbolt Volley. Practically the same.
- Frost Nova. Inflicts 14138 to 15862 Frost damage.
Preferable Raid Composition
Tanks: 2 — You just won’t manage with one.
Healers: 4-6 — You may need fewer if you are good at dodging Lightning Charges; Heroic mode may require additional heal.
DPS: 17-19
Thorim Strategies
Split the party into two groups; one will remain in the arena, the other will go through a gauntlet to make Thorim jump down. Each group should have a complete set of roles: a tank, a healer (maybe two), and DDs. RDDs are better to go upstairs, as the mobs on the way are best to be AOEd. Kill all the mobs on the platform before you split, facing Jormungar Behemoth away from the raid.
Try to stay within the inner circle of the arena, but not too close to each other, due to Thorim’s actions. And this is the second reason to send RDDs away – Stormhammer, which periodically hits someone, silences players.
The part that went on a quick trip comes across a company of mobs. Dark Rune Acolytes should be the prime targets, as they are priests of a kind. Iron Ring Guards are to die in the second turn cos of their 360° AoE stuns.
NB: Free Action Potion won’t unfortunately help you avoid stuns.
Stick to the walls in the last hallway not to be trapped. If you are successful in less than 2:45 minutes, welcome to the Hard mode.
Once you have reunited altogether, position RDDs and Healers as far as you possibly can and gather MDDs in groups of 2-3 players at least 10 yards away from each other – the usual WoW Classic WotLK positioning. Only this tactic will help you avoid Chain Lightning.
Lightning Charge is the worst ability for this encounter. Move away from the targeted pillar, but return to your position once it is safe.
A perfect hiding spot is a place where the gate to the gauntlet is located and a Lightning Charge won’t strike this place. Position the most vulnerable members of your party there. They may be low mobility healers or a melee group without defensive CDs, like Warriors, Paladins and Shamans.
Two minutes after the beginning of this phase, a Lightning Charge will make Thorim’s attacks fatal. You are to kill him within this time.
Sif takes a part in the action once you’ve activated a Hard mode, and Thorim will now have 20.9M HP in 25-ppl mode and deal 67% more damage.
Mimiron Tactics
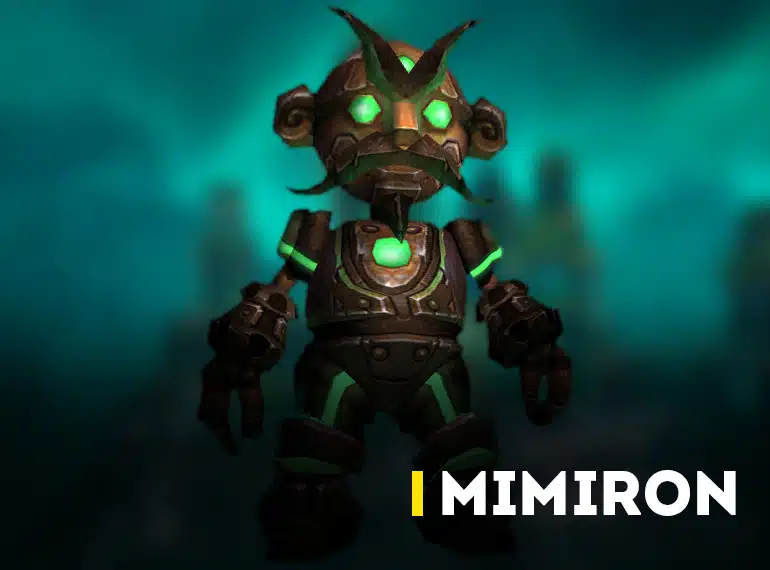
Mimiron has 27.6M HP for a 25-man and 7M HP for a 10-man version. He and his devices use the following skills.
Leviathan MK II
- Plasma Blast. Deals 25000 Spellfire damage per second for 6 seconds. Nonresistible.
- Napalm Shell. Explodes upon impact with a random player, dealing 9425 to 10575 damage instantly and an additional 48000 over 8 seconds.
- Shock Blast. Deals 100k Nature damage to everyone within 15 yards.
- Proximity Mines. The mines trigger if anyone gets within 3 yards of them, dealing 12k Fire damage.VX-001
- Rapid Burst. Deals 1885 to 2115 Spellfire damage per burst for 6 bursts over 3 seconds.
- P3Wx2 Laser Barrage. Deals 20000 damage every 0.3 seconds. Last 10 seconds.
- Rocket Strike. Deals 5M (!) Fire damage to everyone within 3 yards.
- Heat Wave. Deals 1885 to 2115 damage instantly and an additional 10000 Fire damage over 5 seconds to the entire party. (HM)
- Frost Bomb. Throws a Frost Bomb at a random fire that damages and knocks back nearby enemies.
- Aerial Command Unit
- Plasma Ball. Deals 14138 to 15862 damage to the target with the highest threat
Preferable Raid Composition
1 Tank + 1 Warlock — You are going to need a ranged tank for the Aerial Command Unit.
Healers: 4-6 — The party will suffer enormous damage throughout the fight, especially in Hard mode.
DPS: 17-19
Mimiron Strategy
Phase 1 – Leviathan MK II
Leviathan Mk II has 6.9M HP and a regular WoW Classic fighting mechanic position it away from the group and in the middle of the platform. No need to rush away from the napalm animation, as it is just graphics. Place MDDs close to the boss, while RDDs and Healers better spread across the platform.
Plasma Blast is designed specifically to kill tanking characters, and this is one of the first among similar mechanics in WotLK Classic. That’s why major defensive cooldowns like Shield Wall, Divine Protection, Pain Suppression, Guardian Spirit, etc. are at must here.
Beware of Proximity Mines, as they not only explode should you step on them, but their number doubles each round. And watch your step while running away from a Shock Blast, cos there are mines everywhere.
Phase 2 – VX-001
The second phase involves VX-001 module with 6.9M HP and no tanking mechanic. Just spread Healers and RDDs around the room while MDDs may simply run through the module when it casts Rapid Burst. Due to this spell and a Heat Wave, we recommend using Bloodlust/Heroism to complete this phase as fast as you can.
There are two fatal abilities during this phase. Stop whatever you have been doing once you recognise them and run for your life. One is Rocket Strike (easily recognisable by appearing big red circles on the floor); the other one is P3Wx2 Laser Barrage (VX-001 will rotate its cannons in one direction).
Phase 3 – Aerial Command Unit
Aerial Command Unit or ACU has 4.6M HP and levitates rather high, so you won’t reach it with normal melee attacks. Use a Warlock to accumulate aggro, however, any RDD class will do. This module casts a single ability, so RDDs may concentrate on it, while MDDs are to take care of small robots, which spawn constantly.
NB Bomb Bots should be kited away from the group.
Do not tank Assault Bots directly – kite, stun, and then slow them.
Phase 4 – V-07-TR-0N
All previously defeated modules will form a combined transformer, V-ol-tr-on by the name. Thankfully, it has 50% of previous HP and uses twice as fewer abilities. You are to kill all of them within 10 seconds of each other, so spread up the DPS accordingly and beforehand. The idea is pretty much the same: face the “base” away from the group, avoid heavy damaging skills of a “torso”, and use RDDs on a “head”. Luckily, there will be no robots here.
Hard Mode
C’mon! Just PUSH THAT BUTTON already! Do it! Good Job! Now you’ve got only eight minutes left until the world’s gonna blow. But apart from it, Mimiron’s creations will have additional skills:
- Works during all phases. Three random players receive a Fiery Explosion debuff. All three are going to explode soon enough, and a fire will spawn from each explosion. The fires will follow the chosen players, but may switch targets.
- Works during the first phase. A minute after the beginning of a combat, Mimiron will flood the room to stop the fire.
- Works during the second and the fourth phases. Mimiron will create Frost Bombs in a random corner of a fighting area. Each Frost Bomb explodes a few moments later, knocking all nearby players back, but slacking all flames in that corner.
- Works during phase three. The Emergency Fire Bot silences all players in 15 yards distance with Deafening Siren ability. It also deals Frost damage, slacks fire, and knockbacks players within the same range with Water Spray.
General Vezax Tactics

General Vezaxhas 30.7M for a 25-man mode and 8.3M for a 10-man mode. This creature uses:
- Aura of Despair. Prevents mana regeneration from nearly all natural sources and reduces melee attack speed by 20%.
- Shadow Crash. Deals 11310 to 12690 damage to everyone near the impact point. Leaves a pool for 20 seconds, increasing magical damage dealt and casting speed by 100%, and reducing healing done and mana costs by 75%.
- Mark of the Faceless. Drains 5000 HP every second for 10 seconds; Vezax, at the same time, heals for 20 times more HP.
- Searing Flames. Deals 13875 to 16125 damage, reducing protecting ability by 75% for 10 seconds.
- Surge of Darkness. Increases physical damage by 100%, reduces, however, movement speed by 55%, for 10 seconds.
Preferable Raid Composition
Tanks: 1-2 — Hard mode requires two tanks in a good gear.
Healers: 4-6 — Mana may be used up surprisingly fast.
DPS: 17-20
General Vezax Strategy
The boss’ Despair aura locks almost all mana regeneration ways, like potions, talents, buffs, gear with the exceptions for Judgements of the Wise, Spiritual Attunement, Aspect of the Viper, and Shamanistic Rage. Thankfully, some mechanics will compensate for these losses. MDDs, however, don’t have such bonuses and rely on their own strengths. Keep this in mind during the entire pull, and do whatever you can to avoid, resist, dodge the incoming damage. Treasure Healers’ mana.
It’s better for RDD to split into two groups and position as far from each other as they can, and cast spells only being affected by a Shadow Crash. Every 20 seconds, General Vezax casts a Mark of the Faceless at ranged characters only. The affected players must run away from the boss, using practically everything they have (Blink, Demonic Circle: Teleport, Disengage, or Nitro Boosts) to minimize Vezax’s heal, which is enormous.
Interrupt every Searing Flames throughout the combat till the very end – this is important. Despite the expecting in WoW Classic kiting mechanic on Surge of Darkness, use defensive cooldowns like Shield Wall, Divine Protection, Pain Suppression, Divine Sacrifice not to die cos you’ve stumbled over your own feet.
The eighth stack of Saronite Vapors is fatal for every mana user. Try leaving the green spot after 5, maximum 7 stacks.
To get powerful loot (i.e. activate Hard mode), you are to leave alone all Saronite Vapors and wait Saronite Animus to appear. This guy has 2M HP and should be taken care of by an off-tank. Saronite Animus has only one but stacking ability, called Profound Darkness. This Darkness may be categorized as a soft-enrage mechanic, so save your Bloodlust/Heroism till this moment if you can.
Yogg-Saron Tactics
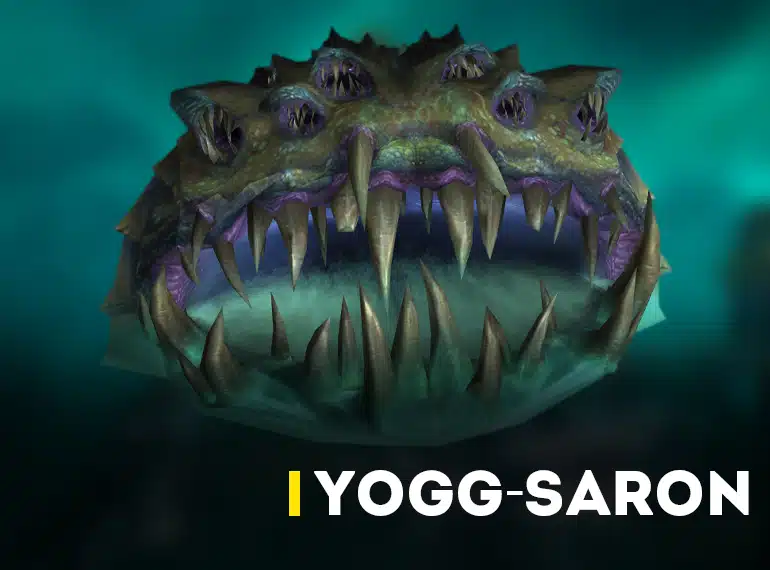
Yogg-Saron is an end boss for the Ulduar dungeon. It has 44M HP in a 25-man version and 11M for a 10-man mode. It uses:
- Sara’s Fervor. Increases a friendly target’s damage by 20%, and the incoming damage by 100%. Lasts 15 seconds.
- Sara’s Blessing. Heals a friendly target for 27k to 33k, but causes 60k Shadow damage over 20 seconds.
- Sara’s Anger. Inflicts 12500 damage every 3 seconds, but increases Physical damage done by 12000. Last 12 seconds.
- Psychosis. Inflicts 5000 Shadow damage. Reduces Sanity by 12%.
- Malady of the Mind. Inflicts 5000 Shadow damage, fears for 4 seconds; reduces Sanity by 3%.
- Brain Link. Deals 3000 Shadow damage and loss 2% Sanity every second.
- Death Ray. Deals 20000 Nature damage every 0.5 second.
- Induce Madness. Reducing Sanity by 100%.
- Lunatic Gaze. Inflicts 5700 to 6300 Shadow damage and reduces Sanity by 4% every second.
- Empowering Shadows. Heals adds for 225000 HP over 20 seconds.
- Deafening Roar. Deals 7600 to 8400 damage and silences for 4 seconds.
Preferable Raid Composition
Tanks: 1-2
Healers: 3-5 — Good DPS plays larger role in this fight.
DPS: 18-21 — You are going to need every DPS your party has.
Yogg-Saron Strategy
This is going to be one of the longest fights in WotLK WoW Classic, and it is definitely the longest in Ulduar. You may ask the Keepers to help you. Thorim will grant your raiding party the strongest buff Fury of the Storm if you are interested in having one light in the darkness achievement. But if you choose the toughest difficulty (with no help) you will engage Hard mode, and find not only some leg slot items (though they are good), but a mount in a loot table. So if you wondered, how do you get Mimiron’s head? This is your answer.
You need 8 explosions from Guardian of Yogg-Saron to low Sara‘s HP and to move to the next phase. Keep the 15 yards distance or run before they explode, as you will catch a one-shot. Avoid stepping into saronite gas clouds as they summon more adds. Dominate Mind takes random players in mind-control for 10 seconds; Purge or Dispel Magic may be of help here. If you aren’t sure of the dancing skill of your group, stay close to the entrance and let adds approach you. A tank will lead them, almost dead, back, where RDD will finish adds.
Use the intermission between phases to finish the adds.
Every player has 100 Sanity at the beginning of phase 2. Yogg-Saron will try to steal it from you and your only goal is to keep it with all your strength or you will be killed by your teammates. This being said, remember that everything tries to drain your Sanity, especially Sara – the image of an Old God. If you asked Freya to help you, she will cast Sanity Wells here and there, where you can refill your Sanity.
Three different tentacle will damage players throughout phase 2. Constrictor Tentacle (medium) should be taken care of foremost. Then concentrate on the smallest – Corruptor Tentacle, and, finally, on the largest Crusher Tentacles.
Sara is surprisingly still here; she tries to drain your Sanity, but you can resist her efforts with Shadow Resistance Aura or Prayer of Shadow Protection. She will also bind two random players with Brain Link. These two should be close to each other for 30 seconds; dying or entering a portal to Yogg-Saron’s mind breaks the tie. Avoid Death Ray as their damage is fatal to you.
10 portals will open around the room soon after the beginning of phase 2. Each portal can let only one person in, so the trooping group should spread around the area. It better be MDDs, as they are more maneuverable. The portals lead the group to the one of three projections: The Forging of the Dragon Soul; The Assassination of King Llane Wrynn; The Torture of Bolvar Fordragon. Now you have about a minute to kill every foe inside the projection to get access to the Brain of Yogg-Saron.
All mobs reflect 60% of damage, while Laughing Skulls drain your Sanity if you look at them. Avoid Bloodlust/Heroism with the brain as it uses Sated ability. Leave Yogg-Saron’s brain several seconds before the end of the Induce Madness, or you will become its loyal servant and start fighting against your comrades.
The rotation repeats until you bring down the Yogg-Saron’s HP till 30% moving to the next phase.
A traditional WoW Classic mechanic – don’t face the boss. Place the group around or at its back. Immortal Guardians are very interesting adds, whose damage has a direct connection to their HP. The healthier they are, the more damage they inflict. Moreover, they cannot be killed, unless you’ve asked Thorim for help before a fight. Control these adds but concentrate your DPS on Yogg-Saron to finish a combat as fast as you can if you don’t have Thorim by your side.
Sara is a shy girl and charges those who look at her and the amoeba beneath her for 4 Sanity every second with Lunatic Gaze. Better use those skills which allow your character to face away, Drain Soul, for instance.
If you have any help from the former bosses of the Inner Sanctum of Ulduar, Yogg-Saron will use additional ability – Deafening Roar. Apart from damage, it silences the entire party for 4 seconds, which might lead to unexpected deaths and even wipes. Take this into consideration.
Algalon, the observer Tactics

Algalon the Observer is an additional Ulduar boss with 41.8M or 10M HP for a 25 or 10-ppl party. He doesn’t have a Normal difficulty, only Heroic, so every ability he uses is very painful:
- Quantum Strike. Inflicts 34125 to 35875 damage to an enemy.
- Phase Punch. Deals 8788 to 10212 damage.
- Cosmic Smash. Deals 53625 to 56375 Fire damage.
- Big Bang. Inflicts 107250 to 112750 Physical damage.
- Ascend to the Heavens. Inflicts 655500 to 724500 Arcane damage (Enrage mechanic).
Preferable Raid Composition
Tanks: 2-3 — 2 tanks are absolutely mandatory to hold out against Phase Punch, Living Constellation, and Unleashed Dark Matter; three, however, won’t be superfluous either.
Healers: 5-6 — The combat is really tough and there are only 6 minutes before the enrage.
DPS: 16-18
Algalon, the observer Strategy
Algalon waits for you in a separate place in Ulduar, called The Celestial Planetarium. You need to finish a questline to get there. We have covered this issue below; feel free to take a look.
You have only an hour to battle Algalon before he disappears. If you are in combat when the time is up, he will simply cause a wipe and leave. Another very important note: don’t even try visiting Algalon if your tanks have gear from, say, normal dungeon daily quests, or from Honor vendors, or whatever. They may be dressed in PvE analogues for Deadly gladiator PvP sets, but nothing will help until you get geared in Heroic Ulduar, using everything that can gain additional health on top of that. Because Algalon deals ridiculously enormous damage and your only goal throughout Phase 1 is keeping tanks alive.
Another very useful technique is to prepare a rotation of defensive cooldowns, for example: Divine Protection or Shield Wall or Icebound Fortitude, followed by Hand of Salvation + Glyph of Salvation or Last Stand or Barkskin, followed by Hand of Sacrifice, followed by Divine Guardian, followed by Pain Suppression or Guardian Spirit, etc. The group either is very well-played or (or better “and”) uses voice programs.
Also, change tanks every 4 stacks of Phase Punch debuff not to lose a tank.
Use Cloak of Shadows or Divine Shield to make your way back if you were drawn in a Black Hole left by a Collapsing Star. You have nothing to do in that realm right now. Even though these Stars are themselves harmless, it’s better to damage them separately, so they don’t explode altogether. Set a couple of RDDs to watch and kill them in time and as far from the party as they can.
Living Constellations represent a normal threat level, have 610k HP each, but don’t need to be killed, thankfully. An off-tank (better choose a DK for this purpose) should move them into Black holes, where they disappear themselves and make that hole collapse.
Everyone should move at least 10 yards away from Cosmic Smash, not to be killed on the spot. A very common, even normal procedure in WoW Classic: make RDDs and Healers spread around the arena and group MDDs so that they could move from a danger without multiplying damaging pools.
Run to the nearest Black Hole ASAP when Algalon casts Big Bang and wait there till the storm passes by. However, someone should stay on this side, or Algalon will kill you all instantly. Shadow Priests are, usually, the ones on duty. They use a Dispersion, empowered by a Glyph of Dispersion. You may also protect a chosen victim with Guardian Spirit or Ardent Defender.
The fourth Big Bang is the last one no matter what, so try to finish a combat before this moment.
Surprisingly, Phase 2 is easier than a previous one. Algalon won’t call for Collapsing Stars or Living Constellations any longer. He will instead create 4 permanent Black Holes, from where Unleashed Dark Matters will spawn every 30 seconds. An Off-tank should gather them and bring closer to the boss so that the party could destroy them according to the residual principle.
No need to kill Algalon for the combat ends when he reaches 3% HP.
Opening the Celestial Planetarium

Algalon, the Observer, lives in separate apartments inside the Antechamber of Ulduar. You may find him in the right part of this wing in the Celestial Planetarium. However, access to this place is prohibited until you complete a special questline. It isn’t necessary to have many keys to these doors – one is enough; Rogues can not open this lock, so there should be someone to complete a quest chain. There are two types of these quests, for 10 and 25 people raid variations, but there aren’t any differences between them apart from this very fact. Note, however, that Algalon himself has only one difficulty – Heroic.
This is what you should do.
Step 1: Archivum Data Disc (10) / Heroic: Archivum Data Disc (25)
Description: Bring the Archivum Data Disc to the Archivum Console in Ulduar.
What to do: These items start a quest: Archivum Data Disc or Archivum Data Disc. They are dropped by the Assembly of Iron boss, depending on whom you will kill last: Steelbreaker or Runemaster Molgeim. The only difference is the achievements you get after, so choose one and move forward.
After you got an Archivum Data Disc and a quest it gives, go to the Archivum, a place that is located right behind the Assembly of Iron, and take it to the Archivum Console to turn in the quest.
Step 2: The Celestial Planetarium (10) / Heroic: The Celestial Planetarium (25)
Description: One of two guys, Prospector Doren, for the 10 player-mode and Prospector Loren for the 25 player-mode at the Archivum in Ulduar, wants you to locate the entrance to the Celestial Planetarium.
What to do: Talk to the NPC to get the quest. Go all the way to the East until you come up against locked doors. This is your destination point.
Step 3: Accepting Four Heroic Dungeon Bosses’ Quests
Hodir’s Sigil (10) / Heroic: Hodir’s Sigil (25)
Description: Prospector Doren or Prospector Loren at the Archivum in Ulduar wants you to get Hodir’s Sigil.
What to do: The quest items you need: Hodir’s Sigil / Hodir’s Sigil. Defeat Hodir in Hard Mode and the item you look for will drop to you directly, since it drops only to those who are on a quest.
Thorim’s Sigil (10) / Heroic: Thorim’s Sigil (25)
Description: Prospector Doren or Prospector Loren at the Archivum in Ulduar wants you to obtain Thorim’s Sigil.
What to do: The quest items you need: Thorim’s Sigil / Thorim’s Sigil. The sigil may drop from Thorim in Hard Mode.
Freya’s Sigil (10) / Heroic: Freya’s Sigil (25)
Description: Prospector Doren or Prospector Loren at the Archivum in Ulduar wants you to obtain Freya’s Sigil.
What to do: The quest items you need: Freya’s Sigil / Freya’s Sigil.
Mimiron’s Sigil (10) / Heroic: Mimiron’s Sigil (25)
Description: Prospector Doren or Prospector Loren at the Archivum in Ulduar wants you to obtain Mimiron’s Sigil.
What to do: The quest items you need: Mimiron’s Sigil / Mimiron’s Sigil. Defeat this boss in Heroic mode to receive the Sigil you need.
Step 4: Algalon / Heroic: Algalon
Description: Bring the Sigils of the Watchers to the Archivum Console in Ulduar.
Rewards: You will gain the key to Celestial Planetarium – Celestial Planetarium Key for 10 ppl raid or Heroic Celestial Planetarium Key for 25 ppl party. You will also get a bag with useful consumables. A Sack of Ulduar Spoils for a party of 10 players, which contains:
- 100 Gold;
- 1 Runed Orb.A Large Sack of Ulduar Spoils is for 25 players group and it has:
- 150 Gold;
- 2 Runed Orbs;
- 1 Random Ulduar Pattern (useful for Leatherworkers, Tailors, or Blacksmithing);
- 10 Badges of Conquest.
Well done! Now you can enter the Algalons’ chamber, attack, kill him and get all the loot you deserved.
Wrath of the Lich King Classic Ulduar Quests

The majority of all WotLK quests you can complete inside the Ulduar raid are connected to the additional boss, Algalon, the Observer. All of them are described in details above. But apart from them, everyone who took part in defeating this boss will be given a quest item Reply-Code Alpha that starts a quest All Is Well That Ends Well or Heroic: All Is Well That Ends Well. Bring the item you got to Rhonin in Dalaran, and choose one of four epic quality gear pieces.
Weekly Quests
Talk to Archmage Lan’dalock in Dalaran to receive the following weekly quests to Ulduar. They may be completed within any raiding group size and at any difficulty. The rewards are the same for every quest – you gain 250 reputation with Kirin Tor.
- Flame Leviathan Must Die!
- Ignis the Furnace Master Must Die!
- Razorscale Must Die!
- XT-002 Deconstructor Must Die!
Val’anyr, Hammer of Ancient Kings Legendary Weapon Quests

Some legendary gear may drop from Heroic dungeon bosses, others are to be collected. Val’anyr, Hammer of Ancient Kings, belongs to the second category, and it requires the strength of all party members to gather its pieces. But apart from collectable tortures, there are several quests, which should be completed in their turn.
Ancient History
Description: Bring the Shattered Fragments of Val’anyr to the Archivum Console in the Archivum in Ulduar.
What to do: Once you’ve collected all 30 fragments of a mace, combine them into Shattered Fragments of Val’anyr and bring to the Archivum Console.
Val’anyr, Hammer of Ancient Kings
Description: Throw the Shattered Pieces of Val’anyr into Yogg-Saron’s maw while he’s casting Deafening Roar, defeat Yogg-Saron and recover the Reforged Hammer of Ancient Kings.
What to do: go feed an insatiable jaw with the mace pieces. This must be done in a 25-ppl mode only.
Rewards: Val’anyr, Hammer of Ancient Kings legendary weapon.

