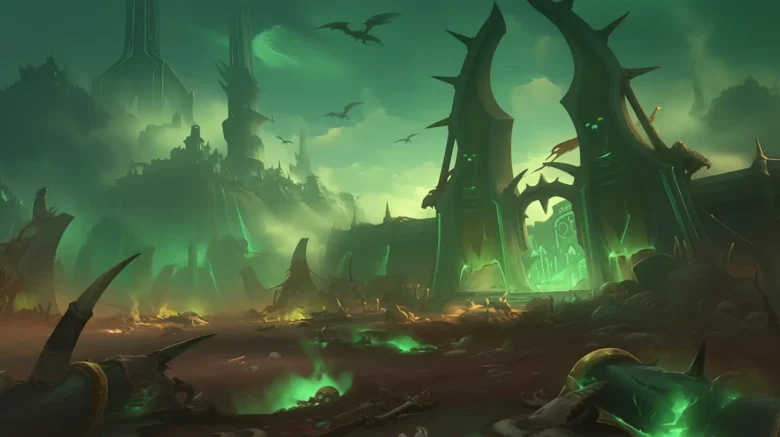
Drowning Labyrinth Quest — Glowing Lies & Hidden Truths
Welcome to Sundered Doctrine dungeon – the final one of the Final Shape pass. Access the quest with the Final Shape Dungeon Key, purchase it from the Eververse Store for 2000 Silver. Sundered Doctrine dungeon introduces Drowning Labyrinth quest. We’re back in Rhulk’s world from Vow of the Disciple, where hard truths mix with a few tall tales. Let’s break it down in this no frills step by step guide.

Navigation & Layout
Keep your eyes peeled for waterfalls, red lights, and hidden pathways tucked into corners and along room edges. The layout is simple: a central room splits into four paths (Left 1, Left 2, Right 1, and Right 2). The left paths (and likewise the right ones) connect via secret corridors so you can switch lanes without retracing your steps. When you drop in, you’ll spot a wall with three symbol slots—two filled and one blank—forming a basic noun–verb–noun sentence. Your job is to build a beam of light to fill the missing symbol.
Drowning Labyrinth Quest Progression & Hidden Steps

This quest isn’t just about the fights—it’s a multi-run dungeon with secret objectives:
- Become Initiated: After you finish the run the first time, head to the Hidden Base Camp (the room with Guardian NPCs). Interact with the piece of paper on a crate to become Initiated.
- Enter the First Code: Next, use the Pyramid device (the giant symbol wheel) to input the code. Many Guardians report entering something like “Witch Queen > Enter > Pyramid” to unlock the next step — finding three laboratory worms.
- Collect Hidden Hive Worms: Each worm carries a unique wall symbol you’ll need later. As you run the dungeon, watch for secret spots where Hive Worms hide:
- Worm #1: Under the first bridge.
- Worm #2: In the underground Pyramid city after the first encounter.
- Worm #3: Near the lens puzzle area.
- Enter a Second Code: Once you’ve collected the worms, return to the Hidden Base Camp and input another code using the symbols you noted (for example, “Witness Gives Darkness”).
- Extra Maze & Secret Chest: Between encounters, you might face a maze with platforming sections. Look for three hidden Darkness switches scattered throughout—shoot them to unlock a secret chest with bonus loot.
Additional progression steps—such as further worm collection and entering new codes—appear in later quest updates, so be ready to adapt as you clear more runs. Having completed the initial objectives, continue to the next phase: Steal Dread Knowledge.
Steal Dread Knowledge

Time to pinch some Dread Knowledge! Once you’ve nabbed the first batch of Hive Worms and punched in the initial code, here’s your cheeky shortcut to the next objective:
- Back In the Dungeon: Restart the Sundered Doctrine run.
- Crack the Second Code: At the Hidden Base Camp, hit up the giant Pyramid wheel. Enter the code derived from your Laboratory Worm symbols (think “Witness, Give, Darkness”).
- Chase the Waterfall: Push on through until you hit a room with a waterfall—right before the big encounter.
- Smash the Shrieker: Take out the Shrieker and its minions to collect those precious Knowledge drops.
- Light Up the Darkness Plate: With your Dread Knowledge stolen, step on the Darkness plate at the room’s rear. This drains the Darkness and flings open a secret door.
- Score the Pyramid Data: Slide into the new room, tap the podium, and snatch the Pyramid Data to complete your Dread Knowledge heist.
First Encounter – The Lens Mechanic

In this section, you use lenses to light up wall symbols. There are two ways to pick the right symbol:
- Context Clues: If the text reads “Guardian Worships ___,” the blank is likely Traveler or Light.
- Truth Speaker: One room hides a grim enemy called the Truth Speaker. Kill it to reveal the needed symbol.
Subjugators spawn along the branching paths and drop lenses (you can only carry one at a time). Place each lens in a holster that lets you rotate it to preset angles, then direct your light beam onto the missing symbol. Not every light connects—check out fellow guardian CyanicKenshi’s map for valid directions. Expect trial and error; most paths use three lenses, though sometimes you’ll need two or four.
Once your chain is set, shoot the Darkness switch above it to activate the beam. (Remember: if you rotate a center light mid-chain, the lenses vanish and you have to start over.) When your chain is complete, you’ll hear “The Pyramid accepts a truth,” and you move on. Later rounds may require filling two blanks in order (for example, Pyramid then Stop).

Second Encounter – Boss Mechanics
This fight is more layered but can be simplified. Your team should be built for boss damage. Options like Anarchy work well (even with a bug boosting Shrieker damage), while setups with Sleeper Simulant, D.A.R.C.I. with snipers, or Thunderlord with Storm Keep Titans (though ammo-hungry) also do the trick. Queenbreaker remains a top weapon, and Whisper holds its own.
Your goal here is to force the boss to “read” the Kill symbol on one of four symbol wheels in the arena. Let’s break down each boss encounter.

Boss 1 – Leftmost Boss (0% Lock)

- Wheel Mechanics: This boss is linked to the leftmost wheel. Each wheel displays seven symbols, with one glowing to indicate its active state.
- Depositing Knowledge: Wizards drop Knowledge in tiers—Heightened (1), Brimming (2), Overflowing (3). Depositing Knowledge shifts the glow along the wheel. The glow moves in a direction set by a spinning rod in the center (clockwise or counterclockwise). If needed, shoot the Darkness switch on top to change its rotation.
- When the Boss Reads the Wheel:
- If the active symbol is blank (white circle), nothing happens.
- If the lock panel is empty, it fills with the glowing symbol, which sets the boss’s behavior during the damage phase.
- If you do nothing, the wheel auto-rotates one space in the rod’s direction.
- Symbol Effects (for Boss 1):
- Hive: Spawns two ogres (left & right)—the worst-case scenario.
- Brain: Brings extra Wizards and a Knight.
- Commune: Converts the boss’s attack into shootable objects.
- Stop: No extra enemy spawns—the best outcome.
- Kill: Begins the damage phase. (You must manually lock this in.)
Boss 2 – Second Boss (25% Lock)

- Setup: The second boss reads its wheel at 25% of the damage meter. Follow the same mechanics as Boss 1, but note that the active symbol on its wheel may differ.
- Key Point: Adjust your deposited Knowledge to shift the glow properly. Wizards will spawn to fuel your Knowledge stacks as the boss “reads” the wheel. Your strategy is to ensure that the wheel’s active symbol is one you can manipulate (ideally setting it to Stop or Kill as needed).
Boss 3 – Third Boss (50% Lock)
- Setup: At 50%, the third boss takes its turn. Again, the same wheel mechanics apply.
- Strategy: Here, precision is key. Make sure you’ve managed your lenses and Knowledge deposits carefully. If the wheel isn’t adjusted, it auto-rotates, potentially forcing you into a more punishing outcome (such as spawning extra Wizards or a Knight).

Boss 4 – Final Boss (75% Lock)

- Setup: The fourth boss reads its wheel at 75% of the meter. This boss, like the others, is linked to its own symbol wheel.
- Critical Point: It’s crucial to lock in the Kill symbol manually on one of these wheels—preferably in the leftmost panel. Locking Kill in the left panel grants you a longer damage phase (over a minute), while locking it in the right panel gives only a short burst (around 5 seconds).
- Combined Strategy: The aim is to juggle all four wheels. For example, my team used a setup of three Stops and one Kill, starting with the rightmost wheel and working through. If you mismanage a wheel, extra ogres or a stray Knight may appear—manageable, but not ideal.
Once the Kill symbol is locked in for each boss, the front panels update with the active symbols from the wheels. If you ignore a wheel, it auto-rotates. (Our cycle once shifted from Kill–Stop–Stop–Brain to Kill–Stop–Commune–Commune because we delayed interacting with one wheel.) You can also speedrun into a damage phase by grabbing all available Knowledge and forcing Kill in one cycle, but that leaves you at the mercy of random outcomes.
Damage Phase Strategy

During damage phases, rely on long-range DPS. Teams using Anarchy and snipers (with a dash of D.A.R.C.I. for burst) have had success. With solid coordination and timely ammo resupply, you can cycle through multiple damage phases until the boss falls.
Secrets & Extras
There are time-gated secrets hidden in the Drowning Labyrinth quest. Keep your eyes open for extra chests and hidden pathways. Often, a secret chest unlocks by shooting three hidden Darkness switches scattered throughout the labyrinth. These bonus items and hidden paths can give you extra loot and may be required for quest progression on later runs.
Good luck, Guardian!
Epiccarry: best wow boost and coaching services
How do I start the Drowning Labyrinth quest?
To kick things off, purchase the Final Shape Dungeon Key from the Eververse Store (2000 Silver) and then access the Sundered Doctrine dungeon. The quest is initiated by speaking with Ikora Rey in the Tower Bazaar.
What are Laboratory Worms and where can I find them?
Laboratory Worms are hidden Hive Worms that carry unique wall symbols crucial for progression. Look for them under the first bridge, in the underground Pyramid city after the first encounter, and near the lens puzzle area.
What does “Steal Dread Knowledge” involve?
Once you’ve collected your first batch of Hive Worms and entered the initial code, restart the dungeon and input the second code (derived from your worm symbols, e.g., “Witness, Give, Darkness”). Then, push through a room with a waterfall, smash the Shrieker and its minions to collect Knowledge drops, step on the Darkness plate to drain the Darkness, and finally, grab the Pyramid Data from the new room to complete the Dread Knowledge heist.
What are the boss encounters and how do they work?
There are four boss encounters, each tied to its own symbol wheel:
Boss 1 (0% Lock): Linked to the leftmost wheel, where depositing Knowledge shifts the glowing symbol.
Boss 2 (25% Lock): Reads its wheel at 25% of the damage meter.
Boss 3 (50% Lock): Takes its turn at 50%—precision is key here.
Boss 4 (75% Lock): Reads its wheel at 75%; here, locking the Kill symbol (preferably in the leftmost panel for a long damage phase) is crucial.
Each wheel has effects based on the active symbol (e.g., Hive spawns ogres, Brain summons Wizards and a Knight, etc.). You must manually lock in the Kill symbol to start the damage phase.
How do I use the codes in the quest?
After becoming Initiated, you’ll use the Pyramid device (giant symbol wheel) to enter the first code (commonly something like “Witch Queen > Enter > Pyramid”) to trigger worm collection. Later, once you collect the worms, you return to the Hidden Base Camp to enter a second code (for example, “Witness Gives Darkness”).
Is there a time limit for each run of the dungeon?
No, there’s no strict time limit for a run, so feel free to take your time solving puzzles and adjusting your setup. However, efficient play helps conserve resources and ensures you can adapt to later, more challenging updates.
Can I complete the Drowning Labyrinth quest solo, or do I need a fireteam?
While you can run the dungeon solo, it’s recommended to have a team—especially for the boss encounters—since coordinated damage and puzzle solving can make the runs smoother.