Zul’Gurub is back, and it’s time to jump into the action! The 5th phase of the Season of Discovery is here, and we’re diving into the wild jungle of Stranglethorn Vale. Get ready to fight the Gurubashi trolls, take on the Blood God Hakkar, and grab some awesome loot. Here’s what you’ll learn in our Zul’Gurub guide:
Today, with our wow sod zul gurub guide you’ll learn about:
- Overview of Zul’Gurub;
- Where it is, how many players you need, and when it resets.
- Getting into Zul’Gurub;
- Do You Need Attunement?
- How to beat all the bosses;
- Loot Table;
- Storyline.
And other, major and minor things, which are helpful for going through the raid!
SOD Zul’Gurub Raid | overview
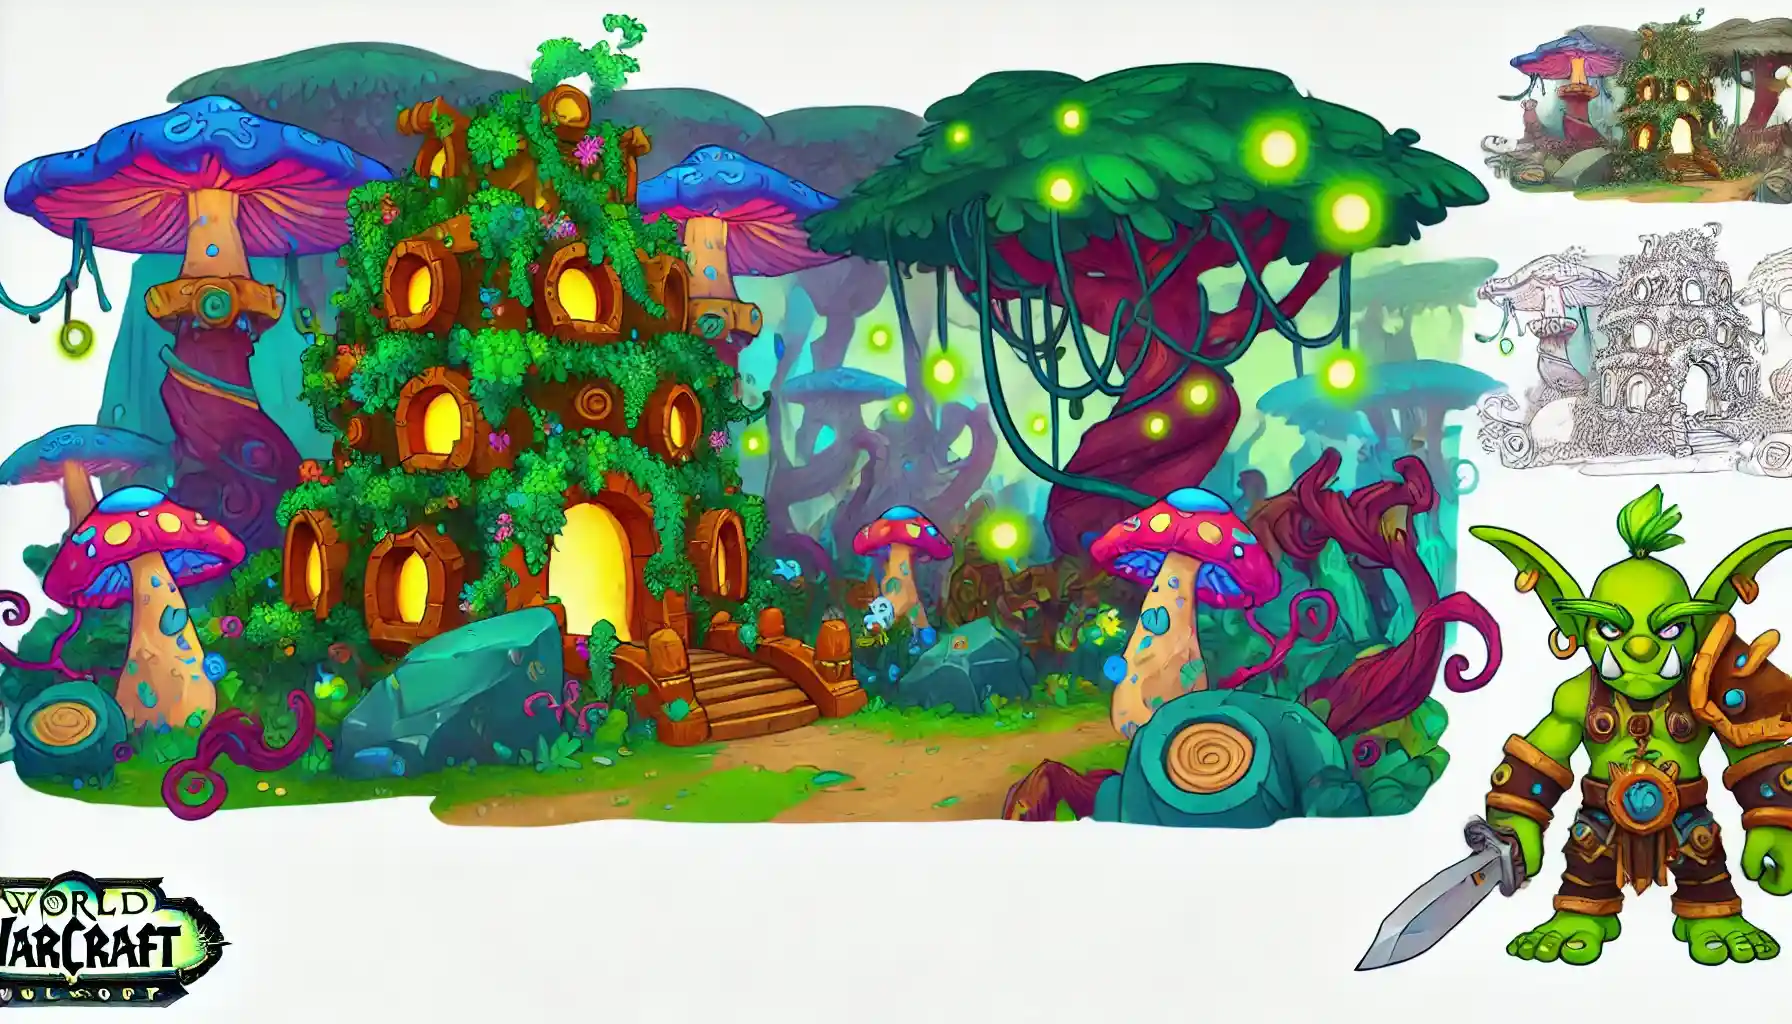
Welcome to Zul’Gurub! Nestled in Stranglethorn Vale, this classic 20-man raid offers up a ton of fun with zero attunement hassle. It’s the old capital of the Gurubashi trolls, now a hotbed for dark priests trying to wake up their nasty Blood God, Hakkar. The Zandalar Tribe needs your help to stop them, and you’ll want to jump in because this place resets every three days—perfect for grabbing those sweet loots and cutting down some evil.
| Feature | Details |
| Location | Northeast Stranglethorn Vale, right past Lake Nazferiti |
| Party Size | 20 players |
| Reset Timer | Every 72 hours |
| Big Bads | Five High Priests and Hakkar the Soulflayer himself |
| Extra Challenges | Optional bosses like the Edge of Madness lineup |
| Cool Drops | Look out for the Swift Zulian Tiger and those Warblades of Hakkari |
| Gear Sets | Grab Primal Hakkari goodies to craft epic class-specific sets |
| Reputation Grind | Fight for the Zandalar Tribe, do quests, get rewarded |
It’s an epic throwdown against some of the toughest trolls around.
SOD Zul’Gurub Raid | Entrance

Zul’Gurub is an ancient troll city located in the northeastern part of Stranglethorn Vale, at approximately coordinates 53, 17. This raid instance, part of WoW Classic’s Season of Discovery, offers a treasure trove of challenges, rewards, and opportunities to gain reputation with the Zandalar Tribe. Whether you’re traveling from Grom’gol Base Camp as Horde or making the journey from Darkshire as Alliance, getting to the entrance is an adventure in itself. The path is dotted with trash mobs and enemies, so be prepared for a bit of a skirmish before the real raid even begins.
| Faction | Instructions |
| Horde | Starting from Grom’gol Base Camp, head north along the main road. Take a right turn at the fork towards Zul’Gurub. Beware of trash mobs and nearby enemies with very little health. Stick together as a group and clear any threats along the way. |
| Alliance | Begin in Darkshire and travel south through Stranglethorn Vale. Stick to the main road, heading east at the fork. Be cautious of random raid members getting caught by enemies and trash mobs. Clear any hostile NPCs periodically cast AOE sleep abilities. Once you reach the Nesingwary’s Expedition camp, continue east until you reach the Zul’Gurub entrance. |
SOD Zul’Gurub Raid | Attunement

No, Zul’Gurub in Classic WoW does not require any attunement. Unlike other raids like Blackwing Lair or Onyxia’s Lair, you can enter Zul’Gurub directly without needing to complete any prerequisite quests or obtain specific items. Just gather your raid group and head to the entrance in northeastern Stranglethorn Vale at approximately coordinates 53, 17.
SOD Zul’Gurub Raid | Boss tactics

Wow SoD High Priest Venoxis Guide
High Priest Venoxis, the first boss you’ll bump into in Zul’Gurub. As a former troll priest turned into a vicious snake, he’s not here to play nice. With his posse of snake adds and a trick up his sleeve that could wipe your raid if you’re not careful, Venoxis is your first real test in the raid. Your goal? Manage his minions, dodge his poison, and smack him down before his Holy Wrath gets out of hand.
For DPS:
- Abilities: Holy Wrath (jumps between players, increasing in damage), Poison Clouds (drops toxic clouds to avoid).
- Phase 1: Ranged DPS should focus on killing one add at a time while keeping distance to avoid Holy Wrath’s chain damage. Melee DPS should use ranged weapons to avoid getting close.
- Phase 2: Go all out on Venoxis but watch for Poison Cloud cues. Move quickly out of the poison areas.
For Healers:
- Abilities: Poison Clouds can catch you off-guard and deal continuous damage if stood in.
- All Phases: Conserve mana in Phase 1, prepare for intense healing in Phase 2. Position yourself to easily dodge poison clouds.
For Tanks:
- Abilities: Venomous melee attacks, Poison Clouds.
- Phase 1: Focus on controlling adds and maintaining aggro on Venoxis.
- Phase 2: Watch for Poison Clouds; reposition Venoxis swiftly to keep melee areas clear.
| Mechanic | Wipe Potential | Instructions | Commentary |
| Holy Wrath | High | Avoid | Keep spaced, don’t chain the pain! |
| Poison Clouds | Extreme | Move | When he raises his hands, run your pants off! |
| Adds Management | High | CC/Kill | Control or chaos, choose wisely. |
| Phase Transition | Moderate | Focus | Gear up for the gear shift when he goes snakey. |
Venoxis isn’t too tough if you handle his adds smartly, dodge the clouds, and save your big guns for Phase 2
Wow SoD High Priestess Jeklik Guide

High Priestess Jeklik, one of the first hurdles in Zul’Gurub. As the bat-loving priestess of the troll pantheon, she’s ready to bombard you with sonic screams and a swarm of her winged minions. Jeklik combines intense sound attacks that can silence and disorient, with a penchant for healing herself, making her a tricky boss to handle. You’ll need sharp reflexes and even sharper coordination to take her down before her aerial minions overwhelm you.
For DPS:
- Abilities: Sonic Shriek, Summon Bats, Charge, Fire Bombs.
- Phase 1: Stay at maximum range to avoid AOE silence from Sonic Shriek. Focus quickly on bats when summoned; use AOE abilities to bring them down.
- Phase 2: Interrupt Jeklik’s Great Heal and Mind Flay. Dodge the fire from the Bat Bombs.
For Healers:
- Abilities: Sonic Shriek, Charge.
- Phase 1: Position yourself to stay out of silence range but within healing distance of melee and tanks. Prepare for sudden damage spikes when bats are summoned or when Jeklik charges.
- Phase 2: Keep up with healing as damage increases; watch for fire bombs and move promptly.
For Tanks:

- Abilities: Summon Bats, Charge, Fire Bombs.
- Phase 1: Maintain aggro on Jeklik and quickly pick up bats to prevent them from attacking healers and ranged DPS.
- Phase 2: Continue to manage any remaining bats and interrupt Jeklik’s Great Heal. Be ready to reposition Jeklik to avoid Fire Bombs.
| Mechanic | Wipe Potential | Instructions | Commentary |
| Sonic Shriek | Moderate | Avoid | Silence is golden, and here, it’s also safe! |
| Summon Bats | High | Kill | Swat those bats before they swarm us! |
| Great Heal | Extreme | Interrupt | Stop that heal or we’ll be here all night! |
| Fire Bombs | High | Move | Dodge the drops, or it’s a fiery flop! |
| Charge | Moderate | Manage | Keep the bait ready, and brace for impact! |
High Priestess Jeklik demands quick decision-making and sharp execution, especially when it comes to managing her bat swarms and dodging her devastating charges. Stay alert, move fast, and cut off her healing to keep the fight under control.
Wow SoD High Priestess Mar’li Guide

Priestess Mar’li, a versatile and dangerous boss who’s as sneaky as she is deadly. Known for her quick changes between troll and spider forms, she’s here to keep you on your toes with a nasty mix of venomous attacks and entangling webs. With adds that grow stronger over time and a nasty habit of healing herself, handling Mar’li is like juggling with knives—you’ve got to be quick, precise, and ready to adapt on the fly.
For DPS:
- Abilities: Poison Bolt Volley, Drain Life, Enveloping Webs, Spawn of Mar’li.
- Instructions: Ranged DPS should maintain a distance of over 30 yards to avoid Poison Bolt Volley and Enveloping Webs. Focus quickly on killing Spawn of Mar’li as they grow stronger over time. Interrupt Drain Life whenever cast.
For Healers:

- Abilities: Poison Bolt Volley, Enveloping Webs.
- Instructions: Stay beyond 30 yards to avoid Poison Bolt Volley. Be ready to cleanse the poison DOT and ramp up healing when Mar’li is in spider form due to increased damage to tanks and melee.
For Tanks:
- Abilities: Enveloping Webs, threat wipe.
- Instructions: The main tank should engage Mar’li and handle adds. Be prepared for her to wipe all threat and switch targets when she transforms into spider form; the off-tank should then quickly pick her up and reposition.
| Mechanic | Wipe Potential | Instructions | Commentary |
| Poison Bolt Volley | Moderate | Outrange/Heal | Stay back or suffer the venomous consequences! |
| Drain Life | High | Interrupt | Cut off her lifeline quick or she’ll outlast us all! |
| Spawn of Mar’li | High | Kill | Kill ’em quick before these little bugs get big! |
| Enveloping Webs | High | Avoid/Free | Get tangled, get troubled. Keep moving! |
| Form Switch | Extreme | Adapt | Shape-shifter alert: switch gears fast or fall flat! |
Mar’li’s dual nature makes her one of the trickier bosses in Zul’Gurub.
Wow SoD High Priest Thekal Guide

High Priest Thekal isn’t just another boss waiting for a smackdown—he’s a full-on party in Zul’Gurub that turns from a classic raid tango into a wild tiger mosh pit. This guy’s got a trick up his sleeve, transforming from troll to ferocious tiger just when you think you’ve got him beat. Keep your raid group tight because you’ll need spot-on coordination to make sure Thekal and his zealot buddies hit the floor at the same time, or it’s instant revival and you’re doing the dance all over again.
For DPS:
- Abilities: Mortal Cleave, Silence, spawns Zulian Tigers.
- Phase 1: Watch those health bars like a hawk and keep Thekal and his adds (Zealot Lor’Khan and Zealot Zath) leveling down together.
- Phase 2: Backs to the wall to avoid being knocked around by Force Punch, and smack down any new tigers that join the bash.
For Healers:
- Abilities: Periodic silences and massive damage spikes.
- Phase 1: Shake off those silences fast and keep the tanks topped off as they juggle Thekal and pals.
- Phase 2: When Thekal hits below 20%, he’ll start hitting like a truck—be ready to go full throttle with those heals.
For Tanks:
- Abilities: Mortal Cleave, aggro resets, and a nasty knockback.
- Phase 1: Keep a tight leash on Thekal and the zealots, swapping taunts if one gets loose because of Gouge or Blind.
- Phase 2: When Thekal goes all tiger on you, keep him pinned down and watch for those aggro-wiping Force Punches.
| Mechanic | Wipe Potential | Instructions | Commentary |
| Simultaneous Deaths | Extreme | Sync kills | Time it like fireworks—explode together or bust! |
| Mortal Cleave | High | Mitigate | Keep healing through the cleave or it’s curtains! |
| Force Punch | Moderate | Brace | Stick to the walls—this isn’t a pinball game! |
| Frenzy/Enrage | High | Tranq/Heal | Cool him down quick or feel the burn! |
| Silence | Moderate | Dispel | Silence is deadly—clear it fast! |
| Zulian Tigers | Moderate | Eliminate | Tiger trouble? Not in my raid! |
Raiding with Thekal is like a wild raid night out—keep the pace, watch your steps, and don’t let the chaos catch you off guard.
Wow SoD High Priestess Arlokk Guide

High Priestess Arlokk, where stealth and savage panthers rule the roost. This boss battle isn’t just about slashing and bashing; it’s a test of your raid’s ability to manage chaos and control. Arlokk herself switches between a troll and a deadly panther, vanishing and reappearing with lethal intent. Your group will need to stay sharp, shuffle quickly, and deal damage smartly to survive her onslaught and the feral friends she brings along for the fight.
For DPS:
- Abilities: Mark of Arlokk, Whirlwind.
- Instructions: Focus damage on Arlokk, keeping DPS balanced and controlled. Avoid panthers initially; concentrate on them only when Arlokk vanishes. Stay clear of her Whirlwind by moving away quickly when she reappears.
For Healers:
- Abilities: Mark of Arlokk, Whirlwind.
- Instructions: Stay at a safe distance to avoid Whirlwind damage. Keep an eye on the raid member marked by Mark of Arlokk, as they will attract panthers and need significant healing.
For Tanks:
- Abilities: Gouge, summons stealthed Panthers.
- Instructions: Main tank Arlokk but be ready for her Gouge, which will incapacitate you briefly; off-tanks should be prepared to quickly take over. Manage panthers effectively and keep them off healers and DPS.
Arlokk’s dance of disappearance and deadly reappearances keeps everyone on their toes. Balancing DPS, managing adds, and avoiding area damage are key. Remember, when she vanishes, it’s time to clear the panthers before she jumps back into the fray.
Wow SoD Hakkar Guide

final showdown in Zul’Gurub against Hakkar the Soulflayer, the notorious Blood God who’s not just a figure of troll nightmares but a real threat that can obliterate your raid if not handled with precision. Known for his infamous Blood Siphon, which can heal him substantially if you’re not careful, battling Hakkar is a dance with death itself. To stand a chance, you’ll need to manage his abilities smartly, counter his healing mechanics, and coordinate your team like a well-oiled machine. Get ready for one of the most intense boss fights that WoW Classic has to offer!
For DPS:
- Abilities: Corrupted Blood, Cause Insanity.
- Instructions: Avoid spreading Corrupted Blood by maintaining distance. Focus DPS on Hakkar consistently but switch to Sons of Hakkar promptly to gain the Poisonous Blood debuff before Blood Siphon.
For Healers:

- Abilities: Blood Siphon, Corrupted Blood.
- Instructions: Prepare for significant raid-wide damage during Blood Siphon; ensure everyone is topped off beforehand. Manage the DOT from Corrupted Blood and keep an eye on those affected by Cause Insanity.
For Tanks:
- Abilities: Cause Insanity, immune to taunts.
- Instructions: Rotate between several tanks to manage threat and cover for each other during Mind Controls. Maintain high threat to keep Hakkar focused and manage positioning to minimize the impact of Corrupted Blood on the raid.
| Mechanic | Wipe Potential | Instructions | Commentary |
| Blood Siphon | Extreme | Get poisoned | Get stung, don’t let Hakkar get his vamp on! |
| Corrupted Blood | High | Spread out | Keep your cooties to yourself, spread out! |
| Cause Insanity | High | Manage tanks | When the tank’s brain takes a holiday, be ready to step in! |
| Sons of Hakkar | Moderate | Kill timely | Whack a Son, grab the poison, no time to nap! |
| Mind Control | High | Rotate tanks | Mind games strong? Keep the tank queue rolling! |
Fighting Hakkar is as much about managing his mechanics as it is about sheer firepower. Stay sharp, keep calm, and remember: the right poison at the right time turns his greatest weapon against him.
Wow SoD Bloodlord Mandokir & Ohgan Guide

Bloodlord Mandokir, a formidable boss in Zul’Gurub who’s not just about brute force but also about picking off raid members with his cunning gaze and charges. Mounted on his raptor, Ohgan, Mandokir offers a dual threat that can turn chaotic quickly. This fight tests your group’s ability to juggle aggro, dodge deadly attacks, and keep cool under the Bloodlord’s menacing watch. Get ready to dodge, heal, and strike with precision—or watch as Mandokir levels up from your mistakes.
For DPS:
- Abilities: Whirlwind, Threatening Gaze, Cleave.
- Instructions: Melee DPS must stay close to avoid charge but quickly retreat during Whirlwind. Ranged DPS should maintain maximum distance to minimize the threat of being charged. Stop all actions if targeted by Threatening Gaze.
For Healers:
- Abilities: Whirlwind, Threatening Gaze.
- Instructions: Be ready for sudden spikes in damage due to Whirlwind and Charges. Keep the raid topped off, and pay special attention to anyone targeted by Threatening Gaze as they may take massive damage if they fail to stop actions.
For Tanks:
- Abilities: Cleave, AoE Fear, Whirlwind.
- Instructions: Maintain aggro on Mandokir and rotate with another tank on Ohgan to manage the stacking debuff. Be vigilant for Mandokir’s Threatening Gaze and prepare to regain aggro quickly after Charges.
Key Boss Mechanics Table:
Battling Bloodlord Mandokir is like playing a high-stakes game of red light, green light, combined with the urgency of keeping a deadly beast and his pet under control.
Wow SoD Gahz’ranka Guide

one of the most water-warped madness bosses of Zul’Gurub, Gahz’ranka. Originally just another resident crocolisk of the murky waters near Yojamba Isle, this beast has been twisted into a terrifying guardian by ancient magic. Facing Gahz’ranka isn’t just a boss encounter—it’s an epic battle against nature itself. This fight is a test of your raid’s ability to adapt and conquer under pressure, making it a hallmark of classic raids. Keep your nature resistance gear handy, and prepare for a splashy showdown that could sweep your entire raid off their feet if you’re not careful.
For DPS:
- Abilities: Massive Geyser, Frost Breath.
- Instructions: Avoid front-facing attacks due to Frost Breath. Stay spread out to reduce the raid-wide impact of Massive Geyser, which can launch random raid members into the air.
For Healers:
- Abilities: Massive Geyser, Frost Breath.
- Instructions: Anticipate high damage from Frost Breath and prepare for sudden bursts of AOE damage from Massive Geyser, which causes significant fall damage to affected raid members.
For Tanks:
- Abilities: Frost Breath, Massive Geyser.
- Instructions: Maintain positioning with Gahz’ranka facing away from the raid to mitigate the damage from Frost Breath. Be ready to quickly reposition after Massive Geyser disrupts placement.
Key Boss Mechanics Table:
| Mechanic | Wipe Potential | Instructions | Commentary |
| Massive Geyser | High | Spread | Up, up, and away! Keep spread to avoid a wet wipe. |
| Frost Breath | Moderate | Dodge | Chill out of the chill zone, or you’ll freeze in place! |
| Random Targeting | Moderate | Stay Alert | Gahz’ranka loves surprises—don’t get caught off-guard! |
| Repositioning | High | Reposition | Get back in place fast—this isn’t a spank fight, it’s tactical! |
Gahz’ranka’s battle is a dynamic test of your raid’s ability to withstand and adapt to environmental hazards while managing a giant beast’s brutal attacks. Managing these challenges efficiently not only secures a victory but also potentially great rewards and a boost in reputation within the world of Warcraft.
Wow SoD Jin’do the Hexxer Guide

Jin’do the Hexxer, the master of curses and mind games in Zul’Gurub. This encounter is not just a test of strength but a battle of wits, where managing chaos becomes as important as dealing damage. Jin’do manipulates shadows and torments adventurers with his hexes, turning raid members against each other and spawning deadly shades that can only be seen by those ensnared by his delusions. Prepare for one of the most cunning and complex fights in WoW Classic, where every move and every decision can tip the scales between a triumphant victory and a devastating wipe.
For DPS:
- Abilities: Delusions of Jin’do, Shadow Shock.
- Instructions: Focus on killing adds in the prescribed order: Shade of Jin’do, Powerful Healing Ward, then Brain Wash Totem before finally attacking Jin’do. Only attack Shades if affected by Delusions of Jin’do.
For Healers:
- Abilities: Hex, Delusions of Jin’do.
- Instructions: Do not dispel Delusions of Jin’do; it’s crucial for seeing and combating Shades. Always dispel Hex immediately to maintain control of the fight. Be prepared to switch to DPS mode to help bring down Shades if you’re cursed.
For Tanks:
- Abilities: Hex, Teleport.
- Instructions: Main tank should be ready for immediate taunts after Hex to manage aggro disruptions. If using a Druid in Bear Form, leverage immunity to Hex for smoother tanking. Position Jin’do strategically to facilitate quick add control and mitigate damage from Teleported raid members.
Key Boss Mechanics Table:
| Mechanic | Wipe Potential | Instructions | Commentary |
| Delusions of Jin’do | High | Don’t dispel | Seeing things? Good, you’re on Shade duty now! |
| Hex | High | Dispel | Turned into a frog? Hop to it and dispel fast! |
| Powerful Healing Ward | Extreme | Destroy | Kill that totem or Jin’do’s just laughing at us. |
| Brain Wash Totem | Moderate | Destroy | Mind control’s a no-go, smash those totems ASAP! |
| Shadow Shock | Moderate | Mitigate | Shock therapy! Keep those shocks in check, team. |
| Teleport to Skeleton Pit | Moderate | Rescue | Got dropped in the pit? Time for a bony beatdown. |
Jin’do the Hexxer demands top-notch awareness and swift reactions from the entire raid. With his arsenal of disruptive and deceptive tactics, every raid member must play their part flawlessly to dismantle his defenses and prevent him from overpowering the group with his dark voodoo
Wow SoD Edge of Madness Guide

Edge of Madness, a mysterious subzone guarded by four unique and formidable bosses who rotate bi-weekly. Each boss demands a specific strategy and offers a distinct challenge, making this part of the raid a true test of adaptability and teamwork. Whether you face the strength of Gri’lek, the stealth of Renataki, the sorcery of Hazza’rah, or the stormy wrath of Wushoolay, each encounter is designed to push your raid group to its limits. Successful teams will need to think on their feet and respond quickly to the unpredictable dangers unleashed by these madness bosses.
For DPS:
- Abilities: Depends on the boss (Avatar, Vanish, Mana Burn, Chain Lightning).
- Instructions: For Gri’lek, keep distance during Avatar; for Renataki, use AoE to reveal him post-Vanish; keep Hazza’rah mana drained; avoid front of Wushoolay to dodge Chain Lightning.
For Healers:
- Abilities: Avatar, Ambush, Mana Burn, Sleep, Lightning Cloud.
- Instructions: Ensure constant healing on targets with Avatar or Ambush; mitigate Mana Burn by keeping Hazza’rah drained; prepare for raid-wide damage from Sleep and Lightning Cloud.
For Tanks:
- Abilities: Avatar, random targeting, Chain Lightning.
- Instructions: For Gri’lek, manage threat post-Avatar; for Renataki, be ready to regain aggro after Vanish; position Wushoolay to protect melee from Chain Lightning; move bosses out of damaging ground effects like Lightning Cloud.
Key Boss Mechanics Table:
| Mechanic | Wipe Potential | Instructions | Commentary |
| Avatar (Gri’lek) | High | Kite | When Gri’lek grows, you go! Keep those legs moving! |
| Vanish (Renataki) | High | Reveal | Playing hide and seek with Renataki? Bring the AoE! |
| Mana Burn (Hazza’rah) | Moderate | Drain | Keep Hazza’rah on a mana diet, starve the burn! |
| Summon Nightmare Illusions (Hazza’rah) | High | Kill fast | Nightmares pop up? Pop them down quick! |
| Chain Lightning (Wushoolay) | Moderate | Position | Stay back or get zapped—Wushoolay’s not kidding around! |
| Lightning Cloud (Wushoolay) | High | Move | See a storm brewing under you? Time to ship out! |
Each Edge of Madness boss brings their own brand of chaos to the fight, testing different aspects of your raid’s ability—from spatial awareness to quick target switching and efficient mana management.
SOD Zul’Gurub Raid | Loot table
The loot table of Zul’Gurub is as diverse as its challenges, offering everything from unique armor sets that meet the reputation requirements of the Zandalar Tribe to powerful weapons perfect for groups tackling this extremely difficult raid. Each of the four bosses, along with numerous adds, drops a variety of items that can enhance AOE capabilities, boost melee and spellcasting prowess, and strengthen defensive stats.
SOD Zul’Gurub Raid | Plot
Zul’Gurub isn’t just your average spooky troll ruins—it’s like stepping into a horror movie set deep in the jungles of Stranglethorn Vale. This place has a vibe that screams ‘bad news’ with every creepy corner and shadow. Originally built by the Gurubashi trolls, it was a place buzzing with life and wicked celebrations. But then, internal conflicts and the whispers from the not-so-chill Blood God, Hakkar the Soulflayer, turned the party into a nightmare. Now, the place is a mess of corruption and dark magic.
As you and your raid group dive deeper into Zul’Gurub, you’ll quickly realize this is no walk in the park. The Atal’ai priests, big fans of Hakkar, are hell-bent on bringing back their Blood God. Imagine the worst possible house guests, then multiply that by ten—that’s these guys, trying to unleash ultimate evil into the world. This raid isn’t just for kicks; it’s a full-on battle to stop a catastrophic apocalypse.
The bosses here aren’t your run-of-the-mill baddies—they’re like the bosses from your worst nightmares. Each High Priest or Priestess has gone full animal-god mode, thanks to Hakkar’s influence. From High Priestess Jeklik flapping around with her bats and sonic screeches to High Priest Venoxis slithering around with his venomous antics. Then there’s High Priestess Mar’li, spawning spiders that could give Arachnophobes a run for their money, and High Priest Thekal, who pounces around like a tiger with a toothache. And don’t get me started on High Priestess Arlokk, who loves playing hide and seek in her panther form, jumping out just when you think it’s safe.
Every step closer to Hakkar, the air gets thicker with voodoo vibes and the stakes get higher. By the time you reach Hakkar, you’re not just fighting his physical form but also battling against the dark mojo he’s got swirling around him. His favorite party trick? Blood Siphon, where he literally sucks the life out of your raid, healing himself unless everyone’s coated with poisonous blood—talk about a toxic relationship!
This raid will test your mettle, your gear, and your ability to stay cool when every random raid member is two seconds away from being dead or turned into a frog. And for those who thrive on reputation, remember, crushing Hakkar earns you more than just loot—it ramps up your rep with the folks who hate his guts as much as you do.
SOD Zul’Gurub Raid | Conclusion
Zul’Gurub is a thrilling raid located in the heart of Stranglethorn Vale, brimming with danger, madness bosses, and dark magic. This raid doesn’t require attunement, so you can dive straight into the action with your group. Inside, you’ll face powerful enemies like the Blood God, Hakkar, and his followers, each bringing madness encounters that deal massive damage. High Priest Venoxis poisons your raid with a deadly poison cloud, while High Priestess Mar’li’s spiders and High Priestess Arlokk’s panther attacks keep the entire raid on edge.
Throughout the raid, you’ll be attacked by trash mobs that must be quickly killed before they overwhelm your group. Bosses like Bloodlord Mandokir gaze menacingly with their threatening gaze, forcing you to act fast. Hakkar’s corrupted blood ability and Blood Siphon will require perfect coordination, as he heals unless quickly dispelled with poisoned blood. Random raid members may fall victim to mind control or aoe sleep effects, adding chaos to an already intense battle.
Completing Zul’Gurub is no easy task, even on heroic difficulty. However, the rewards are worth the effort. From primal Hakkari items to colored bijous and powerful items, every boss drops something valuable. A full run will not only net you rare loot but also gain reputation with the Zandalar Tribe. Victory brings epic loot, class-specific gear, and the satisfaction of conquering some of WoW Classic’s most notorious bosses, proving that teamwork and strategy are key to surviving this brutal encounter.
Epiccarry: best wow boost and coaching services
Frequently Asked Questions
Do I need attunement to enter Zul’Gurub?
No attunement is required for Zul’Gurub. You can head straight to the entrance at coordinates 53, 17 in northeastern Stranglethorn Vale.
What are the main mechanics I need to be aware of in Zul’Gurub?
Key mechanics include managing adds, interrupting powerful abilities, and dealing with AOE effects. Some bosses have unique abilities like AOE sleep that can incapacitate multiple raid members at once.
How do I handle the two zealots with High Priest Thekal?
The two zealots, Zealot Lor’Khan and Zealot Zath, must be killed simultaneously. Coordinate your DPS to bring them down together, or they will resurrect each other.
What should I do if a boss uses an AOE sleep ability?
If a boss casts an AOE sleep ability, healers and DPS need to immediately stop their actions to avoid spreading the effect. Tanks should ensure they are positioned to quickly regain aggro once the sleep effect wears off.
How important is it to kill adds during the fights?
Killing adds is crucial in Zul’Gurub. Adds can overwhelm the raid if not managed properly, so prioritize taking them out quickly to keep the fight under control.
Can Druids tank in cat form in Zul’Gurub?
Druids should generally avoid tanking in cat form as it is meant for DPS. For tanking, Druids should use bear form to maximize their survivability and threat generation.
What do I do if I’m being watched by a boss with a threatening gaze ability?
If a boss targets you with a threatening gaze, you must immediately stop all actions. Any movement or attack will cause the boss to charge and likely kill you.
Are there any specific roles for Paladins in Zul’Gurub?
Paladins can provide crucial support through healing and buffing. They can also use their utility spells to cleanse debuffs and provide auras that enhance the raid’s performance.
Where can I sell or trade items I get from Zul’Gurub?
You can sell or trade valuable items from Zul’Gurub on the auction house. Check the current market prices to maximize your profits from rare drops and crafting materials.
What happens if a raid member gets killed during a fight?
If a raid member gets killed, they can be resurrected by a Paladin or other classes with resurrection abilities. However, too many deaths can make the fight extremely difficult, so minimize casualties.
How do I handle bosses that periodically cast powerful spells?
Interrupts and silences are key. Assign specific raid members to handle interrupts and ensure that spells like AOE sleep or powerful heals are stopped immediately.
What should I do if I encounter the two zealots with High Priest Thekal?
Synchronize your DPS to kill both zealots at the same time, preventing them from resurrecting each other and prolonging the fight.
Who are the main bosses in Zul’Gurub?
The main bosses are five High Priests and Priestesses (Jeklik, Venoxis, Mar’li, Thekal, and Arlokk) and the final boss, Hakkar the Soulflayer.
Are there any optional bosses in Zul’Gurub?
Yes, there are optional bosses, including the Edge of Madness bosses that rotate bi-weekly.
How do you get to Zul’Gurub as Horde?
Horde players should start from Grom’gol Base Camp, head north along the main road, and take a right turn towards Zul’Gurub. Be cautious of trash mobs and nearby enemies with very little health.
How do you get to Zul’Gurub as Alliance?
Alliance players should begin in Darkshire, travel south through Stranglethorn Vale, and head east at the fork. Clear any hostile NPCs periodically and proceed to the Zul’Gurub entrance.
What kind of loot can I expect from Zul’Gurub?
Zul’Gurub offers a variety of loot, including unique armor sets, powerful weapons, and rare mounts like the Swift Zulian Tiger. The loot is essential for meeting reputation requirements with the Zandalar Tribe.
How do you summon the Edge of Madness bosses?
The Edge of Madness bosses are summoned by using the Gurubashi Mojo Madness potion at the brazier in the Edge of Madness area.
What reputation gains can be made from Zul’Gurub?
Completing the raid and associated quests will gain you reputation with the Zandalar Tribe, which is essential for crafting epic class-specific sets and other rewards.
What are some common challenges in Zul’Gurub?
Challenges include managing random raid members being targeted by abilities, handling AOE sleep abilities, killing adds efficiently, and dealing with bosses that have very little health but dangerous abilities.
