Introduction
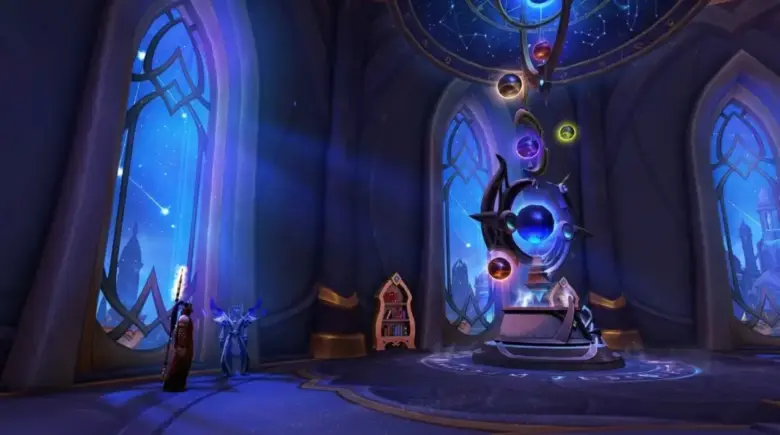
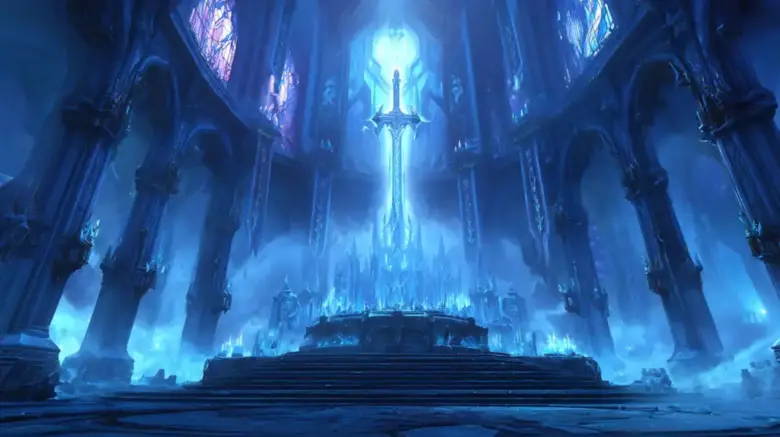
Welcome to our Shadowmoon Burial Grounds Dungeon Guide! This comprehensive guide overviews one of World of Warcraft’s most thrilling and challenging dungeons. Shadowmoon Burial Grounds is a 5-player dungeon located in the heart of Shadowmoon Valley, in the eastern part of Draenor. As the sacred burial site of the Shadowmoon clan, this dungeon holds immense importance in the game’s lore.
This guide aims to help new and experienced players navigate the dungeon, understand the mechanics of each boss fight, and effectively tackle the various challenges presented within the Shadowmoon Burial Grounds. Whether you’re a casual player or a dedicated raider, our guide will ensure you’re well-prepared for everything this dungeon offers. So, gather your party, venture into the depths of this ancient tomb, and uncover the secrets buried within the Shadowmoon Burial Grounds Dungeon.
Dungeon Entrance and Unlocking

This section will discuss Dungeon Entrances and Unlocking requirements for the Shadowmoon Burial Grounds. To access this dungeon and dive into its mysteries, you’ll need to meet certain criteria and know the location of its entrance.
Dungeon Entrance:
The entrance to the Shadowmoon Burial Grounds Dungeon can be found in Shadowmoon Valley, situated in the eastern part of Draenor. The coordinates for the entrance are 31.9, 42.5. You can access the dungeon by flying or using ground mounts to reach the entrance.
Buy Cheap WoW Gold
WoW Gold: Your Key to Greatness! We Grind, you Enjoy!

Unlocking and Requirements:
To unlock the Shadowmoon Burial Grounds Dungeon, you must meet specific level and quest requirements. Here’s what you need to know:
- Level Requirements: The dungeon is designed for level 10-70 characters. However, you can access it through the Dungeon Finder starting at level 10. To queue for the Mythic+ versions, you’ll need to be level 70.
- Quest Requirements: While no mandatory questlines are required to access the dungeon, completing the main story quests in Shadowmoon Valley will provide helpful context and background information on the dungeon’s lore and significance in the game.
Now that you know the Dungeon Entrances and Unlocking requirements, you can gather your party and venture into the Shadowmoon Burial Grounds. Prepare to face the challenges that lie within and embark on a thrilling journey through this ancient dungeon.
Dungeon Bosses and Encounters

Here, we will provide an overview of the Dungeon Bosses and Encounters within the Shadowmoon Burial Grounds and some brief strategies to help you conquer these formidable foes.
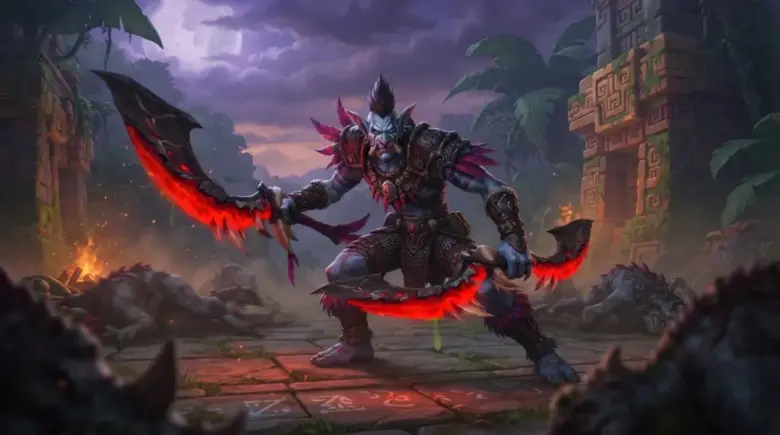
Sadana Bloodfury:

- Sadana Bloodfury is the first boss of the dungeon, a powerful Darkfallen priestess. During the encounter, players must watch out for her Dark Communion and Lunar Purity abilities and avoid touching the purple runes on the ground. To defeat Sadana, interrupt her Dark Communion casts and kill the Defiled Spirits that spawn, ensuring your party is cleansed of the negative debuffs.
Abilities:
- Dark Communion: A channeled spell that heals Sadana for a significant amount and deals damage to all players. This spell must be interrupted.
- Lunar Purity: A debuff placed on a random player, causing them to take increased damage. Standing on a Moon Rune will remove the debuff.
- Daggerfall: Throws a dagger at a random player, creating a purple pool on the ground that damages players standing in it.
- Defiled Spirit: Summons a ghostly add that moves towards Sadana. If it reaches her, it will trigger a massive AoE explosion, dealing heavy damage to the party.
Strategy:
Tank:
- Keep Sadana faced away from the party to avoid cleave damage.
- Interrupt Dark Communion casts as often as possible.
- Pick up and hold aggro on Defiled Spirits when they spawn.
Healer:
- Dispel Lunar Purity debuffs from players by having them stand on a Moon Rune.
- Keep the party’s health topped off, especially when Sadana casts Dark Communion.
- Be prepared for spike damage if Defiled Spirits get too close to Sadana.
DPS:
- Prioritize interrupting Dark Communion to prevent Sadana from healing and dealing damage to the party.
- Focus on killing Defiled Spirits before they reach Sadana, as they can cause a devastating AoE explosion.
- Avoid standing in Daggerfall’s purple pools on the ground to minimize damage taken.
Tips:
- Make sure to communicate with your party about interrupt rotations for Dark Communion.
- When the Lunar Purity debuff is applied to a player, they should quickly move to a Moon Rune and call out to the healer for a dispel.
- Keep an eye on Defiled Spirits and their proximity to Sadana; use crowd control abilities, such as stuns and slows, to keep them away from the boss.
Nhallish:

- The second boss in Shadowmoon Burial Grounds is Nhallish, a Void Revenant who feeds on souls. Players should consider the boss’s Void Vortex, Planar Shift, and Soul Shred abilities. When Nhallish casts Soul Shred, players’ souls will be separated from their bodies, and they must defeat their own Soul Fragments to return to their bodies. Communicate with your party and quickly focus on defeating the Soul Fragments to minimize damage.
Abilities:
- Void Vortex: A swirling vortex that pulls players towards it while dealing damage. Players must move away from the vortex to avoid taking damage.
- Planar Shift: Nhallish teleports to a random location and starts casting Void Devastation, which deals heavy damage in a cone in front of him. Players must avoid standing in the cone.
- Exhume the Crypts: Summons several Void Spawn adds that need to be killed quickly.
- Soul Shred: At 50% health, Nhallish casts Soul Shred, pulling all players into the spirit world. Players must defeat their Possessed Soul to escape and return to the fight.
Strategy:
Tank:
- Keep Nhallish faced away from the party to minimize cleave damage.
- Quickly pick up and hold aggro on Void Spawn adds during Exhume the Crypts.
- Position yourself so that you can easily move away from Void Vortex and avoid Void Devastation’s cone of damage.
Healer:
- Be prepared to heal through the damage caused by Void Vortex and Void Devastation.
- Keep the party’s health topped off, especially during the Exhume the Crypts phase.
- During Soul Shred, focus on healing yourself while damaging your Possessed Soul to escape the spirit world quickly.
DPS:
- Focus on killing Void Spawn adds as quickly as possible during Exhume the Crypts.
- Avoid standing in the cone of damage from Void Devastation.
- During Soul Shred, prioritize defeating your Possessed Soul to escape the spirit world and return to the fight.
Tips:
- Communicate with your party to ensure everyone knows the mechanics and their positioning.
- When Nhallish casts Planar Shift, quickly identify his new location and reposition accordingly to avoid his Void Devastation attack.
- Use defensive cooldowns if necessary to survive the spirit world encounter during Soul Shred.
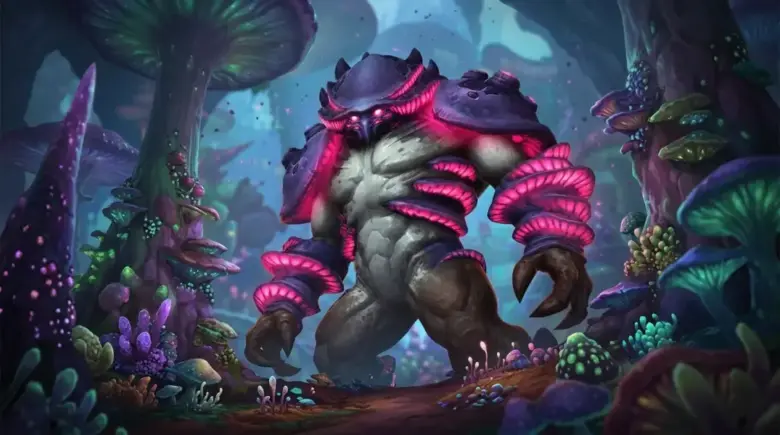
Bonemaw:

- As the third boss encounter, Bonemaw is a monstrous Carrion Worm that resides within the dungeon’s depths. Players such as Body Slam, Inhale, and Necrotic Pitch must manage their powerful abilities. To avoid being swallowed by Bonemaw, stand behind the rock piles during the Inhale phase and dodge the green pools of Necrotic Pitch that appear throughout the encounter.
Abilities:
- Inhale: Bonemaw inhales, drawing players towards him and dealing damage over time. Players must move away from the boss to avoid being swallowed.
- Body Slam: Bonemaw leaps at a random player, causing damage to everyone in the area. Players must move away from the targeted area to avoid damage.
- Necrotic Pitch: Bonemaw spits a pool of necrotic slime, damaging players standing in it. Players should move out of the pool as quickly as possible.
- Carrion Worms: Bonemaw periodically summons Carrion Worm adds, which should be killed quickly to reduce incoming damage.
Strategy:
Tank:
- Keep Bonemaw faced away from the party to minimize cleave damage.
- Quickly pick up and hold aggro on Carrion Worm adds as they spawn.
- Position yourself so that you can easily move away from Bonemaw during Inhale and avoid Necrotic Pitch pools.
Healer:
- Be prepared to heal through the damage caused by Inhale, Body Slam, and Carrion Worms.
- Keep the party’s health topped off, especially during the Inhale phase.
- Be mindful of your positioning, avoiding Necrotic Pitch pools and moving away from Bonemaw during Inhale.
DPS:
- Focus on killing Carrion Worm adds as quickly as possible.
- Avoid standing in the area targeted by Body Slam and move out of Necrotic Pitch pools immediately.
- During Inhale, move away from Bonemaw to avoid being swallowed and taking additional damage.
Tips:
- Communicate with your party to ensure that everyone is aware of the mechanics and their positioning.
- Use personal defensive cooldowns if necessary to survive heavy damage phases like Inhale and Body Slam.
- When Carrion Worms spawn, prioritize them over the boss to reduce incoming damage and ease pressure on the healer.
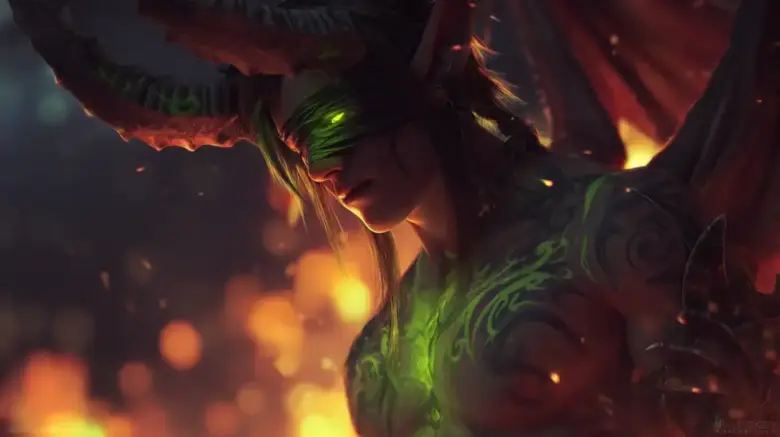
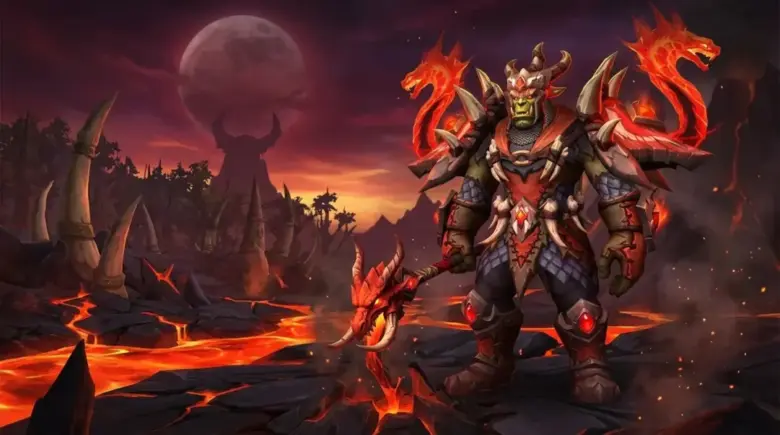
Ner’zhul:

- The final boss of Shadowmoon Burial Grounds is Ner’zhul, an orcish shaman who has fallen to darkness. This challenging encounter requires players to handle abilities like Omen of Death, Malevolence, and Ritual of Bones. Focus on interrupting Omen of Death, spread out to avoid overlapping damage from Malevolence, and quickly destroy the Skeletal Remains during the Ritual of Bones phase to prevent them from reaching the opposite side of the room.
Abilities:
- Malevolence: Ner’zhul casts a shadowy bolt at a random player, dealing damage and applying a damage-over-time effect. This effect can be dispelled.
- Omen of Death: Ner’zhul creates a purple void zone beneath a player’s feet, which explodes after a short period, dealing massive damage. Players must move out of the zone to avoid damage.
- Ritual of Bones: Ner’zhul summons a line of Ritual Skeletons that march forward, dealing damage to anyone caught in their path. Players must kill one of the skeletons to create a gap and avoid taking damage.
Strategy:
Tank:
- Keep Ner’zhul faced away from the party to minimize cleave damage.
- Be prepared to use cooldowns to survive heavy damage, particularly from Malevolence.
- Move out of Omen of Death void zones as quickly as possible.
Healer:
- Be prepared to dispel the Malevolence debuff from affected party members.
- Keep the party’s health topped off, especially during the Ritual of Bones phase.
- Be mindful of your positioning, avoiding Omen of Death void zones and the path of Ritual Skeletons.
DPS:
- Focus on killing one of the Ritual Skeletons during the Ritual of Bones phase to create a gap for the party to move through.
- Avoid standing in Omen of Death void zones and move out quickly.
- Be prepared to use defensive cooldowns to survive heavy damage, particularly from Malevolence.
Tips:
- Communicate with your party to ensure that everyone is aware of the mechanics and their positioning.
- Use personal and group defensive cooldowns effectively to mitigate heavy damage, especially during the Ritual of Bones phase.
- Prioritize killing a Ritual Skeleton during the Ritual of Bones phase to create a safe passage for the party.
Buy The War Within Starting Pack
Enjoy instead of grind!

Dungeon Trash and Notable Mobs

In the Shadowmoon Burial Grounds Dungeon, various trash mobs and notable enemies can pose significant challenges to your group. It’s essential to be aware of their abilities and have strategies to handle them effectively.
Shadowmoon Bone-Mender
Abilities:
- Void Bolt: Inflicts Shadow damage to a single target.
- Shadow Mend: Heals a friendly target for a significant amount.
Strategy: Interrupt Shadow Mend to prevent healing and prioritize killing Bone-Menders first.
Reanimated Ritual Bones
Abilities:
- Bone Flurry: Deals Physical damage to all players within 10 yards.
Strategy: Tanks should face them away from the party and DPS should avoid standing in front of them.
Void Spawn
Abilities:
- Void Pulse: Deals Shadow damage to all players within 30 yards.
Strategy: Interrupt or stun Void Spawn when they begin casting to minimize group damage.
Defiled Spirit
Abilities:
- Defiled Ground: Creates a pool of corruption that deals Shadow damage to players standing in it.
Strategy: Move out of the Defiled Ground as soon as it appears and avoid engaging the Spirit within the pool.
Shadowmoon Loyalist
Abilities:
- Dark Communion: Heals a friendly target for a significant amount.
Strategy: Interrupt Dark Communion and focus on killing Loyalists first.
Shadowmoon Dominator
Abilities:
- Rending Void Lash: Deals Shadow damage and applies a damage-over-time effect to the target.
Strategy: Tanks should mitigate the incoming damage, while healers focus on removing the debuff.
Subjugated Soul
Abilities:
- Soul Shred: Deals Shadow damage to all players within 10 yards.
Strategy: Tanks should face them away from the party, and DPS should avoid standing in front of them.
Shadowmoon Exhumer
Abilities:
- Exhume the Crypts: Summons additional Undead adds.
Strategy: Crowd control or stun the Exhumer during the cast to prevent the summoning of additional adds.
Monstrous Corpse Spider
Abilities:
- Necrotic Burst: Inflicts Nature damage and applies a stacking debuff that reduces healing received.
Strategy: Tanks should kite the spiders when the debuff stacks become unmanageable, while healers dispel the debuff when possible.
Plagued Bat
Abilities:
- Plague Spit: Deals Nature damage and leaves a disease that deals damage over time.
Strategy: Tanks should position the bats facing away from the group, while healers remove the disease from affected players.
Mythic Plus Tips and Strategies

Mythic Plus is a more challenging version of the Shadowmoon Burial Grounds dungeon that introduces scaling difficulty, additional mechanics, and a timed run. This section will provide strategies for handling affixes and optimizing dungeon runs in Mythic Plus mode.
- Understand Affixes: Each week, Mythic Plus dungeons will have a set of rotating affixes that add unique mechanics and challenges. Familiarize yourself with the current affixes and adjust your strategy accordingly. Some common affixes include:
- Fortified: Non-boss enemies have increased health and damage.
- Tyrannical: Bosses have increased health and damage.
- Bolstering: When a non-boss enemy dies, it buffs nearby enemies with increased health and damage.
- Bursting: When a non-boss enemy dies, it applies a stacking damage over time effect to all players.
- Plan Your Pulls: In Mythic Plus, managing trash packs efficiently is crucial for optimizing your run. Coordinate with your group to decide which packs to pull and in what order, considering the dungeon layout and affixes.
- Crowd Control: Utilize crowd control abilities to manage large trash packs or dangerous mobs. Coordinate with your team to assign specific targets for crowd control to minimize the risk of overlapping abilities.
- Focus on Priority Targets: Some trash mobs or affix-generated enemies pose a higher threat and should be prioritized. Identify these targets and focus on eliminating them first to reduce the overall risk to your group.
- Utilize Defensive Cooldowns: In Mythic Plus, damage intake can be significantly higher. Manage your defensive cooldowns effectively, rotating them to ensure that you have them available when needed. Communicate with your group about when you plan to use your cooldowns to maximize their effectiveness.
- Optimize DPS Cooldowns: Coordinate with your team to maximize the use of DPS cooldowns during challenging encounters or high-damage phases. This can help push through difficult parts of the dungeon and save valuable time.
- Communication and Coordination: Mythic Plus requires a high level of teamwork and communication. Make sure you’re familiar with the dungeon mechanics and strategies, and actively communicate with your team throughout the run.
Loot and Rewards

Shadowmoon Burial Grounds offers various loot and rewards for players who successfully complete the dungeon. This section will outline the notable gear, items, and achievements you can obtain while running the dungeon.
- Gear and Items: Each boss in Shadowmoon Burial Grounds has a chance to drop specific gear and items scaled to the level of difficulty you are playing. This includes armor, weapons, trinkets, and other useful items. Some notable loot includes:
- Sadana Bloodfury: Drops a variety of cloth, leather, mail, and plate armor, as well as a one-handed sword and a shield.
- Nhallish: Drops a variety of cloth, leather, and mail armor, as well as a one-handed mace and a two-handed staff.
- Bonemaw: Drops a variety of cloth, leather, mail, and plate armor, as well as a two-handed sword and a crossbow.
- Ner’zhul: Drops a variety of cloth, leather, mail, and plate armor, as well as a one-handed dagger and a two-handed axe.
- Dungeon Achievements: Shadowmoon Burial Grounds features several achievements for players who complete specific challenges or objectives within the dungeon. These achievements include:
- Shadowmoon Burial Grounds: Complete the Shadowmoon Burial Grounds dungeon.
- Heroic: Shadowmoon Burial Grounds: Complete the Shadowmoon Burial Grounds dungeon on Heroic difficulty or higher.
- Mythic: Shadowmoon Burial Grounds: Complete the Shadowmoon Burial Grounds dungeon on Mythic difficulty.
- What’s Your Sign?: Defeat Sadana Bloodfury while only having the runes that correspond to her active lunar cycle lit in Shadowmoon Burial Grounds on Heroic difficulty or higher.
- Icky Ichors: Defeat Bonemaw after having fed him 25 Corpse Skitterlings in Shadowmoon Burial Grounds on Heroic difficulty or higher.
- Souls of the Lost: Defeat Ner’zhul after slaying 2 Ritual of Bones skeletons within 5 seconds of each other in Shadowmoon Burial Grounds on Heroic difficulty or higher.
By tackling the challenges and encounters within the Shadowmoon Burial Grounds dungeon, you can obtain valuable gear, items, and achievements to help progress your character and showcase your accomplishments.
Class-specific Tips and Tricks

This section will provide some class-specific tips and tricks for various roles (tank, healer, and DPS) during the Shadowmoon Burial Grounds dungeon. These tips will help you maximize your class abilities and make your dungeon experience more enjoyable.
Tanks:
- Death Knight: Use Anti-Magic Shell during boss encounters with heavy magic damage, such as Nhallish’s Void Vortex. Additionally, Death Grip can be useful for repositioning dangerous trash mobs.
- Paladin: Utilize Blessing of Spellwarding on yourself or party members to mitigate magical damage. Use Consecration and Avenger’s Shield to maintain aggro on multiple enemies.
- Warrior: Spell Reflect can be a valuable tool against casters. Use Heroic Leap to quickly reposition during boss encounters or move away from dangerous ground effects.
Healers:
- Druid: Use Ursol’s Vortex or Typhoon to help control trash mob positioning. Remember to use Ironbark on the tank or party members taking heavy damage.
- Priest: Use Mass Dispel to remove harmful debuffs from your party quickly. During heavy damage phases, use Guardian Spirit or Pain Suppression to help keep the tank or other party members alive.
- Shaman: Use Capacitor Totem or Earthgrab Totem to help control trash mobs. Spirit Link Totem can be a lifesaver during high damage phases, as it redistributes health among party members.
DPS:
- Mage: Use Counterspell to interrupt dangerous casts, such as Nhallish’s Void Vortex. Use Time Warp or Bloodlust during key moments in boss fights to maximize party DPS.
- Rogue: Make use of stuns like Kidney Shot or Cheap Shot to help control trash mobs. Utilize Cloak of Shadows and Evasion to mitigate damage when needed.
- Warlock: Use your Demonic Gateway and Demonic Circle for mobility during boss encounters, such as Ner’zhul’s Ritual of Bones. Remember to utilize your Healthstones for emergency healing.
- Hunter: Use Misdirection on the tank to help with threat management. Make use of your traps and other crowd control abilities to manage trash mobs and interrupt dangerous casts.