So, The Siege of Orgrimmar. Do you know how much pain and suffering this raid caused when it was retail? No? Then come here and listen — this is the most magnificent, the coolest, the most underrated raid since Vanilla was classic. 14 bosses. Unobvious tactics, and many other things are possible only in the Siege of Orgrimmar. So, now with the release of the MoP Remix, we’re able to share our retail experience in the Pandaria Remix Siege of Orgrimmar raid guide. Right here, you’ll learn:
- Boss abilities and tactics for each boss.
- How to pass through the trash between the 2nd and 3rd bosses in heroic mode.
- How to defeat Garrosh Hellscream without any wipes.
- How to find the entrance, even if you’re not in the Eternal Blossom.
- How to use raid skips and skip the grind in the Remix Mists of Pandaria World of Warcraft: Siege of Orgrimmar.
- How many tanks, heals, and DPS you need to pass this raid in 10/25 and 25 heroic modes.
- How to pass through this raid if you’re not blessed by Wrathion.
- What loot you can expect from this dungeon.
- What achievements are waiting for you in the Pandaria Remix Siege of Orgrimmar.
And many other unobvious things. Also, we’ll tell the story of the Siege of Orgrimmar for those WoW neophytes who skipped the MoP expansion when it was retail.
So, start the Siege, my comrade!
Pandaria Remix Siege of Orgrimmar | Raid | What is It?

The Pandaria Remix Siege of Orgrimmar takes a classic raid from the WoW archives and reimagines it with a twist, making it a must-play for both veterans and newbies. With this remix, players revisit the turbulent events at Orgrimmar, now peppered with new mechanics and remix-exclusive surprises that refresh the experience. Whether you’re here to relive the epic battles or to dive in for the first time, this raid offers a unique blend of nostalgia and new challenges.
| Feature | Details |
| Expansion | Remix Mists of Pandaria |
| Location | Orgrimmar, Underhold, Bladefist Bay |
| Boss Count | 14 Raid Bosses, each with unique remix abilities |
| New Elements | Infinite treasure chests, prismatic gems, meta gems |
| Heroic Raids | Enhanced difficulty settings for heroic modes |
| Character Options | New WoW remix characters with unique abilities |
| Scenarios | Level range zones and specific pandaria scenarios |
| Exclusive Content | Collecting threads, opening treasure chests, remix achievements |
| Subscription or Game Time | Required for access |
This remix not only revives the classic but also integrates new dynamics like inflicting nature damage, handling orbs that impact with frost damage, and navigating through heroic raids with critical challenges. Dive into the Jade Forest or the Dread Wastes within the same raid, and uncover the pandaria secrets like never before.
Pandaria Remix Siege of Orgrimmar Raid | Entrance
In the WoW Pandaria Remix, the entrance to the Siege of Orgrimmar raid is located in the Veiled Stair, near the Tavern in the Mists, at approximately coordinates 55.3, 74.6. Make sure you’re ready for action as you step into this epic battleground, facing fierce enemies and epic bosses.
Routes to Siege of Orgrimmar Entrance
| Faction | Route |
| Alliance | Start from the Shrine of Seven Stars in the Vale of Eternal Blossoms — Fly south-east to the Tavern in the Mists in the Veiled Stair — Coordinates 55.3, 74.6 |
| Horde | Start from the Shrine of Two Moons in the Vale of Eternal Blossoms — Fly south-east to the Tavern in the Mists in the Veiled Stair — Coordinates 55.3, 74.6 |
Prepare to face shield absorbing damage, inflict fire damage, and inflict holy damage as you navigate this Warcraft Remix. Whether you’re a timerunning character or a new WoW remix character, the challenges and rewards in this raid are unmatched.
Wow Mop Remix Siege of Orgrimmar | Raid skip
A raid skip has been added to the Siege of Orgrimmar in the WoW Pandaria Remix! Once you’ve defeated Garrosh Hellscream at least once on your account, you’ll gain access to a scroll near Loremaster Cho at the raid entrance. This scroll lets all characters on your account skip directly to the Inner Sanctum, where you fight Garrosh directly. Perfect for timerunning characters, new WoW remix characters, and anyone farming for transmogs. Enjoy the streamlined path and all the epic rewards without the grind!
Useful for:
- Players farming specific loot like Kor’kron Juggernaut and Mannoroth’s Teeth.
- Timerunning characters aiming for efficient runs.
- Those collecting achievements and rewards in the pandaria wow remix.
- Anyone who wants to skip the initial bosses and head straight to the action with Garrosh.
Pandaria Remix Siege of Orgrimmar Raid | Raid Composition 10/25 people
For the Pandaria Remix Siege of Orgrimmar in the Pandaria expansion, the best raid compositions balance tanks, healers, and DPS to handle the varied challenges. Whether it’s shield absorbing damage equal to your health or inflicting shadow damage to bosses, these setups ensure you have the right mix of skills. For 10 people, keep it cozy and coordinated with a balanced setup. For 25 people, it’s a bit more chaotic but crank up the communication and enjoy the ride!
| Group Size | Amount of Tanks | Amount of Healers | Amount of DPS | Informal Commentary |
| 10 People | 2 | 2 | 6 | Small and tight-knit. Keep everyone on their toes and stick together! |
| 25 People | 2-3 | 5-6 | 16-18 | Bigger group, more chaos. Keep the chatter up and have fun! |
With impact inflicts frost damage, inflict holy damage equal, and critical strikes erupt, having the right team setup is crucial.
Pandaria Remix Siege of Orgrimmar Raid | Thrash mobs + abilities

Stepping into the Pandaria Remix Siege of Orgrimmar, you’ll encounter more than just your average trash mobs. These baddies are sprinkled throughout the raid, each with unique abilities that can really mess up your day if you’re not careful. Whether it’s a sneaky Kor’kron Shadowmage casting spells in the shadows or an Amalgamated Hubris oozing around, you’ll need to keep your wits about you. Gear up for some epic battles and maybe snag some infinite treasure while you’re at it!
| Mob Name | Key Mob Ability | What to Do with That Ability | Informal Commentary |
| Tormented Initiate | Lightning Rod Bubble Shield | Kick | These guys are chilly! Kick to prevent the freeze. |
| Fallen Pool Tender | Bubble Shield Corrupted Water Lightning Rod Waterbolt | Focus & Kill | Healers gotta go! Focus them down quick. |
| Lesser Sha Puddle | Lightning Rod | Ignore | Just a puddle. Step around it unless it gets uppity. |
| Aqueous Defender | Lightning Rod Rushing Waters | Focus & Kill | Break that bubble before it soaks up your DPS. |
| Amalgamated Hubris | Sha Nova Lightning Rod | CC & Focus | Shadowy and sneaky, keep it controlled and focused. |
| Fragment of Pride | Growing Pride Lightning Rod | Kick | Holy moly! Kick to prevent that damage spike. |
| Vanity | Self-Absorbed (stuns target) Lightning Rod | CC | Stunning looks, literally. Crowd control is a must. |
| Arrogance | Lightning Rod | Other (Spread out) | Don’t get cocky! Spread out to manage this buff/debuff. |
| Zeal | Sha Nova Lightning Rod Self-Absorbed (stuns target) Lightning Rod | Focus & Kill | Tough shell, tough fight. Focus down this mini-boss. |
| Blind Blademaster | Blind Cleave Blind Strike Swift Strike | Focus & Kill | Watch out, he hits hard and fast. Keep on your toes. |
| Kor’kron Shadowmage | Shadowflame Mind Spike Mind Spike | Kick | Volley of shadow? Not today! Interrupt fast. |
| Overlord Runthak | Bonecracker Lightning Rod | Focus & Kill | Deal with him quickly or face the storm. |
| Hellscream Demolisher | Hurl Boulder | Focus & Kill | Take it down before it turns you into toast. |
| Doomlord | Shadow Bolt Volley Cripple Curse of Tongues Lightning Rod | Kick | Interrupt or suffer a slow, painful demise. |
| Lingering Corruption | Corrupted Touch | Focus & Kill | Get rid of these corruptions before they spread. |
| Dragonmaw Cannoneer | Lightning Rod | Kick | Stop them from firing or face heavy damage. |
| Kor’kron Cannon | Heavy artillery | Destroy | Take out the cannons fast to avoid massive damage. |
| Dragonmaw Elite Grunt | Melee attacks Lightning Rod | Focus & Kill | Standard grunt, but dangerous in numbers. |
| Kor’kron Elite Sniper | Ranged attack Lightning Rod | Focus & Kill | Pick off these snipers before they pick you off. |
| Storeroom Guard | Call Reinforcements! Lightning Rod | Focus & Kill | Break through their shields quickly. |
| Arcweaver Reinforcements | Infusion Lightning Rod Deteriorate | Kick | Interrupt their spells to mitigate damage. |
| Brute Reinforcements | Slow and Steady Lightning Rod | Focus & Kill | They hit hard, so take them out quickly. |
| Captive Cave Bat | Lightning Rod | CC | Control these bats to avoid getting stunned. |
| Pterrordax | Pterrordax Swoop | Focus & Kill | Deal with them swiftly to avoid nature damage. |
| Starved Yeti | Melee attacks | Focus & Kill | They are hungry and angry, take them out fast. |
| Enraged Mushan Beast | Crushing Swipe Lacerating Bite | Focus & Kill | Strong and enraged, handle with care. |
| Kor’kron Reaper | Reaping Whirlwind Reaper Lightning Rod Charge | Focus & Kill | Dangerous critical hits, eliminate quickly. |
| Harbinger of Y’Shaarj | Y’Shaarj Touched Lightning Rod Grasp of Y’Shaarj | Kick | Interrupt to prevent heavy shadow damage. |
| Manifestation | Bound Y’Shaarj Power | Focus & Kill | Clear these to avoid shadowy troubles. |
| Ichor of Y’Shaarj | Empowering Corruption Lightning Rod | Focus & Kill | Deal with these ichors quickly to prevent spreading damage. Exactly in wow remix mists of pandaria. |
Pandaria Remix Siege of Orgrimmar Raid | Boss tactics
In the Pandaria Remix Siege of Orgrimmar, you’ll face 14 epic bosses, each with unique abilities and mechanics that make the raid an unforgettable experience. From unleashing hail to inflicting shadow damage, these bosses are designed to challenge and reward you with prismatic gems and other treasures. Whether you’re revisiting the Mists of Pandaria with retail characters or diving in with a new character, these encounters promise all these rewards and more!
List of Bosses in the Siege of Orgrimmar:
- Immerseus — This water elemental can inflict shadow damage and requires coordination to defeat.
- The Fallen Protectors — Three bosses in one fight, each with their own unique abilities.
- Norushen — Tests your corruption levels and demands purification.
- Sha of Pride — Inflicts numbing cold and needs careful management of pride levels.
- Galakras — A two-phase fight with a dragon and ground forces.
- Iron Juggernaut — A mechanical beast that unleashes hail and other destructive abilities.
- Kor’kron Dark Shaman — Dual bosses with powerful elemental attacks.
- General Nazgrim — A strategic fight requiring handling of adds and Nazgrim’s rage.
- Malkorok — Utilizes a shield absorbing damage and unleashes powerful attacks.
- Spoils of Pandaria — Opening treasure chests and dealing with ancient traps.
- Thok the Bloodthirsty — A massive dinosaur that inflicts fire damage and more.
- Siegecrafter Blackfuse — Engineering chaos with conveyor belts and deadly inventions.
- Paragons of the Klaxxi — Nine mini-bosses with unique buffs and abilities.
- Garrosh Hellscream — The final showdown with the Warchief himself, featuring multiple phases and shadow damage.
Immerseus

This big ol’ puddle of trouble starts with 100 Corruption, and your crew’s gotta clean that mess up by smashing him down to zero. Every time you knock his health out, he breaks into nasty Sha Puddles and less nasty Contaminated Puddles. Beat the Sha ones, heal the Contaminated ones, and keep doing this dance until his Corruption is as clean as your grandma’s kitchen floor. And watch out for the swirls — they’ll toss you around like a salad!
What Healers Do:
- Dodge the Swirl.
- Heal up those Contaminated Puddles during the Split to purify them.
- Brace yourself, because if those puddles hit the middle, they’re gonna explode with Erupting Sha and make everyone’s day worse.
What Tanks Do:
- Keep Immerseus facing away from the raid, and swap with your tank buddy because of his nasty Corrosive Blast.
- Also, get to smashing those Sha Puddles during the Split.
What DPS Do:
- Avoid the Swirl like you avoid your ex.
- Destroy the Sha Puddles before they reunite with Immerseus.
Quick and Dirty Table Guide
| Key Ability | What to Do | Wipe Potential | Comments |
| Swirl | Move away, don’t get knocked into next week. | High | It’s like dodgeball with pain instead of balls. |
| Corrosive Blast | Tanks swap often to avoid stacking up the debuff. Exactly in wow remix mists of pandaria. | High | This one stings a lot, like a bad sunburn. |
| Sha Puddle | DPS need to crush these ASAP. | Medium | Leave them be and they’ll mess you up. |
| Contaminated Puddle | Healers gotta heal these to full health before they reach mid | Medium | Think of it as giving a potion to a Pokémon. |
| Erupting Sha | Happens if any puddle hits the center. Pain ensues. | Very High | The raid’s “Oh snap” moment. |
The Fallen Protectors

Meet the trio from your Pandaria nightmares — Rook Stonetoe, He Softfoot, and Sun Tenderheart. They gang up on you all at once, each dipping into their bag of tricks at 66% and 33% health with their Desperate Measures, pulling out spooky spirit versions of their pals. Your mission? Sync your watches and take them down together, or they’ll just keep bouncing back from the brink. Keep an eye out for Rook’s heavy hits, He’s sneaky stabs, and Sun’s shadowy spells!
What Healers Do:
- Zap Sun Tenderheart’s Shadow Word: Bane off your buddies ASAP.
- When Sun pulls her Dark Meditation, keep the raid topped off through the constant damage.
What Tanks Do:
- Dance around with Rook to avoid his Vengeful Strikes hitting the group.
- With He, turn your back during his Gouge to avoid a timeout.
What DPS Do:
- Focus on wiping out the dark manifestations during Desperate Measures.
- Juggle damaging all three bosses to drop them simultaneously.
| Key Ability | What to Do | Wipe Potential | Comments |
| Bond of the Golden Lotus | Sync damage to drop all three Protectors at the same time. | High | Get this wrong, and it’s instant redo. |
| Vengeful Strikes | Tanks keep Rook facing away, everyone else steer clear. | Medium | Like getting caught in a lawnmower. |
| Gouge | Tanks turn away to avoid the stun, or it’s chaos. | High | More annoying than a pebble in your shoe. |
| Shadow Word: Bane | Healers need to dispel this fast to prevent it from spreading. | High | It’s like tag, but you really don’t want to be ‘it’. |
| Dark Meditation | Whole raid needs to hunker down and heal through the pain. Exactly in wow remix mists of pandaria. | High | Think of it as a very aggressive group meditation. |
| Desperate Measures | DPS target and kill the manifestations quickly to end the phase. | Very High | Fail here, and the fight drags on forever. |
Keep your cool, communicate with your team, and these protectors will fall like dominos.
Norushen

Norushen’s not your typical boss; he’s more like a test proctor from the Mists of Pandaria remix. He locks everyone up in a Quarantine Zone and brings out an Amalgam of Corruption, which is essentially your combined dirty laundry made manifest. The key here? Clean yourself up! Interact with Purifying Light orbs to face personal role-specific trials—beat them to drop your Corruption levels and hit the Amalgam harder. Keep dodging the Blind Hatred beam as it sweeps around, and don’t let the little corruption blobs boost the boss. It’s all about keeping clean and efficient!
What Healers Do:
- Enter Purifying Light orbs to face the Test of Reliance and blast through your Corruption by keeping allies healthy.
- Keep rotating to avoid Blind Hatred’s deadly path.
- Deal with the chilling effects of Icy Fear by dishing out heals through escalating damage.
What Tanks Do:
- Dive into Purifying Light orbs for the Test of Confidence, duking it out with Titanic Corruption to shed Corruption.
- Keep moving to avoid Blind Hatred.
- Swap duties on the Amalgam to let Self Doubt debuffs fade away.
What DPS Do:
- Take on the Test of Serenity by hopping into Purifying Light orbs and crushing the corruption elements.
- Avoid the sweeping beam of Blind Hatred.
- Nail every corruption manifestation to prevent them from powering up the Amalgam.
Cheat Sheet for Handling Norushen
| Key Ability | What to Do | Wipe Potential | Comments |
| Blind Hatred | Keep on your toes and move out of the damaging zone. | Very High | It’s like playing tag with a laser beam. |
| Self Doubt | Tanks swap to let debuffs fade, manage your stacks. | High | Doubt yourself too much, and you’re toast. |
| Icy Fear | Healers keep up with the frosty AoE damage increase. Exactly in wow remix mists of pandaria. | Medium | Feels like you’re stuck in a freezer. |
| Test of Serenity/Reliance/Confidence | Each role tackles their own mini-game to lose Corruption. | High | Fail your test, and you’re basically buffing the boss. |
| Fusion | Stop expelled corruptions from reaching the Amalgam. | Very High | These are like little boosts for the boss—block ‘em! |
| Unleashed Corruption | Deal with manifestations quickly, or they’ll wreak havoc. | High | They come out swinging, so be ready. |
Stick to the game plan, keep moving, and keep cleansing that Corruption.
Sha of Pride

So, you’re up against the Sha of Pride, think high seas and big egos. This boss boosts your Pride every time it hits you with anything, and as your Pride increases, so does your potential to mess things up for your raid. It’s all about controlling that ego until Norushen steps in at 30% and wipes your Pride slate clean. But until then, keep those Pride levels in check, crack open Corrupted Prisons, dodge Swelling Pride, and handle the projections like a pro.
What Healers Do:
- Keep those Mark of Arrogance debuffs in check, dispelling them smartly to avoid ramping up your own Pride.
- Help out with Corrupted Prison by activating the locks.
- Brace yourself for big raidwide hits from Swelling Pride and get ready to handle those projections if your Pride gets too high.
What Tanks Do:
- Swap on Wounded Pride to keep the tank damage manageable.
- Also, get those prison locks activated to free your trapped buddies.
- Watch your positioning and Pride levels during Swelling Pride to handle projections right.
What DPS Do:
- Knock down those Manifestations of Pride quickly and keep those Mocking Blasts interrupted.
- Break out allies from Corrupted Prison by stepping on the locks.
- Manage your Pride so you can safely handle projections during Swelling Pride.
Cheat Sheet for Handling Sha of Pride
| Key Ability | What to Do | Wipe Potential | Comments |
| Swelling Pride | Avoid extra effects by keeping Pride low, handle projections. | Very High | Like getting smacked by your own arrogance. |
| Mark of Arrogance | Dispel carefully to prevent Pride spikes. | High | It’s sticky and annoying like a bad label. |
| Corrupted Prison | Activate locks to free trapped players. | High | It’s a teamwork check or a wipe waiting to happen. |
| Wounded Pride | Tanks swap to manage damage and Pride gain. Exactly in wow remix mists of pandaria. | Medium | Getting too proud can hurt. Literally. |
| Mocking Blast | Interrupt or suffer the Pride pain. | Medium | Shut them up quick, or they’ll ramp up your Pride. |
| Manifestation of Pride | DPS down quickly to avoid extra Pride from Last Word. | High | They’re like annoying pop-ups of Pride. |
| Projection | Stand in it if it’s yours to prevent raid damage. | High | It’s like dealing with your shadow. Literally. |
Galakras

Get ready for an intense siege where you storm towers, dodge bombs, and take down Warlord Zaela’s pet dragon, Galakras. The first part of the fight has you clearing out baddies and storming towers to man some anti-air turrets. Once you’ve got control, shoot down Galakras and handle him on the ground. This fight’s a mash-up of tower defense and dragon slaying—packed with action and heavy on coordination.
What Healers Do:
- Watch for the Venom Bolt Volley from Korgra; it’s a raid-wiper if not handled.
- If Flames of Galakrond targets you, kite it through your mates to lessen the damage.
- Stay mobile and keep your team topped off, especially during the ground phase with Galakras.
What Tanks Do:
- Interrupt those pesky Chain Heals from the Tidal Shamans.
- Lead assaults on the towers to clear out enemies quickly.
- In the ground phase, tank Galakras effectively and watch for stacking fire damage.
What DPS Do:
- Prioritize destroying Healing Tide Totems and War Banners to limit enemy reinforcements.
- Interrupt Tidal Shamans to prevent them from healing.
- When targeted by Flames of Galakrond, move strategically to reduce the impact.
Key Mechanics Table for Galakras
| Key Ability | What to Do | Wipe Potential | Comments |
| Flames of Galakrond | Lead the flame through players to reduce its damage Exactly in wow remix mists of pandaria. | High | It’s like playing hot potato with a fireball. |
| Healing Tide Totem | Destroy ASAP to prevent enemy healing. | Medium | These totems are more annoying than a bad DJ at a party. |
| Chain Heal | Interrupt to prevent enemy heals. | High | Stopping these can be as satisfying as popping bubble wrap. |
| Venom Bolt Volley | Healers need to be on their toes; it’s heavy raid damage. | Very High | As toxic as a bad take on social media. |
| Tower Assault | Tanks lead the charge; DPS and healers support. | High | Like storming a castle, but with more explosions. |
| Ground Phase (Galakras) | Tank and manage the dragon, avoid fire, and keep damage up. | Very High | Where the real fight happens, no more flying around. |
This encounter is all about pacing and positioning—keep the pressure up, control the battlefield, and bring that dragon down to earth. Then it’s just a matter of burning him down before his fire roasts you.
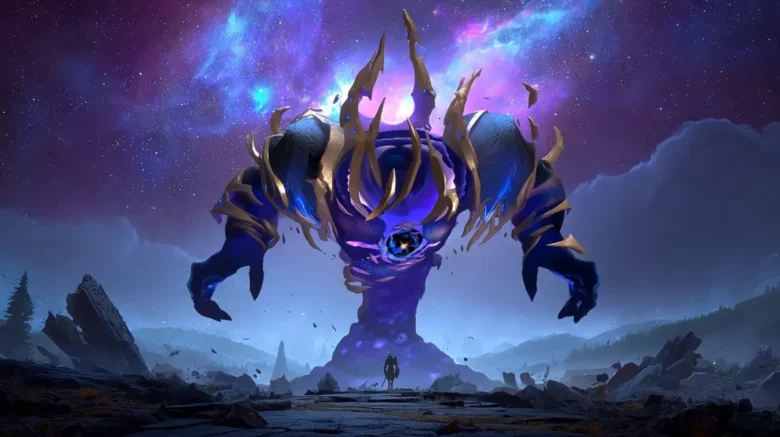
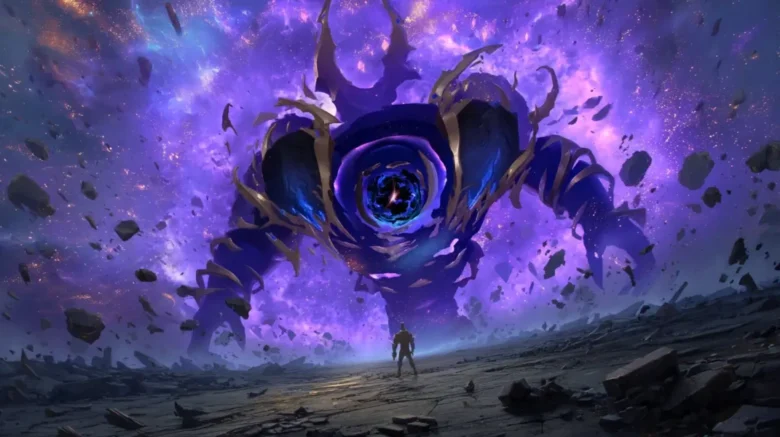
Iron Juggernaut

Iron Juggernaut is like a two-phase dance party where you need to switch moves halfway through. In Assault Mode, it’s all mobile and mean, throwing everything from Borer Drills to Mortar Cannons your way. Then, it switches to Siege Mode, plants itself, and unleashes hell with things like Seismic Activity and a killer Cutter Laser. Keep light on your feet, and don’t let the Juggernaut’s moves catch you off guard!
What Healers Do:
- Stay nimble to avoid getting thrown around by Shock Pulse.
- Brace for constant raid-wide damage in Siege Mode and keep those heals coming.
- Watch out for your own positioning to avoid unnecessary damage from the battlefield.
What Tanks Do:
- Swap duties to manage the Flame Vents’ debuff.
- Handle Crawler Mines by stomping on them when it’s safe—play the hero without getting yourself launched too high.
- Maintain proper positioning to manage the Shock Pulse and avoid tossing your teammates into chaos.
What DPS Do:
- Focus on controlling and quickly dispatching Crawler Mines.
- Avoid dragging Cutter Laser through Explosive Tar, and watch out for your positioning to minimize Shock Pulse disruption.
- Keep up the pressure on the Juggernaut, particularly when it’s in Siege Mode, to push through the phase swiftly.
| Key Ability | What to Do | Wipe Potential | Comments |
| Shock Pulse | Brace yourself to control where you’re thrown. | High | Like getting caught in a giant’s sneeze. |
| Flame Vents | Tanks need to swap to manage debuffs. | High | Hotter than a summer barbecue. |
| Crawler Mines | Stomp them if you can, avoid them if you can’t. | Very High | They’re like really angry, explosive moles. |
| Cutter Laser | Dodge it, especially near Explosive Tar. | Deadly | It’s playing tag with a laser pointer on steroids. |
| Explosive Tar | Keep clear unless you want to light up your life. | Medium | Stickier than that last piece of chewing gum. |
| Seismic Activity | Spread out, keep moving, and heal through the shakes. | High | Feels like a dance floor during an earthquake. |
| Mortar Cannon/Barrage | Avoid clustering to reduce group damage. | High | Incoming! Like dodgeball but with explosives. |
Keep these tips in mind and adjust to the Juggernaut’s rhythms. It’s a tough fight, but with good positioning and quick reactions, you’ll dismantle this mechanical monster piece by piece!
Kor’kron Dark Shaman

Dealing with the Dark Shaman, Haromm and Kardris, feels like a chaotic elemental party—they share health and switch up tactics by dropping different totems as they lose health. Each totem ramps up their abilities, making the fight increasingly complex with everything from toxic mists to ashen walls. Oh, and they start the fight with their war wolves, because why not add more teeth to the mix?
What Healers Do:
- Dodge the Foul Stream to avoid lining up a toxic blast for your friends.
- Keep clear of Ashen Walls and Foul Slimes—they hurt.
- Brace yourself for big hits from Falling Ash and keep the raid alive through sustained damage phases.
What Tanks Do:
- Swap on Haromm to manage stacks of Froststorm Strike.
- Control the positioning of Ashen Walls and kite Foul Slimes away from the group.
- Be ready to handle adds and stomp on Crawler Mines if they pop up.
What DPS Do:
- Aim Foul Stream away from the group.
- Steer clear of Ashen Walls and Foul Slimes and focus on quickly taking down adds.
- Burst down totems as they appear to limit the shamans’ power-ups.
| Key Ability | What to Do | Wipe Potential | Comments |
| Foul Stream | Aim it away from other players. | High | Getting caught is like standing downwind from a skunk. |
| Froststorm Strike | Tanks swap to prevent stack build-up. | High | Colder than a timeless isle winter. |
| Ashen Walls | Position carefully; don’t trap your team. | Medium | It’s like navigating a maze while blindfolded. |
| Falling Ash | Move away from the impact zone. | Deadly | Like dodging meteors—only hotter. |
| Foul Slimes | Keep away from these slimy nuisances. | High | Slippery, nasty, and just plain rude. |
| Toxic Storm | Avoid storms and tornadoes—they’re really toxic. | High | If storms chased you at parties, it’d be like this. |
| Totems | Destroy these ASAP to reduce shaman powers. | High | Like shutting down the power grid of evil. |
Tackling the Dark Shaman is all about mobility, awareness, and quick reactions to their ever-changing arsenal of abilities.
General Nazgrim

General Nazgrim, a loyal warrior of the Horde, turns it up in the Siege with his arsenal of stances and Kor’kron cronies. It’s all about managing his Rage—don’t let him get too angry, or he’ll unleash havoc. The fight toggles between his hacking, slashing, and calling in backup, and managing this dance properly is key to bringing him down.
What Healers Do:
- Brace for big damage when Nazgrim’s Rage gets high, especially from his War Song.
- Watch out for Assassins targeting non-tank players and handle the sporadic heavy damage they cause.
- Stay mobile and avoid getting caught in AoE attacks from Nazgrim and his adds.
What Tanks Do:
- Swap tanking duties on Nazgrim to manage the debuffs from Sundering Blow.
- Keep an eye on the Kor’kron Warshaman; you’ll need to prevent them from healing Nazgrim.
- Manage your position and the adds’ positions to minimize damage taken and to control the flow of the fight.
What DPS Do:
- Focus on taking down Kor’kron adds quickly, especially the Warshaman and their totems.
- Avoid hitting Nazgrim directly when he’s in Defensive Stance to prevent him from gaining extra Rage.
- Interrupt Arcweavers and Warshaman to stop their spellcasting and reduce overall raid damage.
Key Mechanics Table for General Nazgrim
| Key Ability | What to Do | Wipe Potential | Comments |
| Sundering Blow | Tanks need to swap to clear stacks. | High | It’s like getting repeatedly hit with a giant hammer. |
| War Song | Healers be ready; it hits like a truck. | Very High | Basically, Nazgrim’s version of a power ballad. |
| Defensive Stance | Stop DPS on Nazgrim to avoid Rage spikes. | High | It’s like trying not to annoy an already grumpy bear. |
| Kor’kron Banner | Destroy these ASAP to stop Rage generation. | Medium | Like popping a balloon—satisfying and necessary. |
| Healing Tide Totem | Destroy quickly to prevent adds from healing. | High | Don’t let these stick around, or you’ll regret it. |
| Shockwave/ Heroic Shockwave | Avoid getting hit to prevent Nazgrim from gaining Rage. | High | Dodge or jump—think of it as deadly double dutch. |
| Kor’kron Adds | Control and kill quickly, especially Warshaman. | Very High | Like whack-a-mole but with actual consequences. |
This battle is a marathon, not a sprint. Manage Nazgrim’s Rage, control the adds, and keep your cool. Stay sharp, and this general will eventually salute you—in defeat!
Malkorok

Malkorok turns the battleground into a strategic nightmare with his Ancient Miasma, turning all your heals into shields. He’s all about big smashes and dark energy bursts, alternating between smashing the ground and exploding it. During his Blood Rage, he beefs up his melee attacks but lets you heal normally, giving you a brief respite before it’s back to shield-only mode.
What Healers Do:
- Pump out heals to maximize the Ancient Barrier shields while Ancient Miasma is up.
- Steer clear of the zones targeted by Arcing Smashes to dodge the subsequent Breath of Y’Shaarj explosions.
- Dispel Displaced Energy from allies once they’re clear of others to prevent raid-wide damage.
What Tanks Do:
- Swap turns on Malkorok to manage the Fatal Strikes debuff, which ramps up the damage taken.
- Cluster together during Blood Rage to share the hefty damage from Malkorok’s enhanced attacks.
What DPS Do:
- Watch where Malkorok’s Arcing Smashes land and avoid those spots when he casts Breath of Y’Shaarj.
- Jump into Imploding Energy to absorb it if you have a strong shield, preventing it from damaging the whole raid.
- Stay spread to avoid spreading Displaced Energy when it expires and explodes.
Key Mechanics Table for Malkorok
| Key Ability | What to Do | Wipe Potential | Comments |
| Ancient Miasma | Heal to build shields, not restore health. | High | It’s like trying to fill a leaky bucket. |
| Arcing Smash | Memorize where they hit to avoid later explosions. | High | Like playing a deadly game of “Simon Says.” |
| Blood Rage | Tanks group up, DPS and healers manage their spacing. | Very High | The rage phase is all about sharing the pain. |
| Breath of Y’Shaarj | Avoid previously smashed areas to dodge huge damage. | Deadly | If the ground looks funky, don’t stand there! |
| Imploding Energy | Stand in it if shielded to neutralize, else it hurts all. | Very High | It’s like jumping on a grenade for the team. |
| Displaced Energy | Move away from others, dispel safely. | High | Like having really, really bad static cling. |
| Fatal Strikes | Tanks swap to prevent excessive stacking. | High | Each stack is like adding another weight to your barbell. |
Keep these strategies in mind, stay vigilant about your positioning, and Malkorok’s tactics can be countered effectively. Manage the miasma, absorb the energies, and keep those shields up to survive this brutal fight!
Spoils of Pandaria

You’re not fighting just one boss here but a whole treasure trove of them! Spoils of Pandaria is all about opening crates, managing what pops out, and charging up override levers before everything goes kaboom. Think of it as a high-stakes, beat-the-clock, and don’t-let-the-baddies-win type of deal. You’ll split your team between two rooms, bust open crates, handle the nasties inside, and power up the room to move on. Efficiency and speed are key!
What Healers Do:
- Keep everyone alive through waves of enemies pouring out from these crates.
- Jump into Matter Scramble rings if you’ve got a sturdy shield to prevent raid-wide kabooms.
- Watch out for the heavy hitters like Mogu and Mantid champions dealing raidwide damage and manage your cooldowns.
What Tanks Do:
- Get ready to grab whatever comes out of those crates fast—control is crucial.
- Keep big baddies like Modified Anima Golems out of their healing pools to prevent them from regenerating.
- Make sure to manage the room’s space efficiently, keeping the nastier mobs away from healers and DPS.
What DPS Do:
- Prioritize targets—shut down Warshamans quickly to prevent heals, and smash any dangerous totems or statues asap.
- If you’re tagged with Set to Blow, carefully place your explosives away from the group.
- Keep moving, stay alert, and knock down those crates as quickly as you can manage.
Key Mechanics Table for Spoils of Pandaria
| Key Ability | What to Do | Wipe Potential | Comments |
| Matter Scramble | Stand in the highlighted areas if safe, to absorb damage. | High | Like playing musical chairs with high explosives. |
| Set to Blow | Drop off bombs far from the group, manage your stacks. | Very High | Handling fireworks—keep calm and place carefully. |
| Crimson Reconstitution | Keep enemies out of the pools to stop their healing. | Medium | Like stopping a drink at an enemy’s party. |
| Modified Anima Golem | DPS these down before they wreak havoc. | Medium | Not your garden-variety golem, definitely more smashy. |
Tackle the Spoils of Pandaria with a clear plan, sharp reflexes, and maybe a little bit of luck. Open those crates, charge those levers, and let’s keep the treasure room from becoming your tomb!
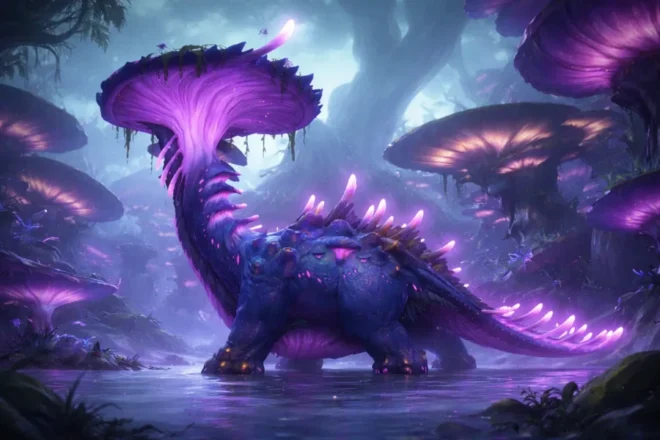
Thok the Bloodthirsty

Thok is like an ever-hungry, raging dinosaur on a rampage in a cage. Initially, Thok’s all about that sonic boom with his Deafening Screech until he smells blood, literally. Once he senses enough injured players close together, he flips into Blood Frenzy mode, chasing down and gobbling up players. It’s about managing these phases, popping open cages to distract him with prisoners, and keeping the raid from becoming dino dinner.
What Healers Do:
- Keep everyone’s health as topped up as possible to delay Thok’s Blood Frenzy.
- Be mindful of Deafening Screech; it interrupts spellcasts, so time your heals.
- Cure Corrosive Blood and manage any freeze effects from Freezing Breath if Thok has devoured Waterspeaker Gorai.
What Tanks Do:
- Swap tanking duties to manage the debuff from Thok’s fearsome bites.
- During Blood Frenzy, you can’t tank Thok but prepare to pick him up post-frenzy and position him away from the group.
- Keep Thok facing away to avoid hitting the raid with breath attacks when he’s got special powers.
What DPS Do:
- Keep clear of Thok during Blood Frenzy unless you fancy a trip inside a dino’s belly.
- Focus on opening cages and dealing with adds quickly to help manage the fight’s flow.
- Avoid the areas hit by Arcing Smash to prevent getting blasted by the subsequent Breath of Y’Shaarj.
| Key Ability | What to Do | Wipe Potential | Comments |
| Deafening Screech | Time heals around screeches to avoid interruptions. | High | It’s like trying to shout over a jet engine of the endless spring with a tinker gems. |
| Blood Frenzy | Stay spread out, run if targeted. | Very High | More terrifying than being chased in a nightmare. |
| Freezing Breath/Acid Breath/Scorching Breath | Position correctly according to the breath type. | High | Like weathering a storm, but the storm is a dinosaur like it was in pandaria dungeons. |
| Dispel Mechanics (Corrosive Blood, Icy Blood) | Quick dispels are crucial to keep raid members alive. | High | It’s a cleanup on aisle five situation with a cloak of infinite potential. |
| Kor’kron Jailer & Prisoners | Free prisoners to manage Thok’s frenzy. | Medium | Like throwing a steak to distract a guard dog for nearby enemies. |
Managing Thok involves a careful dance of keeping everyone healthy enough to avoid triggering his frenzy too soon, while also dealing with his powerful attacks and the adds that come with each phase. Keep calm, and maybe you’ll get out without being stomped or frozen!
Siegecrafter Blackfuse

Siegecrafter Blackfuse is the mad genius of Garrosh’s arsenal, and his fight is a crazy mash-up of mechanics with a conveyor belt system that could rival any factory floor. You’ll deal with an assembly line that constantly churns out deadly weapons unless you intervene. The key to this fight? Manage the assembly line effectively, destroy the right weapons, and handle the ones that get built, all while dodging a slew of room-wide hazards.
What Healers Do:
- Keep the raid topped off, especially when an Electromagnet is crushing everyone with sustained damage.
- Be ready for big heals when Automated Shredders overload, dealing massive raidwide damage.
- Watch for players hit by lasers or missiles and patch them up quickly.
What Tanks Do:
- Juggle Blackfuse’s attention while managing any Automated Shredders that join the fray, keeping them away from Blackfuse’s repair beams.
- Use your stacking Electrostatic Charge to blast through a Shredder’s Reactive Armor when it gets too beefy.
- Control the placement and pacing of boss and adds to avoid chaos from area effects and missiles.
What DPS Do:
- Rotate who jumps on the conveyor belt to sabotage the assembly line, taking out the most threatening weapons.
- Focus on quickly dealing with Crawler Mines before they reach their targets and explode.
- Keep an eye out for the Automated Shredders; bring them down fast to prevent them from rampaging through the raid.
Key Mechanics Table for Siegecrafter Blackfuse
| Key Ability | What to Do | Wipe Potential | Comments |
| Assembly Line | DPS need to disrupt the assembly line by destroying weapons. | Very High | It’s like playing whack-a-mole, but the moles are bombs. |
| Automated Shredders | Tanks manage these with DPS focusing them down when vulnerable. | High | These guys are like little tanks; don’t let them run wild. |
| Electrostatic Charge | Tanks use this to increase damage against Shredders. | Medium | Use it wisely to turn the tide against the machines. |
| Reactive Armor | Focus damage during the Shredder’s vulnerable phase post-slam. | High | Hit it hard when it’s down, or it’ll get back up. |
| Magnetic Crush | Spread out to minimize group damage and manage positioning. | High | This will pull you in—resist! |
| Crawler Mines | Prioritize these before they reach their target. | Deadly | Like stopping missiles before they hit home. |
| Overcharged Weapons | Deal with enhanced threats immediately on the assembly line. | Very High | Supercharged problems need supercharged solutions. |
Handling Siegecrafter Blackfuse is about precision and timely intervention.
Paragons of the Klaxxi

This fight is a Klaxxi free-for-all where you face off against nine bosses one after the other, or rather, in groups of three. Each Paragon has unique abilities and buffs they grant to their allies, making the fight dynamic and pretty chaotic. You’ll deal with a bunch of mechanics simultaneously, needing sharp focus on which Paragon is active and which abilities they’re throwing at you.
What Healers Do:
- Stay on top of heavy raid damage, especially from abilities like Hisek’s Aim then Fire.
- Dispel Corrosive Blood and manage heals around Feed from Rik’kal’s Amber Parasites.
- Stay mobile and ready to switch healing targets as the active Paragons change.
What Tanks Do:
- Juggle Paragons effectively, watching for their buffs and debuffs like Rik’kal’s Injection that requires active mitigation.
- Coordinate with DPS to manage threats like Skeer’s Bloodletting oozes and Xaril’s Caustic Blood.
- Maintain positioning to manage the multitude of area effects and boss abilities.
What DPS Do:
- Target switch efficiently to handle priorities like Blood oozes or breaking Encase in Amber.
- Handle adds like Amber Parasites and Hungry Kunchongs, keeping them under control or destroying them as necessary.
- Avoid mechanics like Hisek’s Fire that can wipe the group if not managed properly.
Key Mechanics Table for Paragons of the Klaxxi
| Key Ability | What to Do | Wipe Potential | Comments |
| Bloodletting | DPS quickly destroy Blood oozes before they heal Paragons. | High | Like stopping leaks in a sinking ship. |
| Encase in Amber | DPS break the amber to prevent healing. | Medium | Like breaking someone out of jail before they’re full health. |
| Aim then Fire | Group up to split damage, then spread out. | Very High | Get ready to huddle, then hustle. |
| Injection | Tanks use mitigation to prevent parasites. | High | Prevention is better than cure! |
| Feed | Kill or control parasites quickly to prevent damage. | High | Like swatting mosquitoes that really hurt. |
| Hungry Kunchong | Avoid or deal with adds quickly before they devour players. | Deadly | Don’t pet the deadly bug! |
| Amber Parasites | Focus and kill these quickly as they fixate on players. | High | They’re more annoying than a bad rash. |
Handling the Paragons of the Klaxxi is about flexibility and quick responses to the active threats. Each Paragon brings a new twist to the fight, so stay alert, adapt quickly, and knock ’em down one by one!
Garrosh Hellscream

Garrosh Hellscream is a three-phase boss fight where he pulls out all the stops with his True Horde, powerful abilities, and the Heart of Y’Shaarj. Expect to deal with adds, Iron Stars, and multiple trips into the Realm of Y’Shaarj. His abilities become more devastating as the fight progresses, culminating in an empowered final phase.
What Healers Do:
- Keep the raid topped off to manage heavy raidwide damage from Whirling Corruption and Exploding Iron Stars.
- Dispel Touch of Y’Shaarj to prevent it from spreading.
- Be prepared for heavy healing during Annihilate in the Realm of Y’Shaarj.
What Tanks Do:
- Trade tanking Garrosh to reset Gripping Despair.
- Position Garrosh away from the raid to manage abilities like Desecrate and Whirling Corruption.
- Handle adds like Kor’kron Warbringers and Farseers efficiently.
What DPS Do:
- Interrupt Far Seers’ casts and kill Siege Engineers quickly to prevent Iron Stars from activating.
- Focus down Sha manifestations in the Realm of Y’Shaarj.
- Spread out to minimize damage from Whirling Corruption and handle adds efficiently.
| Key Ability | What to Do | Wipe Potential | Comments |
| Desecrate | Move out of the ground effect and destroy the weapon. | Medium | It’s like playing hopscotch with shadowy patches. |
| Hellscream’s Warsong | Interrupt Far Seers and kill Warbringers quickly. | High | Interrupt fast or face a painful song. |
| Exploding Iron Stars | Kill Siege Engineers to prevent activation. | High | Think of them as oversized, explosive bowling balls. |
| Whirling Corruption | Spread out to minimize damage and avoid adds spawning close. | High | Keep your distance or face a swirling death. |
| Touch of Y’Shaarj | Damage afflicted players to remove the effect. | High | Like popping dangerous bubbles. |
| Annihilate | Heal through heavy raidwide damage in the Realm of Y’Shaarj. | High | Heavy damage, stay on your toes and heal hard. |
| Empowered Abilities | Handle adds, spread out, and focus targets as necessary. | Very High | Everything is on steroids now, stay alert! |
| Gripping Despair | Tanks swap to manage debuff stacks and avoid explosive damage. | Medium | Don’t hold on to that despair too long, tank swaps are key. |
Garrosh is a challenging and chaotic fight that demands coordination and quick responses. Keep your cool, handle the adds and mechanics efficiently, and bring down the Warchief!
Pandaria Remix Siege of Orgrimmar Raid | loot Table

Gear up with the epic loot from Garrosh Hellscream in the Siege of Orgrimmar! This limited time event drops some seriously cool items. The Kor’kron Spire of Supremacy is a powerful staff that enhances your primary stat and looks awesome. If you’re into stunning enemies with critical strikes, the Xal’atoh, Desecrated Image of Gorehowl is the axe for you. For those who love trinkets, the Black Blood of Y’Shaarj will unleash hail of boosts for your stats. And don’t forget the Chest of the Cursed Conqueror, perfect for the forgotten kings needing top-tier gear.
Pandaria Remix Siege of Orgrimmar Raid | Plot
Plot of the Siege of Orgrimmar, casually and in simple terms. So, Garrosh Hellscream has totally lost it, and he’s gone full-on dictator mode, twisting Orgrimmar into his personal fortress. He’s wielding some seriously dark powers from an ancient heart of a dead Old God, Y’Shaarj, and it’s up to us, the heroes, to stop him.
First off, we fight our way through the outskirts, taking down some massive bosses like the protectors and the corrupted Kor’kron. These guys are no joke, and they’re standing between us and the heart of Garrosh’s madness.
Next, we break into Orgrimmar itself. The city is under heavy guard, and Garrosh has all sorts of nasty surprises waiting for us. We face everything from dark shaman channeling twisted elements to siege engines trying to crush us. Each boss has its own set of deadly moves, and teamwork is crucial to get past them.
As we push deeper, we deal with Siegecrafter Blackfuse, who’s been creating deadly weapons to defend Garrosh, and the Paragons of the Klaxxi, who are some seriously tough insect-like warriors with unique abilities that test our raid coordination.
Finally, we reach Garrosh himself. The fight starts with him using his regular abilities, but as we wear him down, he taps into the power of Y’Shaarj, transforming and unleashing devastating attacks. This battle is intense, with phases that test our endurance and skill. Garrosh drags us into the Realm of Y’Shaarj, where we must defeat manifestations of the Old God’s power to weaken him.
In the end, we bring Garrosh down, stopping his mad reign and saving Orgrimmar from total destruction. The victory is bittersweet, as the Horde must reckon with the aftermath of Garrosh’s tyranny and rebuild from the chaos he caused.
Pandaria Remix Siege of Orgrimmar Raid | Achievements
The Siege of Orgrimmar raid is packed with awesome achievements that will test your skills and coordination. From tackling unique challenges with your raid team to taking down Garrosh himself, there’s plenty to keep you busy. Whether you’re dodging lasers, stomping mines, or ensuring Gamon stays alive, these achievements will make your runs through Orgrimmar epic and rewarding. Get ready to unleash your power and earn some cool titles and rewards as you conquer the dark heart of Orgrimmar!
| Achievement Name | Informal Commentary |
| Conqueror of Orgrimmar | Show Garrosh who’s boss on Heroic. |
| Criss Cross | Split the work and avoid mixing enemies. |
| Downfall | Beat up Garrosh’s last line of defense. |
| Fire in the Hole! | Play whack-a-mole with mines before the big fight. |
| Gamon Will Save Us! | Let Gamon join the fun and keep him alive. |
| Gates of Retribution | Clear out the front yard of Garrosh’s fortress. |
| Giant Dinosaur vs. Mega Snail | Unleash a giant snail to feast on Thok. |
| Go Long | Play hot potato with the Mark of Anguish. |
| Lasers and Magnets and Drills! Oh My! | Dodge all the deadly gadgets and beat Blackfuse. |
| Liberator of Orgrimmar | Free Orgrimmar from Garrosh’s grip. |
| No More Tears | Stop Immerseus and wipe out his tears. |
| None Shall Pass | Keep the corruption at bay and win. |
| Now We are the Paragon | Step into the shoes of the Paragons and take them down. |
| Rescue Raiders | Save the captives and Ji before beating the shaman. |
| Strike! | Line up the Warbringers for a perfect Iron Star strike. |
| Swallow Your Pride | Stay humble and beat the Sha of Pride. |
| The Immortal Vanguard | Keep the NPCs alive while taking down Galakras. |
| The Underhold | Break into Garrosh’s hidden stronghold. |
| Unlimited Potential | Show Malkorok the true potential of corruption. |
| Vale of Eternal Sorrows | Cleanse the Vale of the bosses haunting it. |
| Heroic: Siege of Orgrimmar | Clear the entire raid on Heroic. |
| Raid Finder: Siege of Orgrimmar | Clear the raid in Raid Finder mode. |
| Siege of Orgrimmar | Complete the whole raid on at least Normal difficulty. |
Conclusion

The Pandaria Remix Siege of Orgrimmar brings a fresh twist to a beloved yet challenging raid, offering both nostalgia and new hurdles for WoW players. By revisiting this epic battleground with updated mechanics, players can experience the thrill of the original raid while facing unique remix challenges. Whether you’re coordinating complex strategies for each boss, navigating heroic trash mobs, or making the most of raid skips and efficient compositions, this guide equips you with the knowledge needed to triumph.
Remember, the Siege of Orgrimmar isn’t just about defeating Garrosh Hellscream—it’s about teamwork, quick thinking, and adapting to ever-evolving encounters. Dive into this reimagined adventure, conquer the dark heart of Orgrimmar, and claim your place among the champions of Azeroth. Prepare your raid team, refine your tactics, and let the Siege begin!

Epiccarry: best wow boost and coaching services
Frequently Asked Questions
What is the Pandaria Remix Siege of Orgrimmar?
It’s a reimagined version of the classic Siege of Orgrimmar raid from the Mists of Pandaria expansion. It offers new mechanics and surprises while keeping the original’s epic battles.
How many bosses are there?
There are 14 unique raid bosses, each with special remix abilities.
Where is the raid entrance located?
The entrance is at the Veiled Stair, near the Tavern in the Mists, around coordinates 55.3, 74.6.
How do I reach the entrance?
Alliance: Start from the Shrine of Seven Stars in the Vale of Eternal Blossoms and fly southeast.
Horde: Start from the Shrine of Two Moons in the Vale of Eternal Blossoms and fly southeast.
Can I skip parts of the raid?
Yes, after defeating Garrosh Hellscream once, you can use a scroll near Loremaster Cho to skip directly to the Inner Sanctum.
What’s the ideal raid composition?
For 10 players: 2 Tanks, 2 Healers, 6 DPS.
For 25 players: 2-3 Tanks, 5-6 Healers, 16-18 DPS.
What are some key boss tactics?
Immerseus: Purify Contaminated Puddles and defeat Sha Puddles.
The Fallen Protectors: Sync damage to defeat all three bosses together.
Norushen: Cleanse corruption through personal trials.
Sha of Pride: Manage Pride levels and break out of Corrupted Prisons.
Galakras: Control towers and handle ground phase attacks.
Iron Juggernaut: Dodge Shock Pulse and handle Crawler Mines.
Kor’kron Dark Shaman: Avoid Ashen Walls and toxic areas.
General Nazgrim: Manage Rage and interrupt Kor’kron adds.
Malkorok: Build shields and avoid Arcing Smashes.
Spoils of Pandaria: Split teams to open crates and manage adds.
Thok the Bloodthirsty: Manage Blood Frenzy and avoid breath attacks.
Siegecrafter Blackfuse: Disrupt the assembly line and handle Shredders.
Paragons of the Klaxxi: Handle unique abilities and prioritize targets.
Garrosh Hellscream: Manage phases, handle adds, and survive the Realm of Y’Shaarj.
What kind of loot can I expect?
Epic gear such as the Kor’kron Spire of Supremacy staff, Xal’atoh axe, Black Blood of Y’Shaarj trinket, and more.
Are there any achievements to earn?
Yes, numerous achievements like “Conqueror of Orgrimmar,” “Gamon Will Save Us!,” “The Immortal Vanguard,” and “Heroic: Siege of Orgrimmar.”
What’s the plot of the raid?
Garrosh Hellscream has gone mad, turning Orgrimmar into his fortress using the dark powers of Y’Shaarj’s heart. The raid is about stopping him and his corrupted forces to save Orgrimmar.
Is there anything special about the trash mobs?
Yes, they have unique abilities like Lightning Rod and Bubble Shield. Each type requires different strategies to handle effectively.
Do I need a subscription to access the raid?
Yes, either a subscription or game time is required to access the Pandaria Remix Siege of Orgrimmar raid.
What’s the key to beating General Nazgrim?
Manage Rage, interrupt adds, and avoid hitting him during Defensive Stance.
What should I focus on with Malkorok?
Build shields with healing, avoid Arcing Smashes, and dispel Displaced Energy safely.
What’s the strategy for the Spoils of Pandaria?
Split teams, open crates, manage adds, and charge override levers quickly.
How do I survive Thok the Bloodthirsty?
Manage Blood Frenzy, avoid breath attacks, and keep everyone’s health up.
What’s important in the Siegecrafter Blackfuse fight?
Disrupt the assembly line, handle Shredders, and avoid room-wide hazards.
How do I defeat the Paragons of the Klaxxi?
Handle unique abilities, prioritize targets, and stay flexible.
What are the main tactics for Garrosh Hellscream?
Manage phases, handle adds, avoid Exploding Iron Stars, and survive the Realm of Y’Shaarj.